

Learn how to add CMS loops in sections to dynamically display your content with ease. This guide will walk you through setting up CMS loops so you can showcase blog posts, product listings, or any type of repeatable data on your website — perfect for creating structured, scalable, and dynamic pages.
Adding CMS List Block
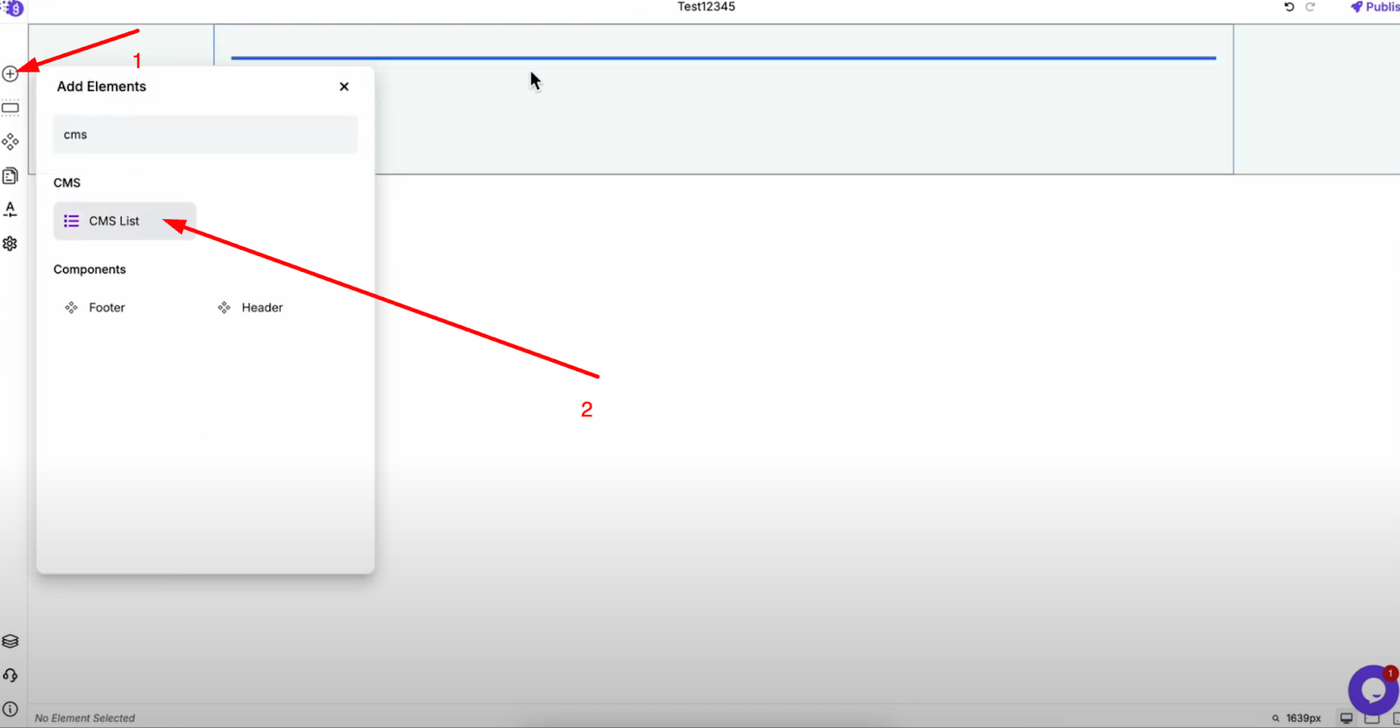
Open the Grigora site editor and click on "Add Elements". Search for "CMS List" and drag and drop it into the editor where you want your dynamic content to appear.
Configuring CMS List Settings
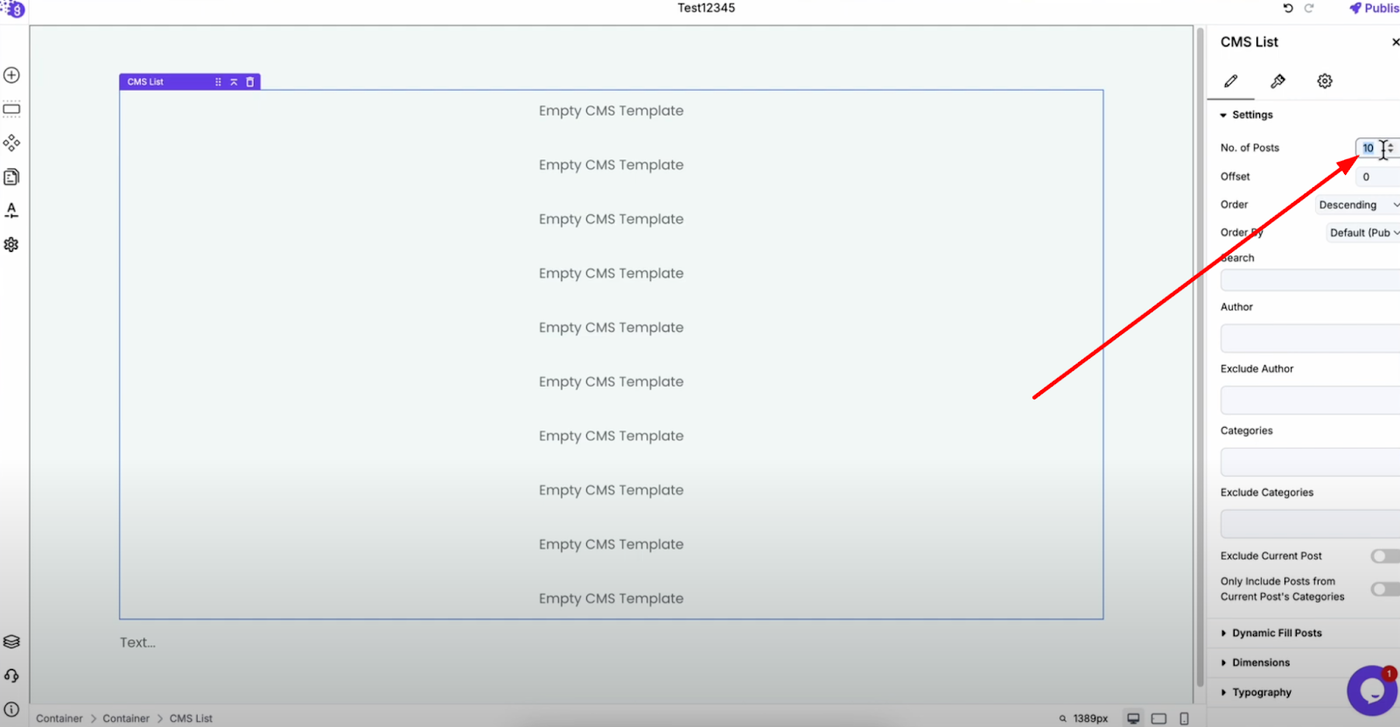
Once the CMS list is added, open its settings to customize how your content displays. Set the number of posts according to your requirement.
 You can also adjust offset, order, order by, and apply filters as needed to control which posts appear and in what sequence.
Creating Column Layout
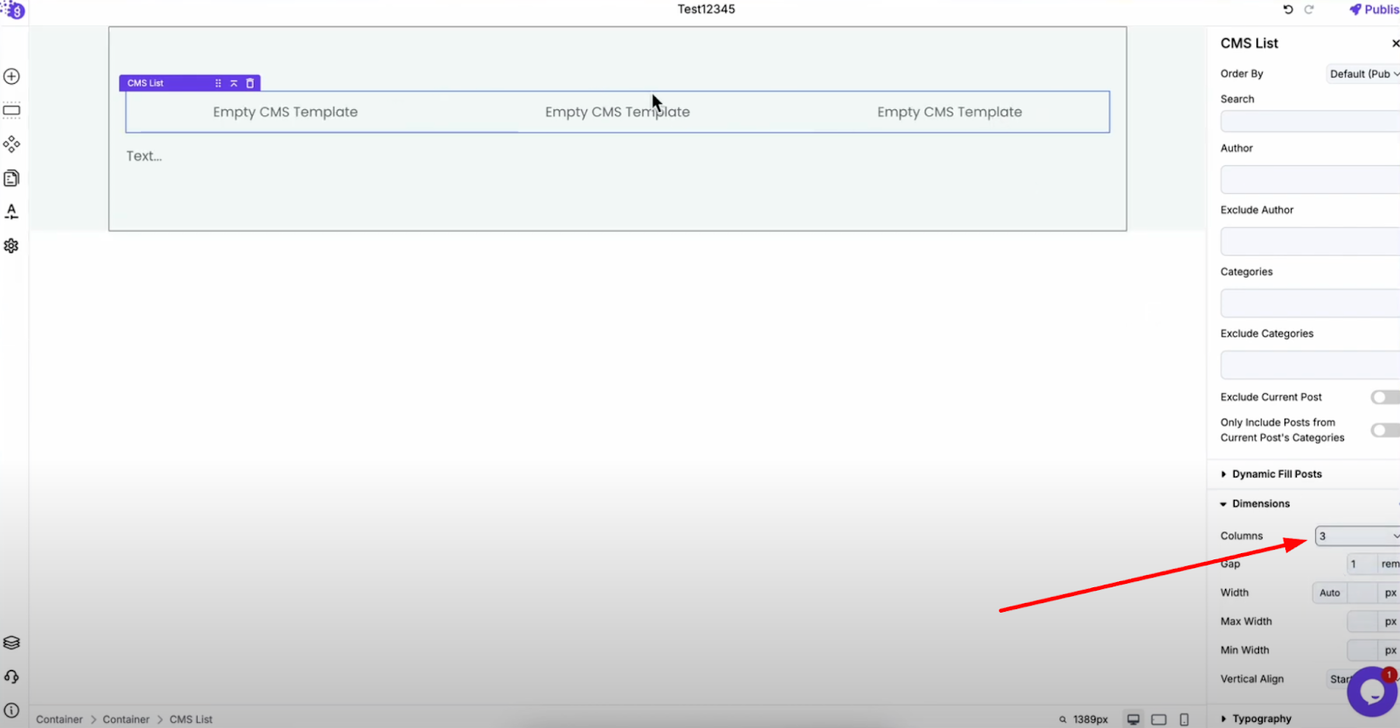
Go to the dimension section and select "Columns" to create a column layout for your CMS list. This organizes your content in a grid format that's visually appealing and responsive across devices.
Adding and Linking Container
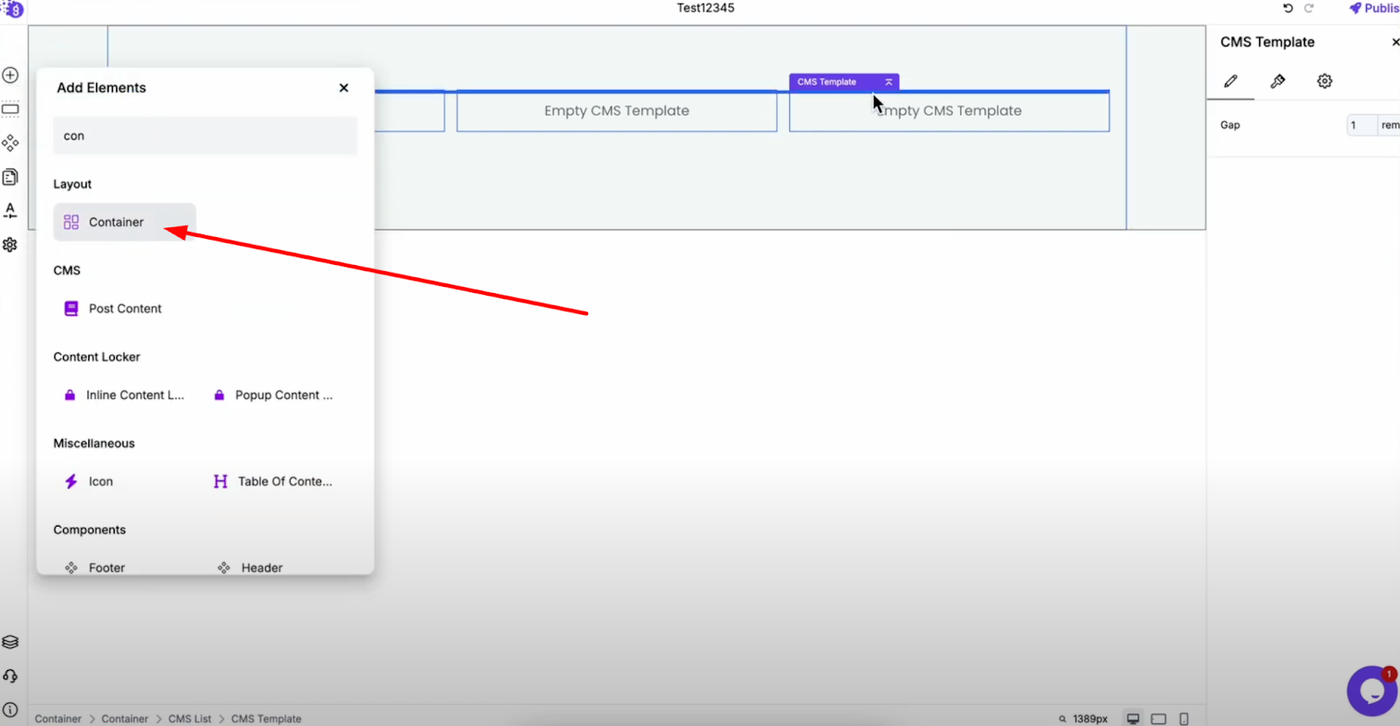
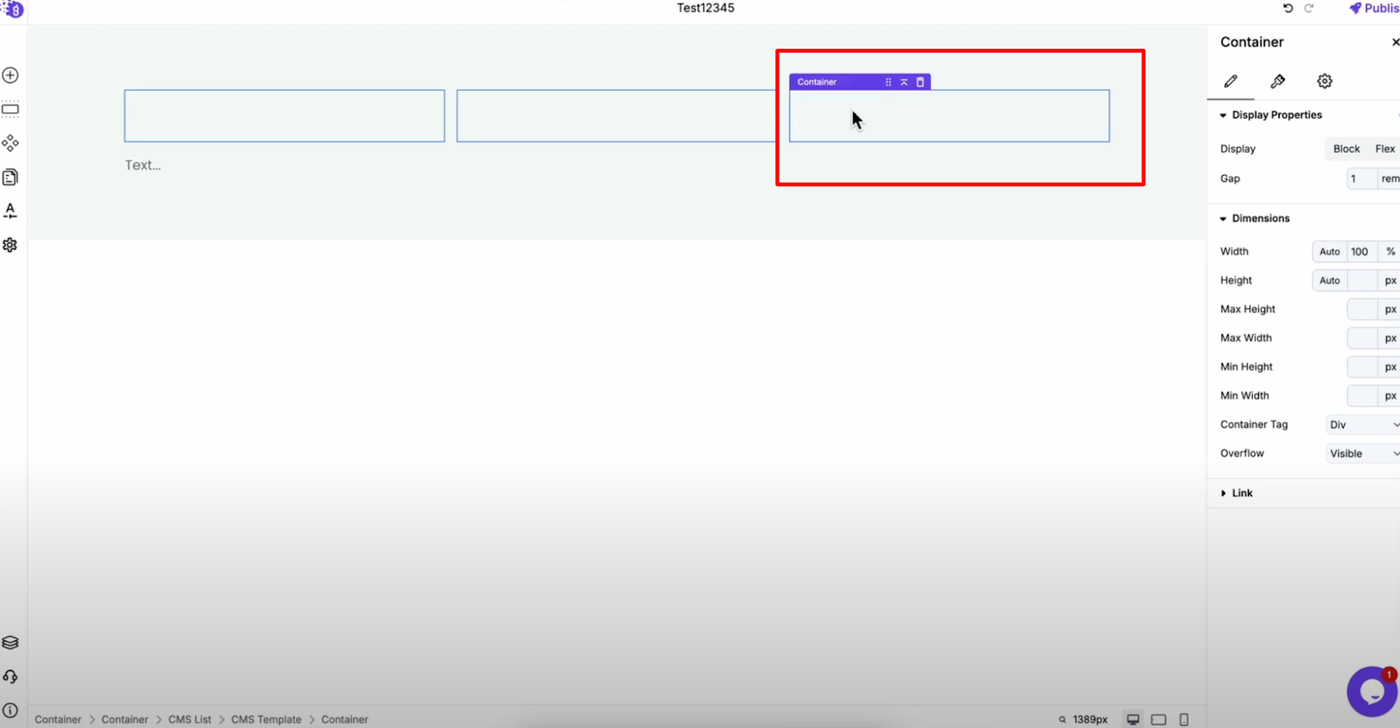
Add a container by dragging it from "Add Elements" and placing it inside the CMS list.
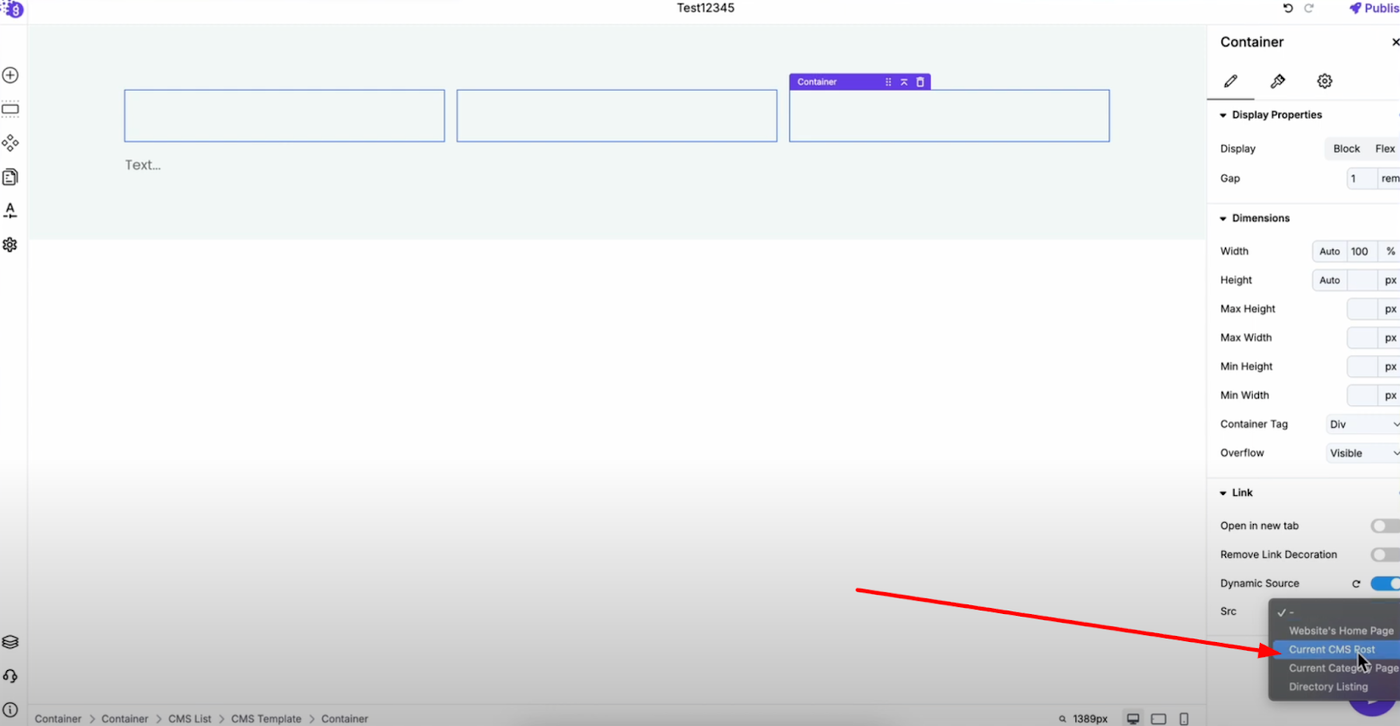
Link this container dynamically to the CMS post by going to its settings, opening the link section, and toggling on "Dynamic Source". Then select "Current CMS Post" — this makes your container clickable and linked to CMS posts dynamically.
Designing the Content Layout
Typically inside a CMS loop, you add elements like the post's featured image, title, date, and excerpt:
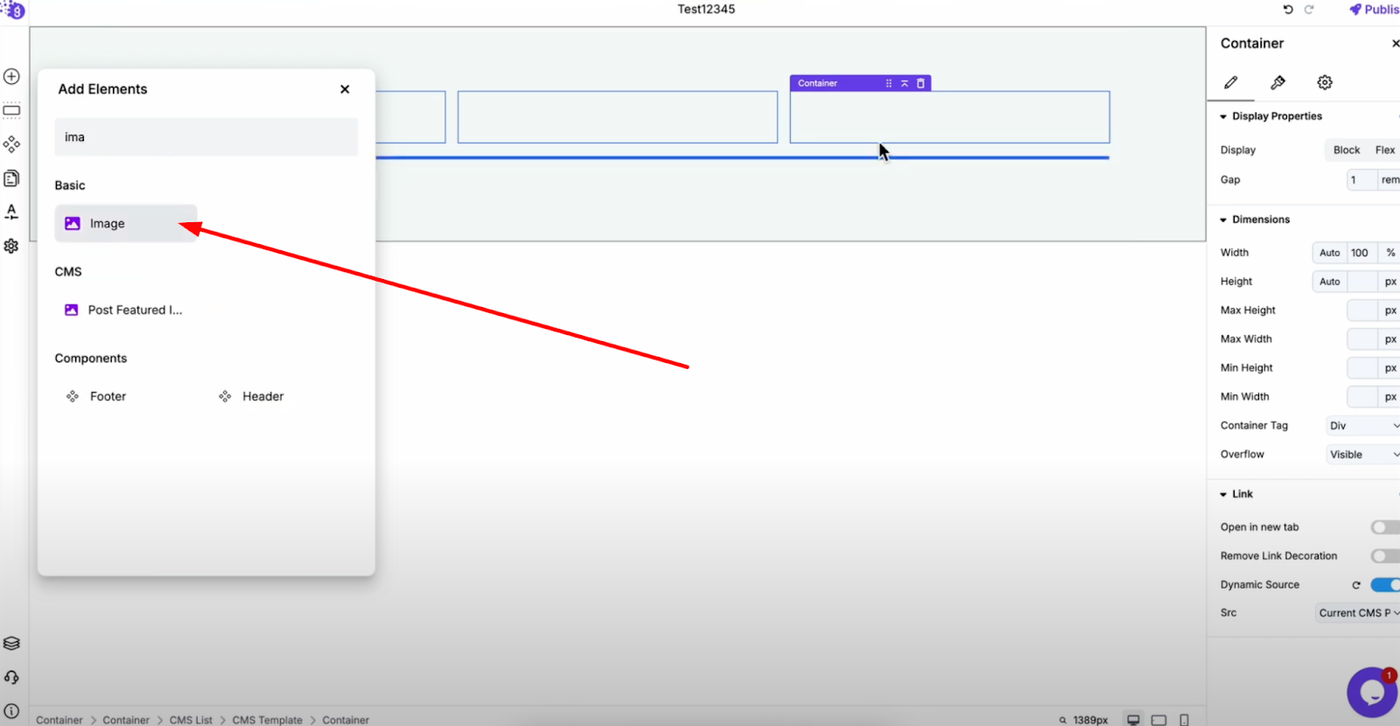
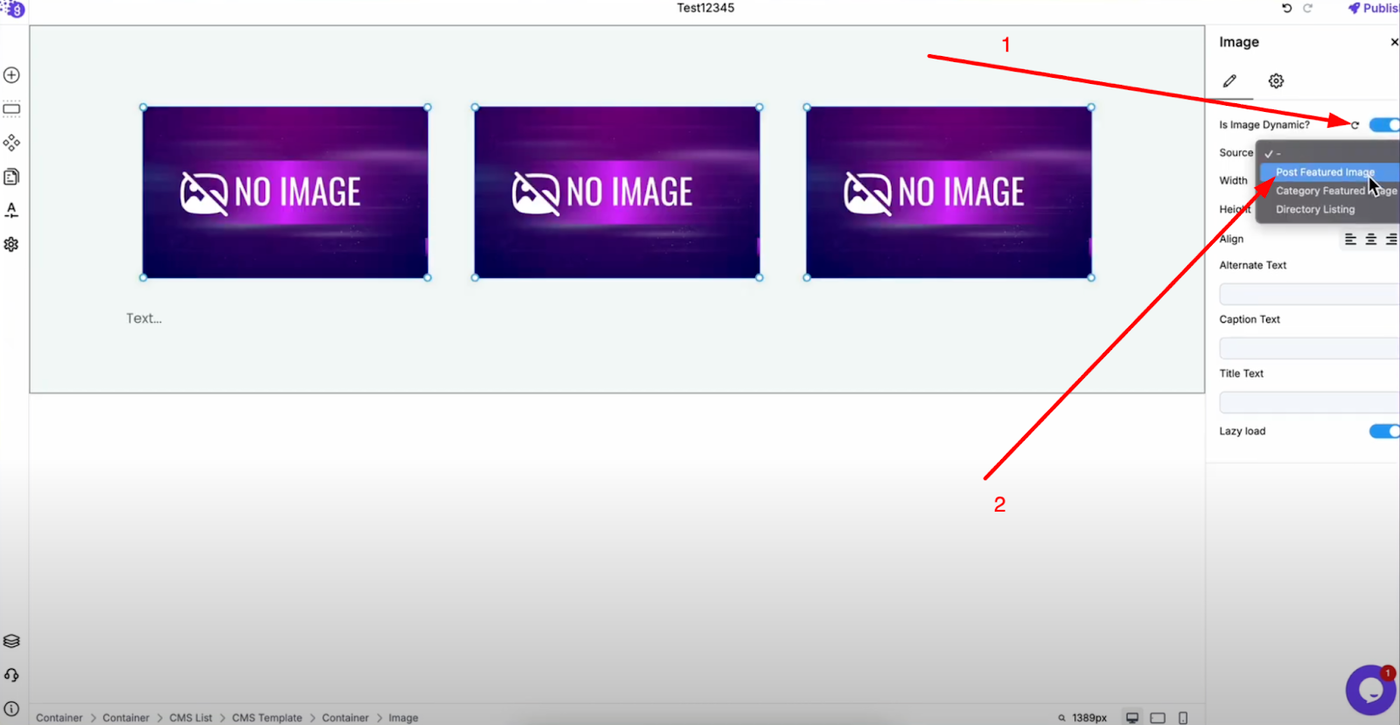
Add an image block inside the container. In its settings, toggle on "Is Image Dynamic" and select "Post Featured Image" as the source to display each post's featured image automatically.
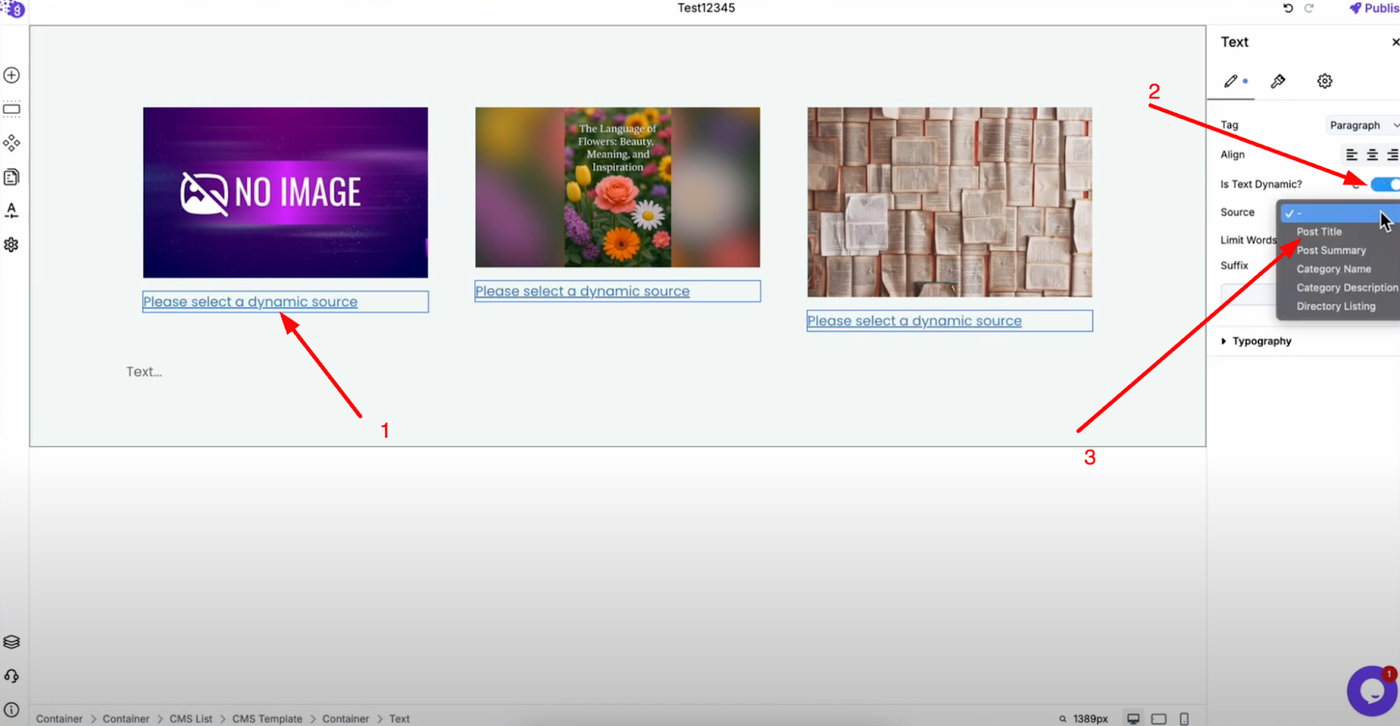
Add a text block for the post title. Toggle on "Is Text Dynamic" and choose "Post Title" as the source.
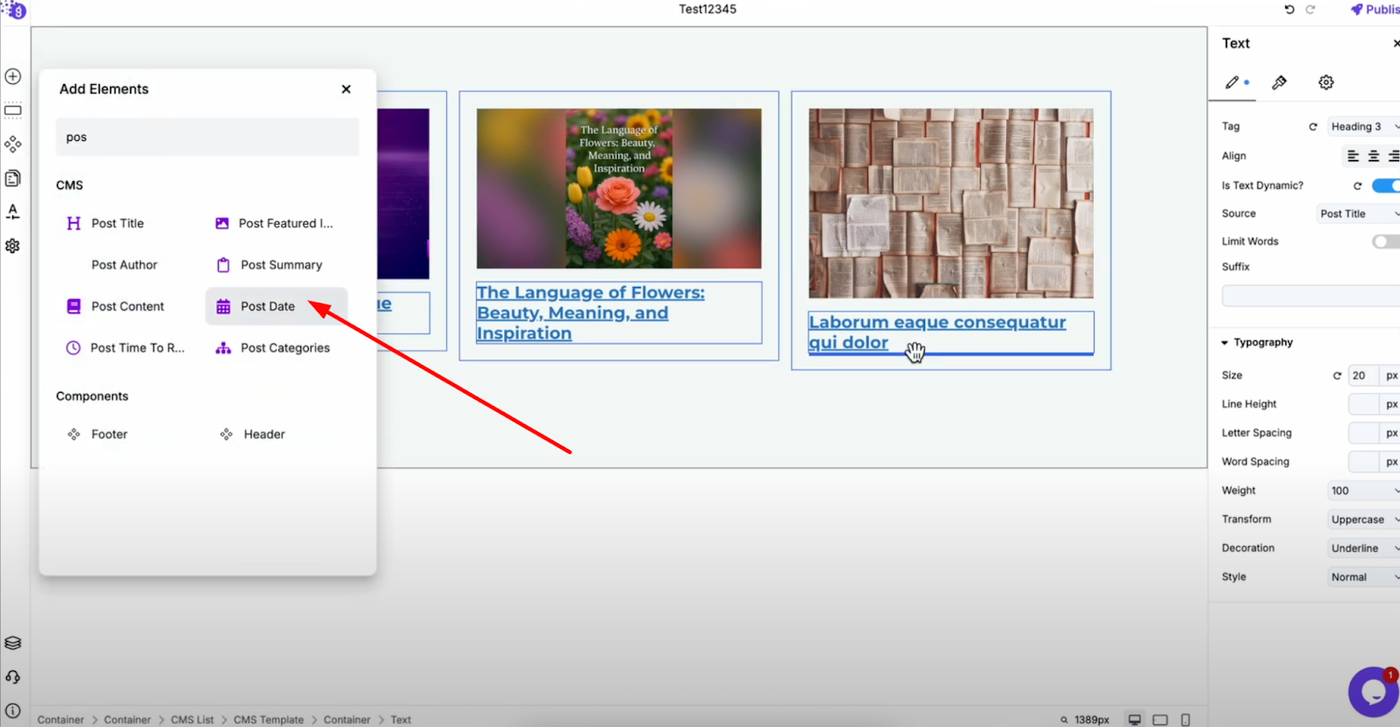
Add the post date by dragging it from "Add Elements" to show when each post was published.
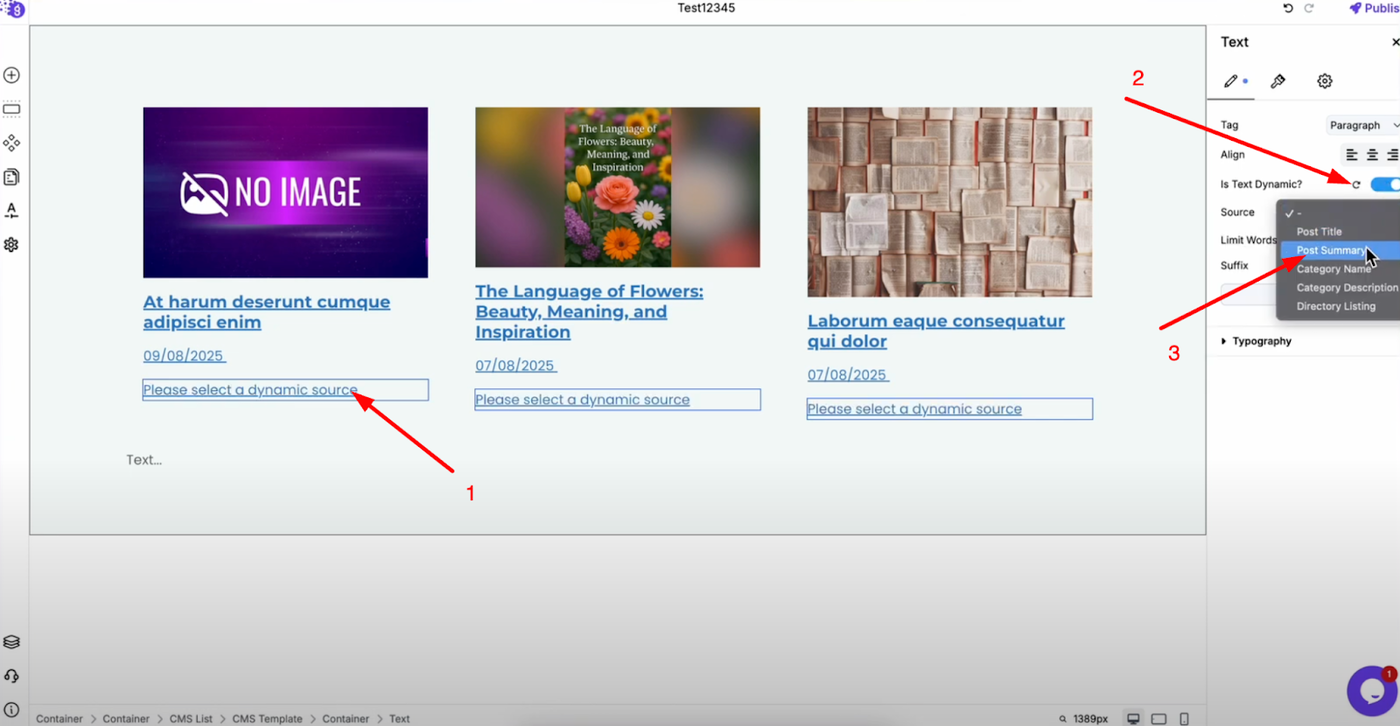
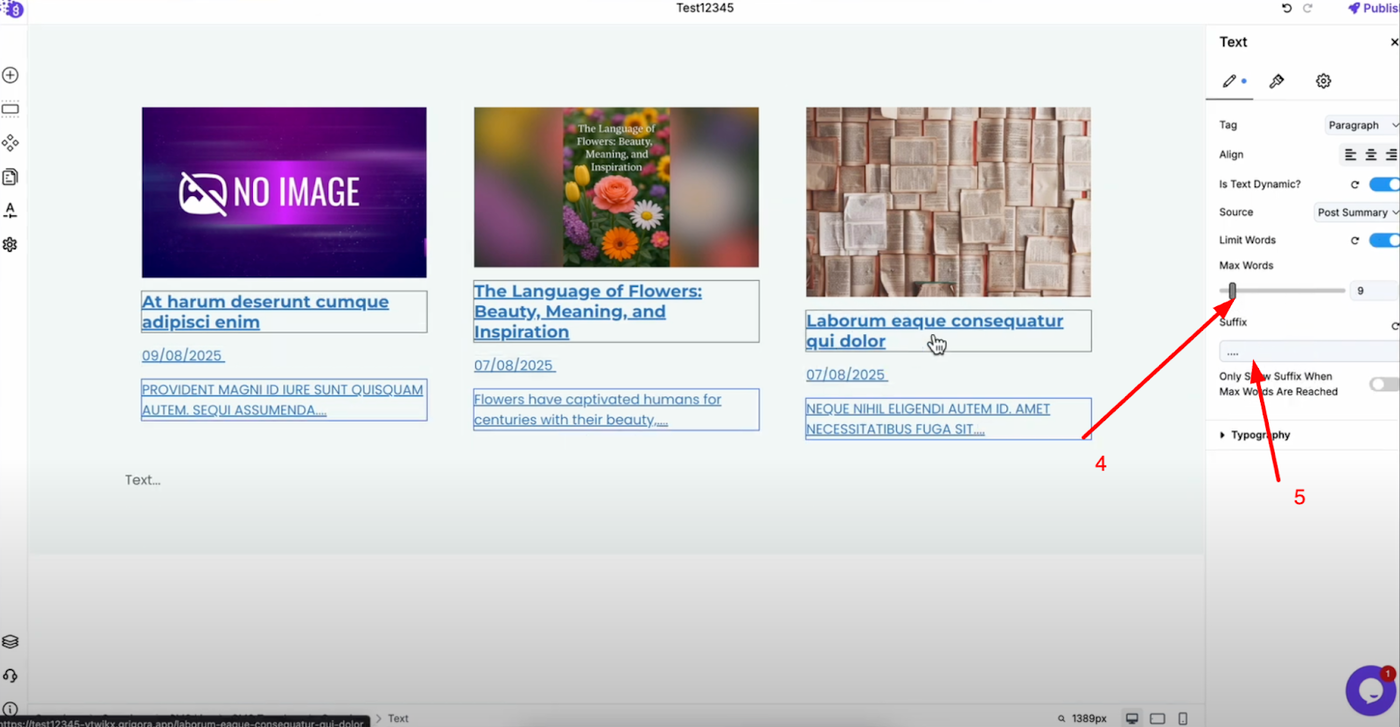
For the post excerpt, add another text block. Toggle on "Is Text Dynamic", select "Post Summary", and limit the number of words as per your requirement. You can also add a suffix like three dots for a clean, professional look.
Styling and Customization
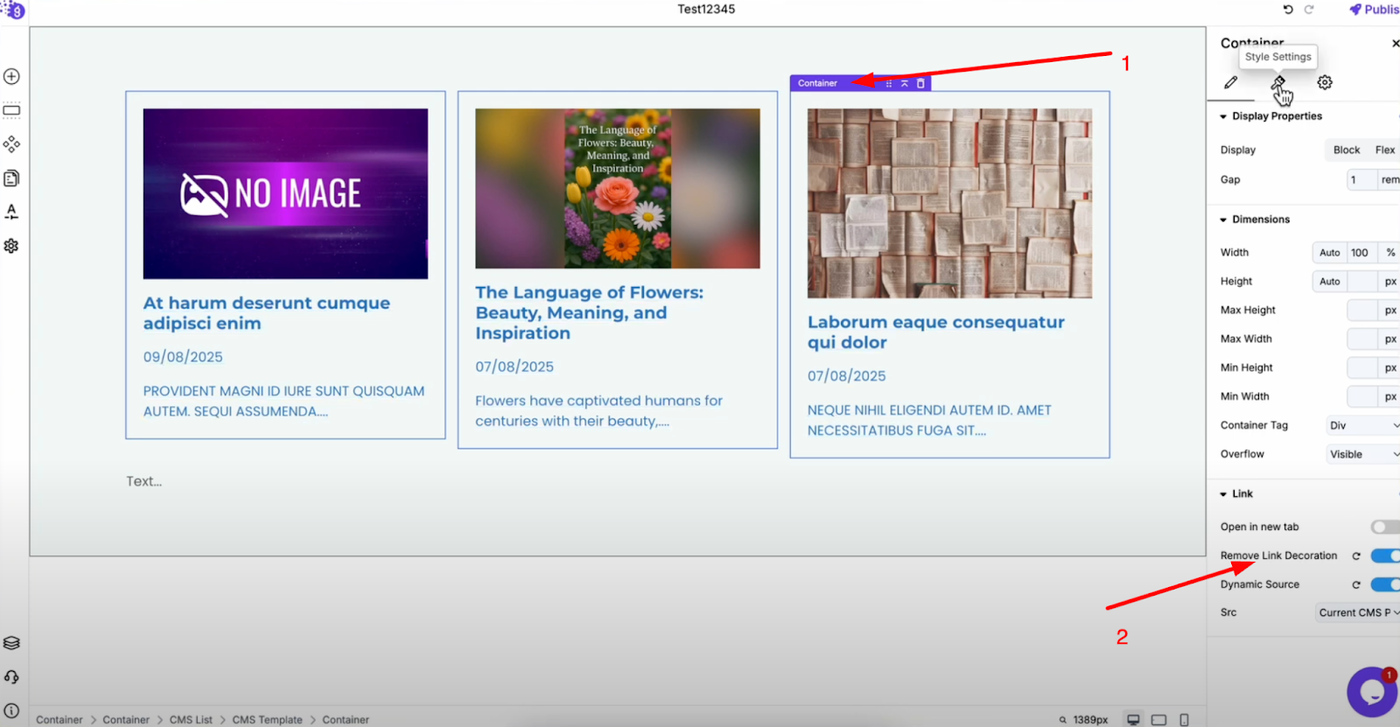
To remove unwanted link decoration, select the container and in its settings under "Links," enable "Remove Link Decoration".
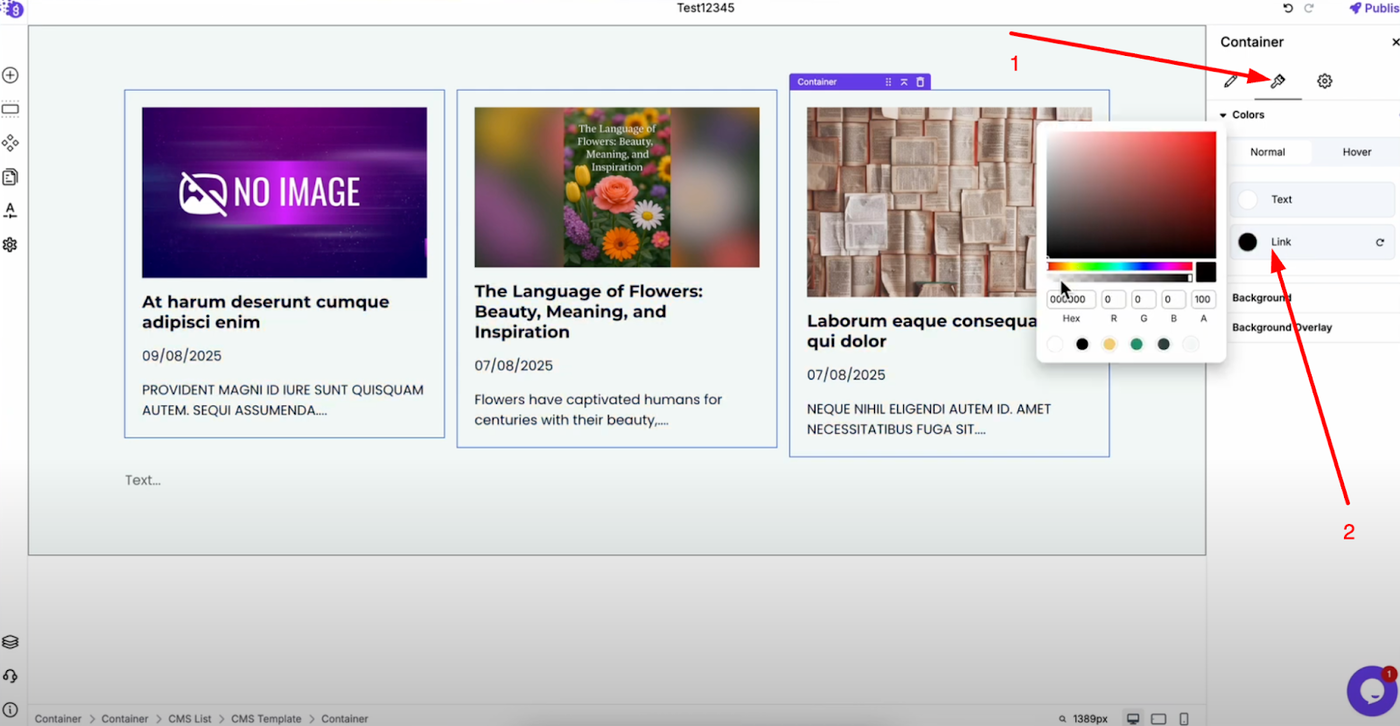
To change the link color, go to the container style settings and set the link color to your preferred color.
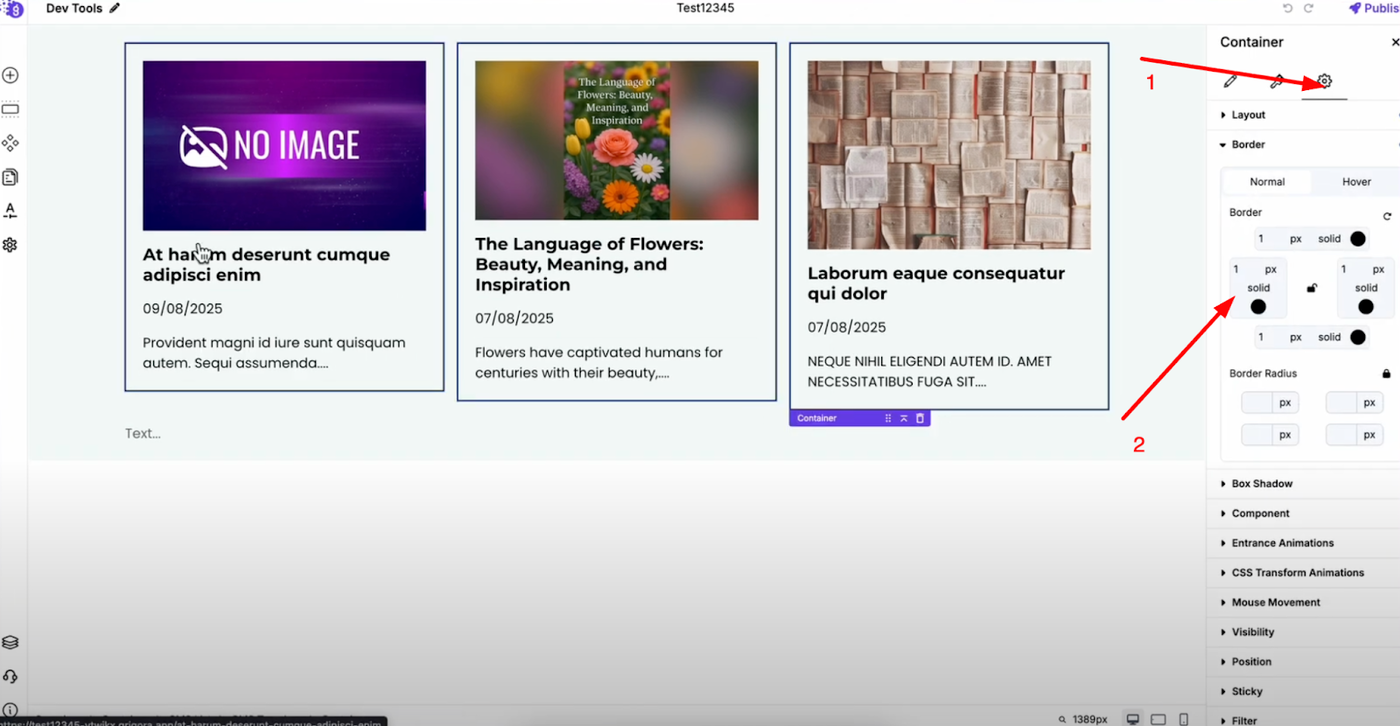
To differentiate each card, add a border to the container (for example, one pixel solid black) to create clear visual separation between posts.
Using Pre-Built CMS Sections
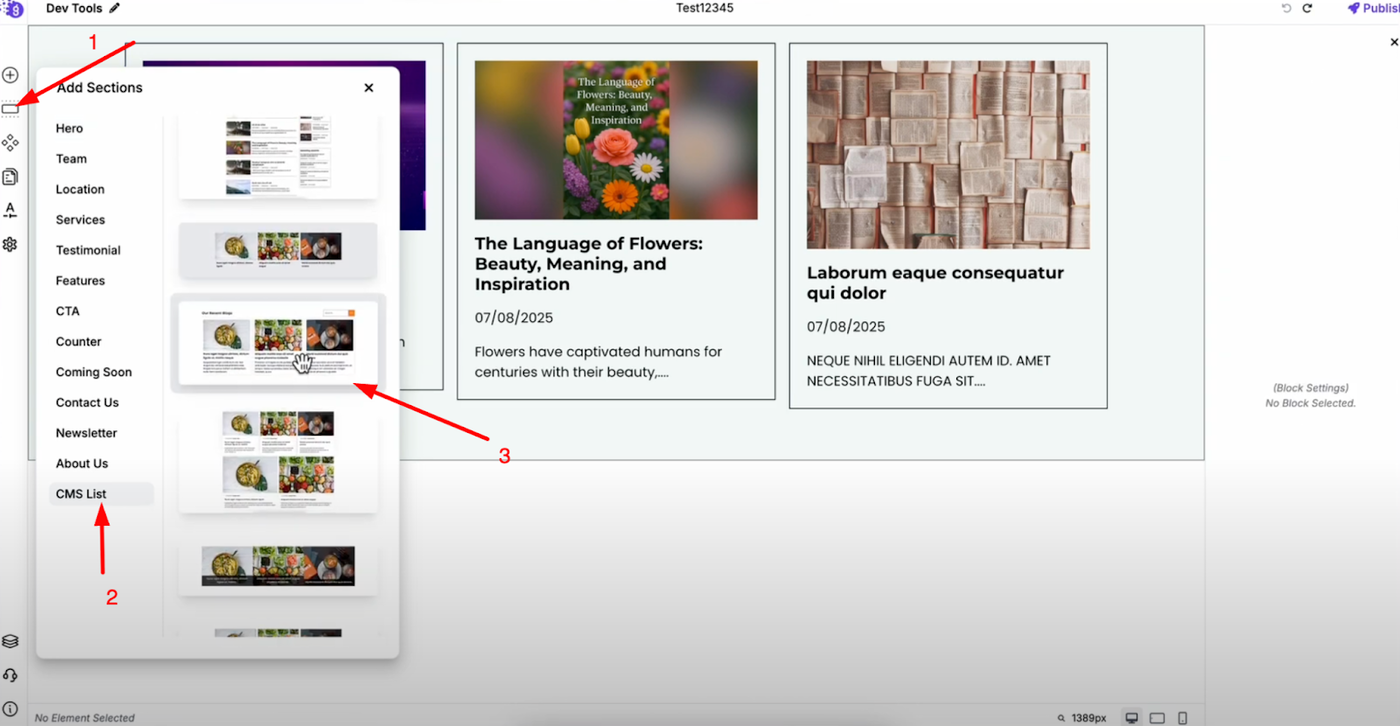
Alternatively, you can add a CMS list by selecting the "Add Sections" option in the left panel. Click on it and navigate to the "CMS List" section where you'll find a variety of ready-to-use CMS lists. Choose one that you like and drag it into the editor for quick implementation.
Publishing Your CMS Loop

After configuring all elements, save and publish your website. Your CMS loop is now ready and when a user clicks on any card, it will dynamically open that post, creating a seamless browsing experience for your visitors.