

Tags are another valuable tool for organizing and categorizing your blog posts on Grigora. They provide an additional layer of organization, allowing readers to find content based on specific topics or keywords.
1. Access Your Grigora Dashboard:
Log in to your Grigora account and navigate to your dashboard.
2. Select Your Website:

Choose the website where you want to manage blog post tags.
3. Navigate to the Posts Tab:

On the left-hand side navigation panel, click on "Posts".
4. Open the Post You Want to Edit:

Locate the blog post you wish to modify and click on it to open the editing interface.
5. Access the Post Information:

In the top bar of the editing interface, click on the "Info" button. This will open a sidebar with post details.
6. Locate the Tags Field:
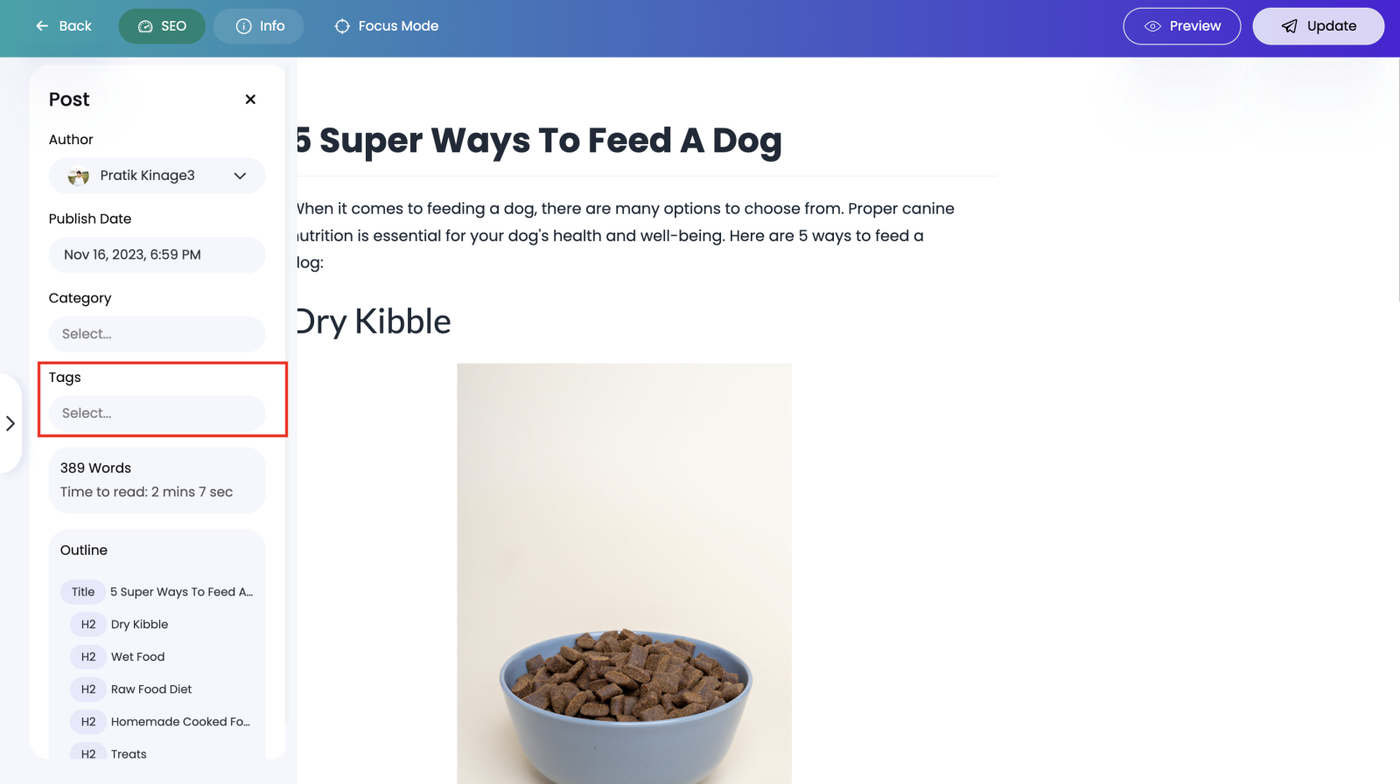
Within the post information sidebar, find the field labeled "Tags".
7. Add or Edit Tags:
Place your cursor in the tags field.
Start typing the name of the new tag.
As you type, Grigora will suggest existing tags that match your input.

If the desired tag doesn't appear, continue typing and press Enter to create it.
8. Update the Post:

Once you've added or edited the tags, click on the "Update" button to save your changes.