

Want to save time and streamline your content workflow? This guide will show you how to automate blog publishing using n8n, a powerful open-source automation tool. Learn how to connect your CMS, schedule posts, and publish blogs automatically without manual work. Perfect for bloggers, content creators, marketers, and businesses looking to simplify their publishing process.
Why Blog Publishing Automation Matters
Automation is a game-changer for content teams because it eliminates repetitive manual tasks, ensures consistent publishing schedules, and allows you to focus on creating quality content rather than managing the publishing process. With n8n and Grigora, you can create sophisticated workflows that handle everything from content fetching to publishing automatically.
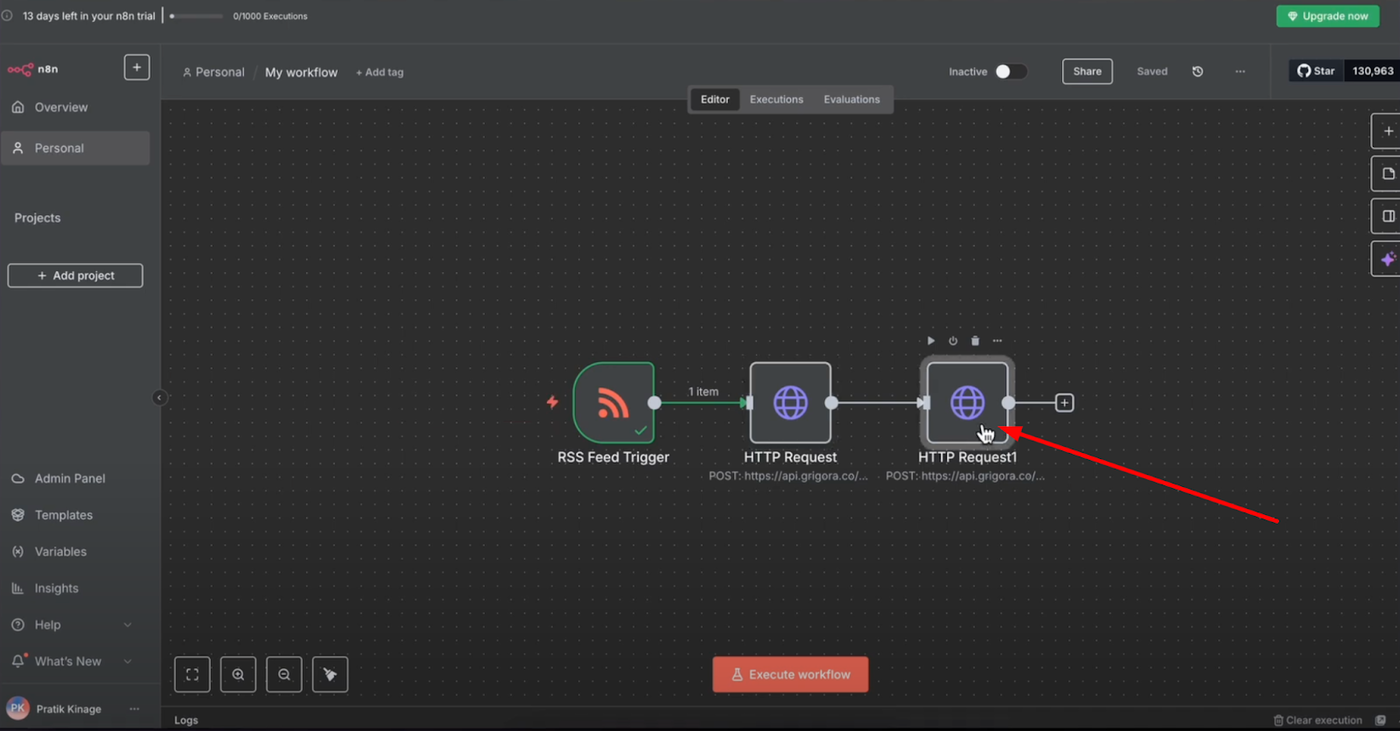
Setting Up Your n8n Workflow
Initial Workflow Creation

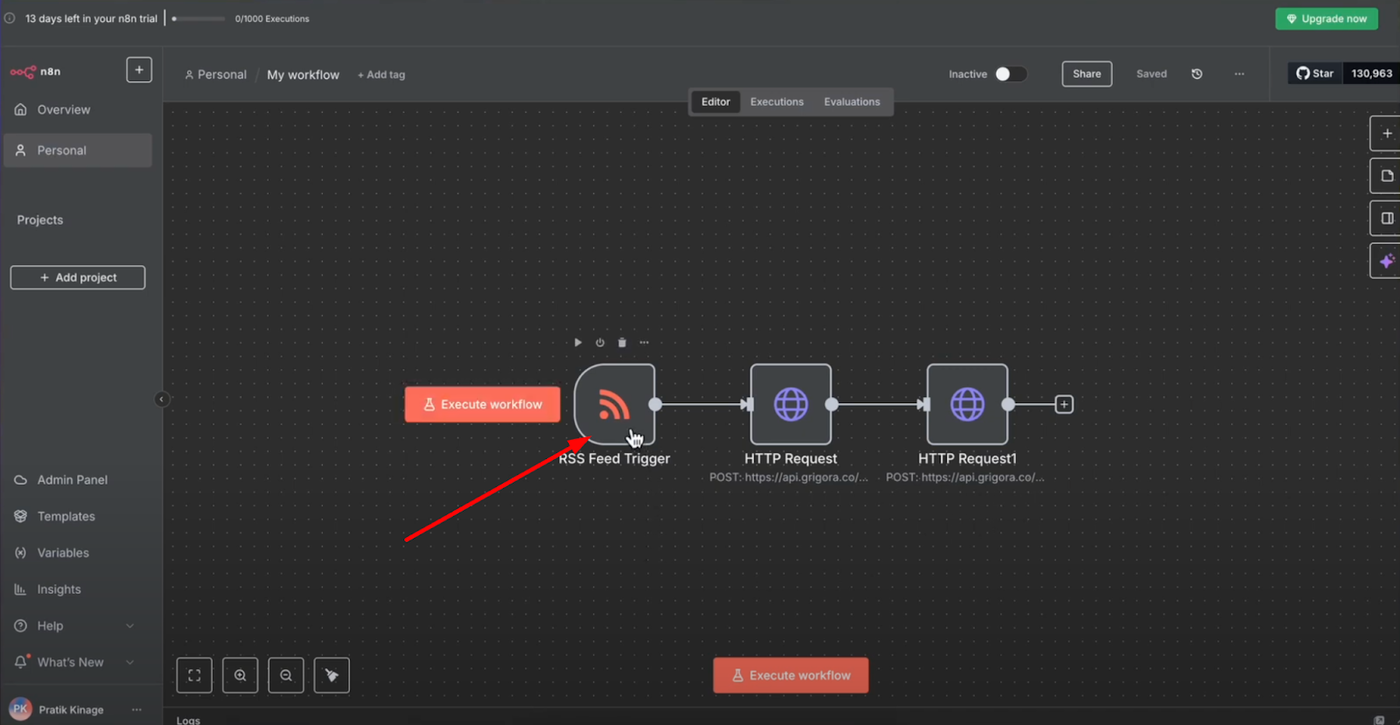
Open n8n and create a new workflow to begin your automation setup. For this automation, we'll use three nodes:
-
RSS Feed Trigger for monitoring new content
-
Two HTTP Request nodes for creating and publishing posts to Grigora
This three-node structure provides complete automation from content detection to final publication.
Step 1: Configure RSS Feed Trigger
RSS Feed Setup
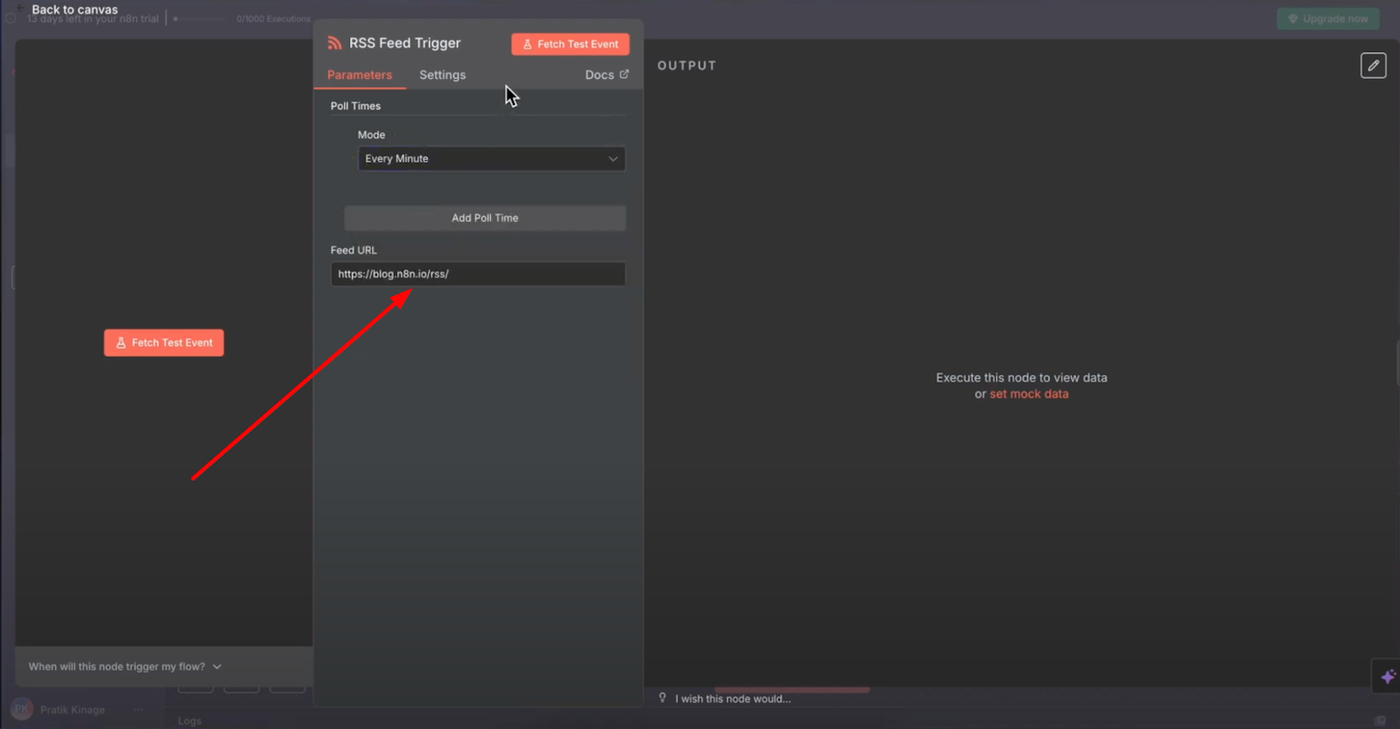
Configure the RSS feed trigger first by accessing the RSS node settings. Paste your RSS feed URL into the RSS URL field - this can be from any blog, news site, or content source you want to automatically republish.

Choose the polling time depending on how often you want to check for new posts - options typically range from every few minutes to daily, depending on your content needs and source update frequency.
Testing RSS Connection

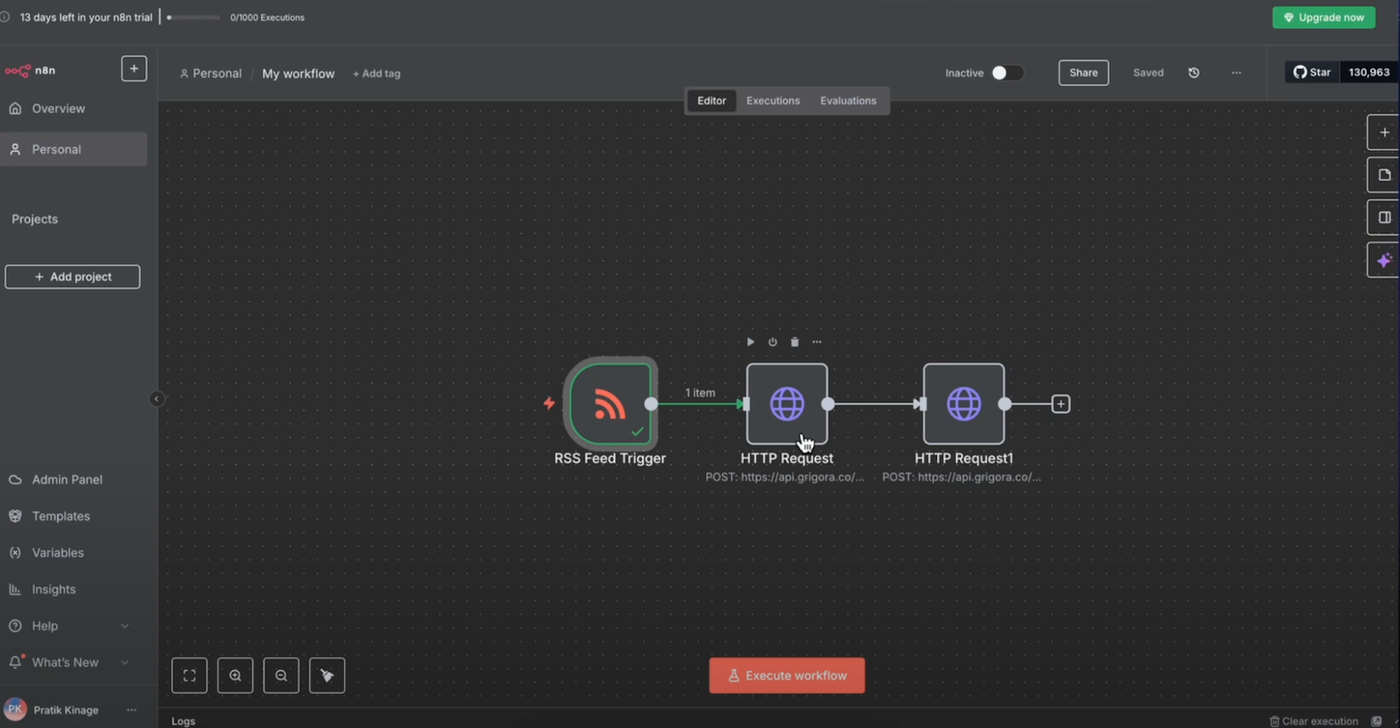
Click "Fetch Test Event" to verify it can successfully read a post from the feed. This test ensures your RSS connection is working properly and that n8n can access and parse the content before proceeding to the next steps.
Once the RSS trigger is working, we'll pass this data to Grigora via the n8n workflow for automated post creation and publishing.
Step 2: Configure HTTP Request to Create Post
API Endpoint Setup
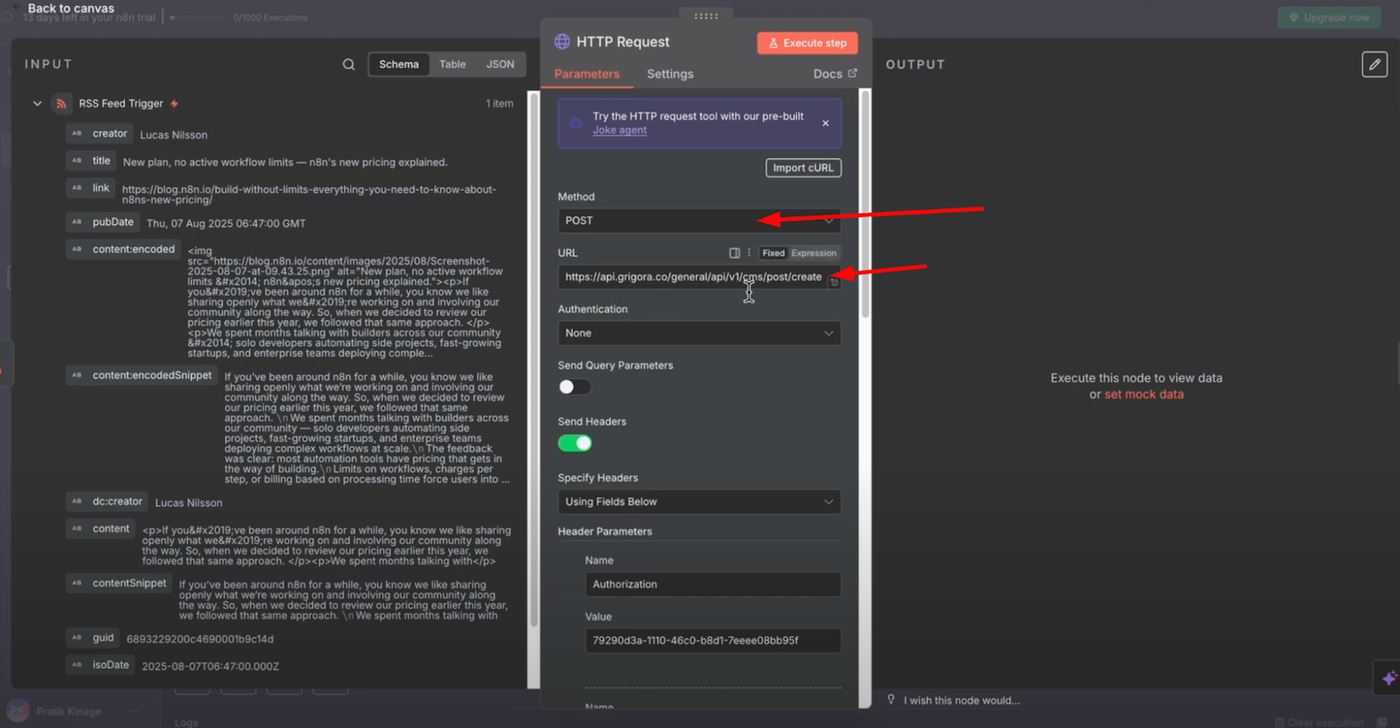
Set the method to POST for creating new content. In the URL field, use Grigora's API endpoint for creating a post - this endpoint handles the initial post creation with all your content data.
Refer to Grigora's API reference guide to map the required parameters correctly and ensure your workflow communicates properly with Grigora's system. The API reference documentation provides detailed parameter specifications and examples.
Headers and Authentication
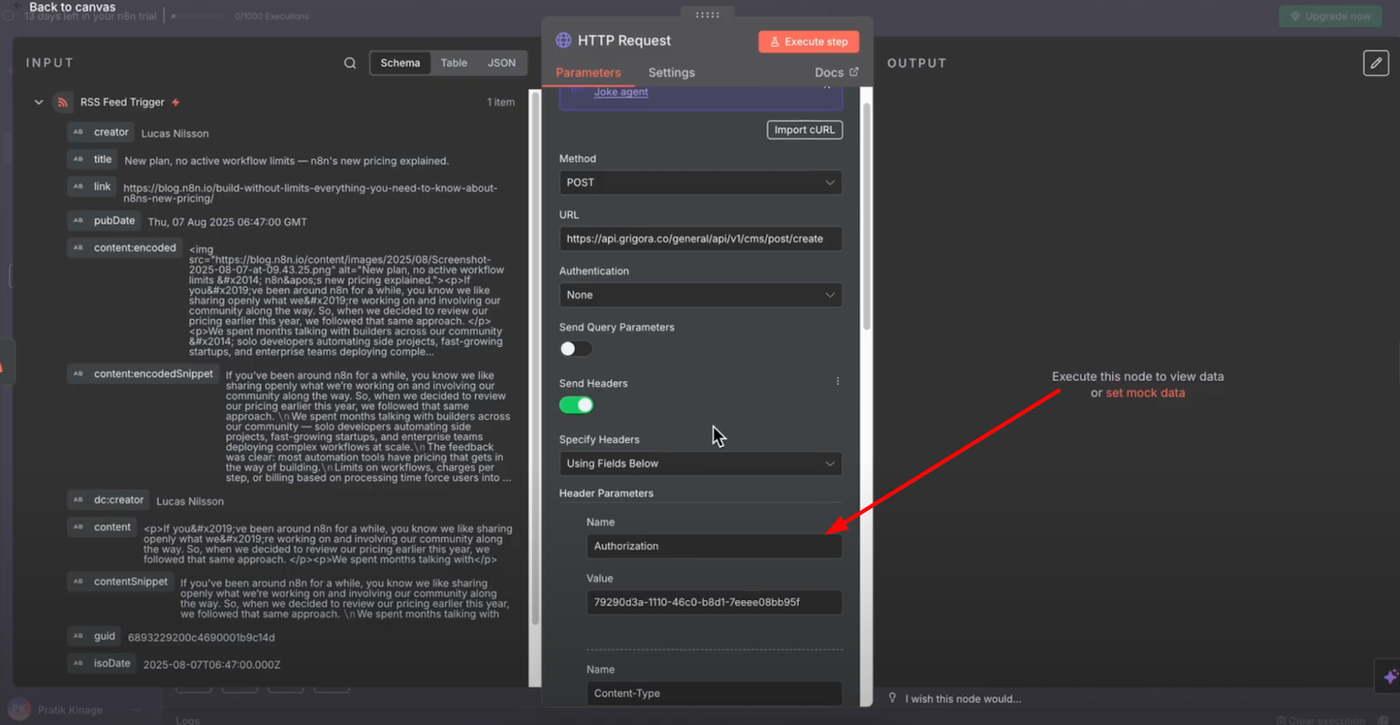
Configure the headers including authorization and content type for proper API authentication. This typically includes your API key and content-type specification for JSON data transmission.
Configure body parameters such as:
-
Title from the RSS feed content
-
Content body from the RSS source
-
Excerpt for post summaries
-
Slug for URL generation
-
Categories and tags based on your content organization needs
Step 3: Configure HTTP Request to Publish Post
Publishing Endpoint Configuration
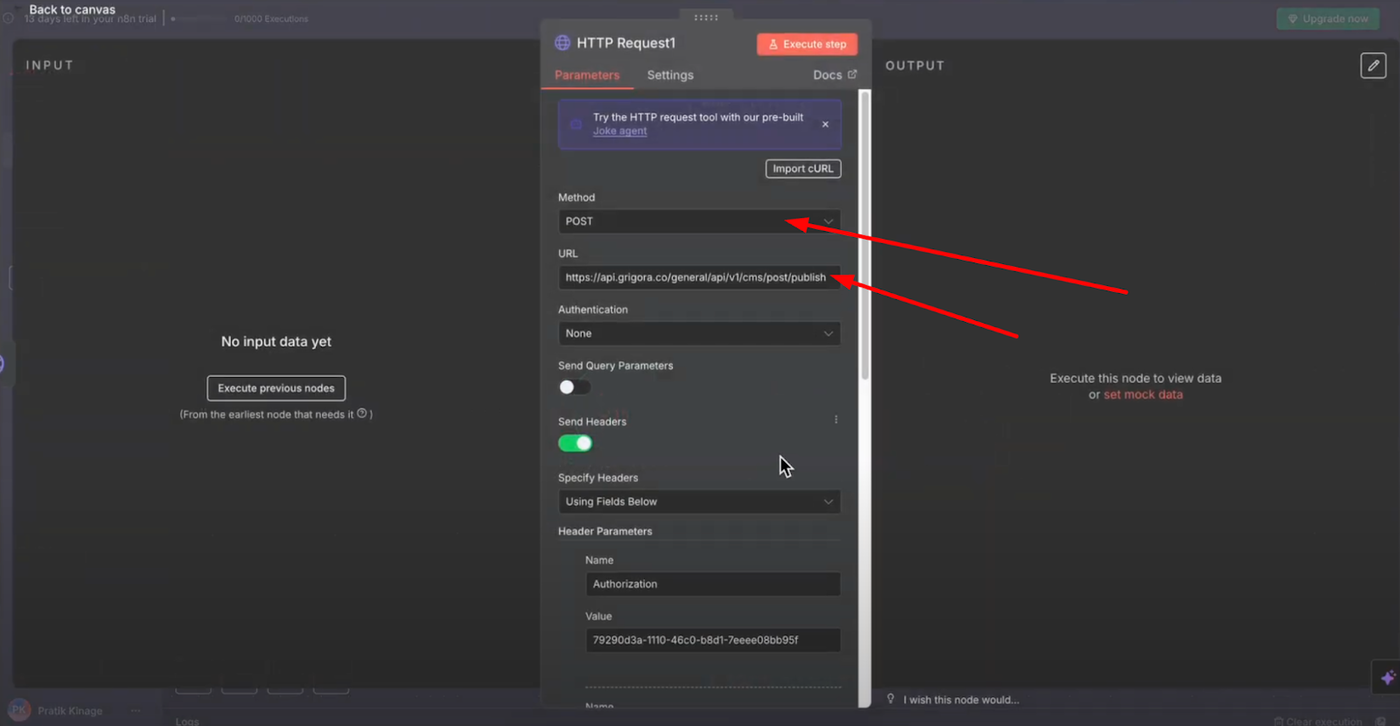
Set the method to POST for the publishing action. Use Grigora's API endpoint for publishing a post - this endpoint takes created posts from draft status to live publication.
Map the necessary parameters including the post ID returned from the create step. This ID links the creation and publishing actions, ensuring the correct post gets published.
Ensure headers and body fields match the API requirements for successful post publication and proper content delivery to your live website.
Testing and Verification
Workflow Execution
Execute the workflow to test your complete automation setup. When execution is successful, you'll see confirmation messages indicating that each step completed properly.
Go back to Grigora's posts section and reload the page to verify the automation results. You'll see that a new post has been added with the fetched content, confirming that the automation is working as expected.