

Want your website visitors to take action? This guide will show you how to insert call-to-action buttons on your Grigora site and link them to any page or URL. Perfect for landing pages, sales funnels, blogs, and more!
Adding Button Elements
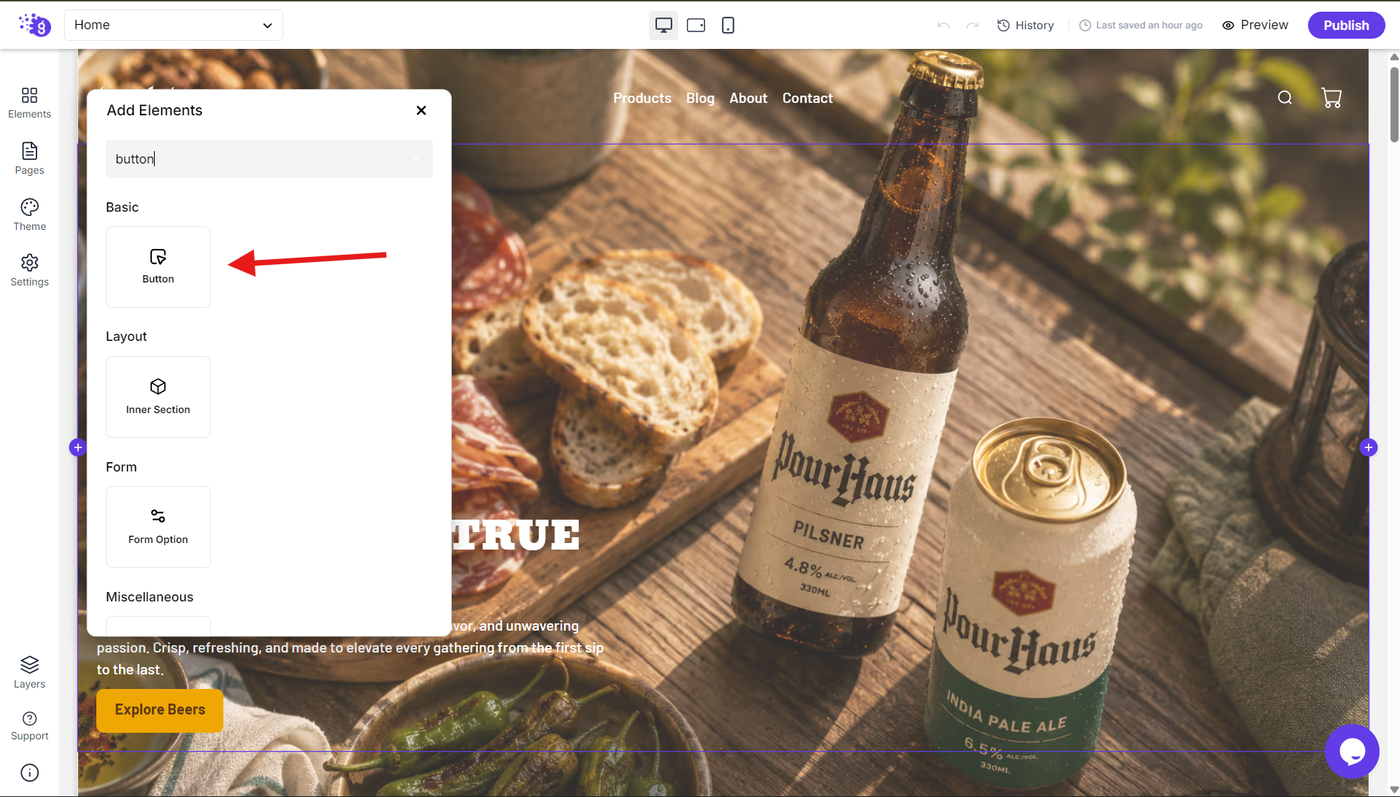
Open the Grigora editor and click on "Elements" to access all available design components. Find the button element and drag it into your editor workspace where you want the call-to-action to appear.
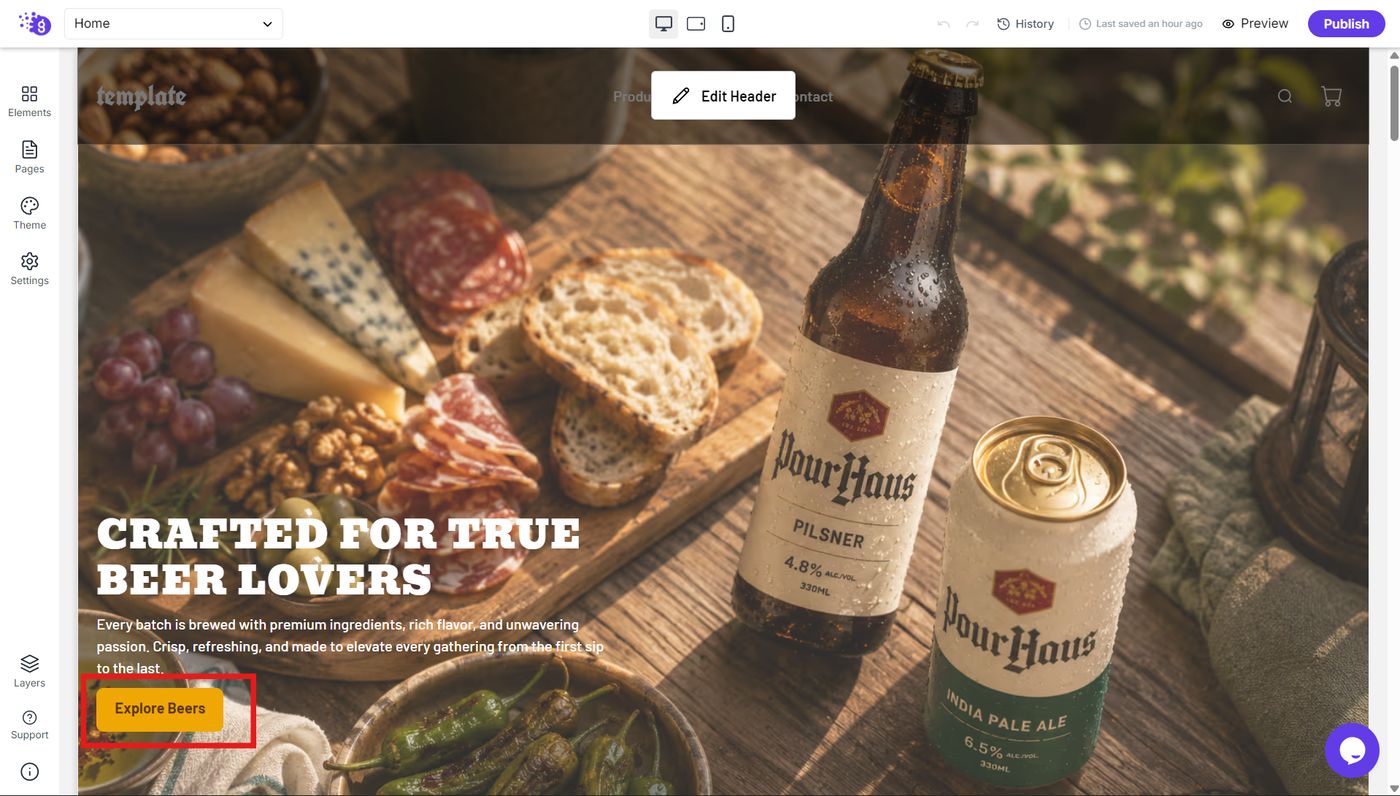
Once added, you can type your button text directly by clicking on the button and entering your desired call-to-action text.
Accessing Button Settings
To access more customization options, right-click the button and select "Settings" to open the comprehensive button configuration panel where you can control all aspects of your button's appearance and behavior.
Setting Up Button Links
Adding URLs
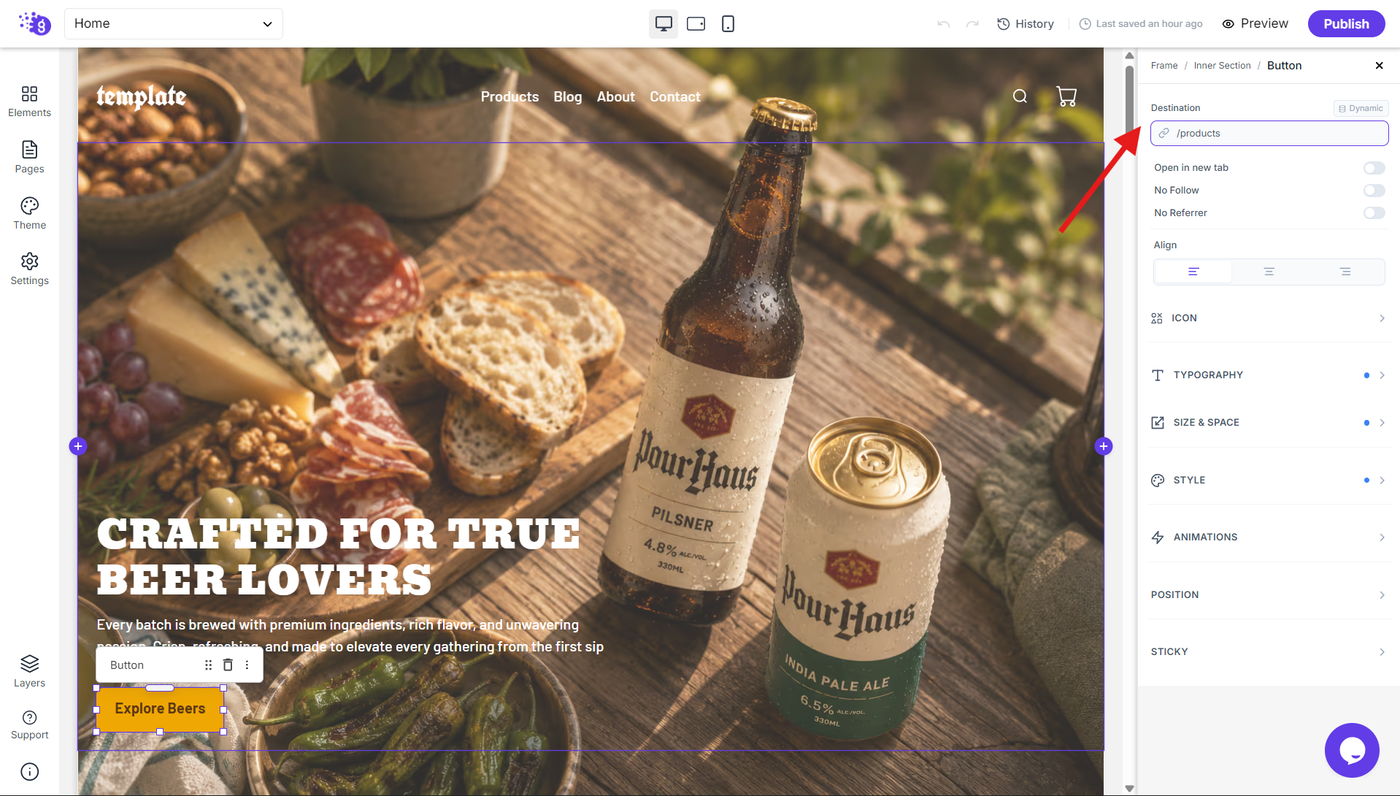
In the settings panel, you'll find a link option where you can paste your URL — this can be an internal page link, external website URL, or file download link depending on your call-to-action goals.
Link Behavior Control
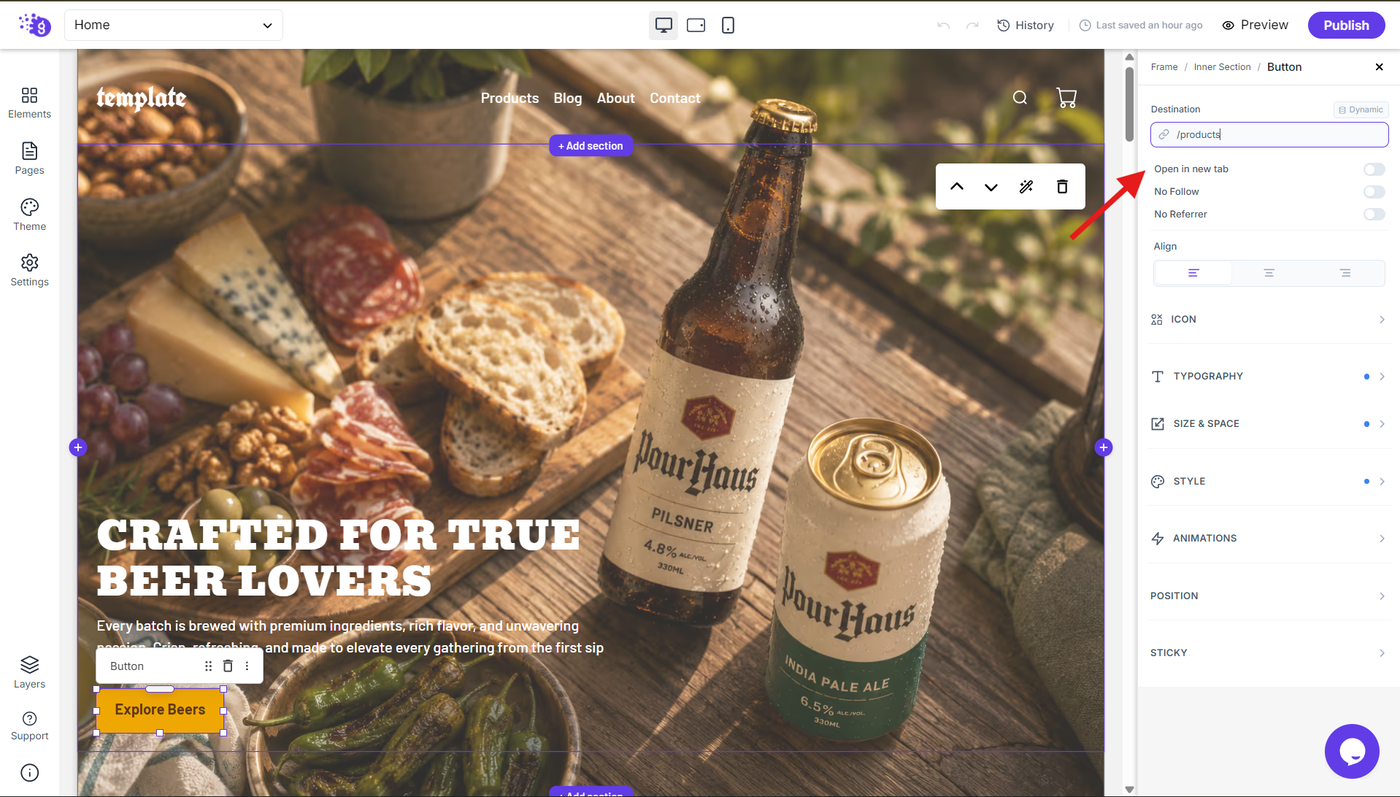
Toggle "Open in New Tab" if you want the link to open in a separate browser tab when clicked. This is especially useful for external links or when you want visitors to stay on your main site while exploring additional resources.
Customizing Button Dimensions and Layout
Size and Positioning
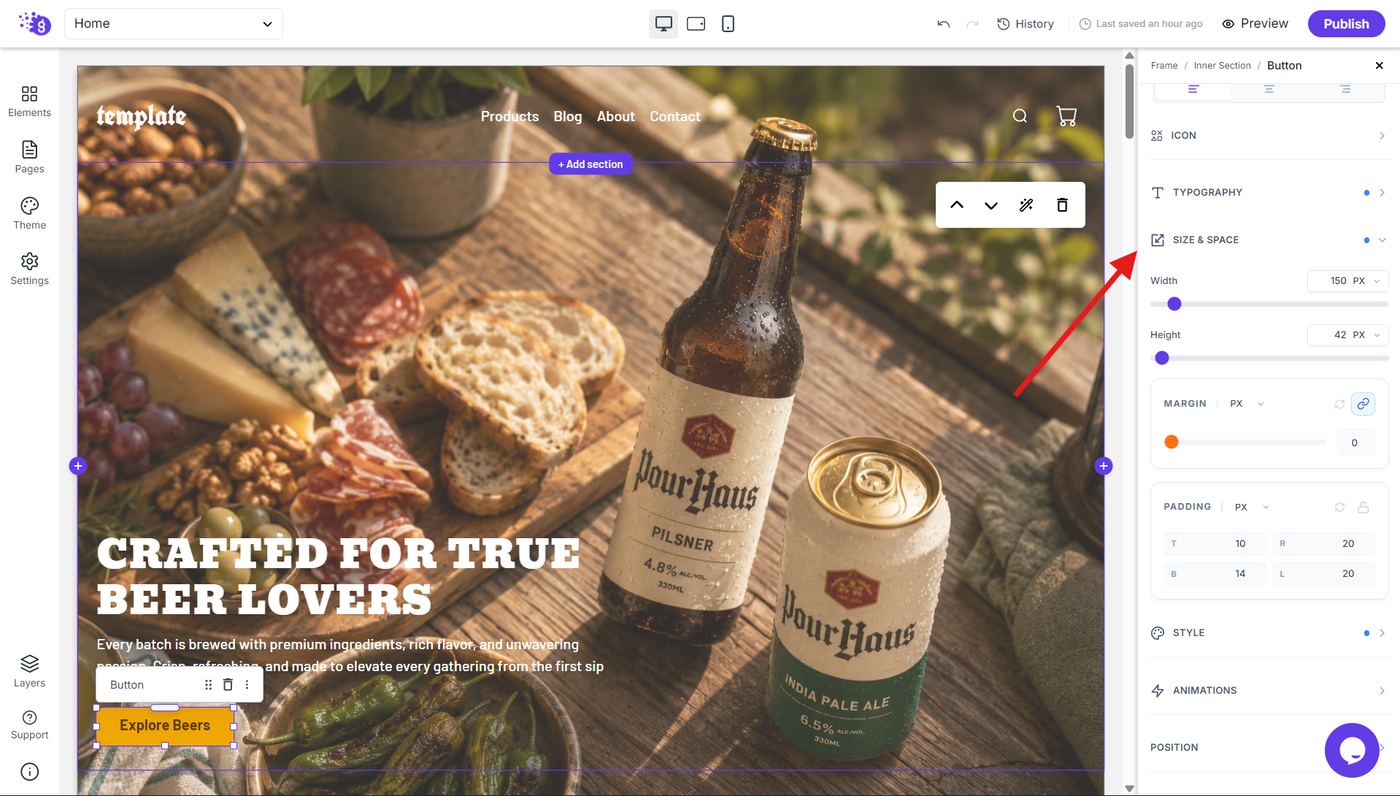
You can adjust the button’s width and height under the Size & Space section to control its overall dimensions. The Padding and Margin options let you fine-tune the spacing around the button and its content.
Typography Customization
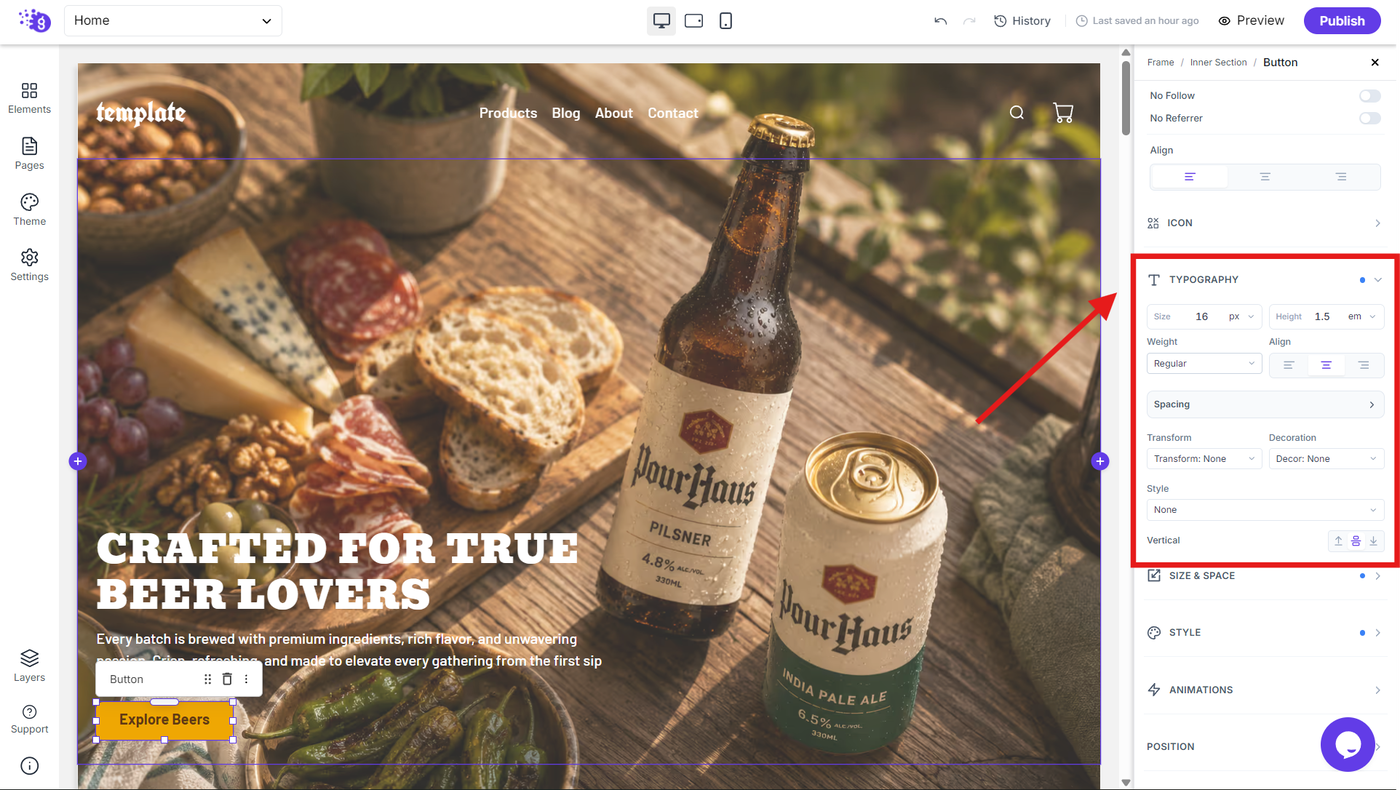
Customize Button Typography
Use the Typography section to fine-tune the appearance and alignment of your button text:
Font Size: Adjust the text size to make the button label more prominent or compact.
Line Height: Control the vertical spacing between lines of text for better readability.
Font Weight: Choose the appropriate weight, from lighter to bolder styles, to control the emphasis of the button text.
Text Alignment: Align the button text to the left, center, or right within the button.
Spacing: Adjust letter and word spacing to refine the overall appearance of the text.
Text Transform: Control the capitalization of the button text, such as uppercase, lowercase, or capitalize.
Text Decoration: Add or remove decorations such as underlines.
Text Style: Apply available text styles such as italic or other supported variations.
Vertical Alignment: Position the text vertically within the button for precise alignment.
Style Settings and Colors
Color Customization
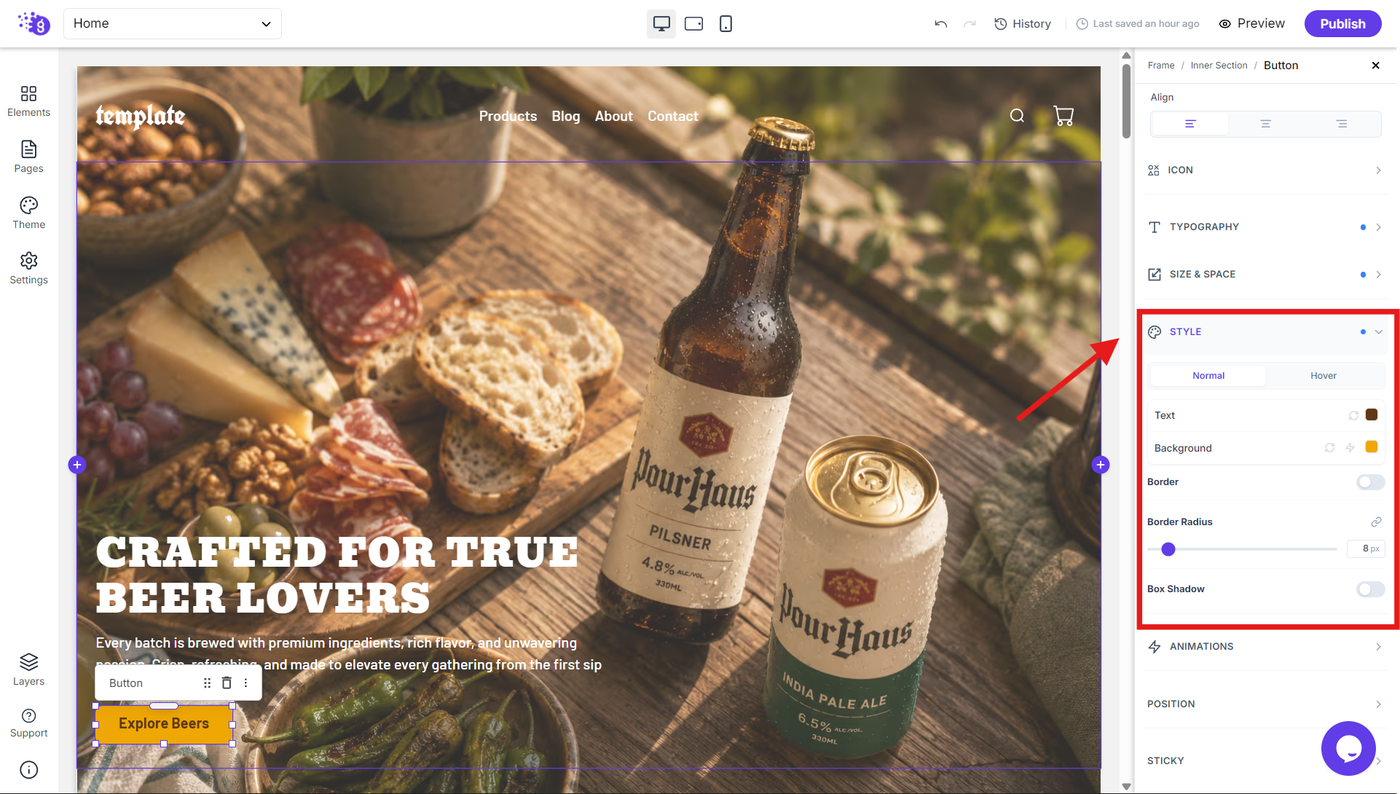
Open the Style section in the settings panel to customize the button’s overall appearance. You can adjust the Text and Background colors, enable and customize the Border, set the Border Radius to control the button’s corners, and apply a Box Shadow to add depth and emphasis.
Interactive Effects
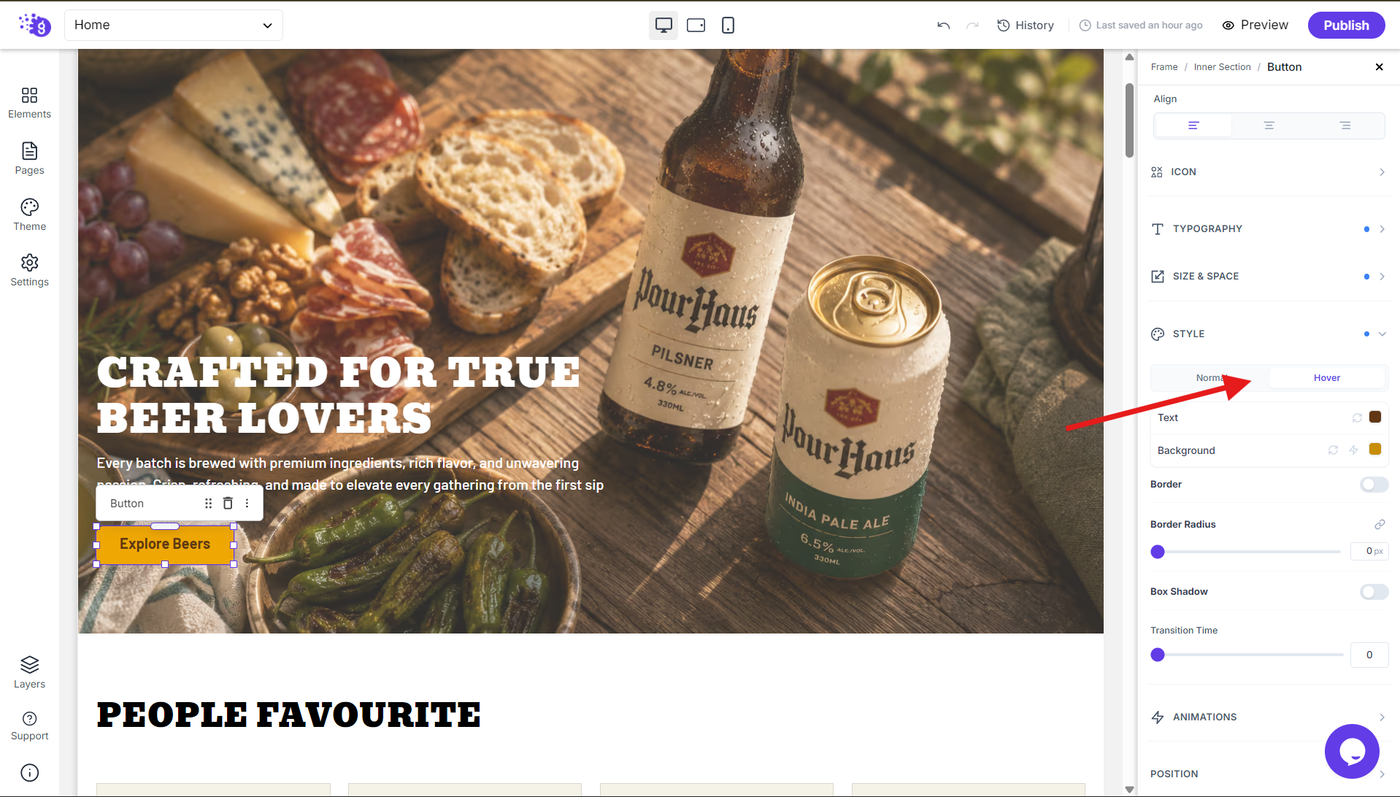
You can set hover effects for both text and background colors to create engaging interactive buttons that respond when users hover over them. This provides visual feedback and improves user experience. Add transition time to make color changes smooth when users hover over the button, creating professional, polished interactions that enhance your website's overall feel.
Professional Call-to-Action Implementation
This comprehensive button system allows you to create everything from basic text buttons to fully styled call-to-action elements with links and hover effects. Use these buttons strategically throughout your site to guide visitors toward desired actions like:
Newsletter signups for lead generation
Product purchases for e-commerce conversions
Contact form submissions for business inquiries
Content downloads for value delivery
Social media follows for community building