

Want to customize your Grigora website beyond the default settings? This guide will show you how to add or apply custom CSS to any element in Grigora. Customize fonts, colors, spacing, layouts, and more to make your site truly unique and fully branded. Perfect for beginners and advanced users who want full control over their website design.
Why Use Custom CSS in Grigora
Custom CSS allows you to enhance your site's appearance and functionality with advanced styling that goes beyond Grigora's built-in options. You can target specific elements with precise styling, apply unique visual effects, maintain responsive design, and create fully branded experiences that match your exact vision.
Step-by-Step Process
Step 1: Select and Prepare Your Element
Open Grigora's site editor and navigate to the page containing the element you want to customize. Select the element to which you want to add custom CSS - this can be any element including containers, text blocks, buttons, images, or headers.
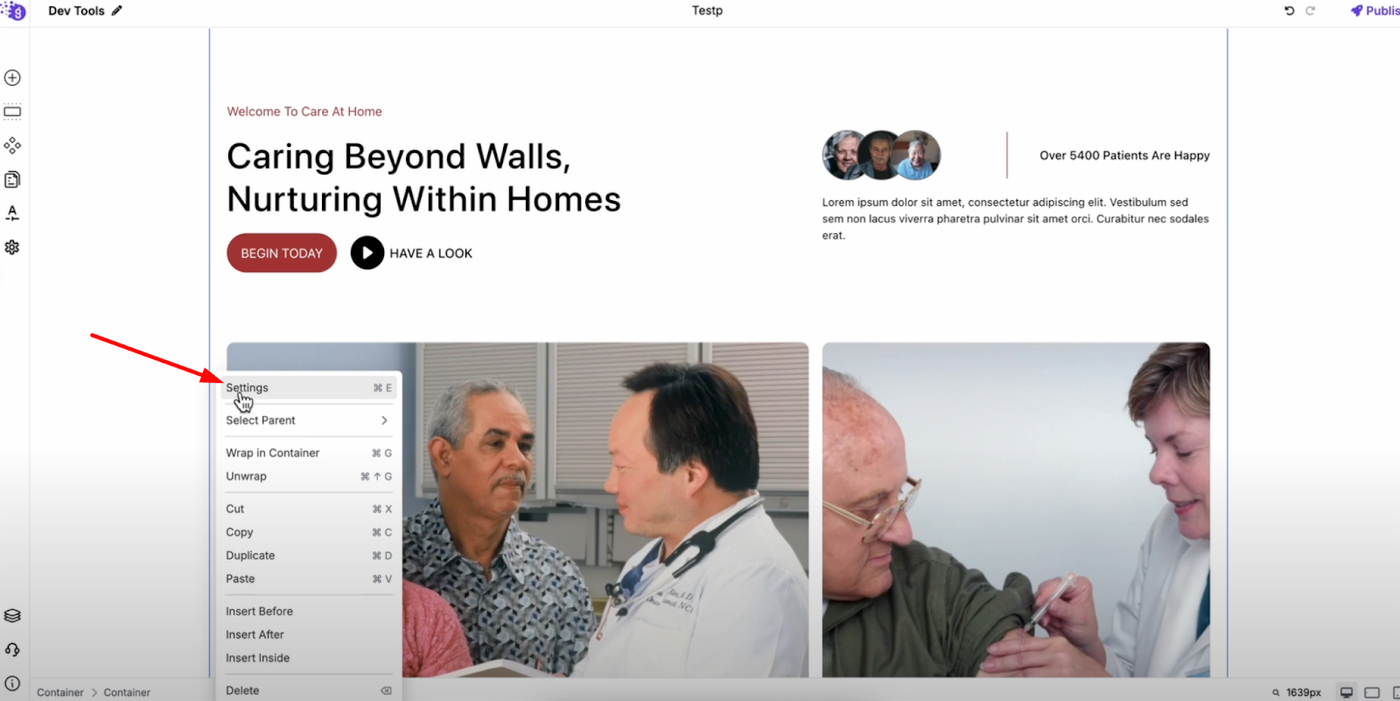
Open the element settings by right-clicking on the selected element and choosing "Settings" from the context menu.
Step 2: Add Custom Class Name
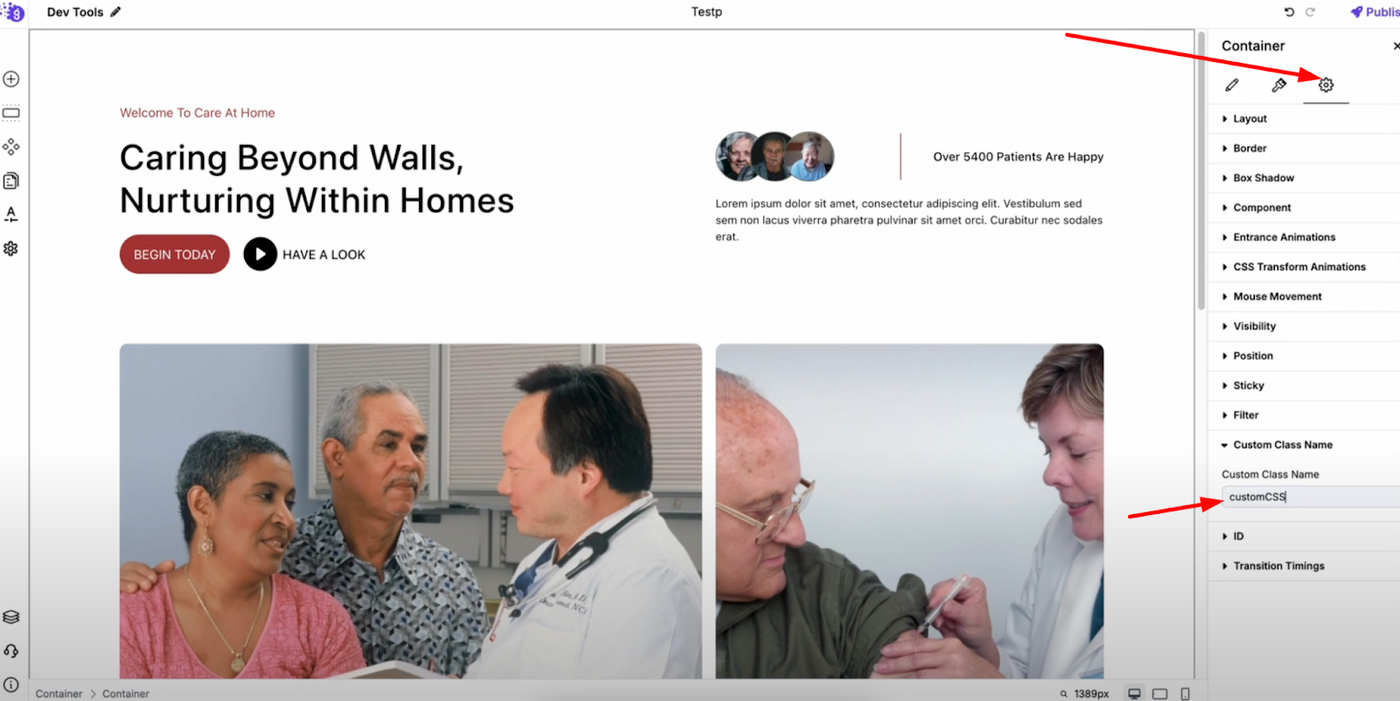
Go to the advanced settings tab (typically the third tab in the settings panel) to access advanced customization options. Give the element a custom class name that will serve as the CSS selector for your styling.
Step 3: Save and Publish

Save and publish the site to ensure your class name changes are applied to the live website. This step is crucial because the custom CSS won't work until the element with the class name is actually present on the published site.
Step 4: Access Custom Code Settings
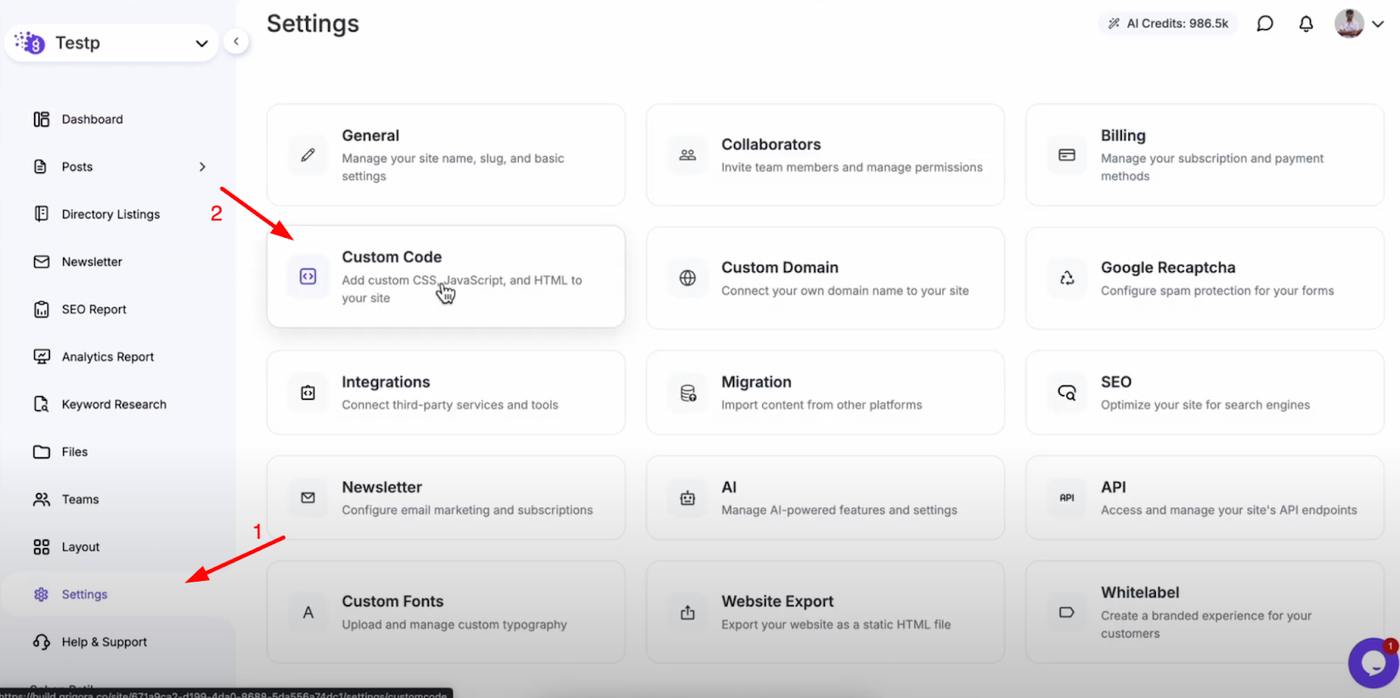
Go to the site dashboard in Grigora by navigating away from the editor to the main dashboard interface. In the left panel, click on "Settings" to access site-wide configuration options.
Select "Custom Code" from the settings menu to access the area where you can add custom CSS, JavaScript, and other code snippets to your website.
Step 5: Add Your Custom CSS
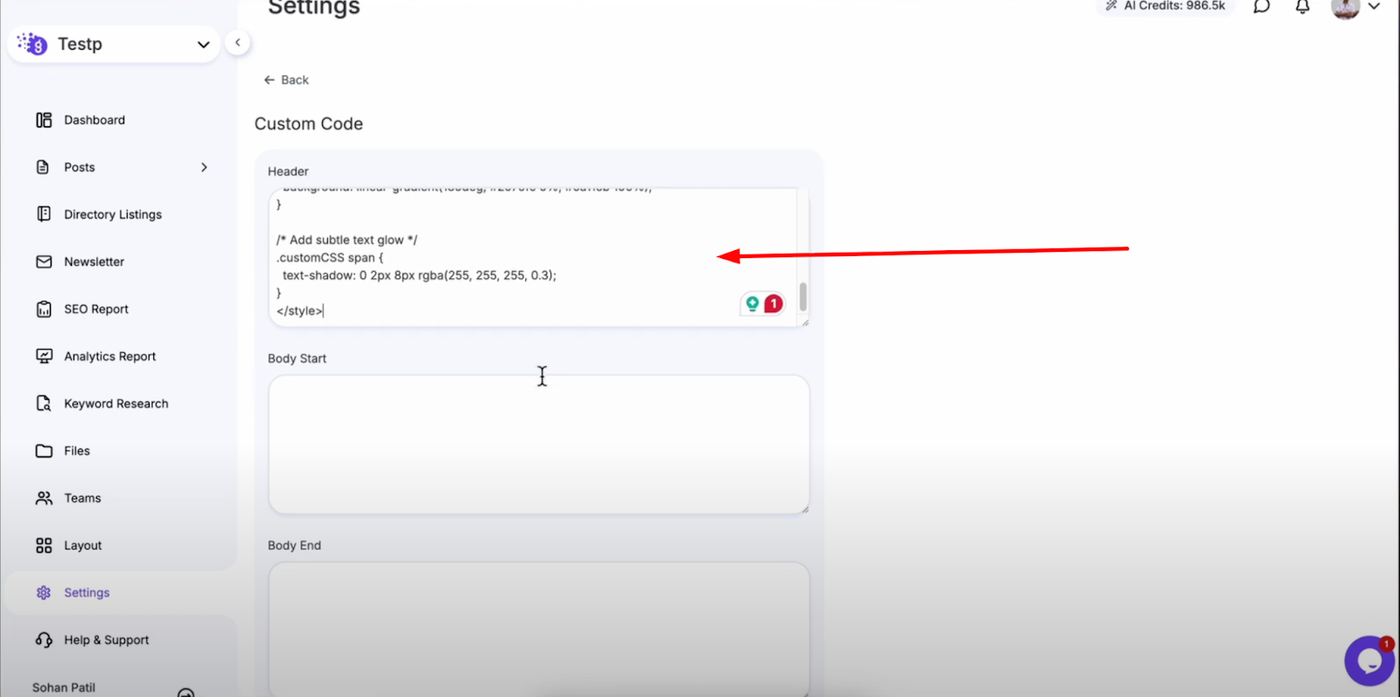
Inside Custom Code, add your custom CSS inside the header section where it will be loaded with every page on your website. Write your CSS using the class name you assigned to the element.
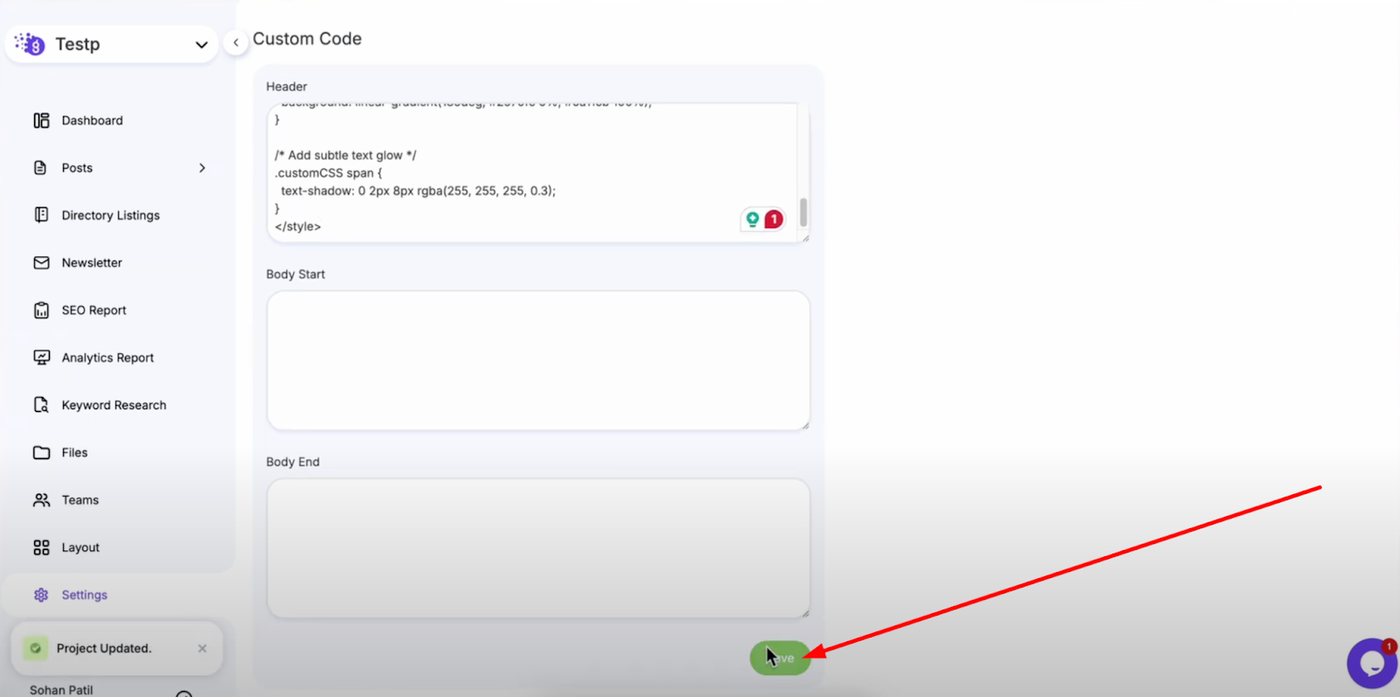
Save your custom CSS to apply it to your website.
Step 6: View Your Changes
After saving, reload your site to see the changes take effect. You'll see the custom CSS applied to the element with the custom class exactly as you specified in your code.
Practical Examples and Use Cases
Button Customization
Target buttons with classes like .custom-button to create unique hover effects, gradients, or animations that match your brand perfectly.
Text Block Styling
Use custom CSS on text elements to create special typography effects, custom fonts, or unique text layouts that aren't available in the standard editor.
Header Modifications
Apply custom styling to headers for unique navigation effects, sticky behavior customizations, or branded color schemes.
Layout Enhancements
Create custom spacing, positioning, or responsive behavior that goes beyond the standard layout options.
Best Practices for Custom CSS
Responsive Design Considerations
Always test your custom CSS across different screen sizes and use media queries when necessary to maintain responsive behavior.
Clean and Maintainable Code
Use descriptive class names and organize your CSS logically. Comment your code to remember what each section does, especially for complex styling.
Performance Optimization
Keep your custom CSS lean and efficient. Avoid overly complex selectors or unnecessary code that could slow down your website.
Testing and Validation
Always preview your changes on the live site and test across different browsers to ensure consistent appearance and functionality.
Advanced Customization Possibilities
This method opens up unlimited customization possibilities including:
-
Custom animations and transitions for interactive elements
-
Unique color schemes and gradients beyond the built-in palette
-
Advanced typography effects with custom fonts and text styling
-
Responsive layout modifications for specific design requirements
-
Brand-specific visual elements that perfectly match your identity