

Learn how to use the Tabs Block in Grigora Website Editor to organize and present your content in a clean, user-friendly way. Tabs make it easy for visitors to switch between multiple pieces of content without leaving the page, improving both engagement and user experience. Whether you're building a blog, business website, or portfolio, Tabs Block helps you structure your content better and make your site more interactive.
Adding the Tabs Block
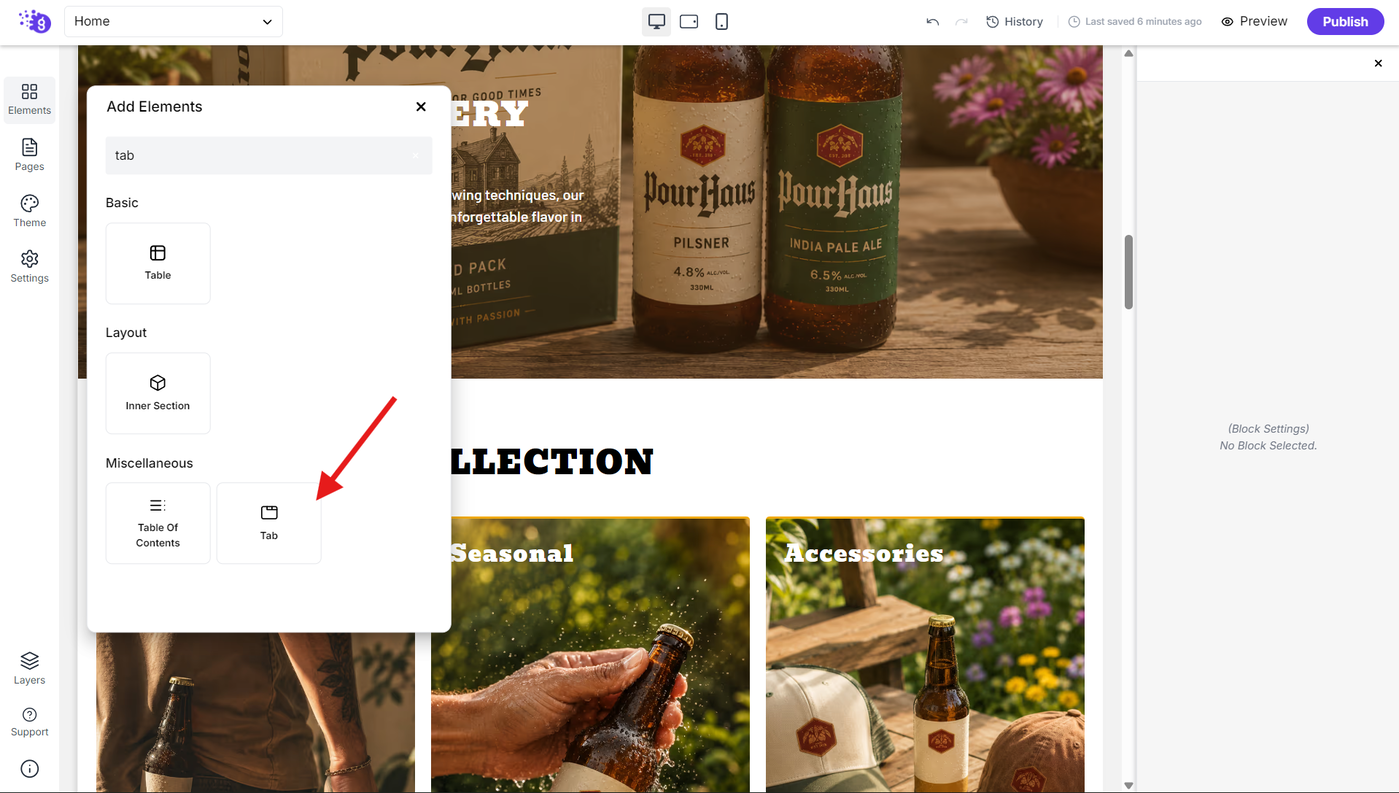
Open the Grigora editor and click on "Add Elements" to access the component library. Search for "Tab" and drag and drop the tab block into the editor where you want your tabbed content to appear.
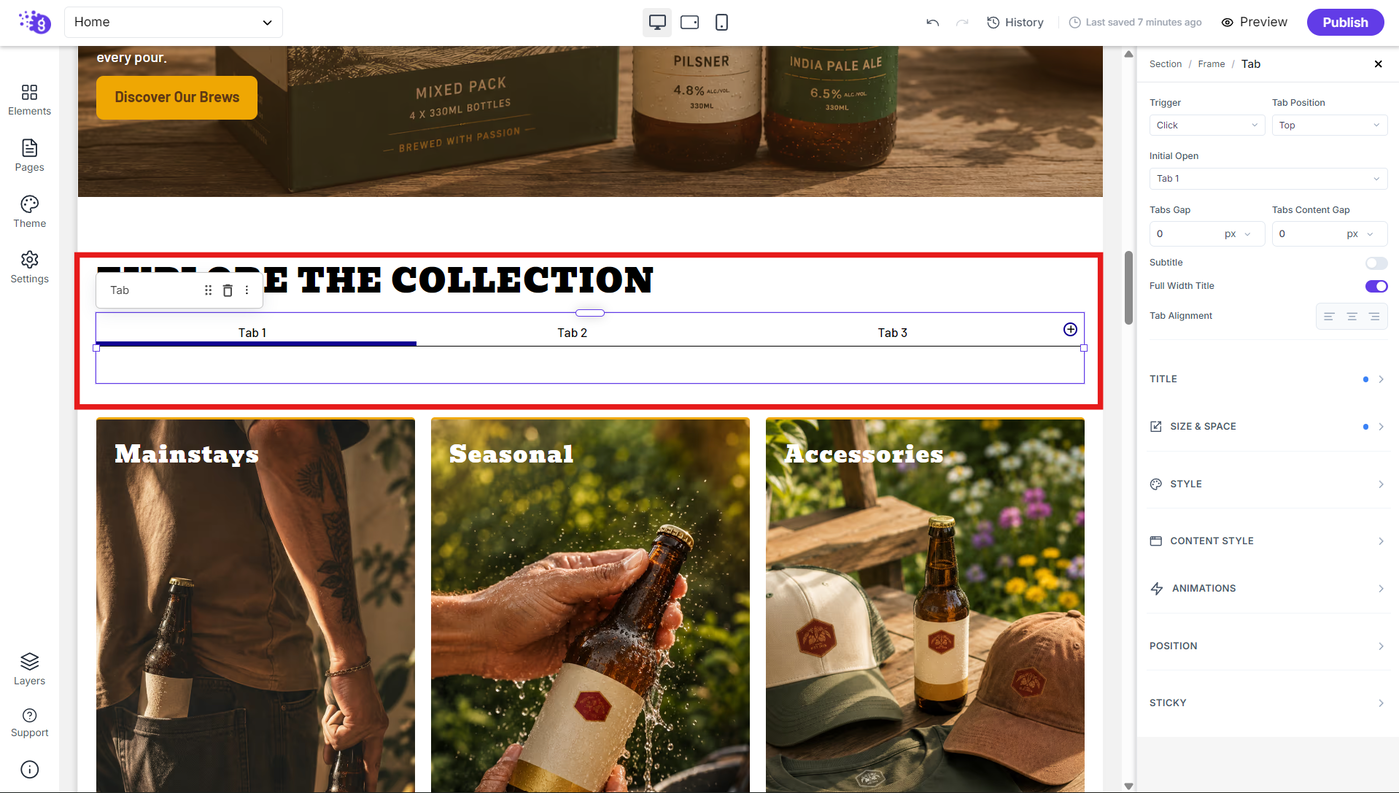
By default, you'll see three tabs in your new tab block. You can click the plus icon to create more tabs as needed for your specific content organization requirements.
Setting Up Tab Content
Renaming Your Tabs
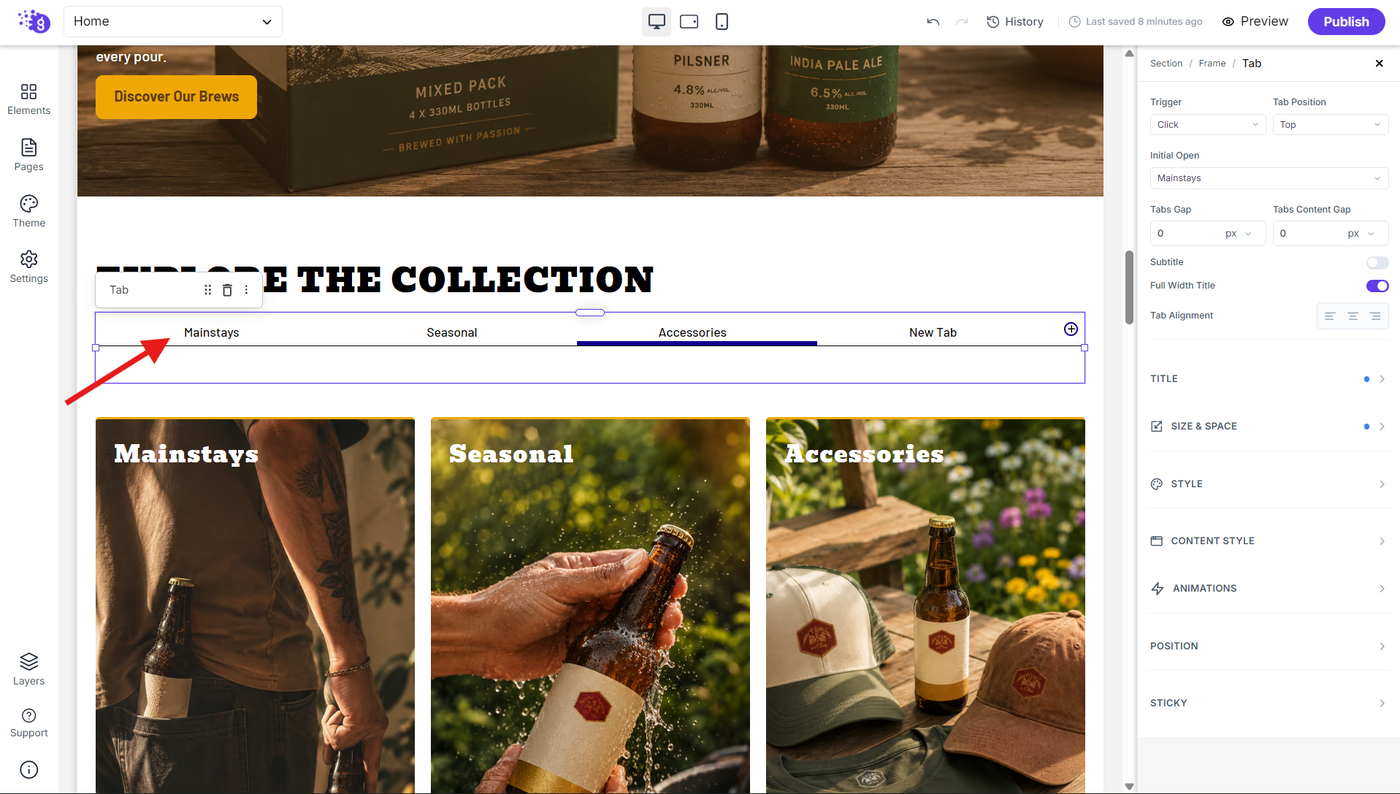
Let's rename the tabs to match your content. Double-click on each tab title and enter your new titles that clearly describe what content each tab contains. Use descriptive, concise labels that help users understand what they'll find in each section.
Adding Content Inside Each Tab
Now let's add content inside each tab for a complete user experience:
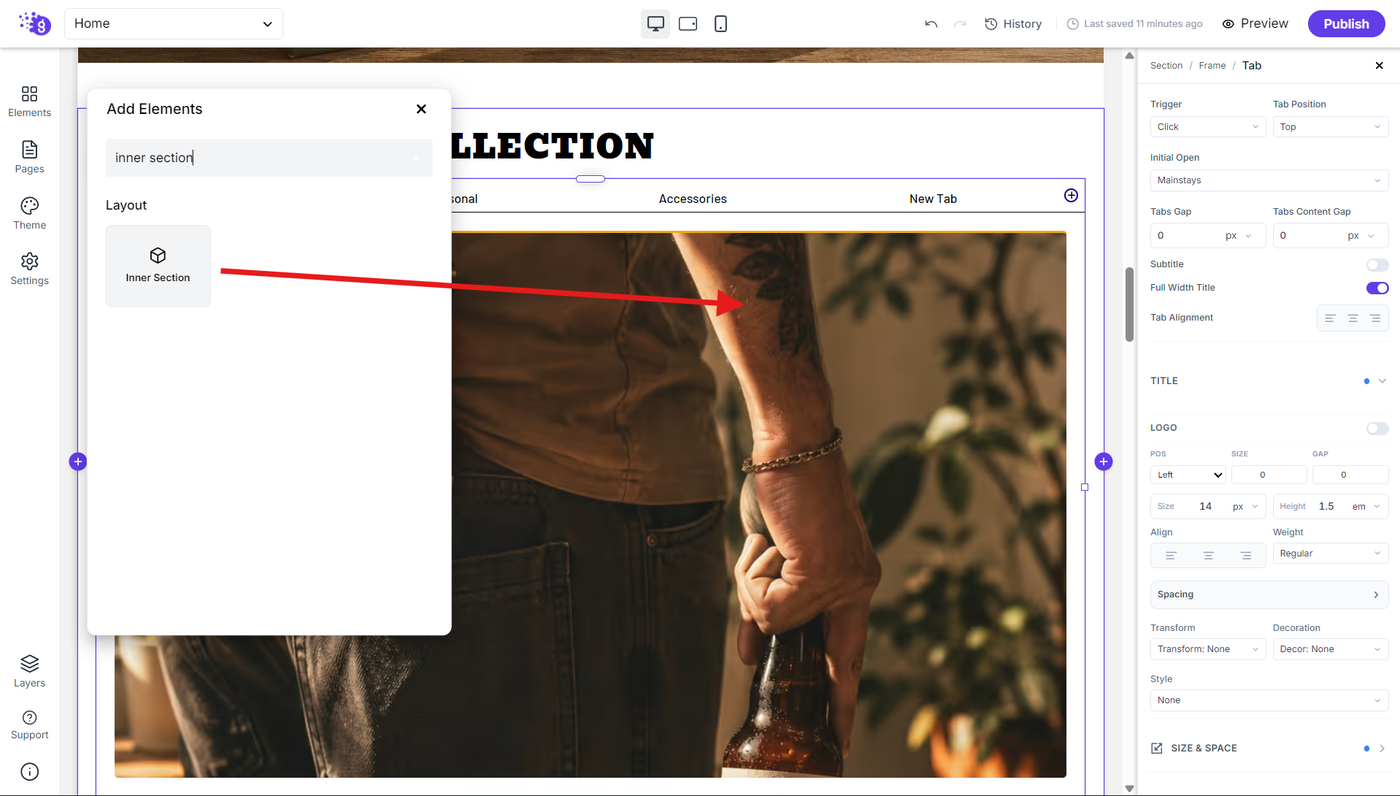
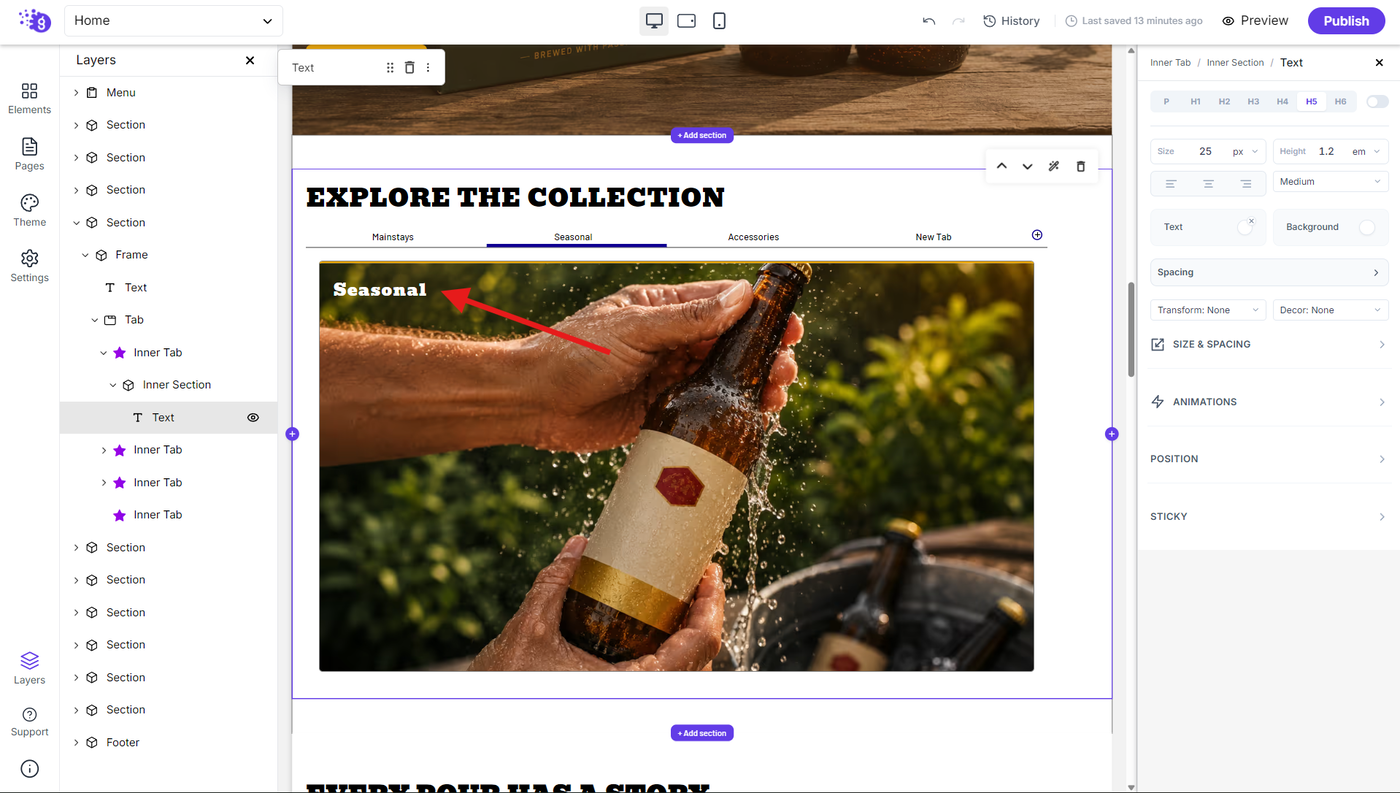
Open an inner tab to access its content area. Add a Inner Section as the foundation for your tab content. Add a text block inside the Inner Section for your primary content. Repeat this process for all tabs so each tab has its own organized content container
This systematic approach ensures consistent content structure across all your tabs.
Customizing Tab Settings
Select the Tab element to open its settings panel. The main tab behavior options are available at the top of the panel, while additional customization options are organized into sections such as Title, Size & Space, Style, Content Style, Animations, Position, and Sticky
General Settings Configuration
The general tab settings let you control how your tabs behave and how their titles are displayed.
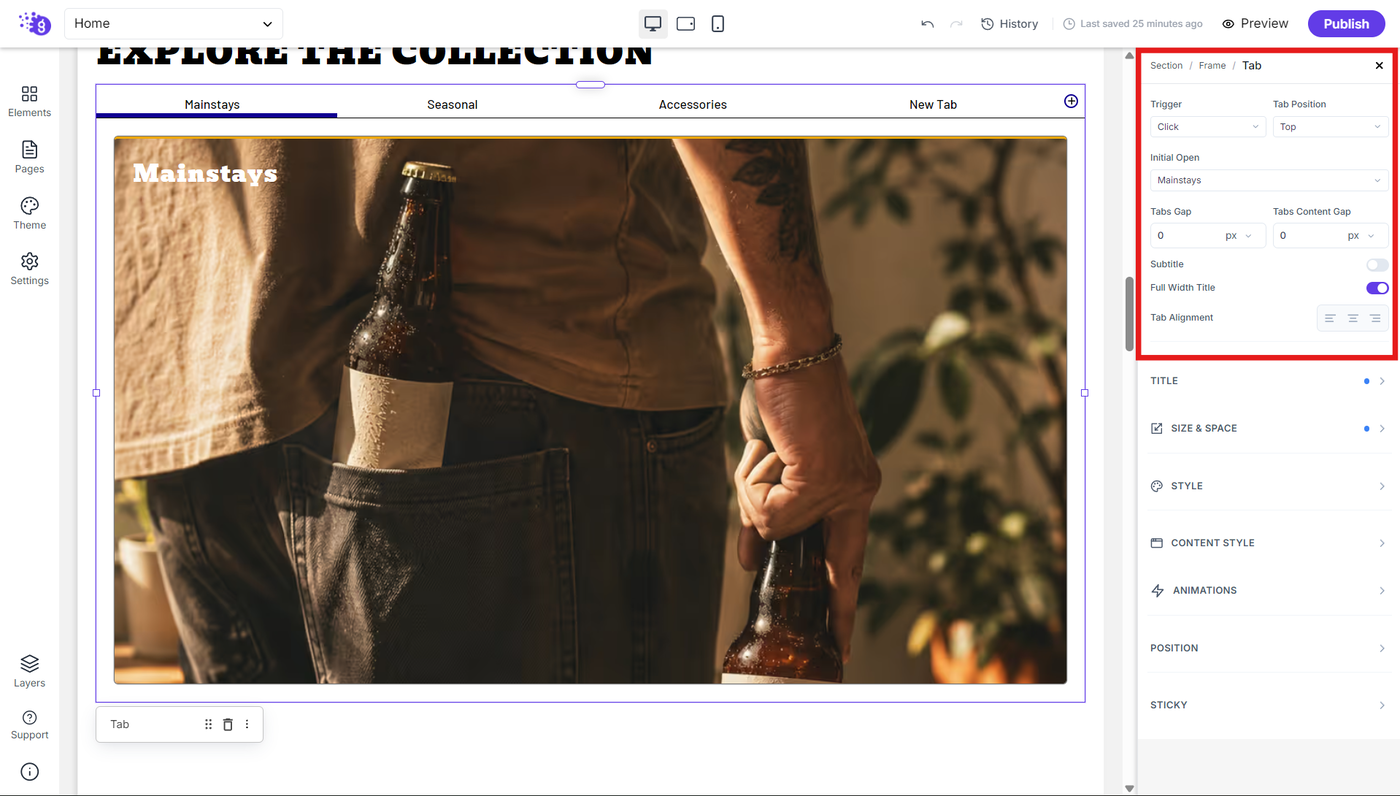
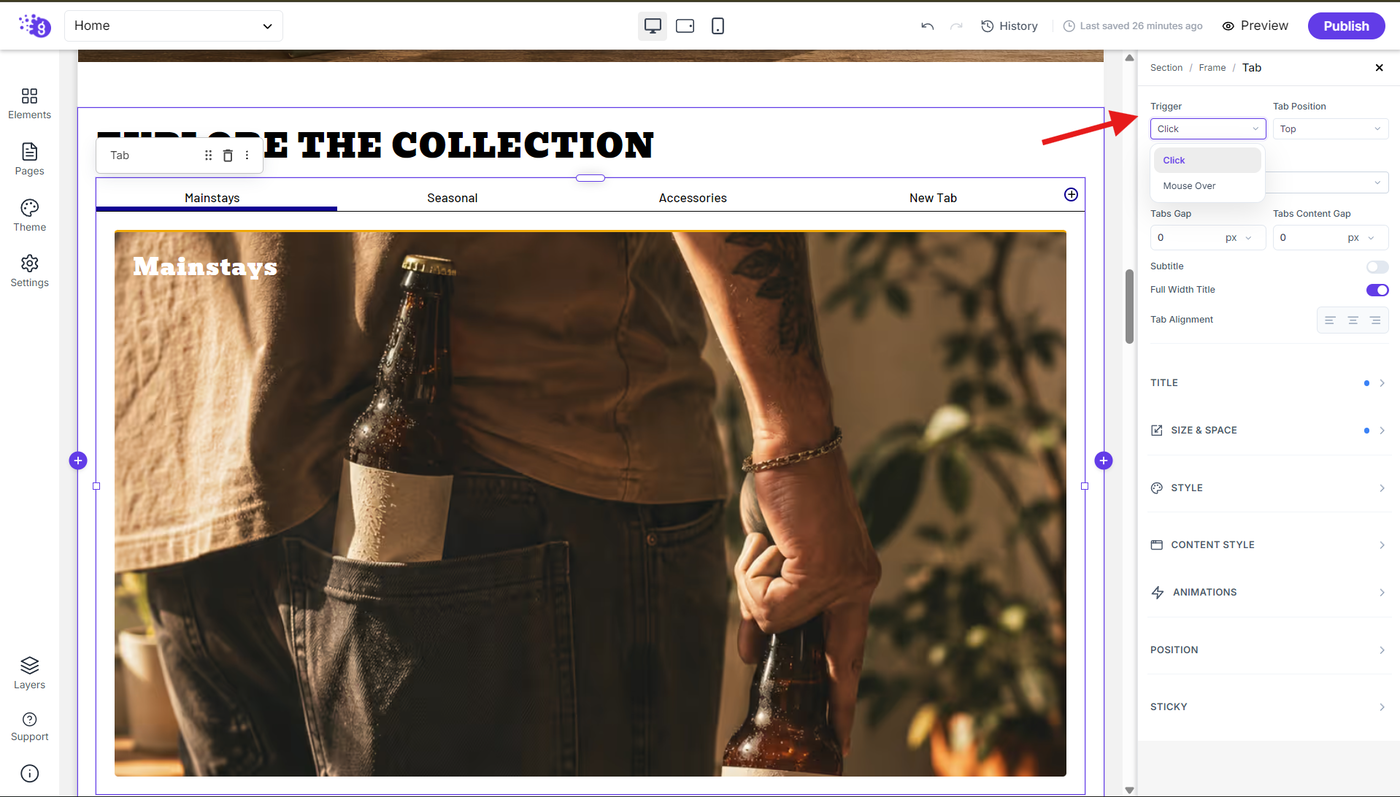
Trigger: Use the Trigger option to choose how users switch between tabs. Select Click to switch tabs when users click a tab title, or choose Mouse Over to switch tabs when users hover over a tab title.
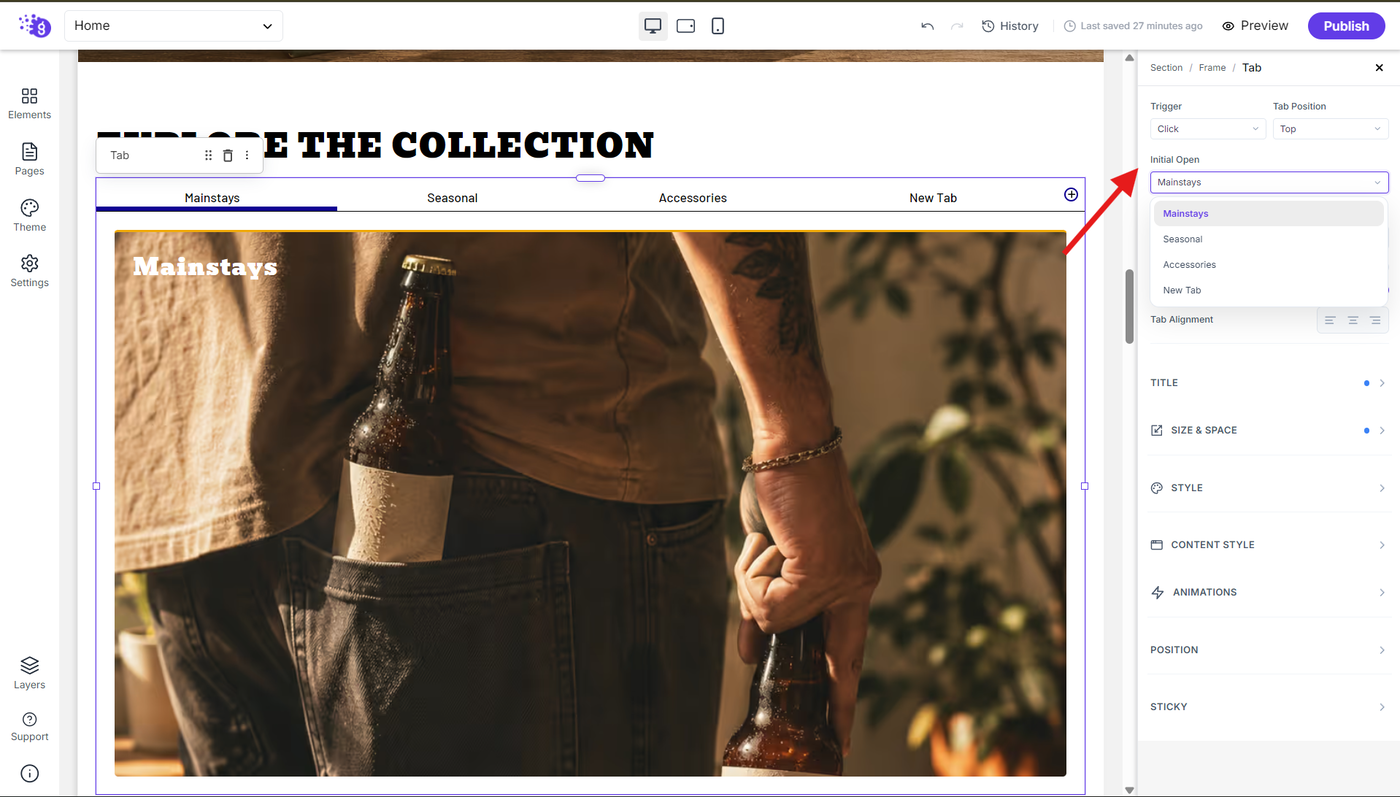
Initial Open: Use the Initial Open option to choose which tab is displayed by default when the page loads. Select the tab you want visitors to see initially.
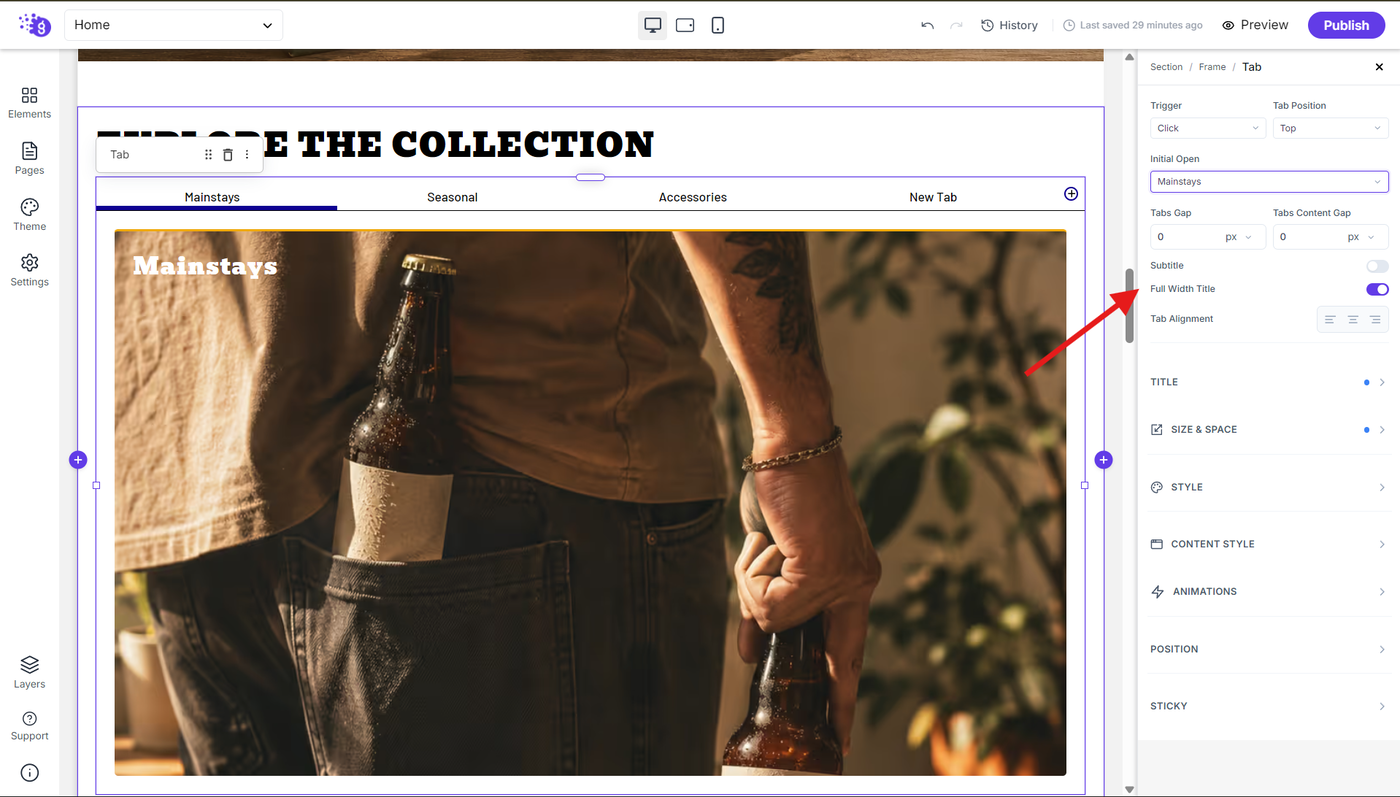
Layout: Enable "Full Width Titles" so tab titles span the entire width of the tab element for better visual balance
Adding Icons to Tabs
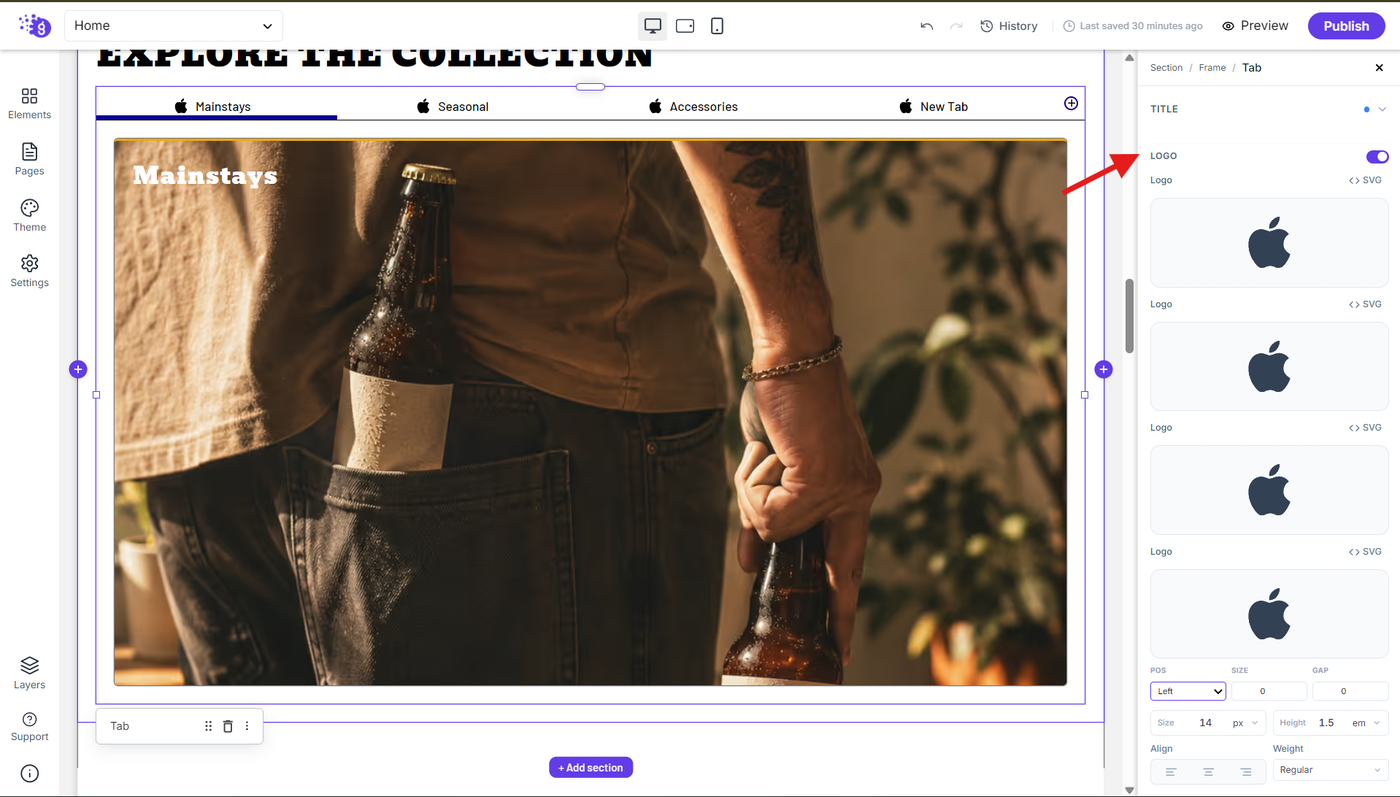
In the title section, toggle "Logos" on to display icons for each tab title, making your tabs more visually appealing and easier to identify.
Assign a different logo icon per title that represents each tab's content. Set icon position to "Top" for clear visual hierarchy. Adjust icon size and set title text size for optimal readability and visual impact.
Adjusting Tab Size and Spacing
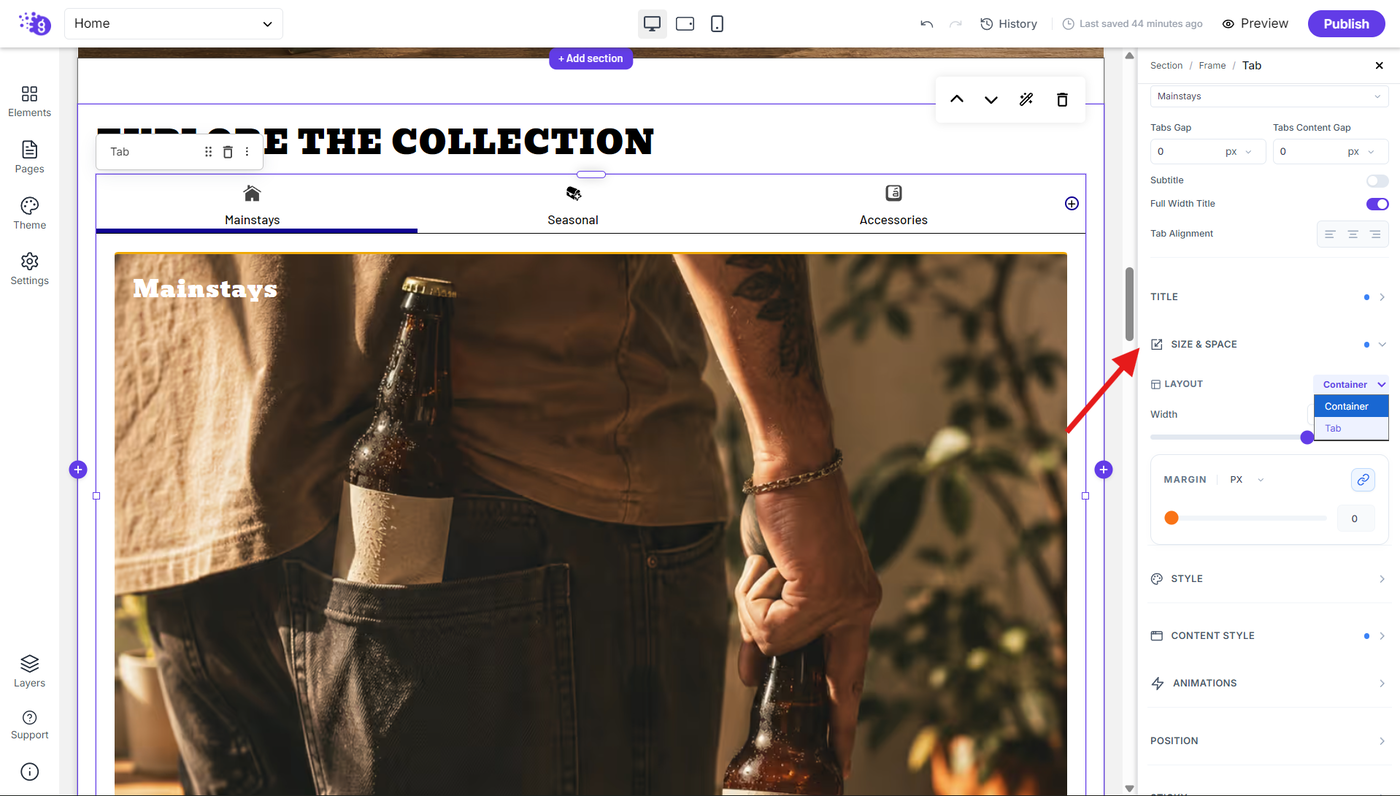
Use the Size & Space section to customize the dimensions and spacing of the Tab element. Use the Layout option to choose whether you want to customize the Container or the Tab itself, then adjust the available sizing and spacing settings for the selected option.
Style Customization
Normal State Styling
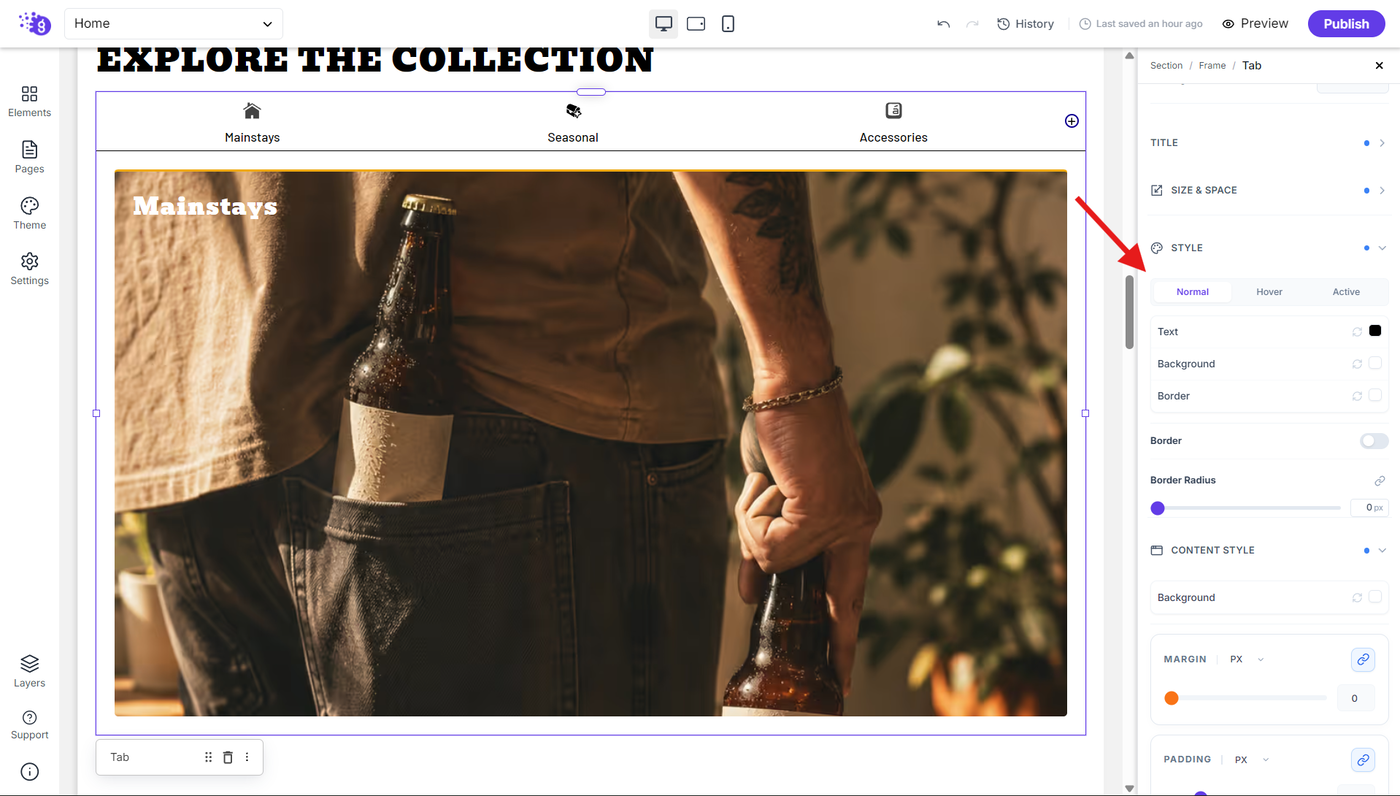
In title normal settings, establish your default appearance:
Text Color: Set text color to dark gray for good readability
Border: Set border to light gray for subtle definition
Hover Effects
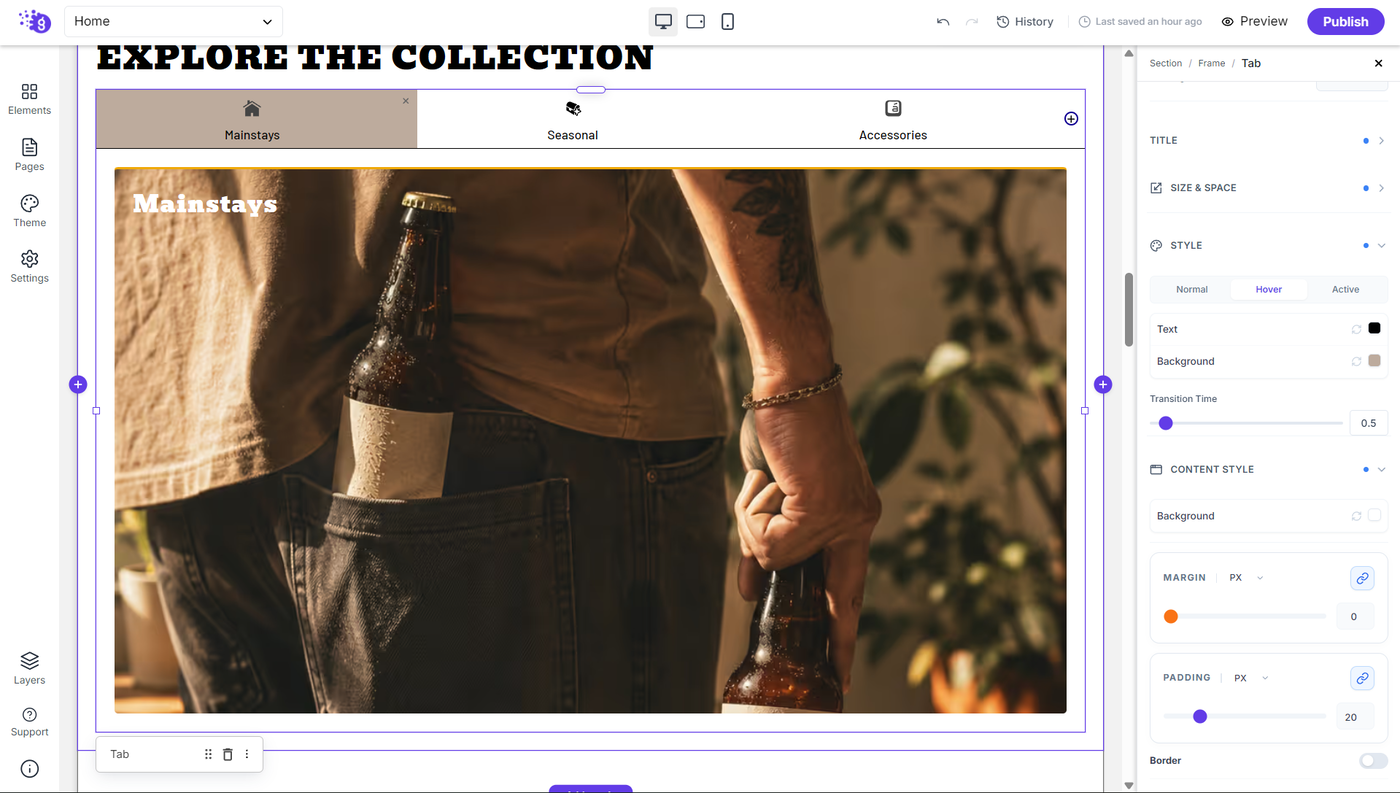
For title hover state, create engaging interactions:
Text Color: Set text color to black (or your brand color) for visual feedback
Background Color: Set the background color to a contrasting shade or your brand color to make the hovered tab visually distinct.
Transitions: Add transition timing for smooth color changes when users hover
Active State Styling
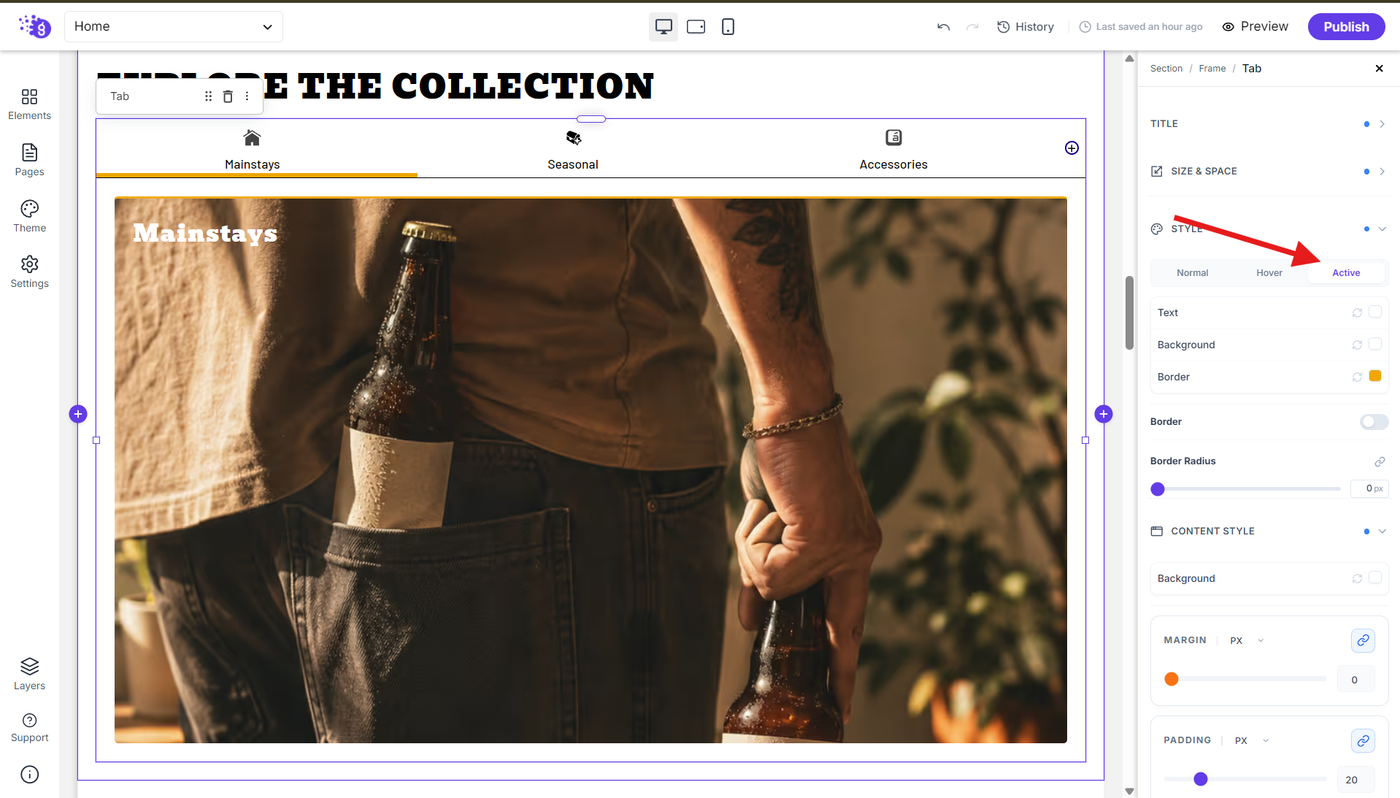
For the Active state, customize the appearance of the currently selected tab:
Text Color: Use a darker or more prominent shade of your normal text color to clearly distinguish the active tab.
Background Color: Use a subtle shade of your brand color or a variation of the normal background color to highlight the selected tab.
Border: Use a matching shade to reinforce the active state and create a clear visual distinction from the other tabs.
Content Area Styling
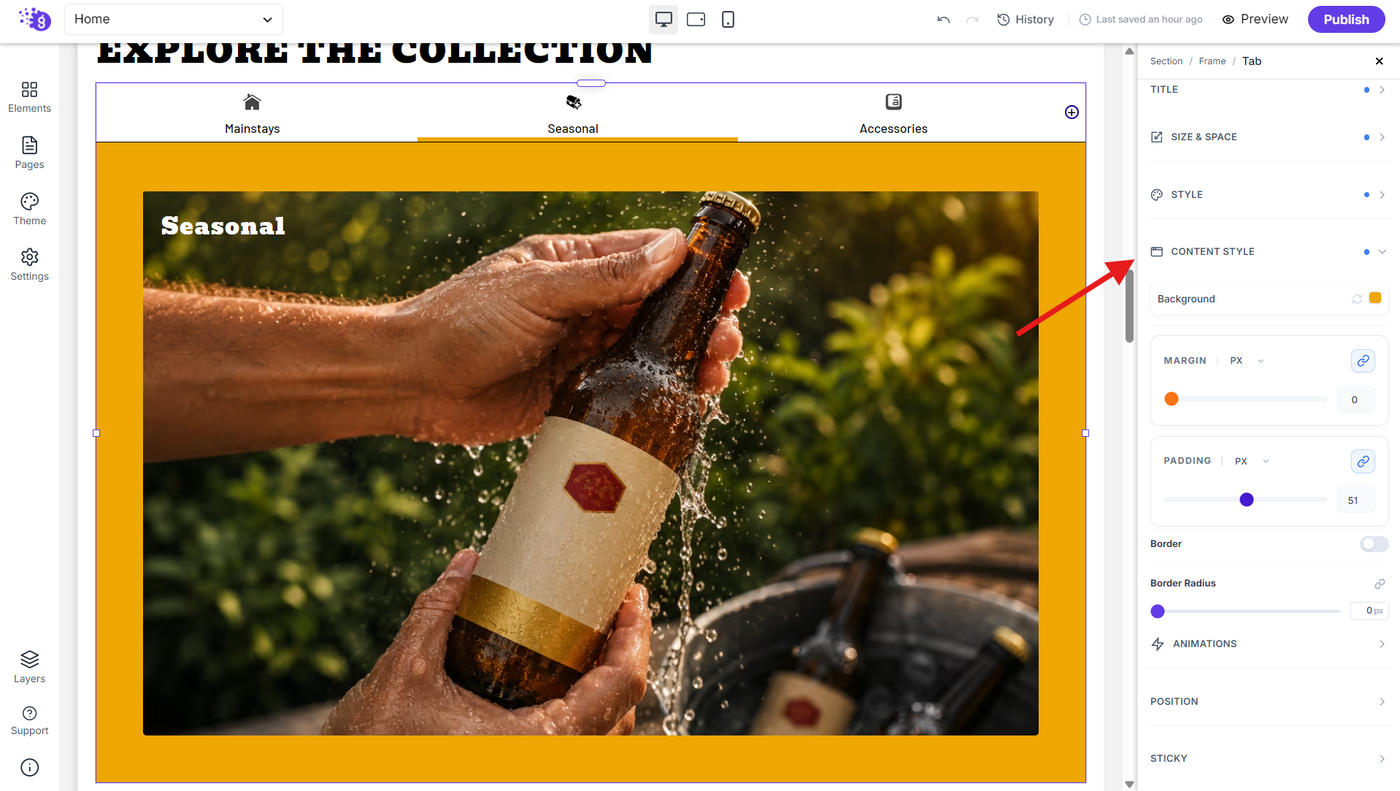
In content settings, set the content background color to match your overall theme and ensure visual consistency across your website design.
Final Optimization
Publishing Your Tabs
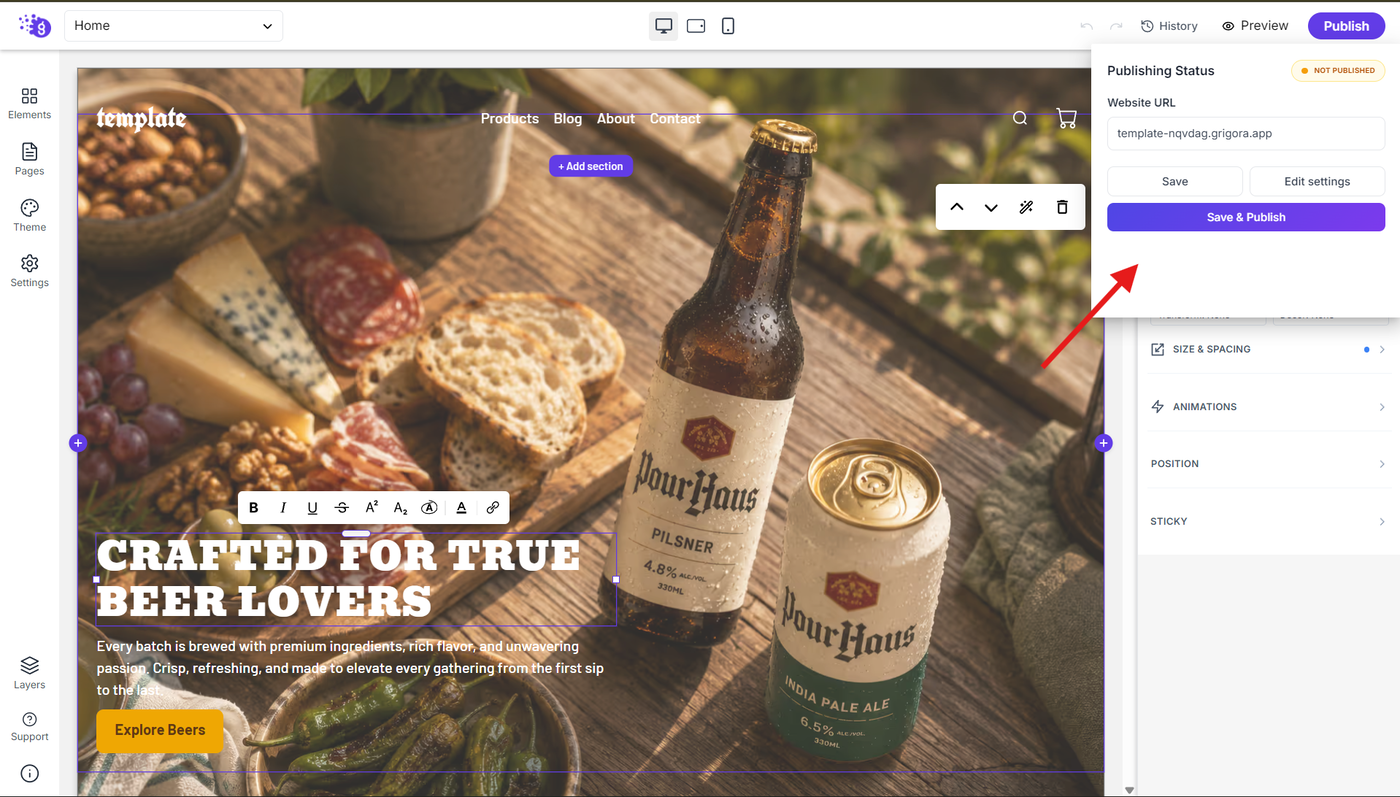
Finally, save and publish your website to make your new tabbed content live. Your tab layout is now ready with:
Renamed tabs with descriptive titles
Custom icons for visual appeal and clarity
Hover and active styles for interactive user experience
Optimized content containers for clean presentation
Benefits of Using Tabs
This approach gives you clean, responsive tabs that look professional and provide several key advantages:
Improved User Experience by organizing related content in an accessible format
Space Efficiency by allowing multiple content sections in a compact area
Enhanced Navigation with clear visual indicators and smooth interactions
Professional Appearance with customizable styling that matches your brand