Leverage the Grigora API to integrate your project with other applications, automate workflows, and extend its functionality. To get started, you'll first need to generate an API key from your project dashboard.
Generating Your API Key
An API key is a unique identifier that authenticates requests associated with your project.
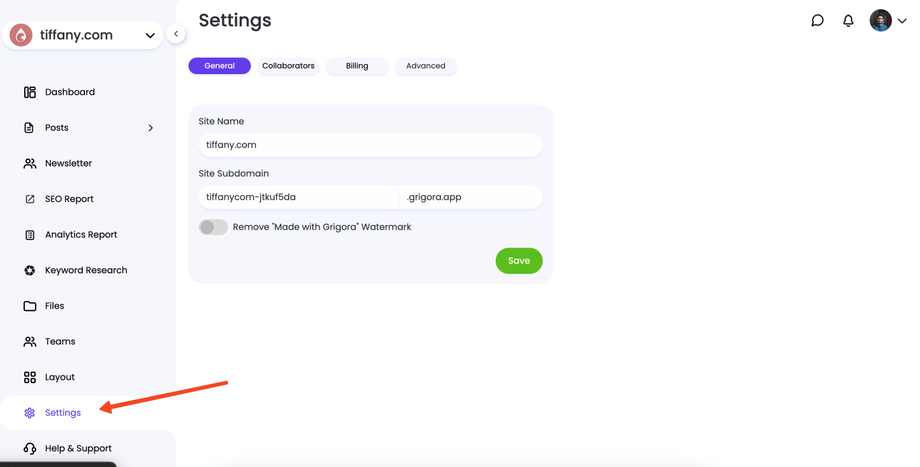
Navigate to Settings: Open your Grigora Dashboard and select Settings from the main navigation menu on the left.
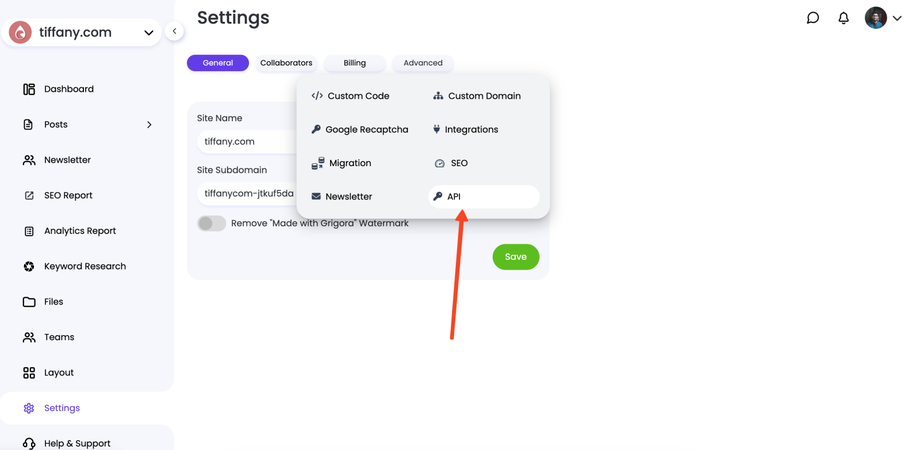
Access API Settings: Within the Settings menu, click on Advanced and then select the API tab.
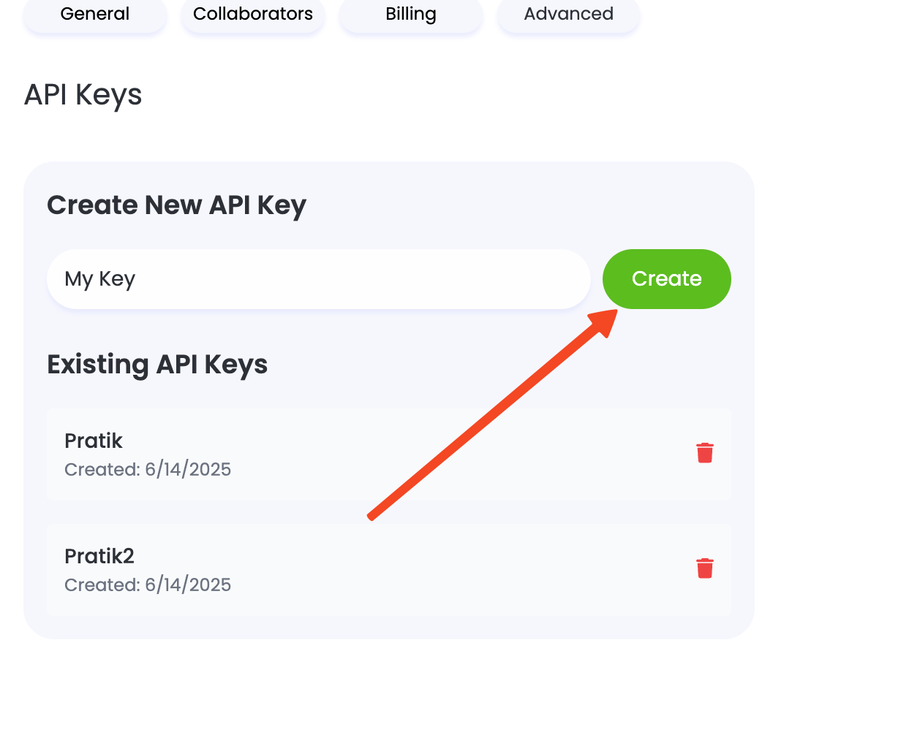
Create a New Key: Provide a descriptive name for your API key. This will help you identify its purpose later (e.g., "Zapier Integration" or "Mobile App Sync"). Click Create.
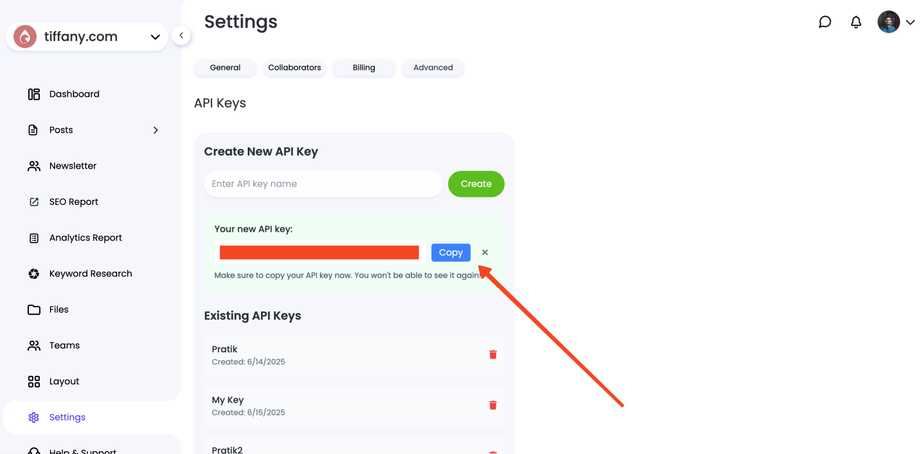
Copy Your Key: Your new API key will be displayed on the screen.
⚠️ Important Security Notice For security reasons, your API key will only be shown once. Make sure to copy and store it in a secure location immediately. If you lose the key, you will need to revoke it and generate a new one.
Authorizing API Requests
To authenticate your API calls, you need to include your generated API key in the request header.
The base endpoint for all API calls is: https://api.grigora.co/general/api/v1
When making a request, pass the key as an Authorization header. Grigora will automatically associate the request with the correct project.
Here is an example of how to structure your request using cURL:
curl -X GET "https://api.grigora.co/general/api/v1/{endpoint}" \
     -H "Authorization: YOUR_API_KEY"
Replace YOUR_API_KEY with the key you copied earlier and {endpoint} with the specific API endpoint you wish to access.
With your key now authorized, you are ready to explore the full potential of the Grigora API. For a complete list of available endpoints and their functionalities, please refer to our comprehensive API reference guides.


