Every visitor who reaches out on your website is an opportunity to win a new client, close a deal, or build a loyal subscriber base. Grigora comes equipped with a built-in Leads management hub that captures every form entry automatically—no external plugins, database setups, or third-party CRM connectors required.
Whether someone submits a contact inquiry, requests an estimate, or signs up for your newsletter, their response is instantly organized in your dedicated Leads dashboard. In this guide, you will learn how to build forms across your website and use the Leads dashboard to filter, inspect, and export your inquiries.
Step 1: Add a Form to Your Website
Grigora lets you build forms in two ways depending on how you create your site: using natural language in the AI Website Builder or dragging modular blocks in the Visual Block Editor.
Method 1: Using the AI Website Builder (Zero Manual Setup)
If you build or maintain your website with Grigora's AI Website Builder, creating forms requires no manual block assembly:
Open your website chat or design prompt prompt box in the builder.
Type your form request directly to the AI. For example:
"Add a clean newsletter signup form to the footer with an email field and a Subscribe button."
"Create a contact form with fields for Full Name, Work Email, Phone Number, and Project Details."
The AI automatically structures the form, injects the necessary input fields, applies proper labels, and styles the submission button to match your brand palette.
Click Publish in the top header. As soon as visitors submit the form, their data automatically populates your Leads dashboard.

Method 2: Using the Visual Block Editor
If you prefer designing with modular visual elements, you can place and configure form blocks manually:
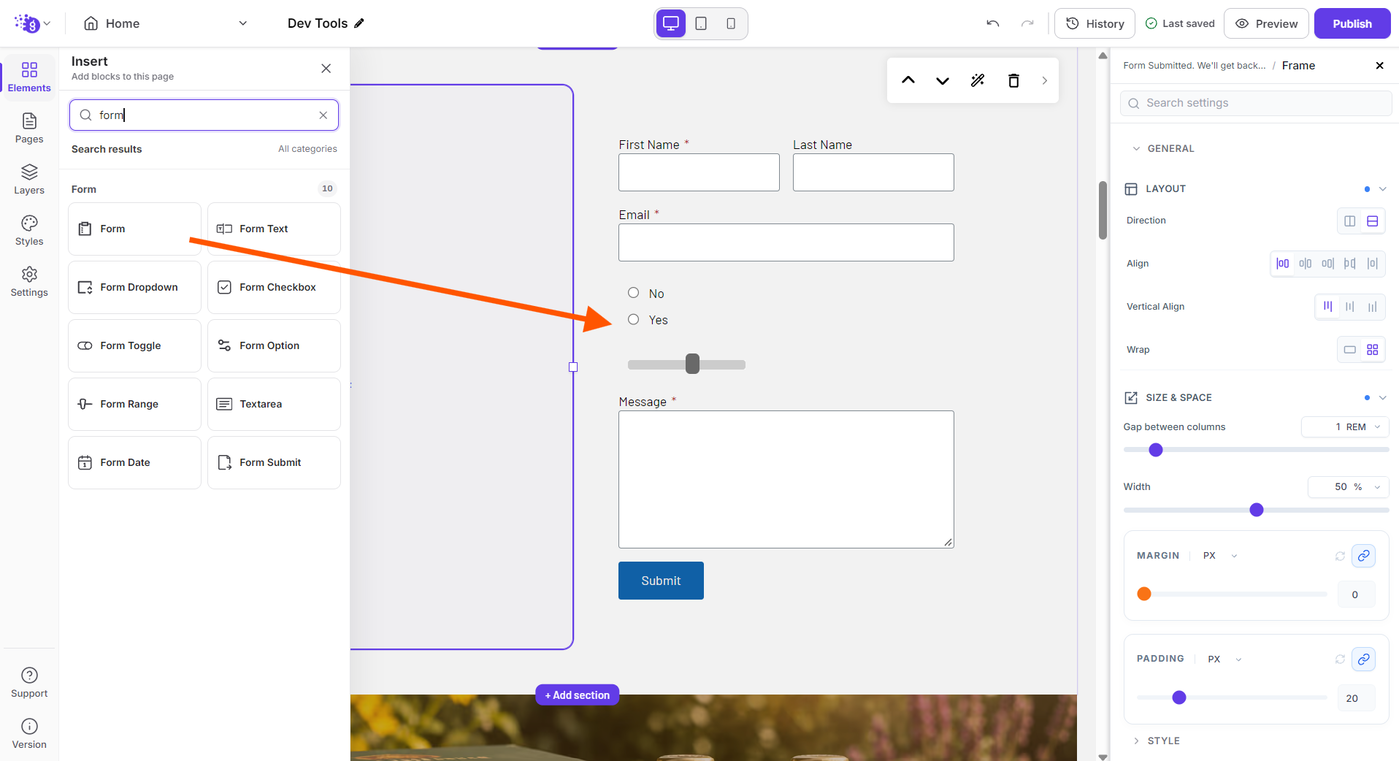
In the left sidebar, click the Elements tab.
Locate the Form block in the block palette and drag it onto your canvas at your desired page location (such as a Contact page, header section, or footer).
Add and configure your form input fields:
Name Fields: Add input fields labeled
Name(or separateFirst nameandLast name).Contact Fields: Add an
EmailorPhoneinput.Inquiry Fields: Add a
Subjectline and a multilineMessageorDescriptionarea for detailed inquiries.
In the block settings panel, assign a recognizable name to your form (such as Contact Form, Newsletter Signup, or Service Estimate). Grigora uses this name to categorize your submissions in the dashboard.
Click Publish in the top header to push your form live.
Step 2: Access the Leads Dashboard
Once visitors begin submitting forms on your live website, you can access your submission records directly inside your project workspace:
Open your Grigora project dashboard.
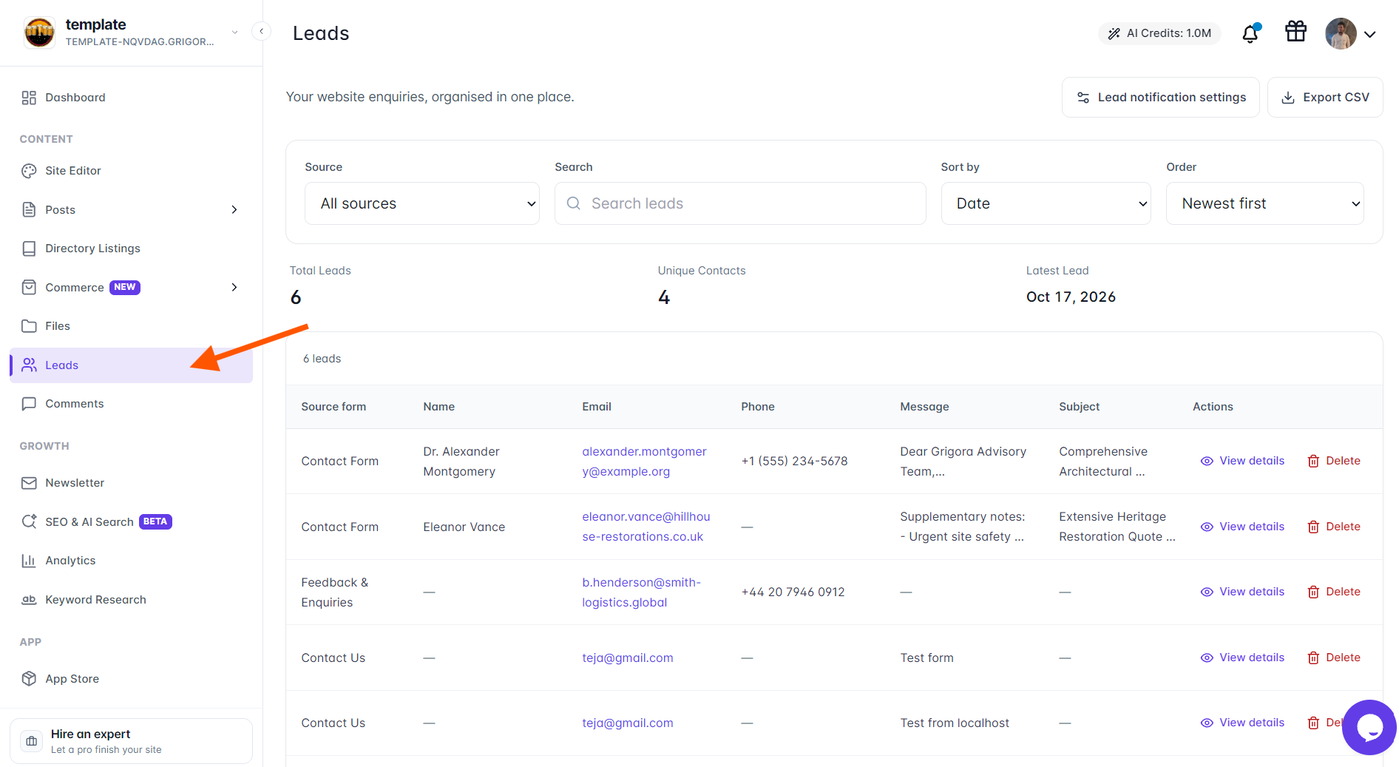
In the left navigation sidebar, click Leads (represented by the user community icon).
The Leads dashboard opens, presenting your high-level pipeline summary:
Total Leads: The total volume of submissions captured across all forms on your website.
Unique Contacts: The deduplicated count of individual prospects based on their email address.
Latest Lead: The exact date of your most recent customer submission.
Step 3: Filter, Sort, and Search Inquiries
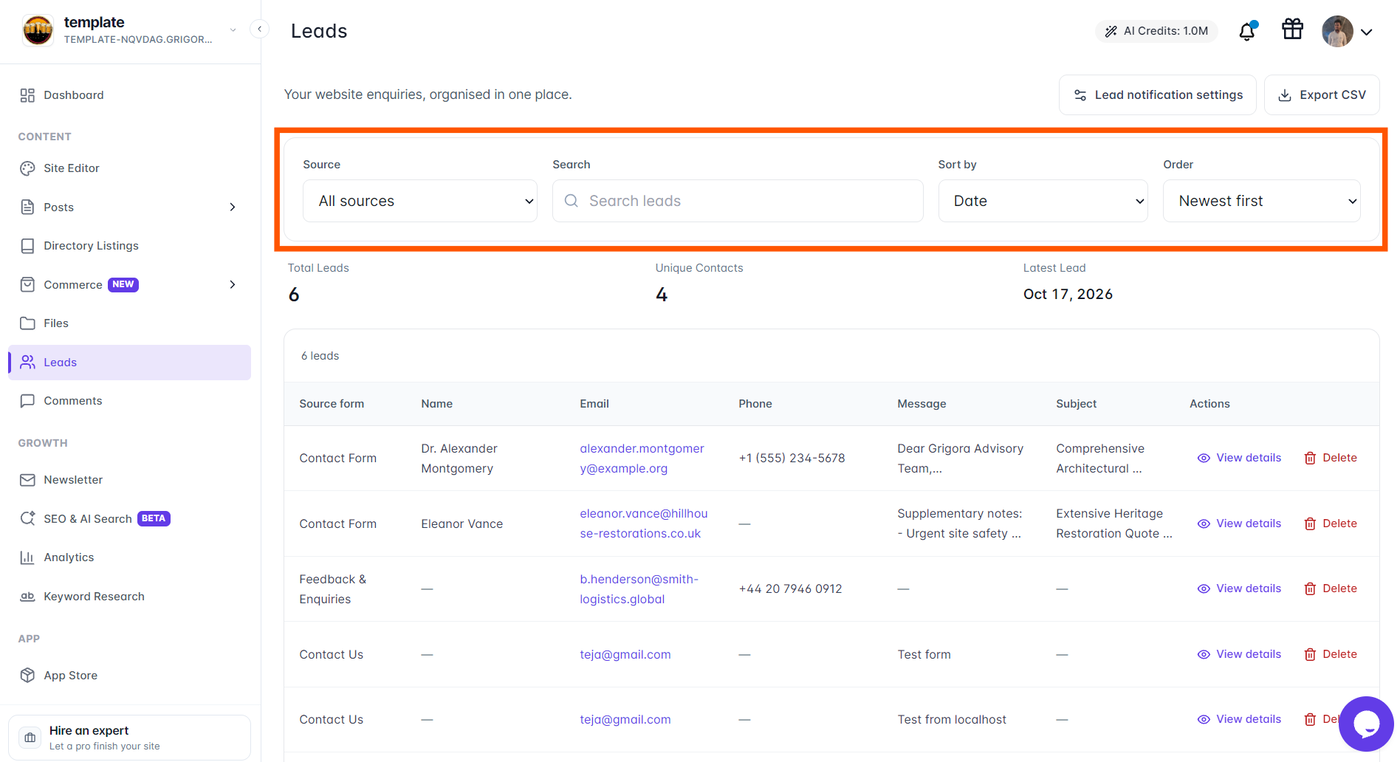
When collecting responses from multiple forms—such as a homepage newsletter bar and a contact form—the Leads toolbar helps you pinpoint exact submissions:
Filter by Source: Use the Source dropdown to switch between forms. Select All sources to review everything in chronological order, or choose a specific form (like Contact Form or Newsletter Signup) to isolate those responses.
Instant Search: Use the Search bar to search across any contact name, email address, company title, or message excerpt. Click Clear search to reset the view.
Sort Field & Order: Use the Sort by selector to sort your table by submission date, name, email, or any submitted custom field. Toggle the Order dropdown between Newest first and Oldest first (or Ascending and Descending).
Step 4: Inspect Lead Submissions in the Table
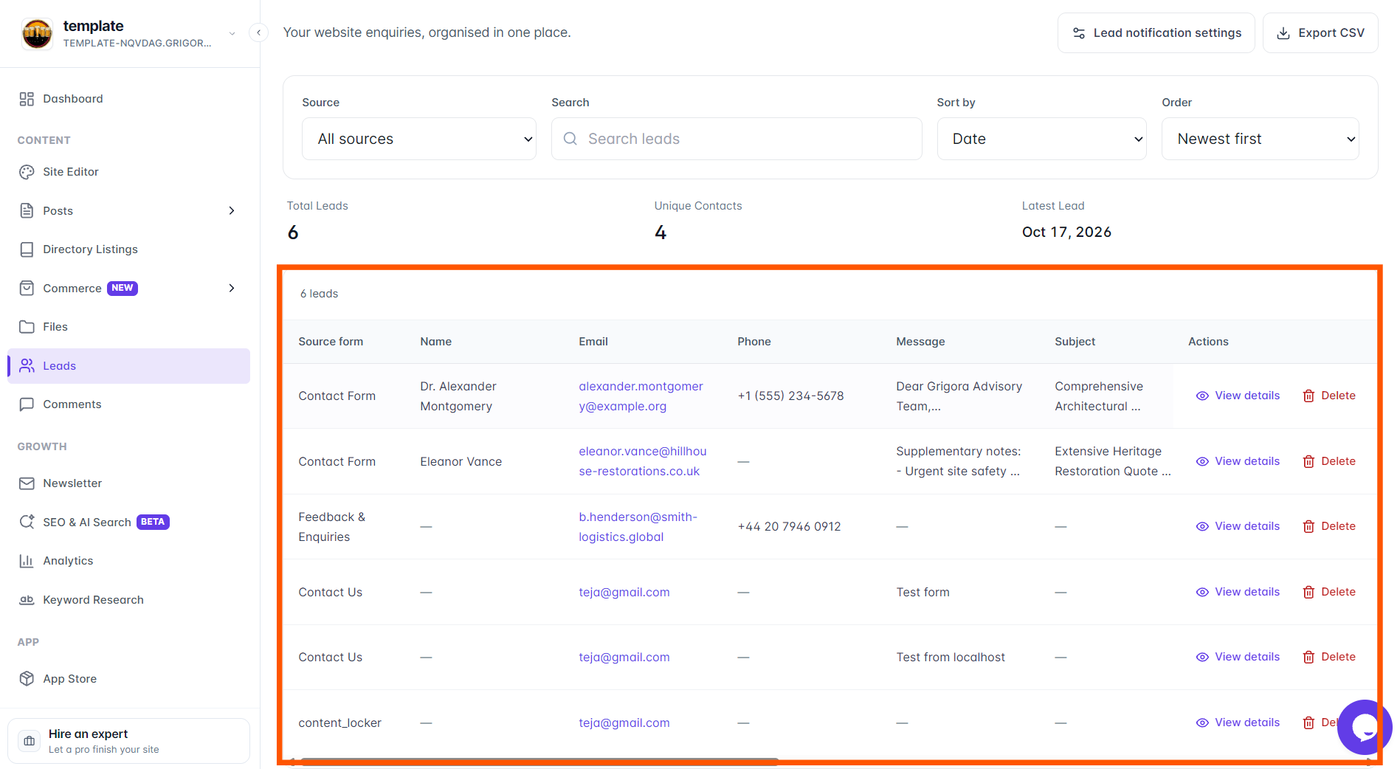
Grigora dynamically maps your form fields into a neat, responsive table:
Dynamic Column Mapping: Every field you configured in your form (such as Email, Name, Phone, Subject, and Message) automatically receives its own distinct column.
Clean Two-Line Clamping: When prospective clients submit lengthy paragraphs or multi-sentence project descriptions, Grigora automatically clamps the preview to two lines with an ellipsis (
...). This prevents rows from stretching vertically and keeps your dashboard clean and uniform.Hover Tooltips for Quick Reading: Need to read a truncated message without leaving the table? Simply hover your cursor over the clamped text, and an instant tooltip appears displaying the entire message.
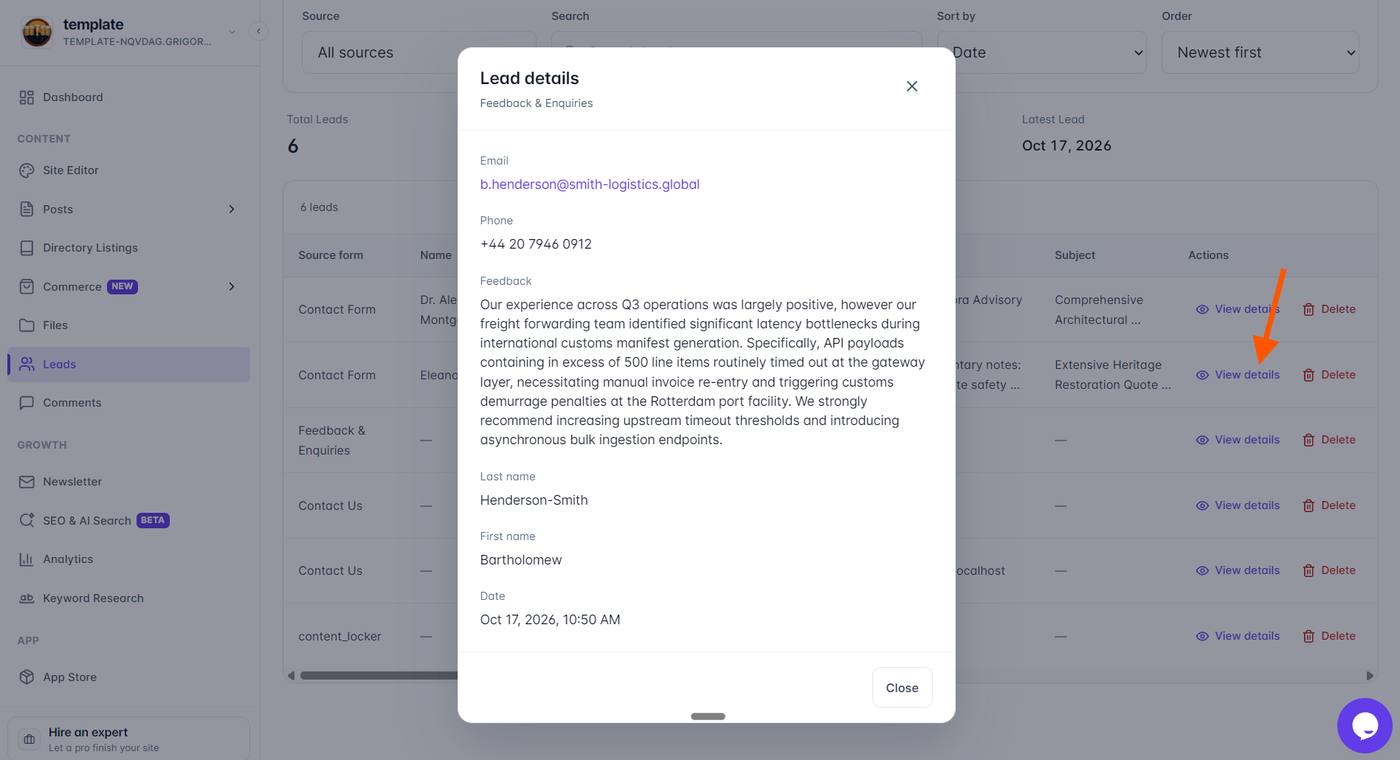
View Details Modal: Click View details in the right-hand Actions column. A dedicated modal window slides in showing the entire submission, complete with all custom fields, raw multiline text, and sender information.
Delete Lead: If you receive a test entry or spam submission, click the Delete button in the Actions column to permanently remove it from your records.
Step 5: Export Your Leads to CSV
Need to import your website leads into a CRM, share contacts with your sales team, or back up your inquiries? You can export your data in one click:
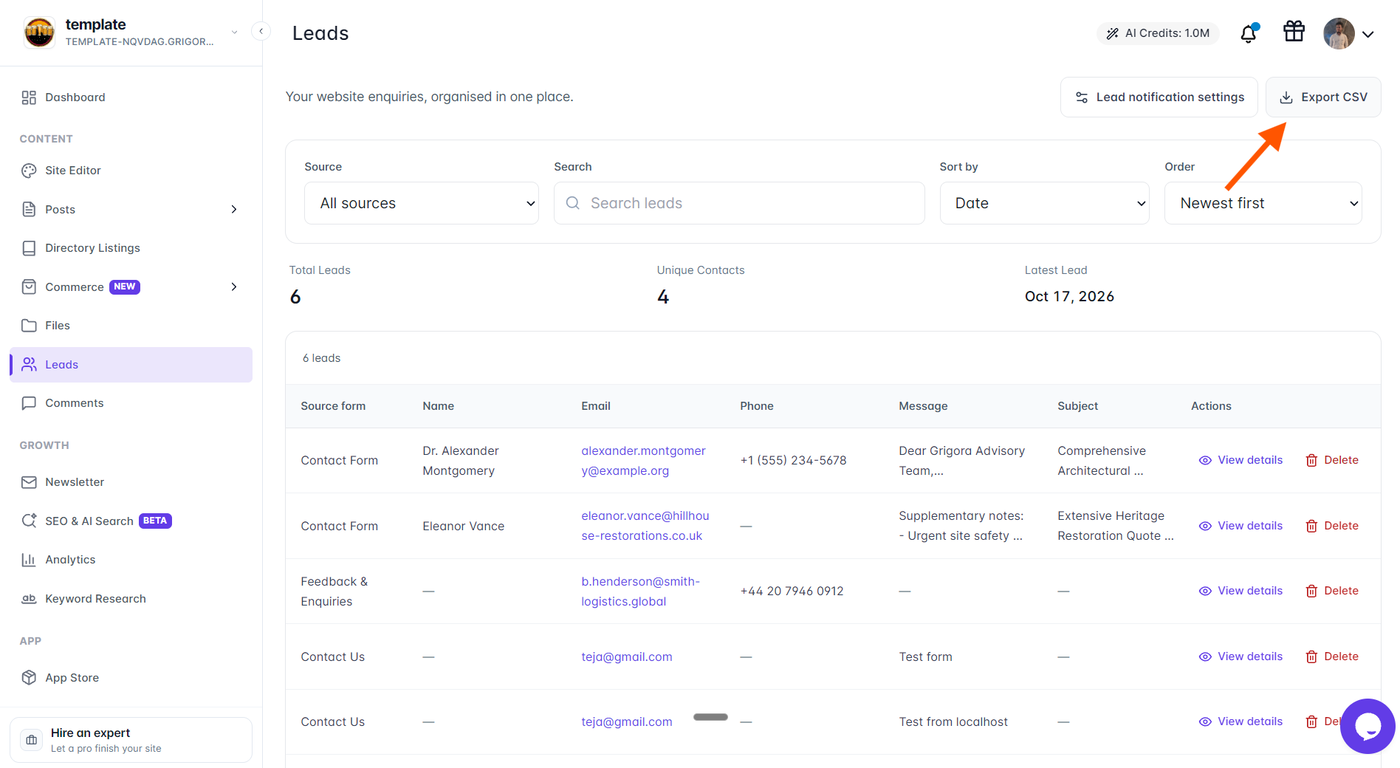
At the top of the Leads dashboard, click the Export CSV button.
Grigora downloads a structured CSV spreadsheet file (
grigora-leads.csv) containing every submission row, with columns neatly aligned to your form fields.
Step 6: Receive Instant Email Notifications
Never let a hot lead go cold by setting up instant email alerts for incoming inquiries:
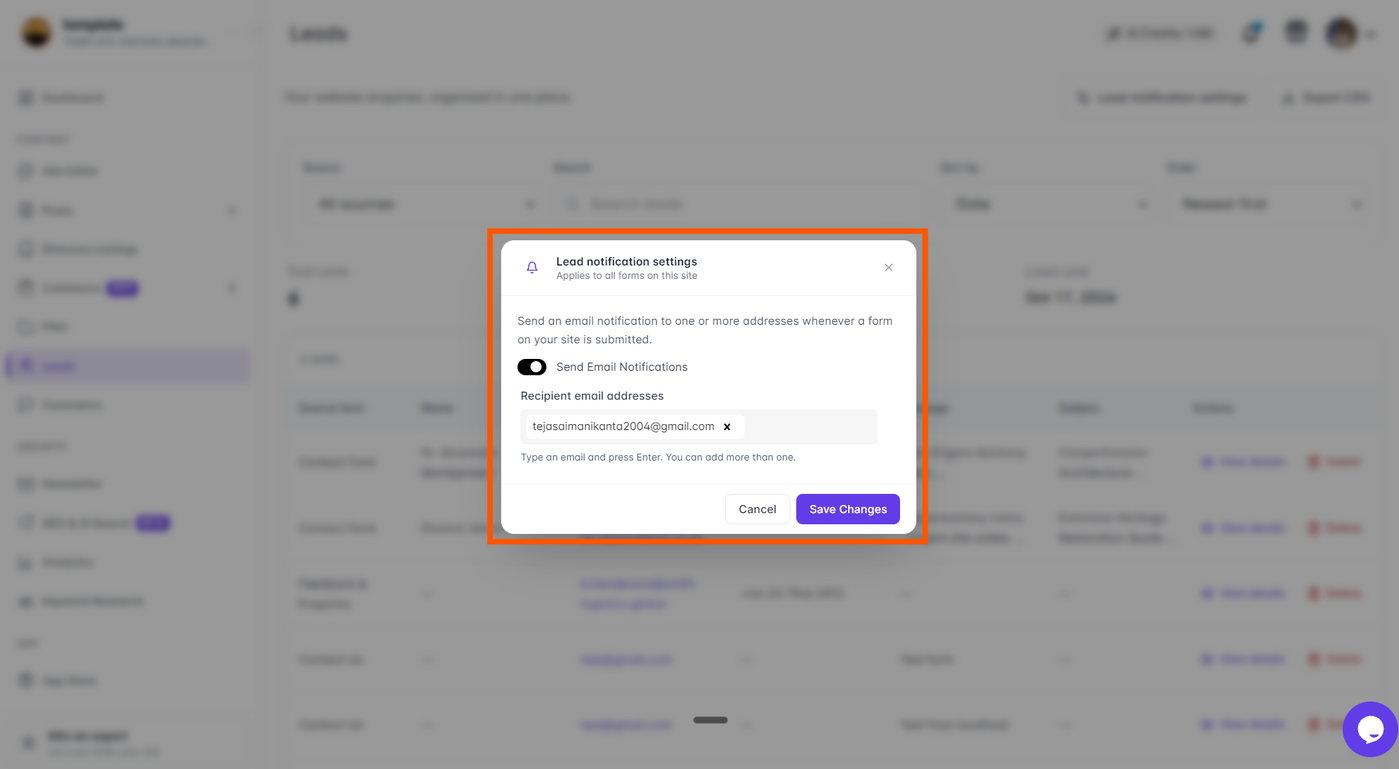
In the Leads dashboard header or toolbar, click the Lead notification settings button (gear icon).
Turn on the email notification toggle.
Enter one or more recipient email addresses separated by commas.
Click Save changes. Every time a visitor submits a form on your site, Grigora delivers the submission directly to your inbox in real time.