

Creating a website with Grigora’s AI website builder starts with a simple prompt. Describe your business, the type of website you need, and the features you want, and the AI automatically designs and builds a structured, responsive website with relevant content, custom styling, and functional sections—without writing code or manually arranging blocks. There are two ways to create a website in the AI website builder:
Method 1: From the Landing Page (Grigora.co) — When exploring the landing page, the website builder is available directly, allowing you to browse suggested prompts belonging to various categories or enter your own.
Method 2: Inside the Builder (Sites Manager) — In your dashboard Sites Manager, click the New button to open the creation page featuring the prompt text area, media attachment button, model picker, and all relevant templates.
Method 1: Creating from the Landing Page (Grigora.co)
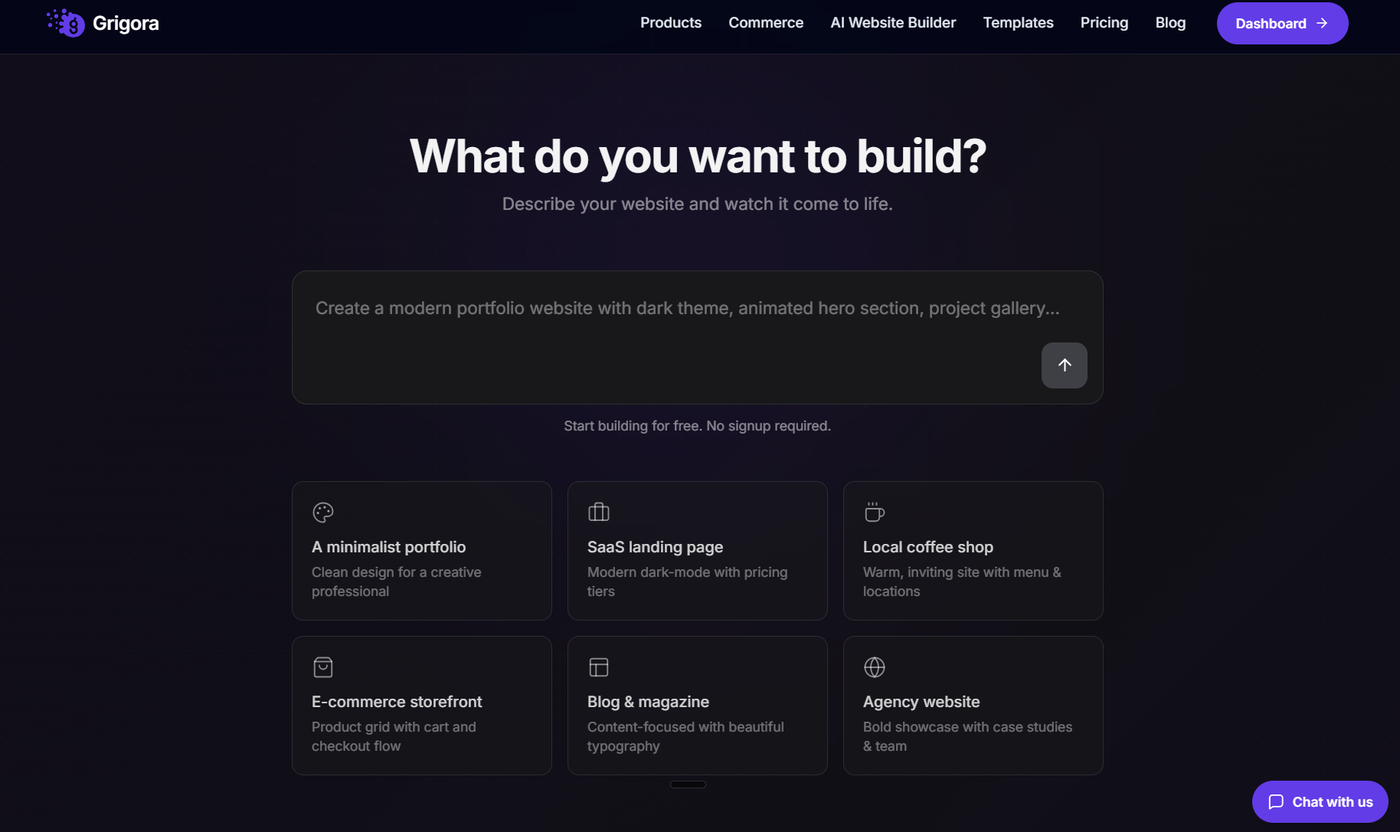
When you visit and explore the Grigora.co landing page, the AI website builder is available right on the page for instant access:
Browse Suggested Category Prompts: You can explore ready-made prompt suggestions tailored for different industries, including Portfolio, SaaS Landing Page, Local Coffee Shop / Dining, E-Commerce Storefront, Blog & Magazine, and Agency.
Enter or Customize Your Prompt: Click on any suggested category prompt to use it as a foundation, or type your own custom brief directly into the prompt box explaining your goals and desired sections.
Submit to Build: Press Enter or click the send button to launch the AI builder and watch your website come to life.
Method 2: Creating from Within the Sites Manager
Step 1: Starting from Your Sites Manager
If you are logged in to your Grigora account, you can create a new website from your dashboard:
Existing accounts: In your dashboard under Your Sites (Sites Manager), click the + New Site button located in the top control bar.
New accounts: If you haven't created a website yet, click the purple Create your first site button in the center of the welcome screen.
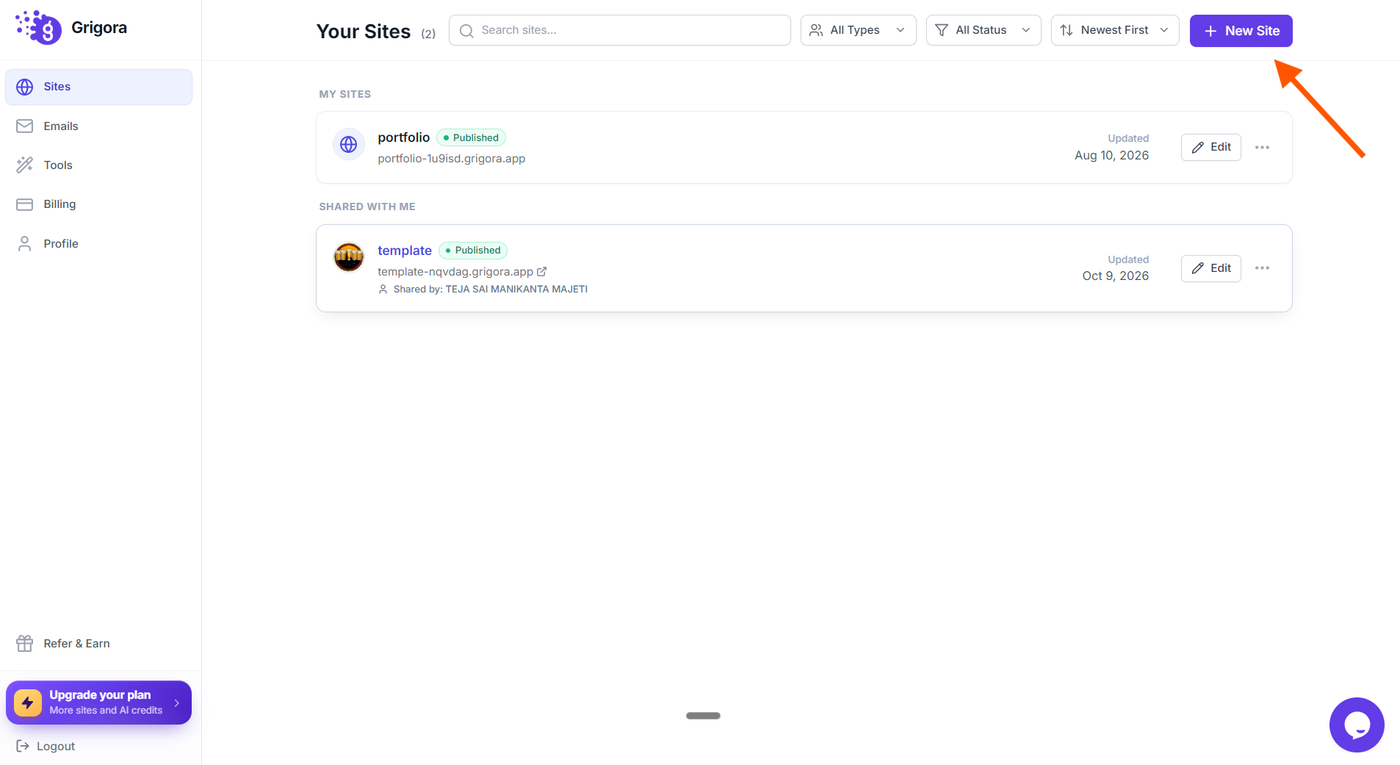
Step 2: The "What are you building?" Page
Visual Output: Clicking the New button opens the Step One creation page:
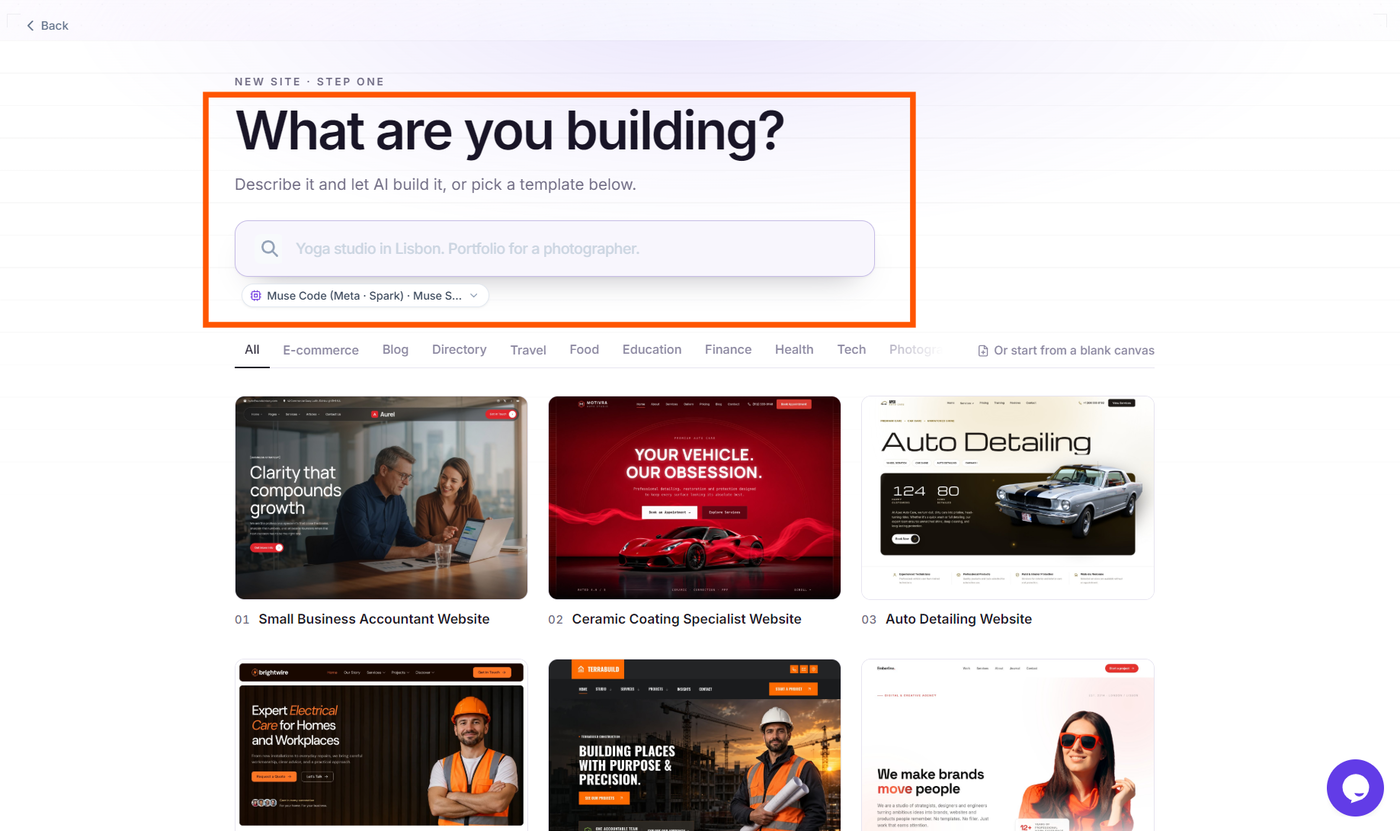
Headline & Instructions: Displays "What are you building?" with the subtitle "Describe it and let AI build it, or pick a template below."
Prompt Text Area: A clean input field with the placeholder: "Yoga studio in Lisbon. Portfolio for a photographer."
Attach Media (+ Button): Inside the prompt area, click the + button to attach images, brand logos, PDF brochures, or data files for the AI to incorporate into your website.
Category Tabs & Templates: Below the prompt field, you can browse templates by category (All, E-commerce, Blog, Directory, Travel, Food, Education, Finance, Health, Tech, Photography) or click Or start from a blank canvas.
Step 3: Entering Your Prompt and Initiating the Build
Click inside the text area to expand the composer and describe your website in detail:
Write your brief: Describe your business, target audience, style preferences, and key sections (e.g., "A modern architecture portfolio in Lisbon with minimalist typography, a project gallery, an about section, and a consultation booking form.").
Start building: Press Enter on your keyboard (or click the send arrow button inside the prompt composer) to start the AI generation process. Alternatively, you can click any template from the gallery below to start with that design.
Step 4: Watching the Live AI Generation
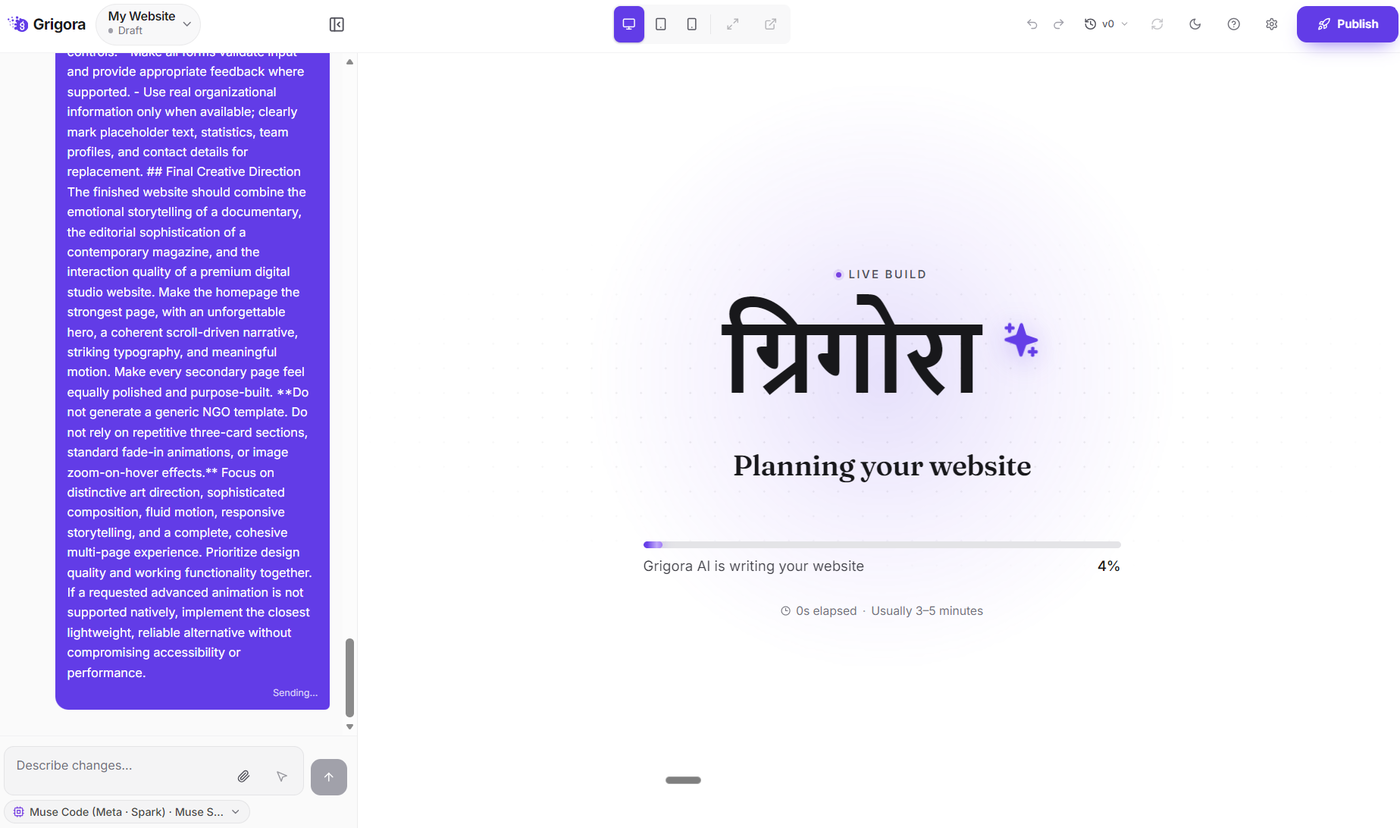
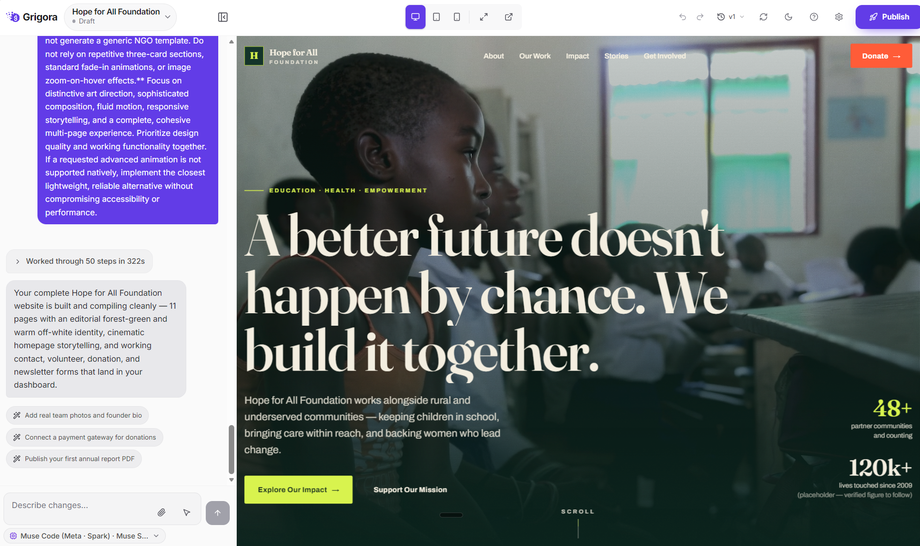
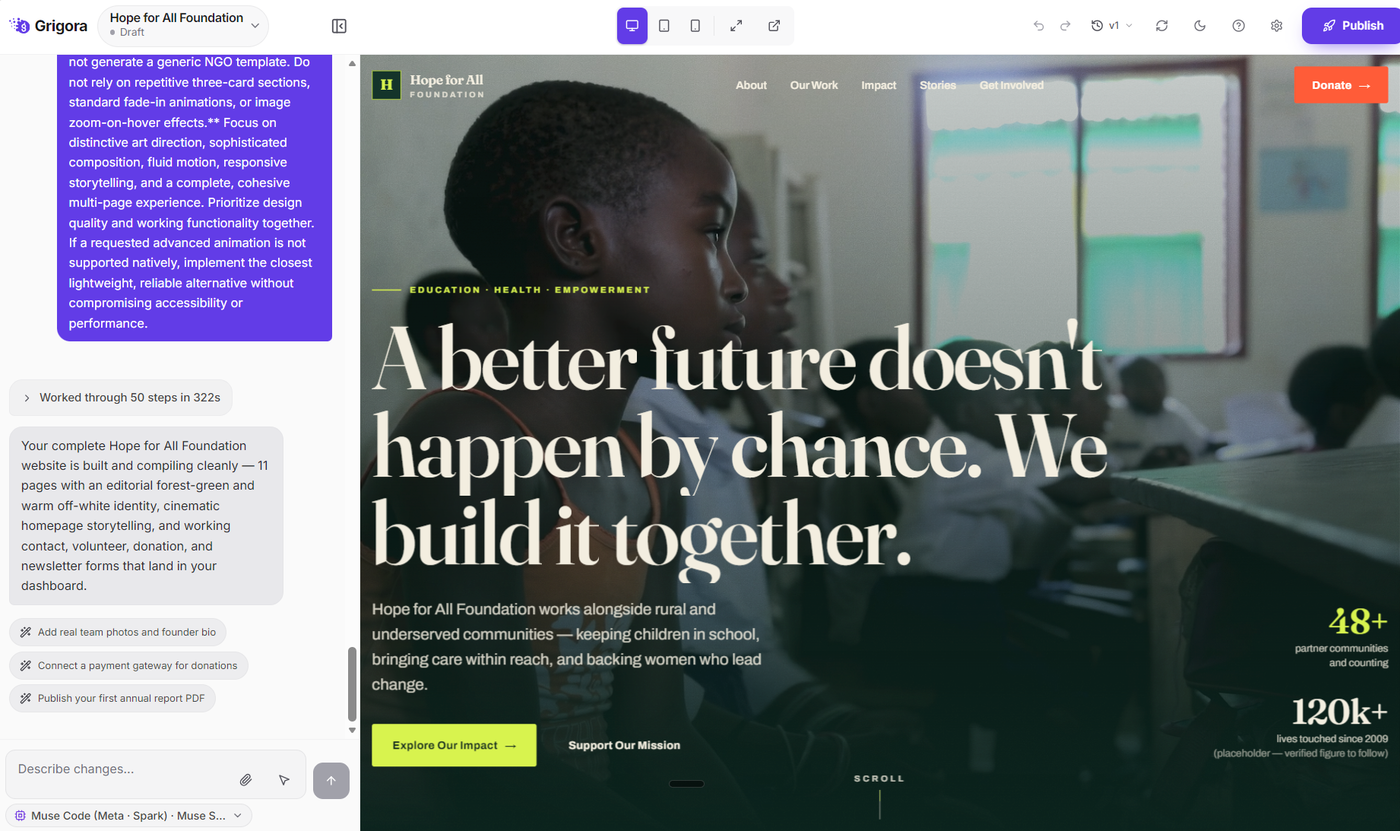
Visual Output: The screen transitions into the full-screen AI workspace divided into two coordinated panels:
AI Chat Panel (Left): Displays real-time build progress and updates as the AI outlines your site structure, styles typography, formats palettes, and writes page copy.
Live Preview Canvas (Right): Renders your website live as it is being assembled. You can see the navigation bar, hero banner, feature grids, galleries, and contact sections appear in real time.
Step 5: Refining Your Website with Conversational AI Prompts
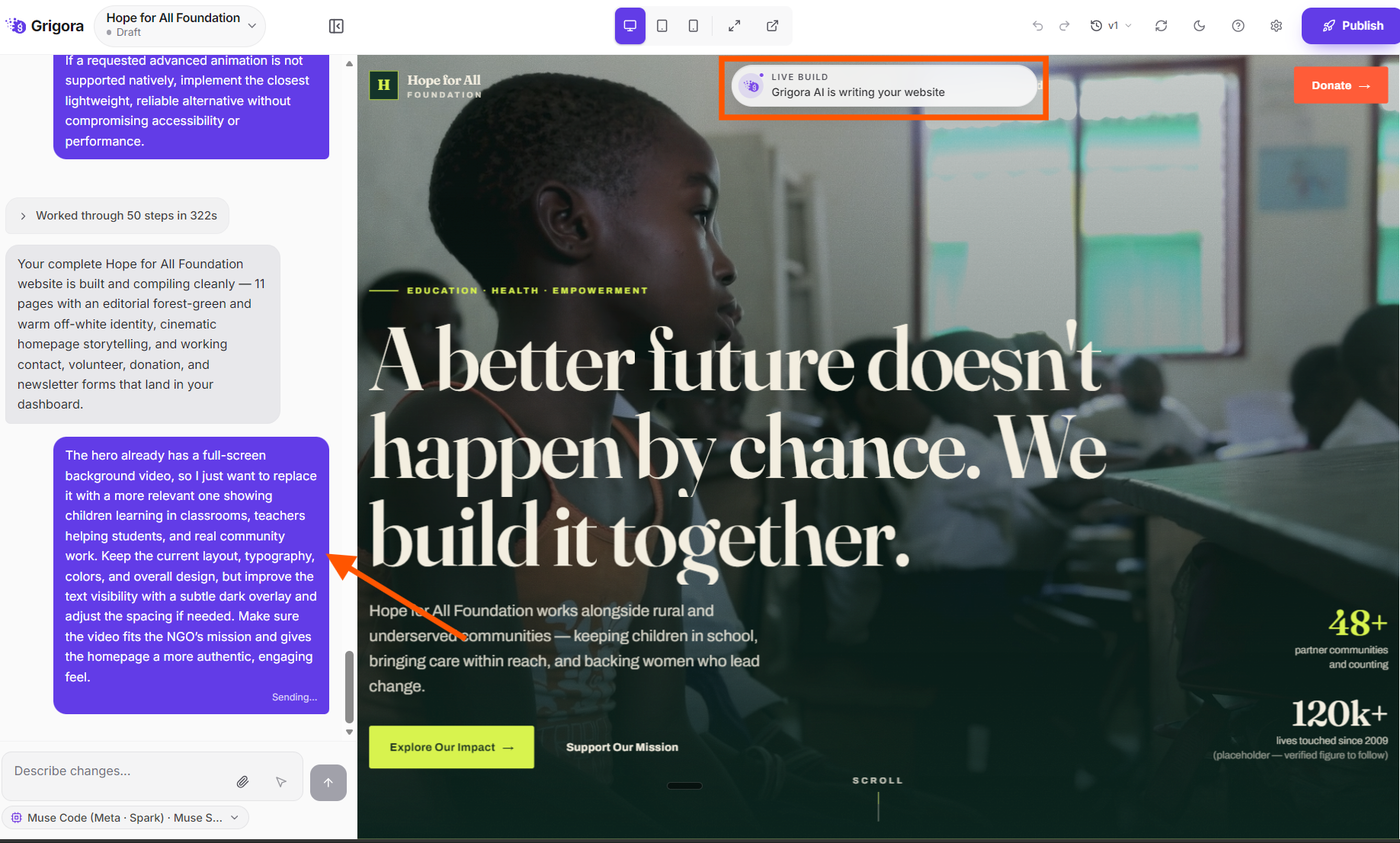
Once the initial generation completes, use the conversational chat bar at the bottom of the left panel to request any changes or enhancements:
Updating text and headlines: Type instructions like "Make the hero headline more punchy and emphasize 10 years of experience" or "Add 3 client testimonials with 5-star ratings."
Adjusting visual styles: Request theme updates such as "Change the primary accent color to forest green", "Make all buttons rounded", or "Switch to an elegant dark mode."
Adding new pages: Request multi-page additions such as "Add an About page with a company timeline and a Contact page with an interactive map."
After sending each prompt, the AI updates the site and refreshes the live preview canvas immediately so you can inspect your changes.
Step 6: Editing Specific Elements with Point-and-Click Inspection
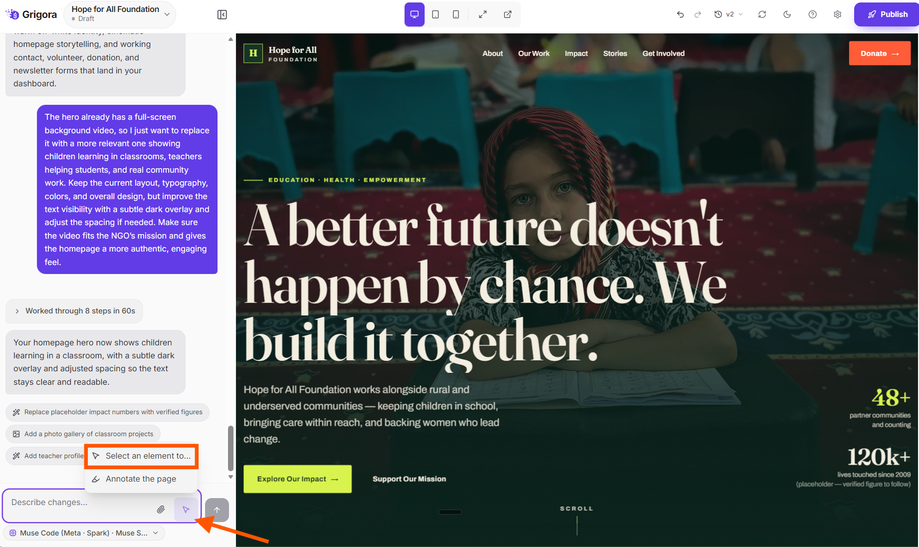
If you want to edit a specific button, paragraph, or card without describing the whole section, use the visual annotation tool:
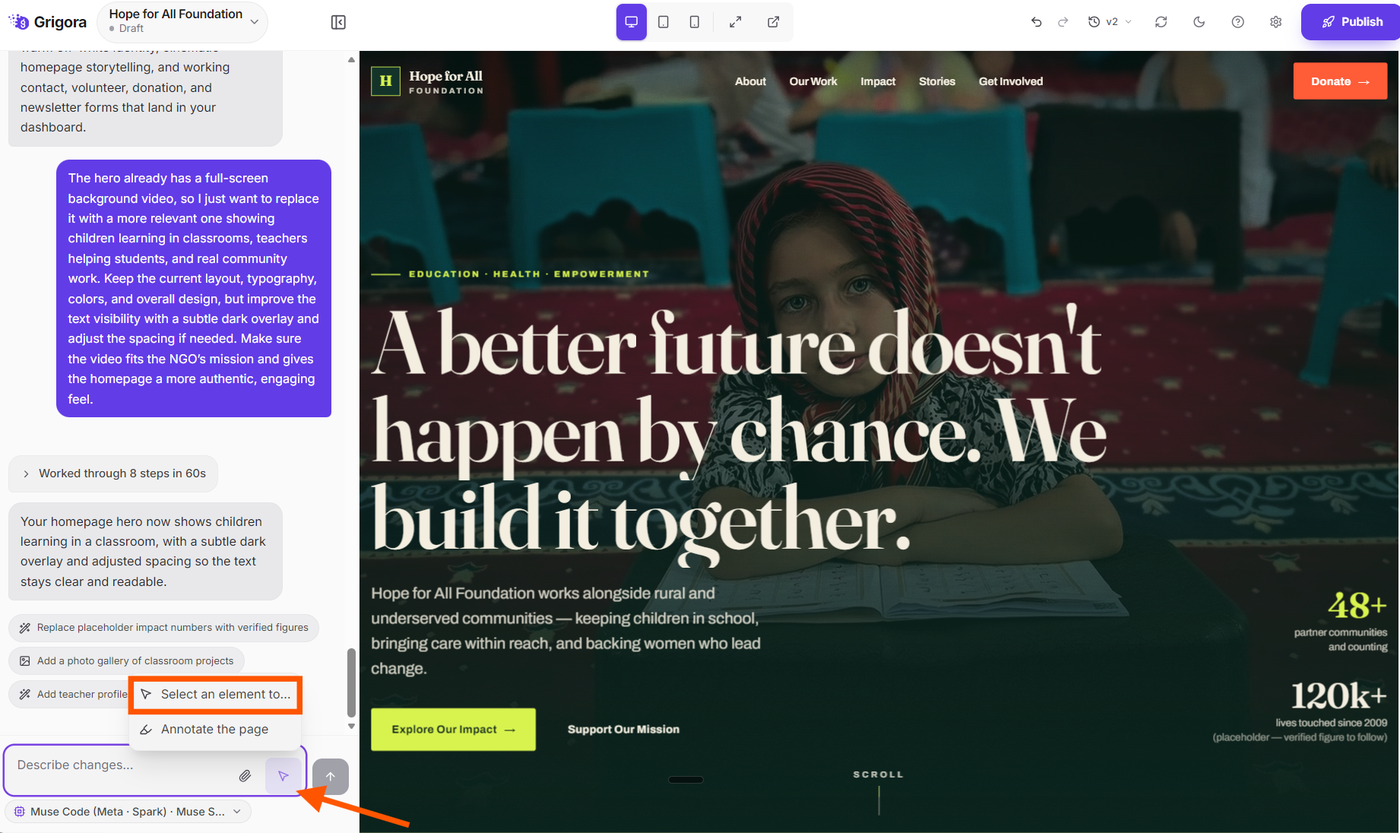
Click the Select element cursor icon located in the chat bar.
Hover over the preview canvas and click directly on the element you want to modify (such as a specific call-to-action button or heading).
The selected element attaches to your prompt input as a focused reference tag.
Type your specific instruction (e.g., "Change this button label to 'Book Free Consultation' and make it purple") and send.
Step 7: Previewing Across Devices and Reviewing Versions
Use the top control bar to inspect your website before going live:
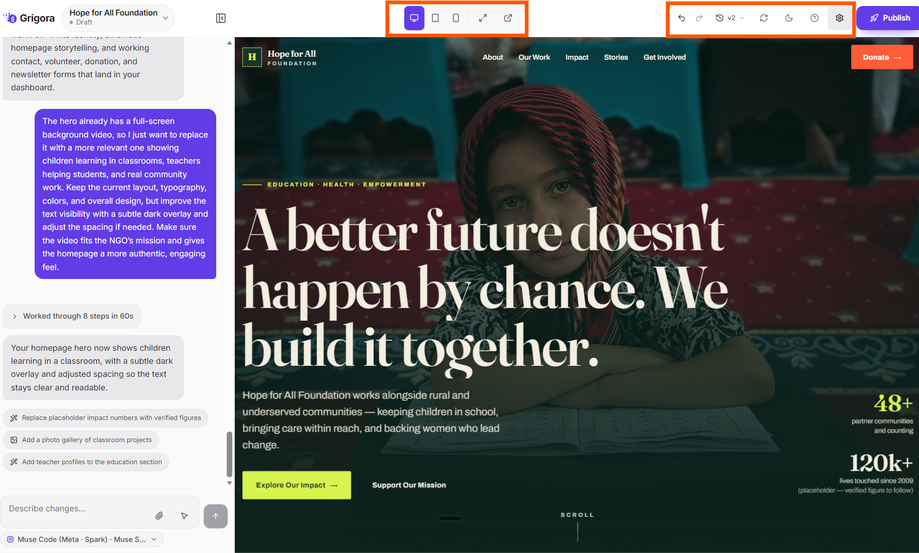
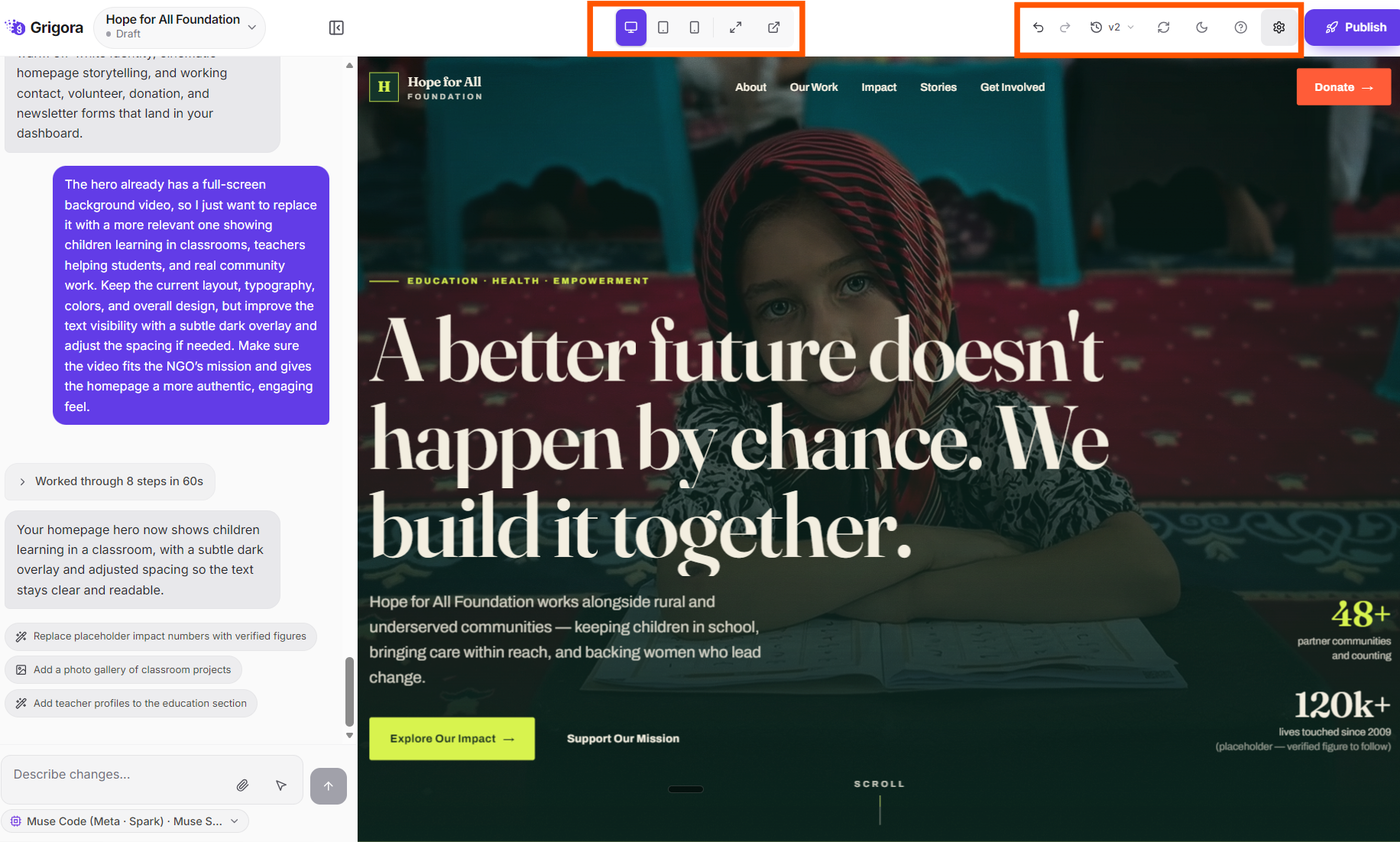
Responsive viewports: Click the Desktop, Tablet, or Mobile icons to check how your layout, spacing, and typography adapt across different screen sizes.
Page switcher: Click the page navigation dropdown to switch between generated pages (e.g., Home, About, Services, Contact).
Undo and Redo: Click the Undo or Redo arrows to revert or reapply recent prompt adjustments.
Version history: Click the Version history icon (showing v1, v2, etc.) to review previous iterations and restore an earlier snapshot whenever needed.
Step 8: Publishing Your Live Website
When you are satisfied with your website design, content, and mobile responsiveness:
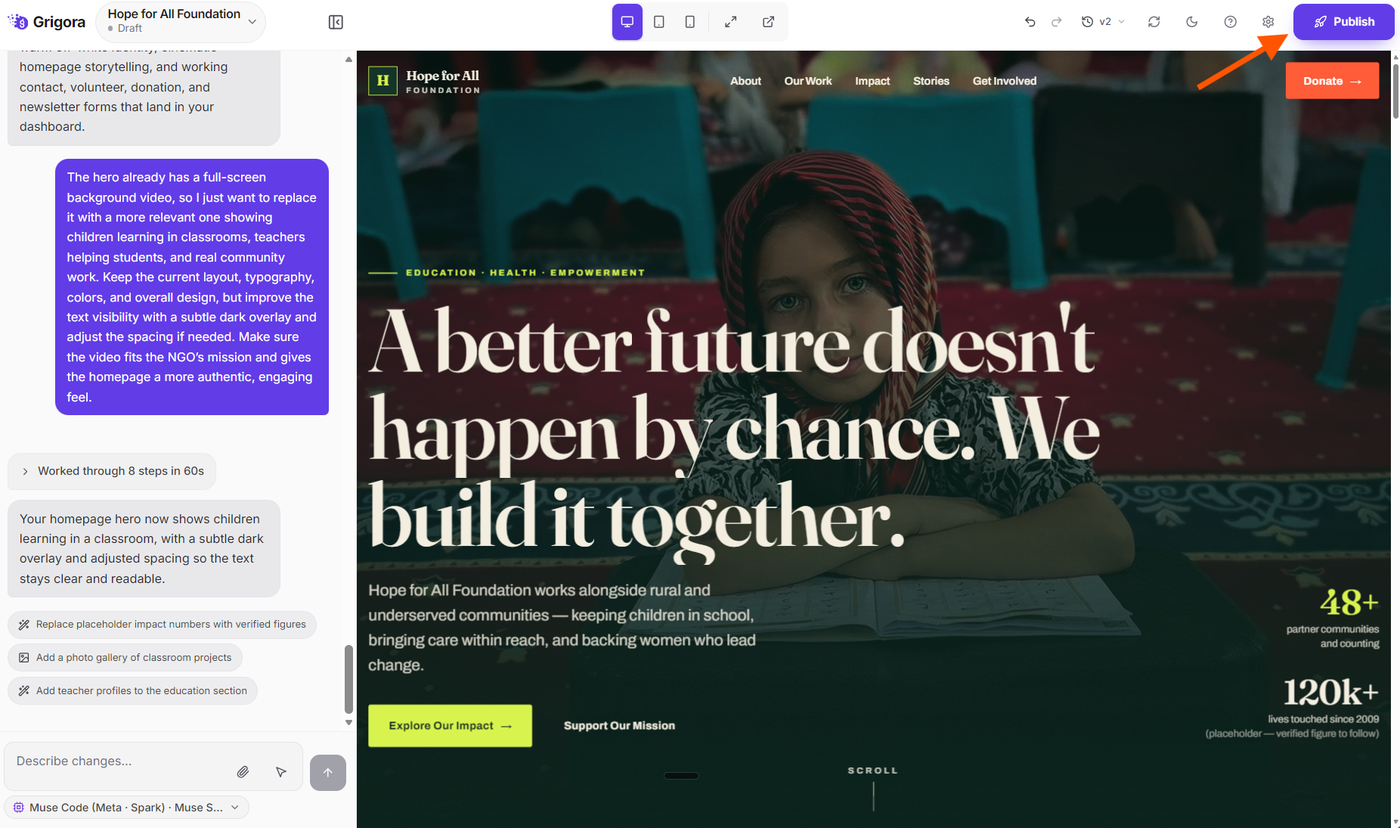
Click the Publish button (rocket icon) in the top-right corner of the editor.
Grigora builds and publishes your website instantly to a secure live web address on the Grigora network (e.g., yourwebsite.grigora.app).
A success modal appears displaying your live website URL. Click the link to view your live website in a new browser tab.
You can return to the AI editor at any time to request further updates, add new sections, or publish updated versions to your audience.