Integrating Google Analytics with your Grigora website is a straightforward process that will provide valuable insights into your website's traffic and user behavior. Follow these steps to successfully add Google Analytics to your site:
1. Obtain Your Google Analytics Tag ID
- If you haven't already, create a Google Analytics account.
- Once you have an account, navigate to the Admin section.
- Under the Property column, select your website property.
- Go to the Tracking Info section and click on "Tracking Code".
- Your Google Analytics Tag ID will be displayed in the format "G-XXXXXXXX". Copy this ID for later use.
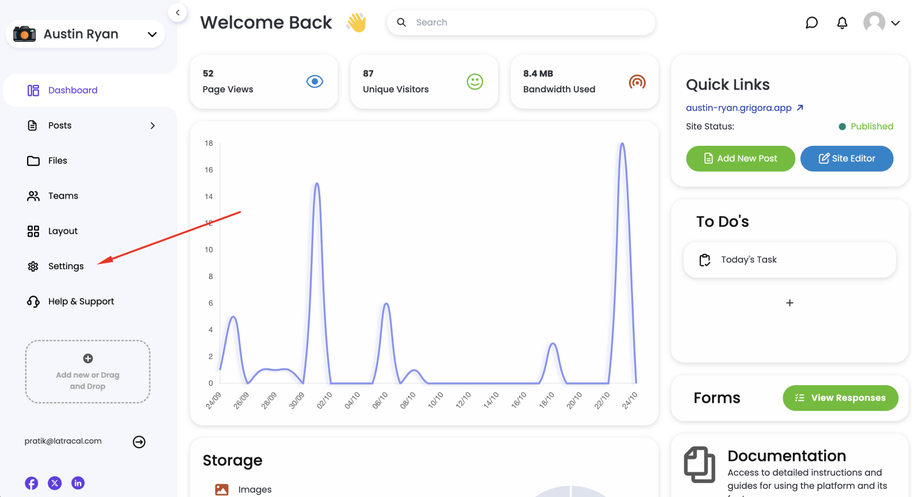
2. Access Your Grigora Dashboard
- Log in to your Grigora dashboard.
- Locate and open the website you want to integrate Google Analytics with.
3. Navigate to Settings
- On the left side navigation panel, click on "Settings".
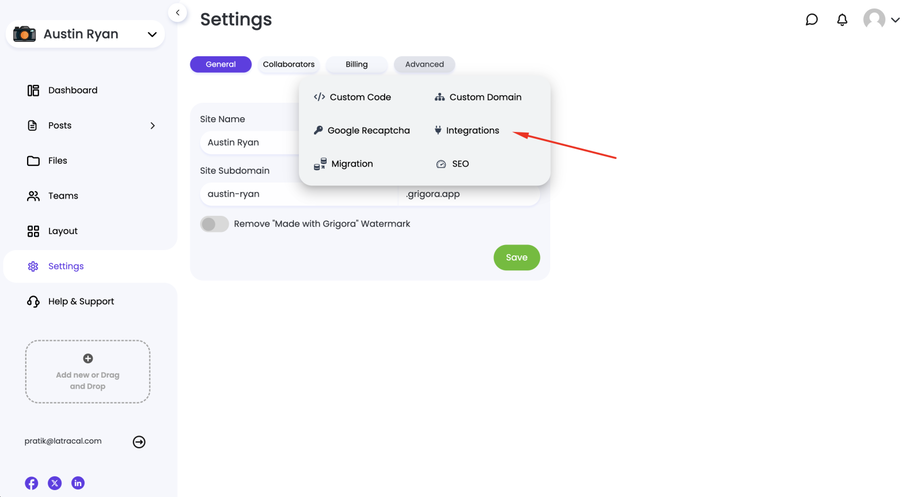
4. Go to the Advanced Tab
- Within the Settings section, click on the "Advanced" tab.
5. Access Integrations
- Under the Advanced tab, you'll find the "Integrations" section. Click on it.
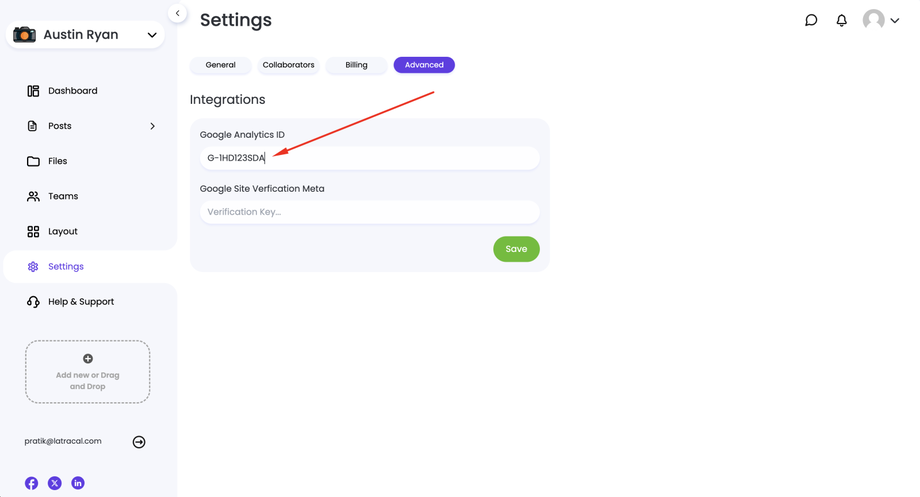
6. Enter Your Google Analytics Tag ID
- In the provided field, paste the Google Analytics Tag ID (G-XXXXXXXX) that you copied earlier.
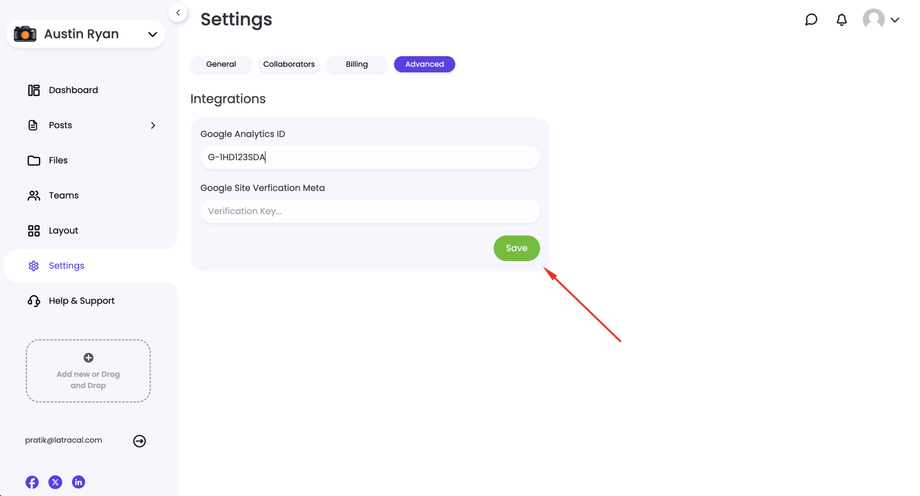
7. Save the Changes
- Click on the "Save" button to apply the changes.
That's it! Your Grigora website now has the Google Analytics tracking code embedded. Once you've published your website, Google Analytics will start collecting data about your website's visitors.
Note: It may take some time for Google Analytics to start showing data, especially if your website has low traffic initially.


