

Google Site Verification is a process that allows Google to verify ownership of your website. This verification is often required for certain Google features, such as Google Search Console.
Here's how to add the Google Site Verification meta tag to your Grigora website:
1. Obtain Your Google Site Verification Meta Tag:
Visit the Google Search Console and add your website to your account.

Once your website is added, you'll be provided with a meta tag. Copy the entire meta tag, but we'll only need the unique ID within it.
2. Access Your Grigora Dashboard:
Log in to your Grigora dashboard.
3. Select Your Website:

Choose the website where you want to add the verification meta tag.
4. Navigate to Settings:

On the left-hand side navigation panel, click on "Settings".
5. Go to the Advanced Tab:
Within the Settings section, look for the "Advanced" tab and click on it.
6. Select Integrations:

Under the Advanced tab, you'll find the "Integrations" section. Click on it.
7. Paste the Verification Meta Tag ID:
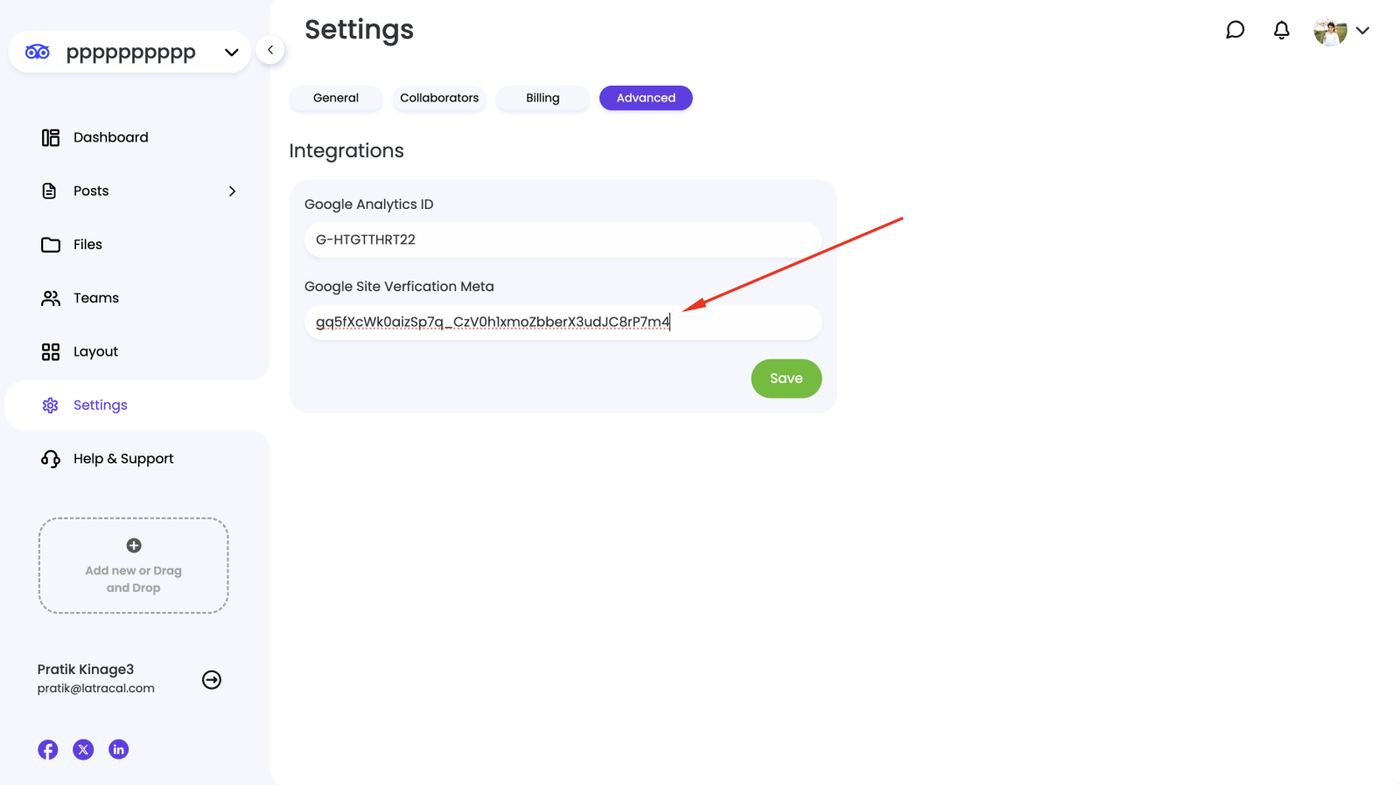
In the "Google Site Verification Meta" field, paste only the unique ID from the meta tag you copied earlier. Do not paste the entire meta tag.
8. Save Changes:

Click on the "Save" button to apply the changes.
That's it! Once you've saved the changes, Grigora will automatically add the Google Site Verification meta tag to your website's <head> section.
Note: It may take some time for Google to verify your website after adding the meta tag. You can check the verification status in Google Search Console.
By following these steps, you've successfully added the Google Site Verification meta tag to your Grigora website, allowing Google to verify your ownership and access additional features.