Adding a custom domain to your Grigora website gives it a professional and memorable touch. Here's a detailed guide to walk you through the process:
1. Access Your Grigora Dashboard:
Log in to your Grigora account and navigate to your dashboard.
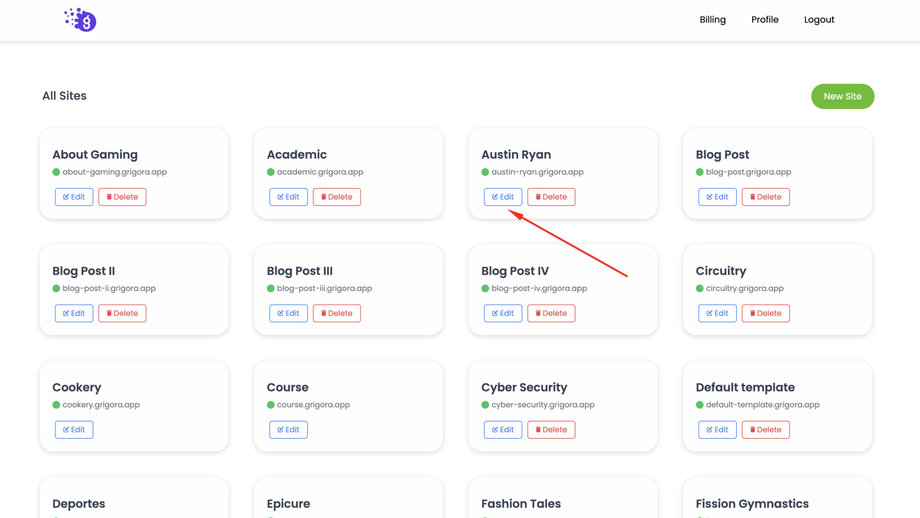
2. Select Your Website:
From the dashboard, locate and open the website you want to connect the custom domain to.
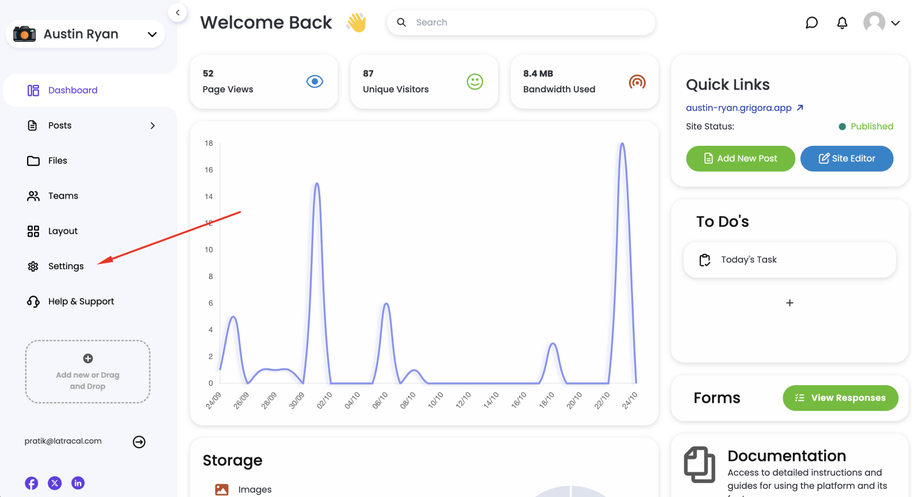
3. Navigate to Settings:
On the left-hand side navigation panel, click on "Settings".
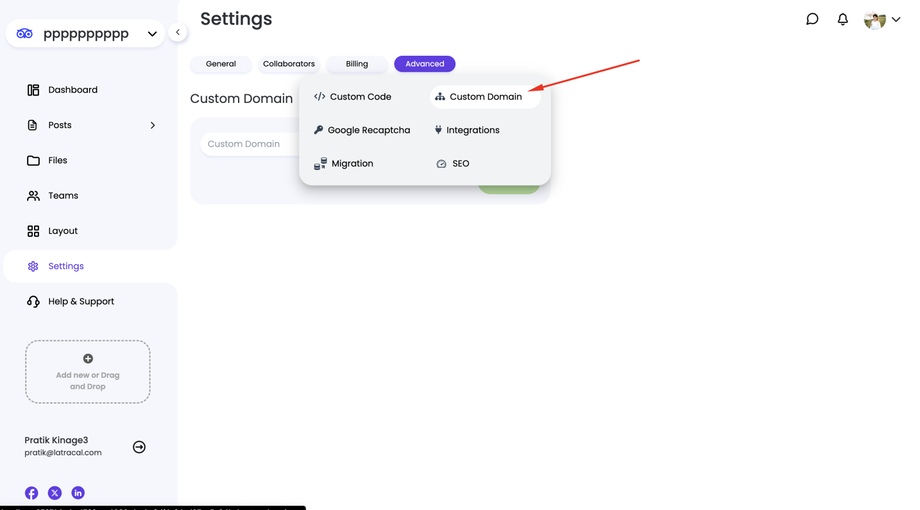
4. Access the Advanced Tab:
Within the Settings section, look for the "Advanced" tab and click on it.
5. Find the Custom Domain Section:
Under the Advanced tab, you'll find the "Custom Domain" section. Click on it.
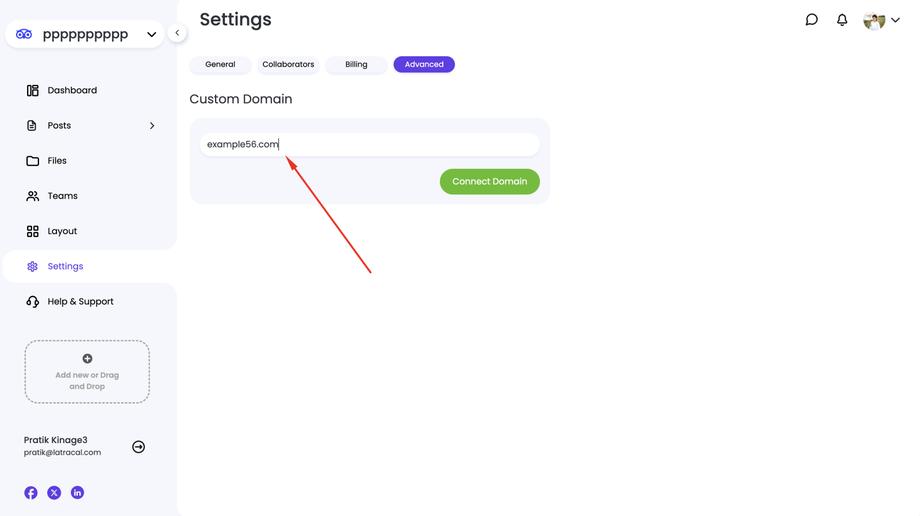
6. Enter Your Custom Domain:
In the provided field, type in your desired custom domain. You can connect a root domain (example.com), a subdomain ([invalid URL removed]), or even a subdirectory within an existing domain ([invalid URL removed]).
Important Note: The setup process may differ slightly depending on whether you choose a root domain, subdomain, or subdirectory.
Connecting a Root or Subdomain:
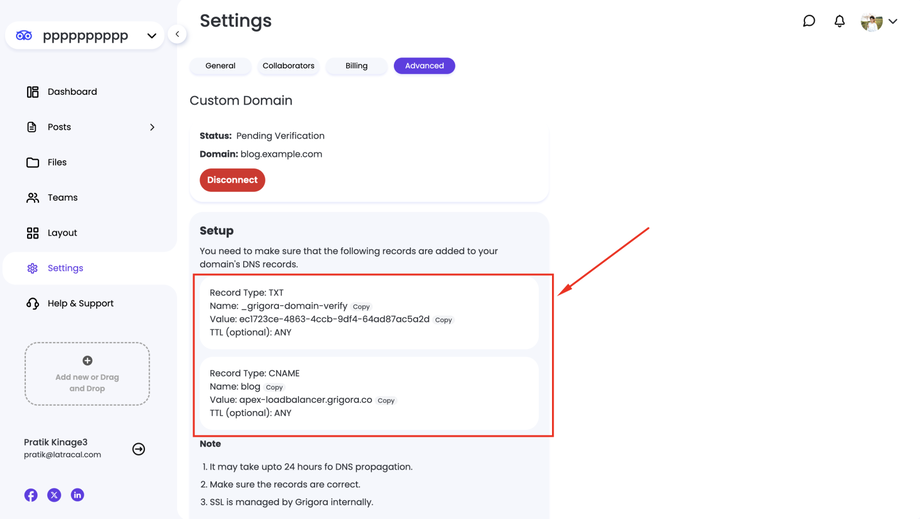
After entering your domain name, Grigora will display the specific DNS records you need to add to your domain registrar's control panel.
Carefully copy these records.
Log in to your domain registrar's control panel and add the provided DNS records.
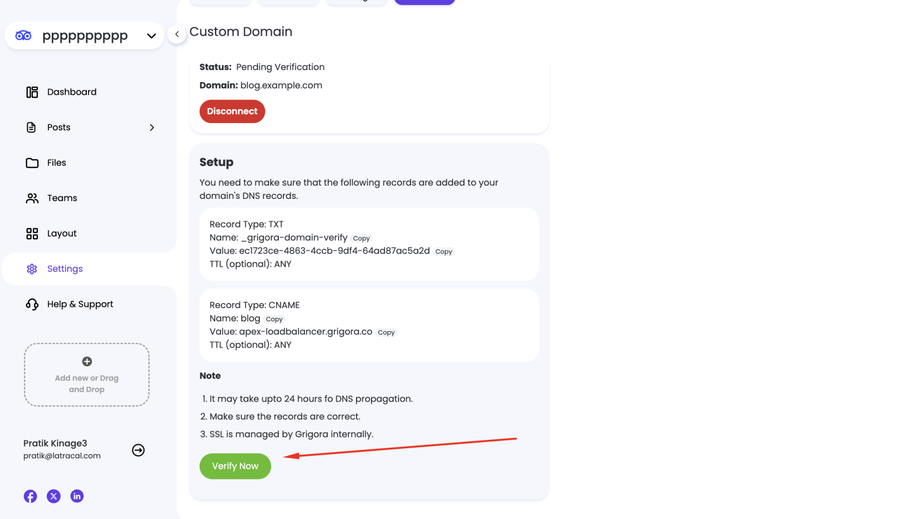
Once the records are added, click the "Verify" button within Grigora's custom domain section. This will initiate the verification process.
Grigora will automatically install an SSL certificate for your custom domain, ensuring secure connections.
Connecting a Subdirectory:
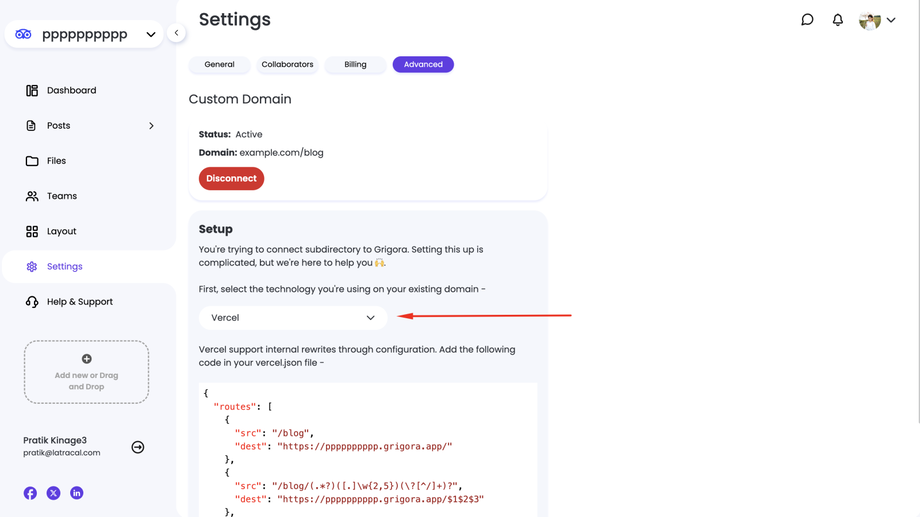
If you choose a subdirectory, Grigora will ask you to select the platform where your current website is hosted (e.g., WordPress, Wix).
Based on your chosen platform, Grigora will provide you with a specific proxy script.
You'll need to add this script to your existing website's configuration on the chosen platform.
Verification and Completion:
Once you've completed the steps for your chosen domain type (adding DNS records or using the proxy script), click the "Verify" button in Grigora.
Grigora will verify the connection and complete the installation process.
7. Save Changes:
After successful verification, click "Save" to finalize the connection of your custom domain. (Save button is not available in subdirectory)
Congratulations! Your Grigora website is now accessible through your custom domain. Remember to ensure your DNS records propagate across the internet, which might take a few hours.


