This guide will show you how to integrate webhooks with your Grigora forms to automatically send submission data to an external service.
Access Website Settings:
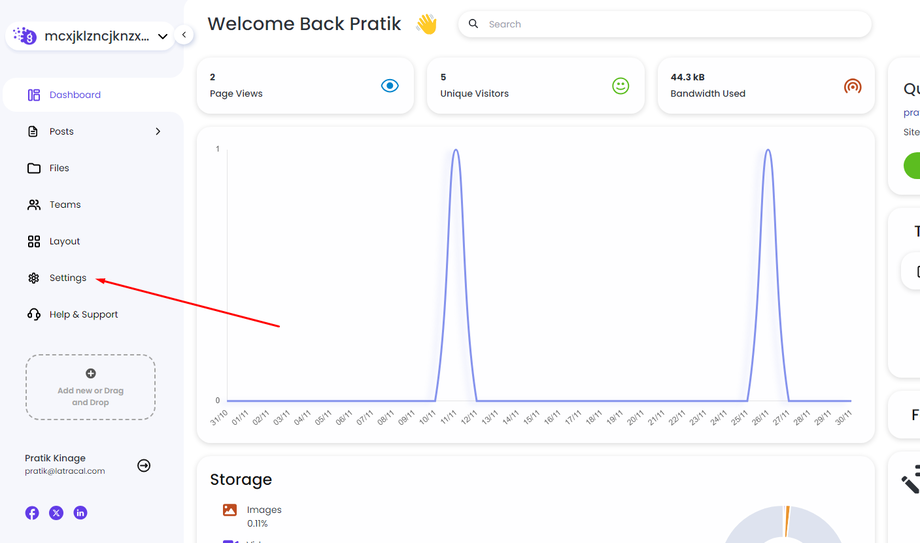
Log in to your Grigora account and access your website's dashboard.
From the left navigation menu, click on Settings.
Enable Webhook Integration:
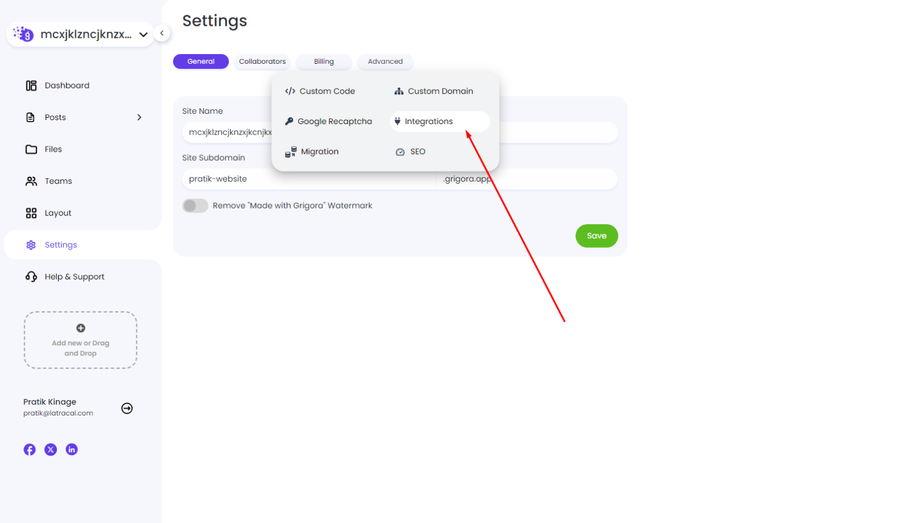
Click on the Advanced tab.
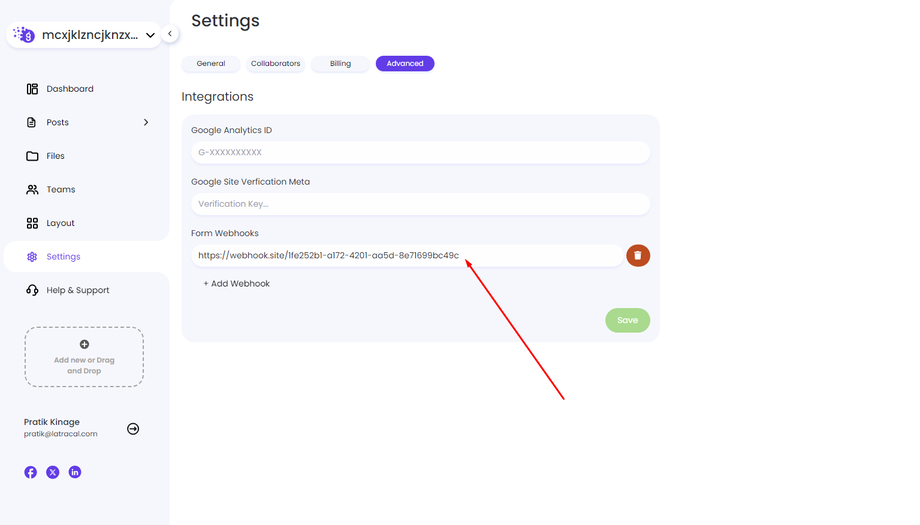
Under Advanced, navigate to the Integrations section.
Locate the Form Integration URL input field.
Set Up Your Webhook:
In the Form Integration URL field, paste the URL provided by your chosen webhook service. This is the URL where Grigora will send your form submission data.
Once you've entered the URL, click Save to activate the integration.
Understanding the Webhook Response:
Grigora sends form data in a specific JSON format. Here's an example to help you understand:
{ "response": { "First Name": "Name", "Last Name": "Last", "Email": "email@example.com", "Message": "Hello" }, "id": "01JDY18715K1Q5048P1G83ZP6N", "name": "Newsletter", "timestamp": "2024-11-30T07:58:33.403Z"}- response: This object contains the actual form data submitted by the user. Key-value pairs represent form fields and their corresponding values.
- id: A unique identifier for the form submission.
- name: The name of the form that triggered the webhook.
- timestamp: The date and time the form was submitted, formatted in UTC.
By following these steps, you've successfully integrated webhooks with your Grigora forms and can automate sending form submission data to external services for further processing or analysis.


