

Learn how to organize your contacts into groups for more efficient communication. This guide will show you how to create custom lists, add members, and manage your group details directly from your Grigora Mail dashboard.
Accessing the Groups Section
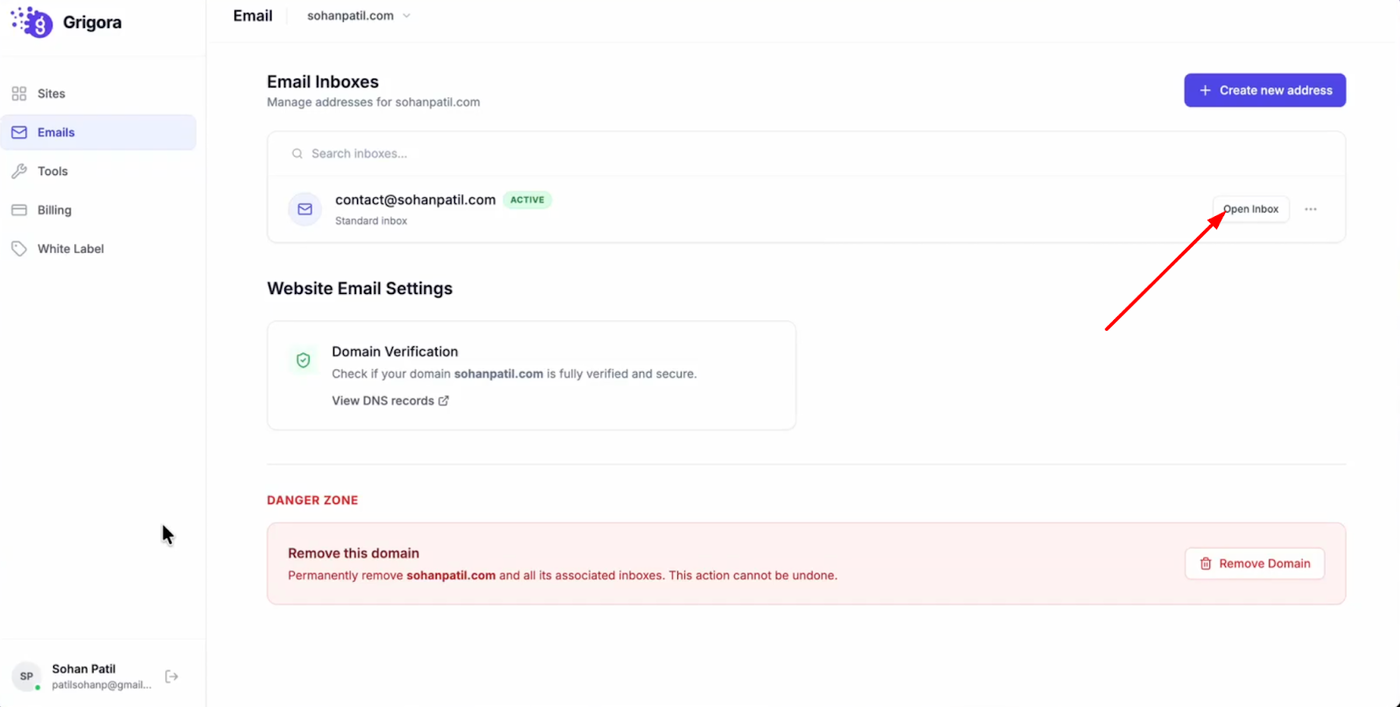
Navigate to the email section in your Grigora dashboard and click "Open inbox".
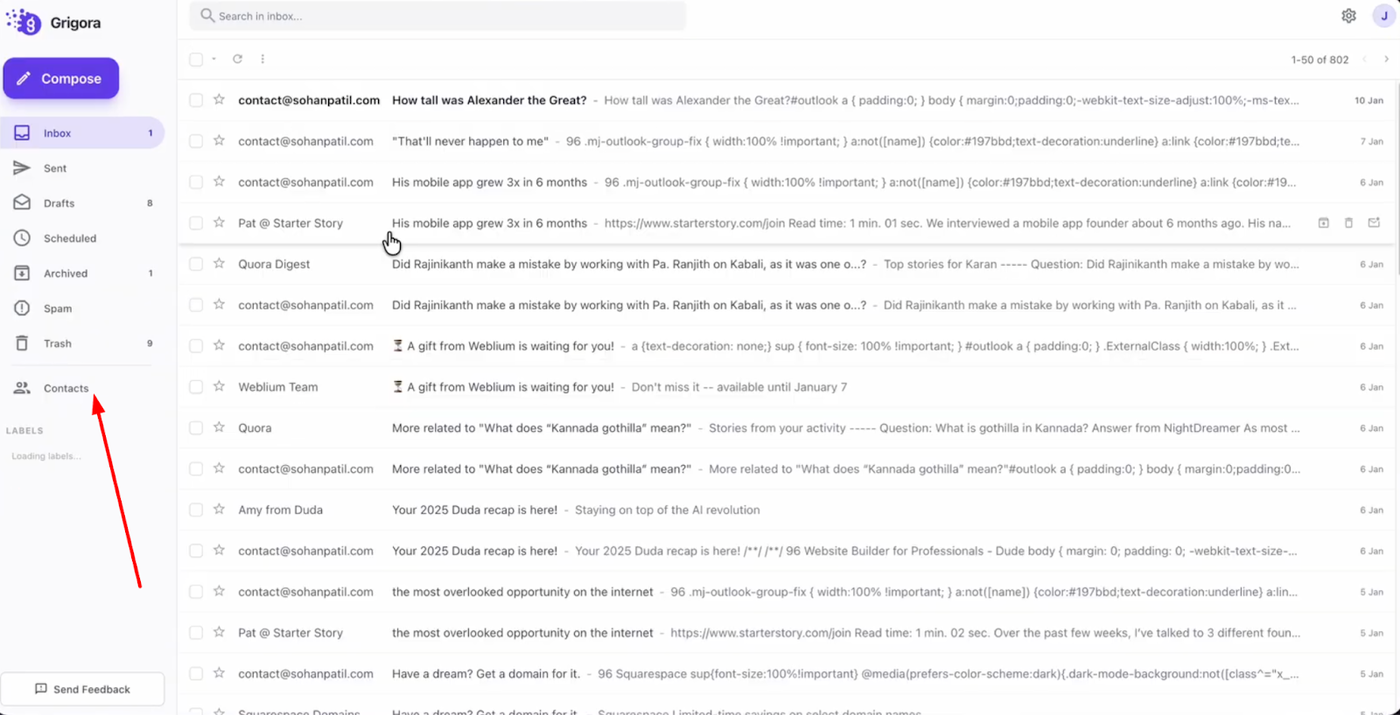
Look at the left sidebar and click on "Contacts."

At the top of the contacts page, locate the tab for "All contacts" and click on "Groups" right next to it.

Once in the group section, click the "Create group" button on the right side to begin.
Creating and Managing Your Group
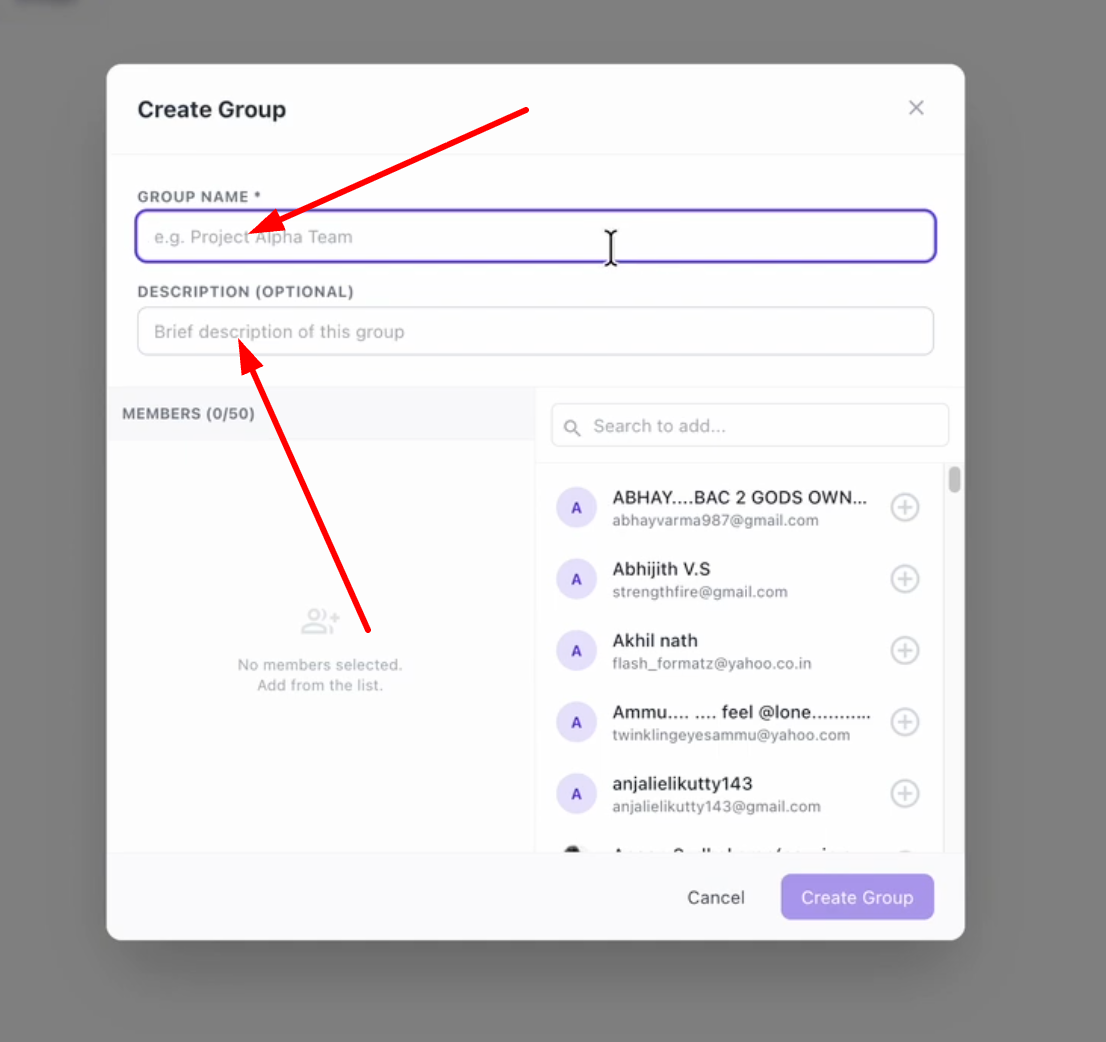
A pop-up window will appear for you to fill in the details. Enter a "Group name" and an optional description to help you track your lists.
Next, choose the contacts you want to include by searching or scrolling through your list.
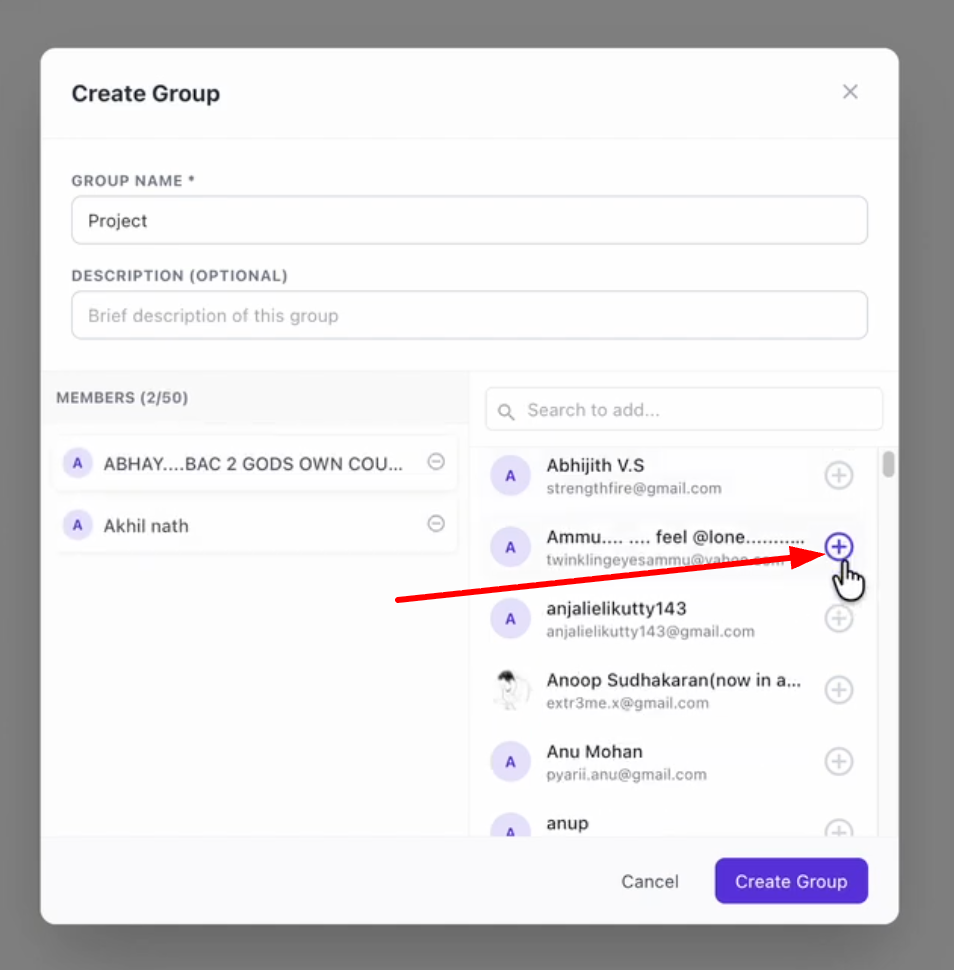
Click "Add" next to each person to move them to the "Members" list on the left (you can add up to 50 contacts per group).
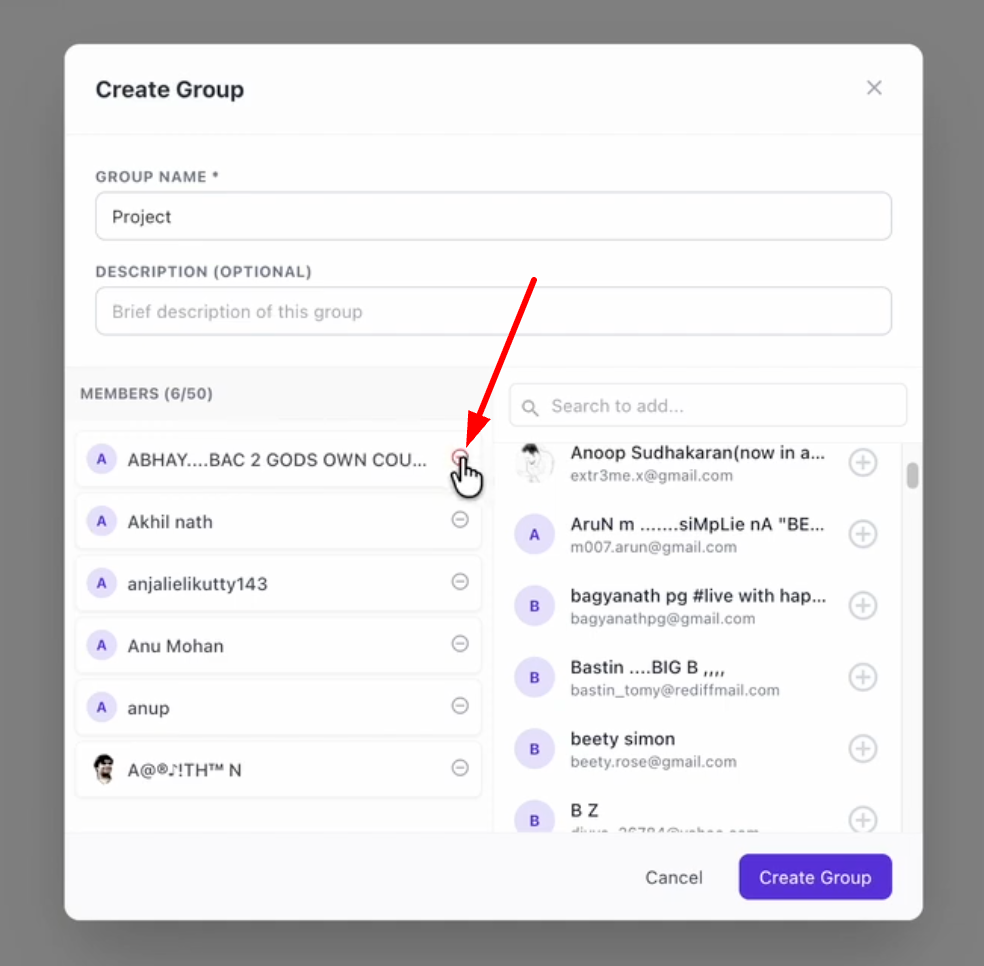
If you need to remove someone, simply click the minus button next to their name.
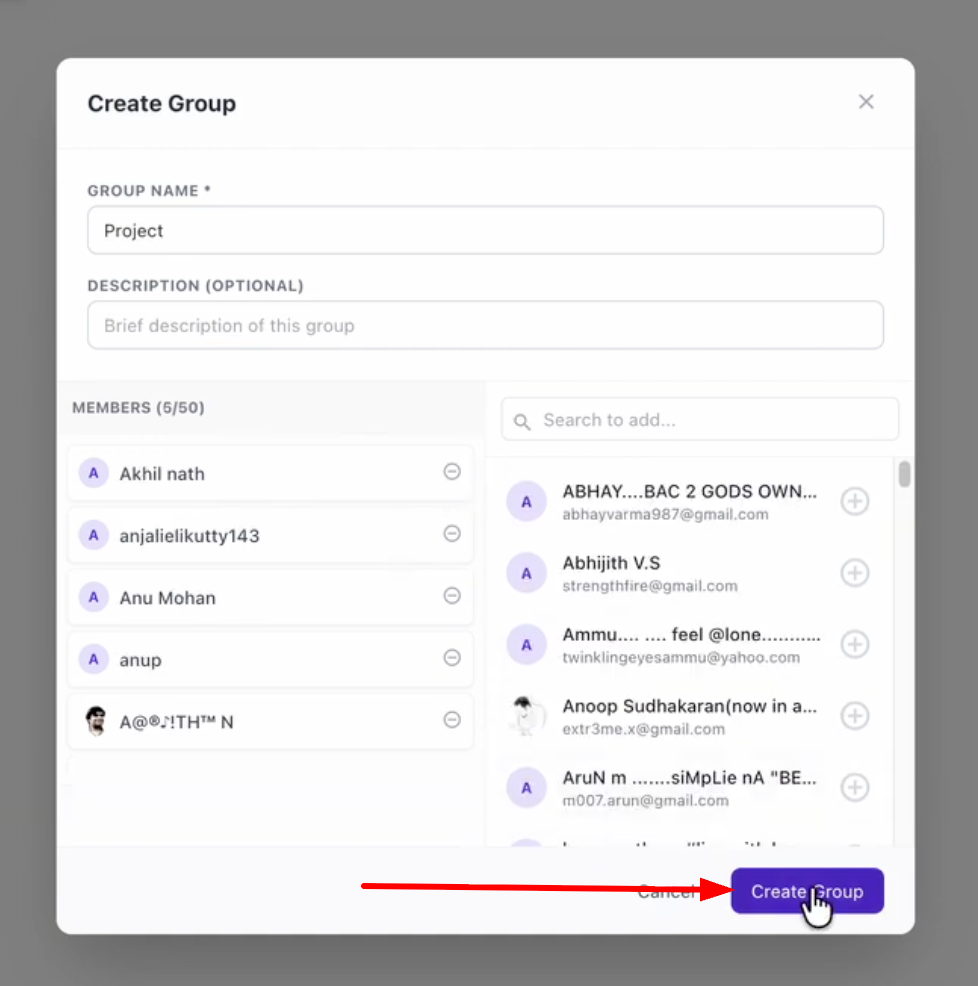
Once your list is finalized, click "Create group" at the bottom to save it.