

Learn how to efficiently handle several email addresses from one centralized location using the Grigora Mail dashboard. This guide walks you through creating new addresses, managing passwords, setting up forwards, and configuring aliases to keep your email workflow organized.
Accessing and Creating Inboxes
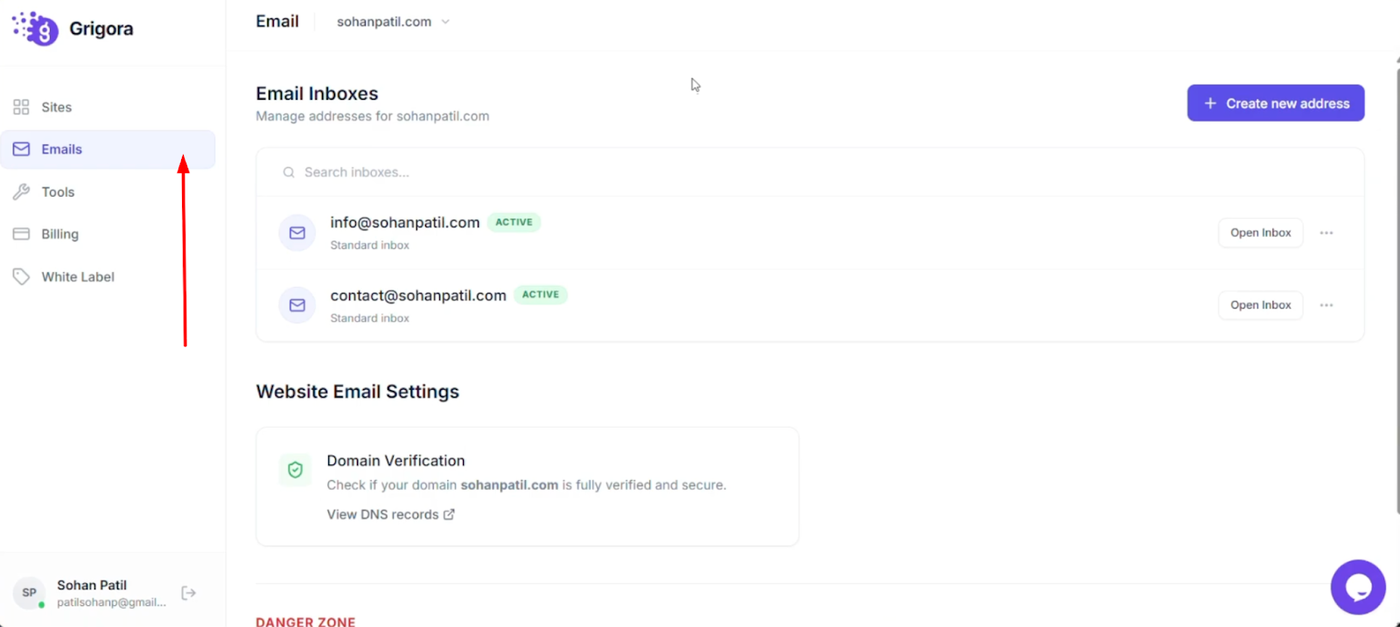
Open the Grigora dashboard and click on the "Emails" option from the left sidebar to view a list of all your existing email addresses.
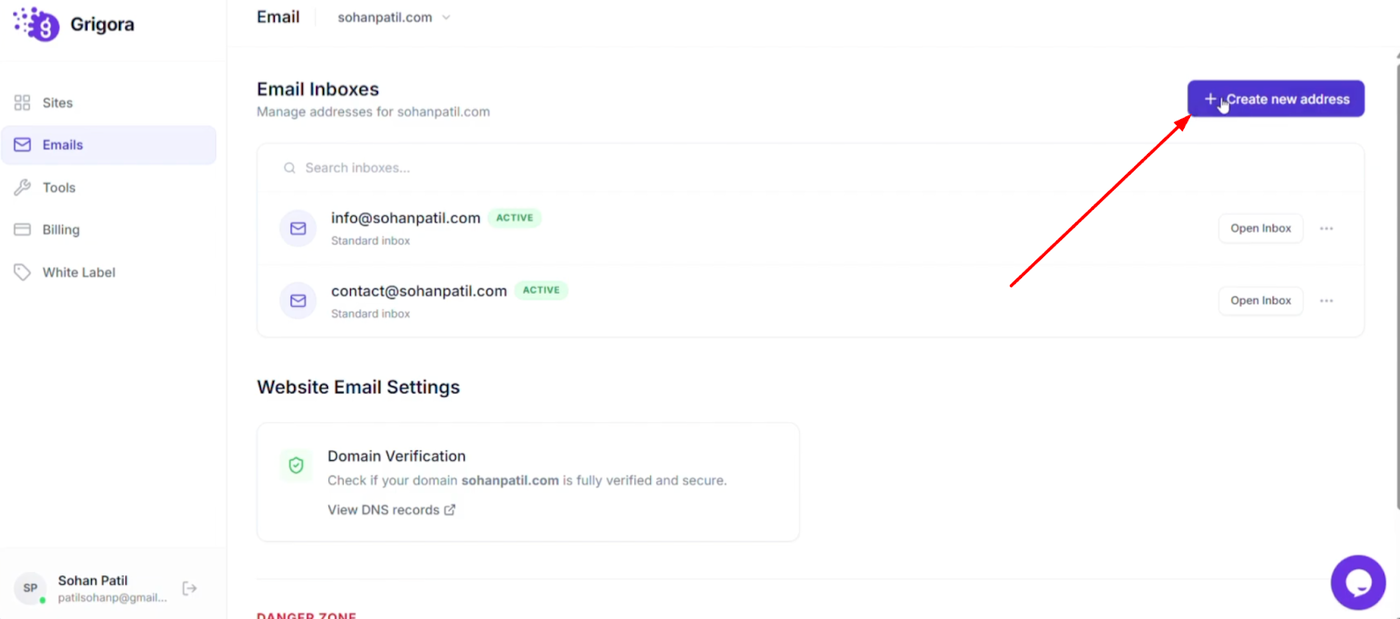
To add a new inbox, click "Create new address" at the top right of the screen and follow the setup prompts.
Managing Settings and Passwords

To manage an existing email address, click the three dots next to it.
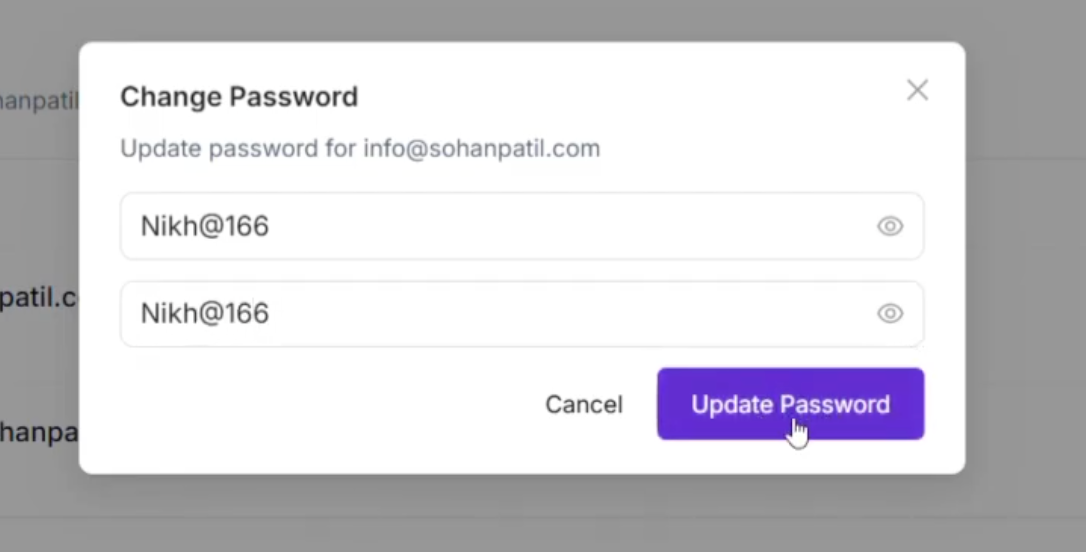
From the pop-up menu, select "Change password" to update your credentials.
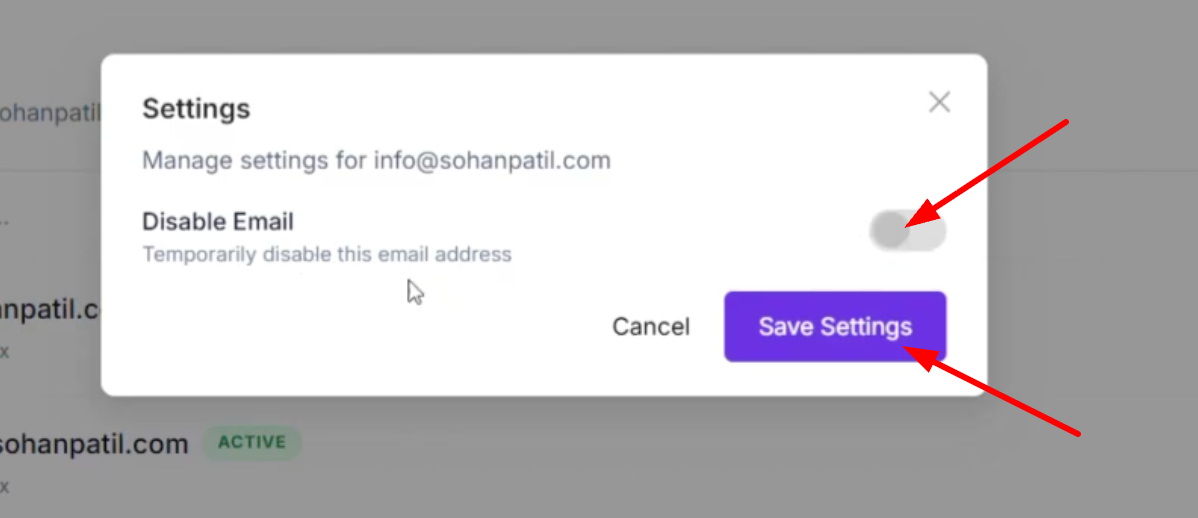
Choose "Open settings" to access configuration options like the "Disable email" toggle for temporary deactivation. Always remember to click "Save changes" after making adjustments.
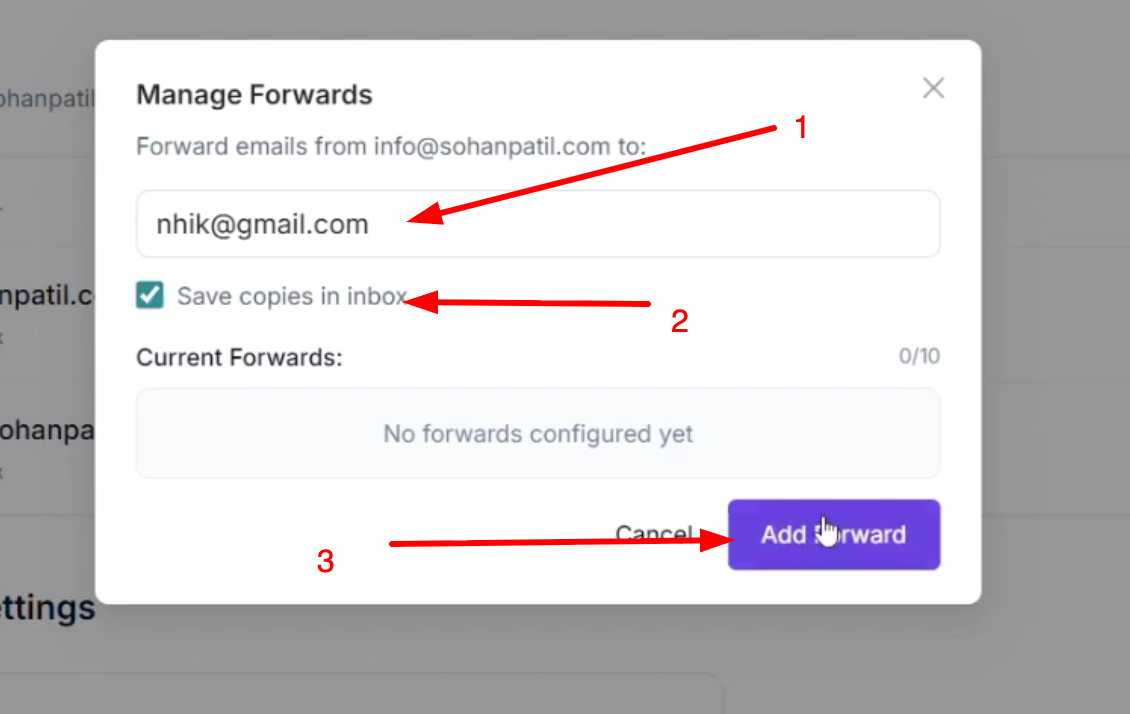
Select "Manage forwards" to automatically redirect incoming messages to another address; simply enter the email and click "Add forward."
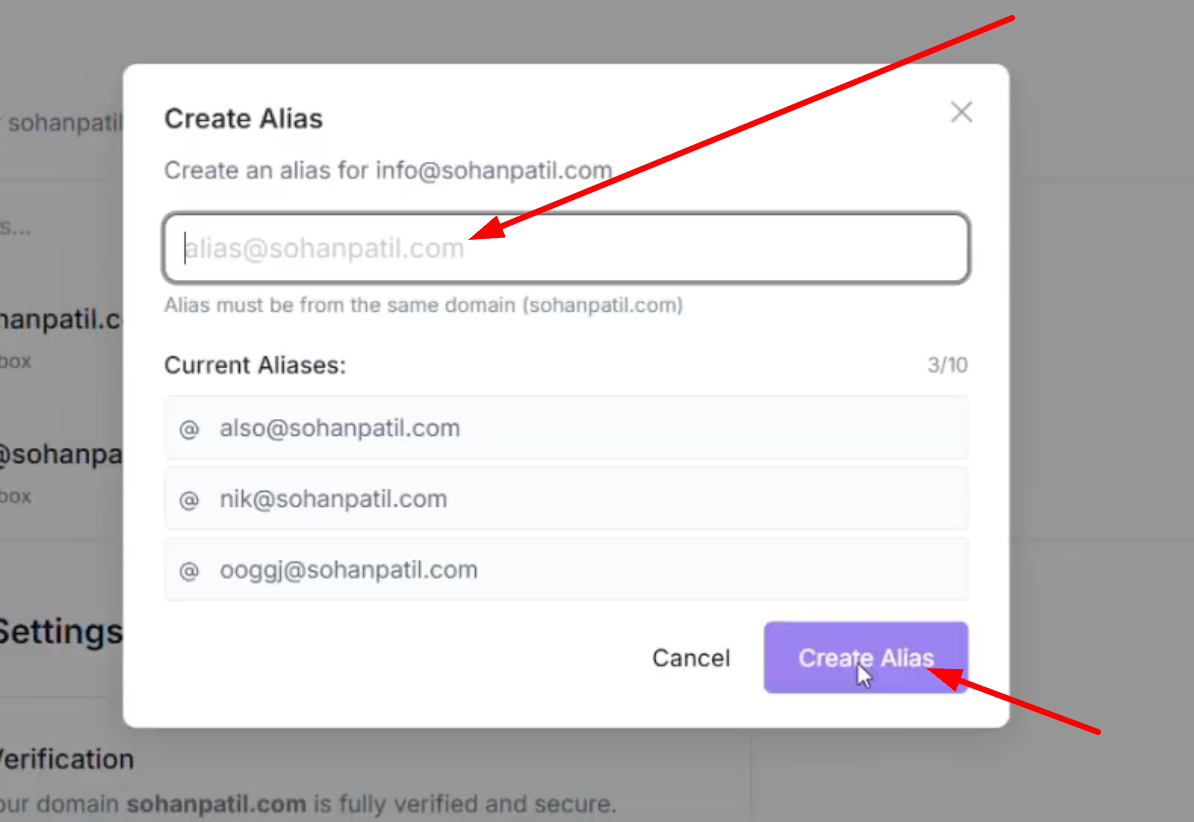
To create an alternate email name for the same inbox, select "Create alias," type your desired name, and click "Create alias."
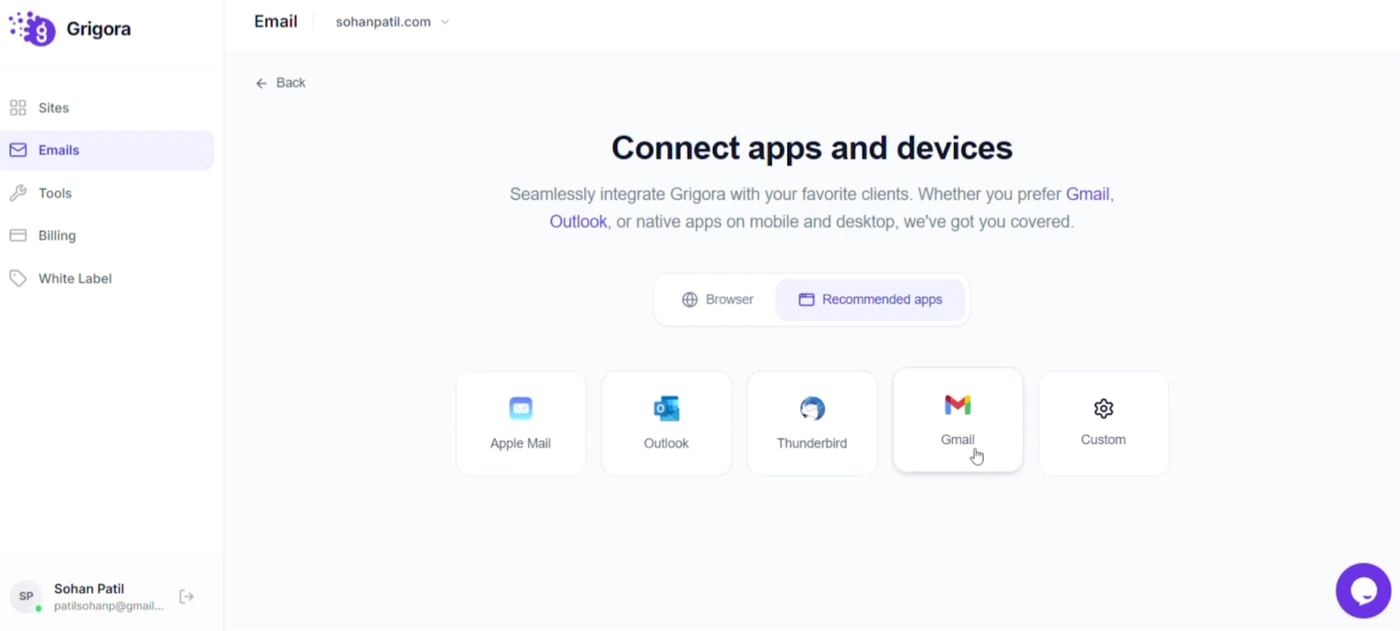
Select "Connect apps" from the menu to link your Grigora Mail account to popular external email clients. This feature allows you to integrate seamlessly with platforms like Apple Mail, Outlook, Thunderbird, and Gmail, or even configure custom apps for easier access to your messages.
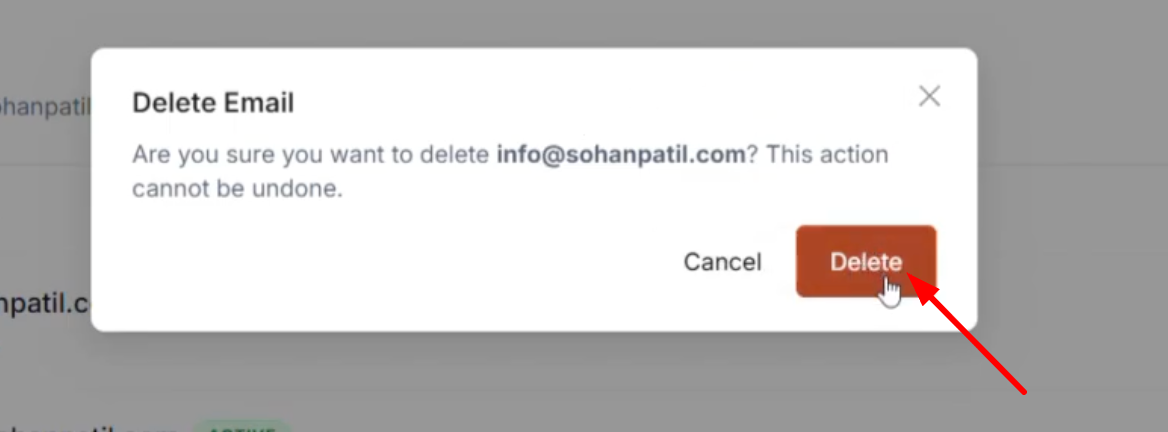
If you need to remove an address entirely, select "Delete" from the options menu. A confirmation pop-up will appear to verify your choice. Proceed with caution, as this action permanently removes the email address and its data from your account.