

Optimize your website's visibility with Grigora's built-in SEO settings. This guide will help you configure meta titles, descriptions, sitemaps, and indexing behavior to ensure your Grigora site is search engine-friendly from the start.
Accessing SEO Settings
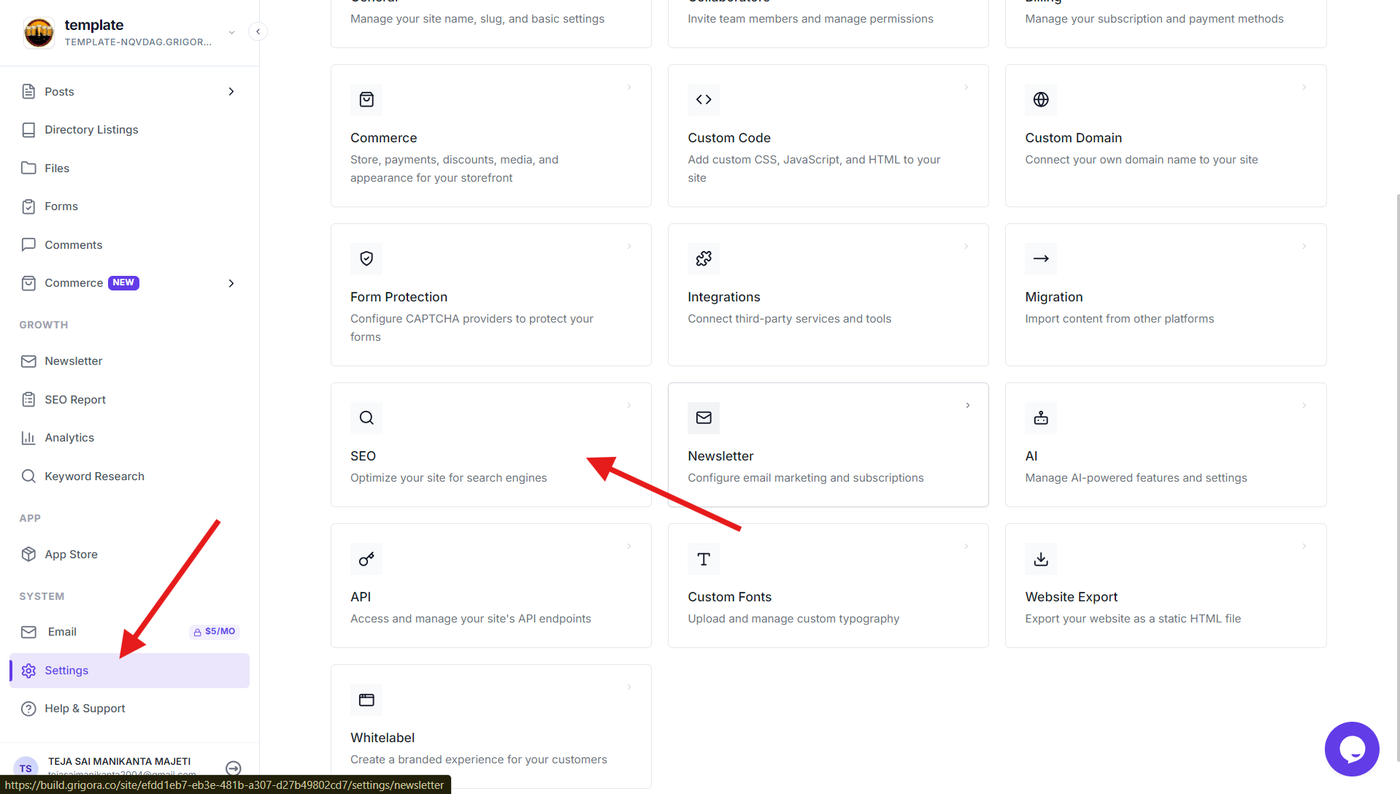
Navigate to your Grigora dashboard and click on Settings in the sidebar. Select SEO to access all the search engine optimization configuration options for your website.
Configuring Sitemap Settings
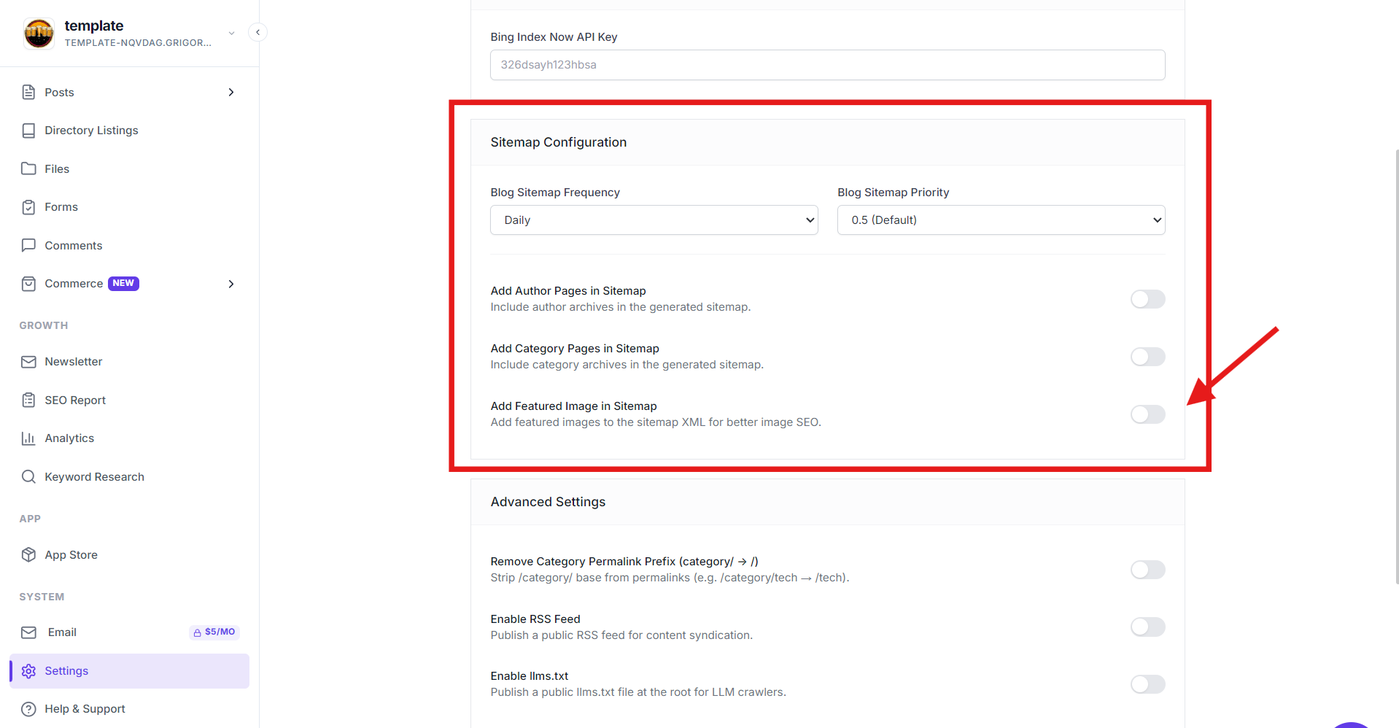
Toggle on "Add Featured Image and Sitemap".
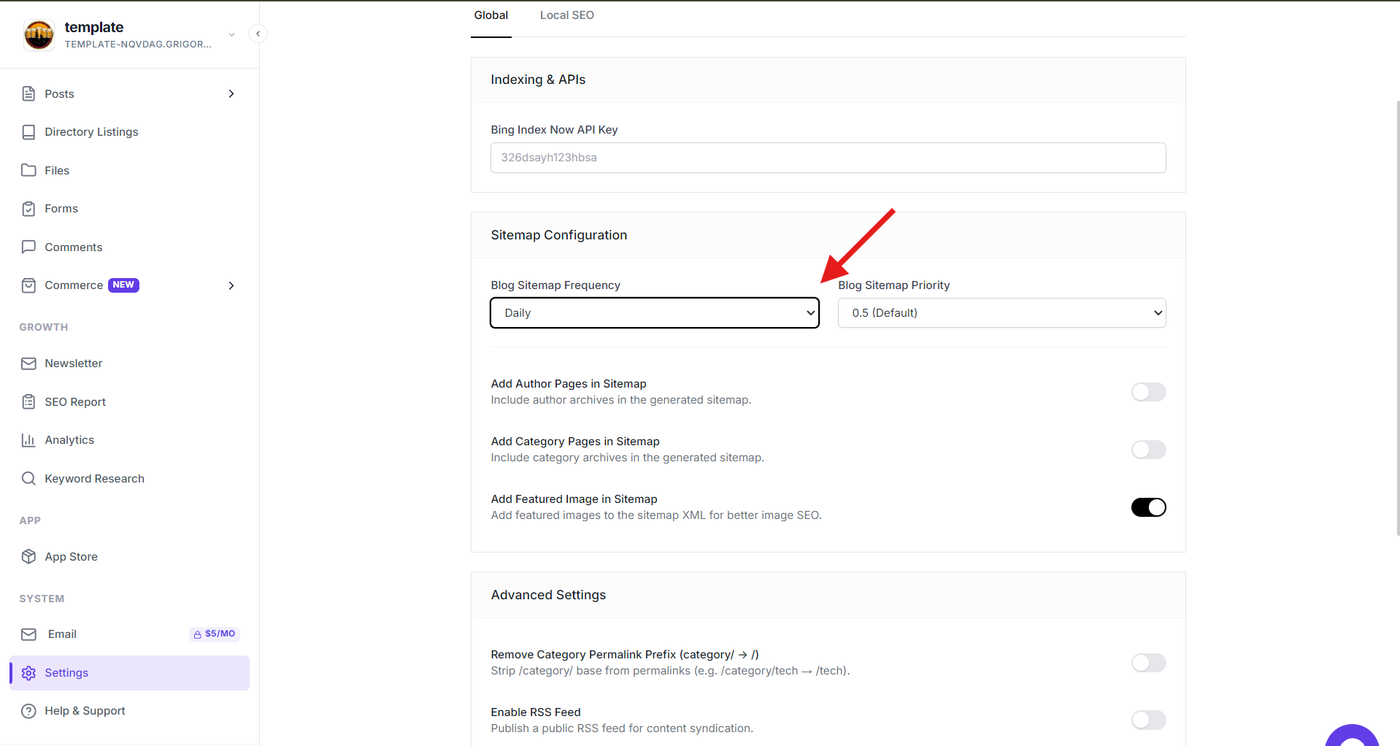
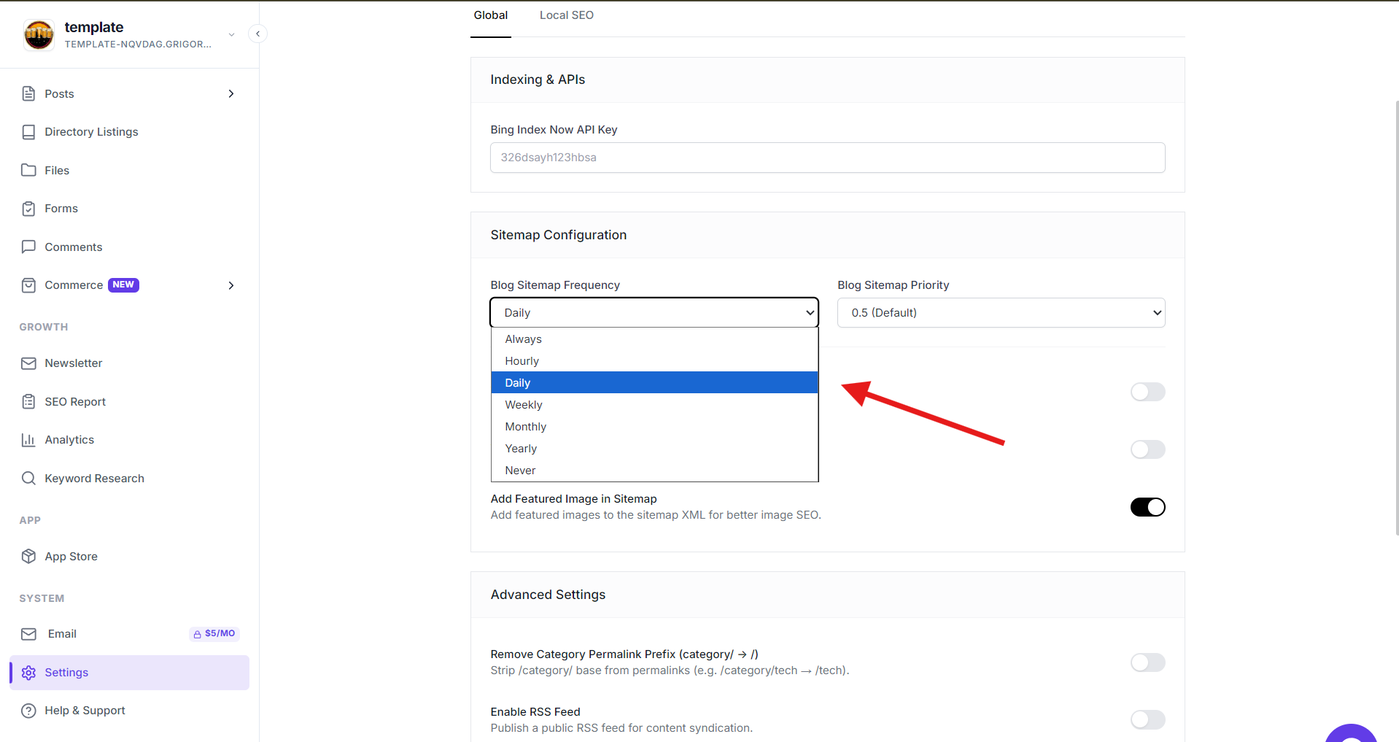
Set your blog's sitemap frequency to determine how often search engine crawlers will crawl your site.
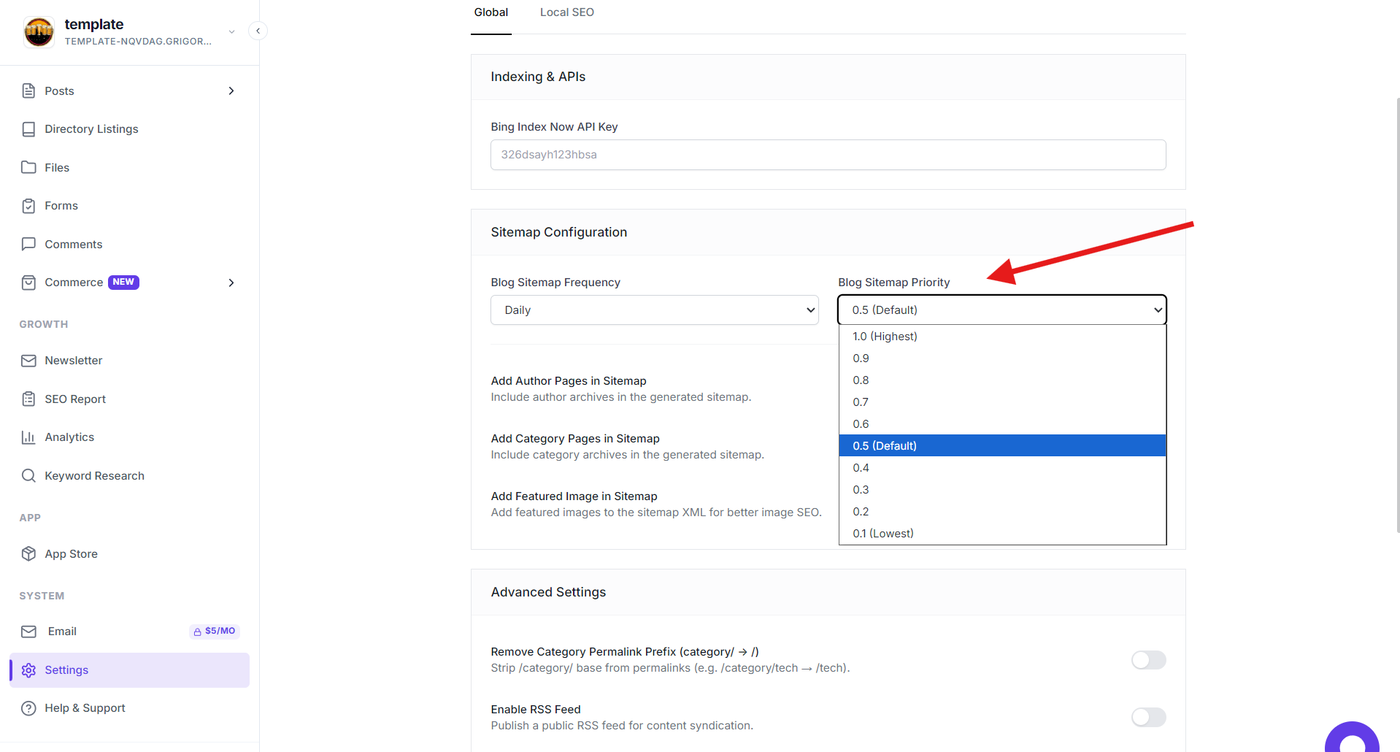
Configure blog sitemap priority to set the priority level for your blog pages in the sitemap structure.
Setting Up Bing IndexNow Integration
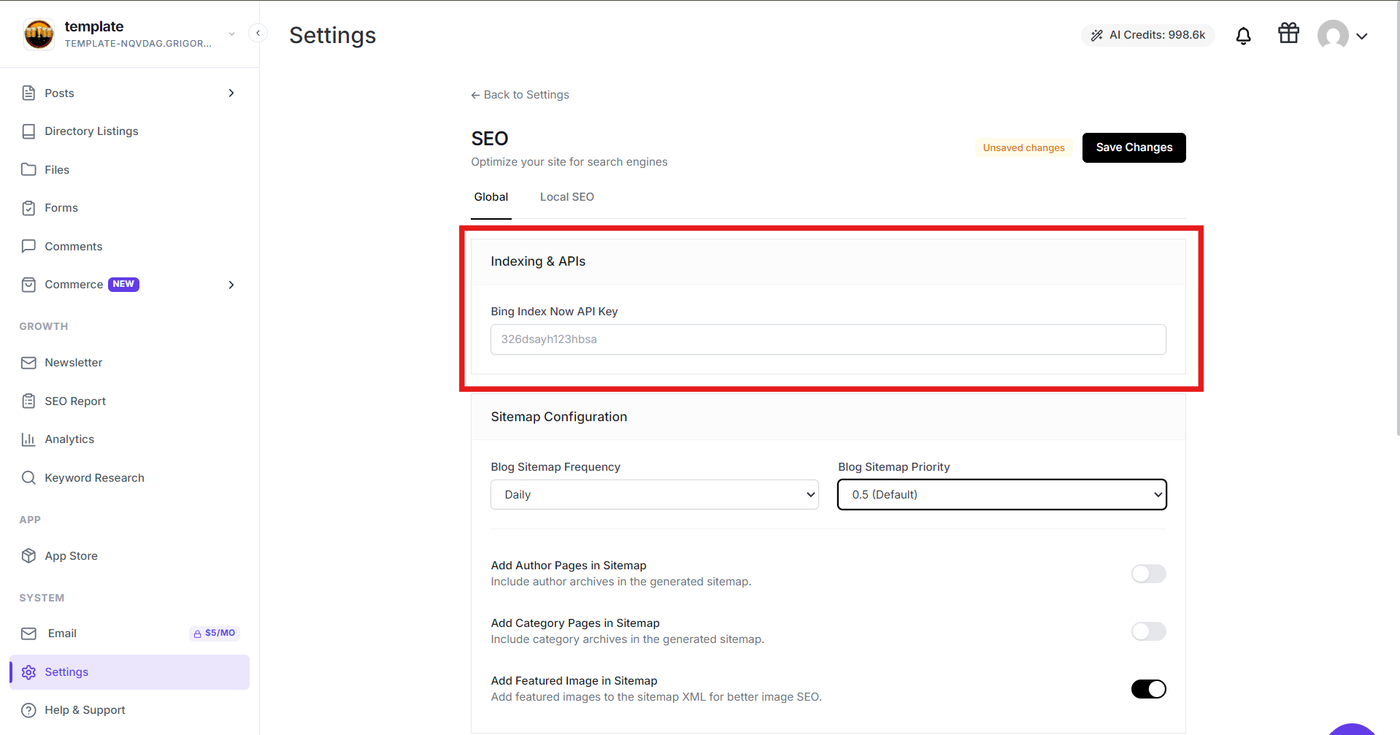
Add your Bing IndexNow API key to automatically submit new posts to Bing for instant indexing. Get this API key from Bing Webmaster Tools under the IndexNow section to enable automatic submission of your content to Bing's search index.
URL Structure Optimization
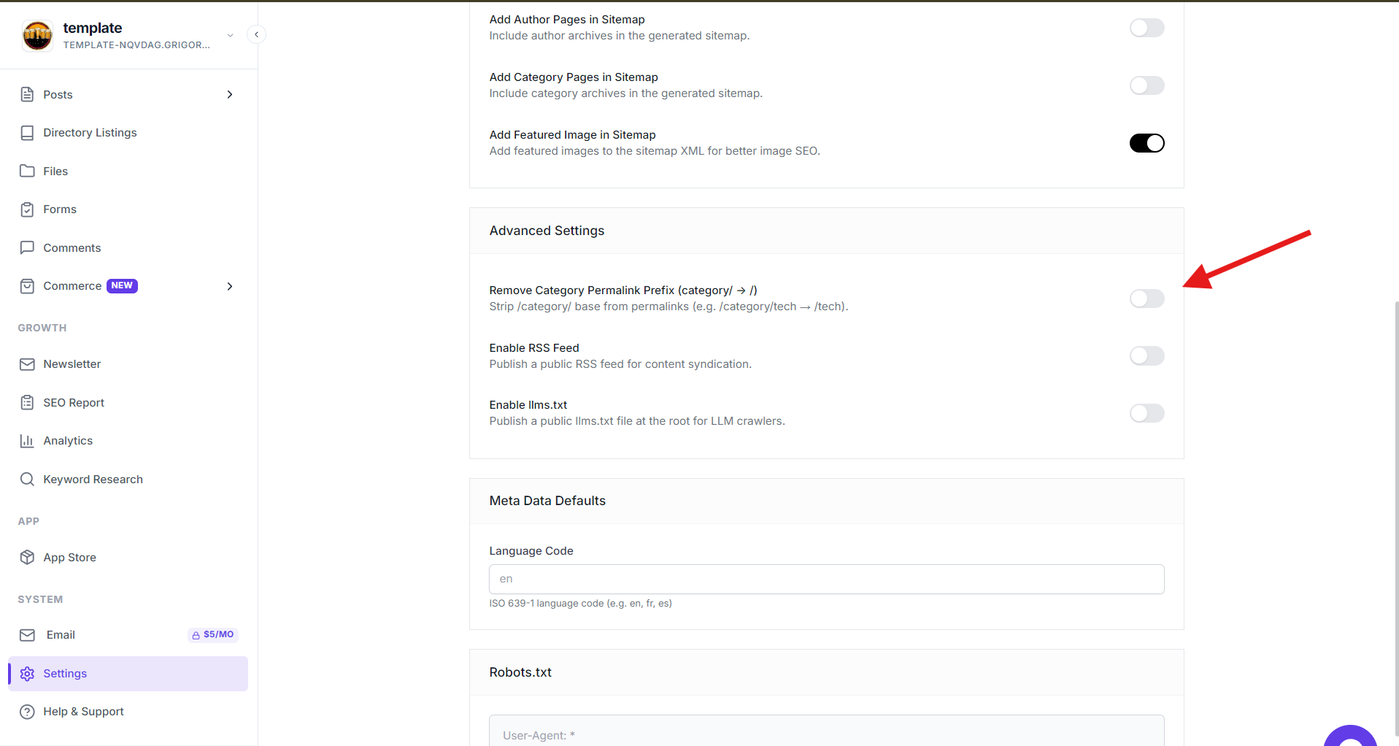
Toggle "Remove Category Permalink Prefix" to remove the word "category" from your URLs, creating cleaner and more SEO-friendly URL structures for your website categories.
Managing Sitemap Inclusions
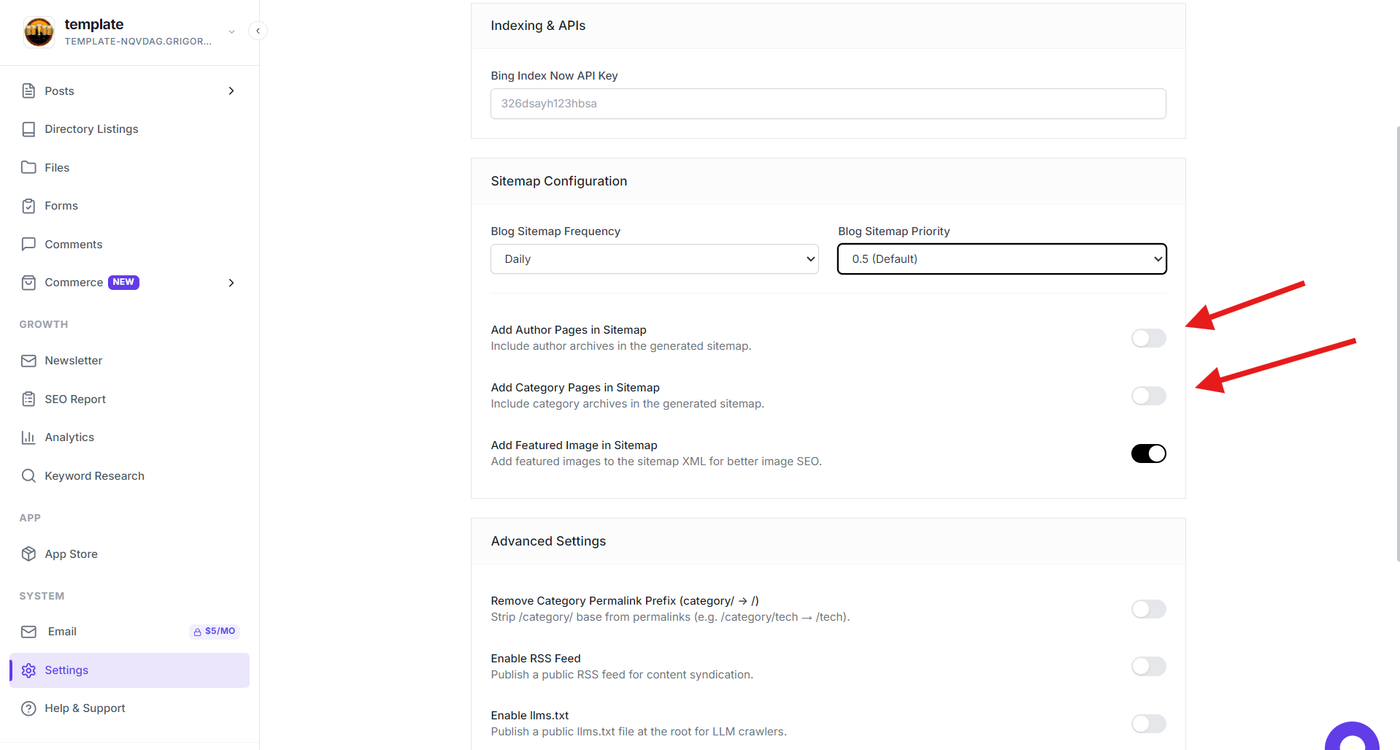
Toggle "Add Author Pages in Sitemap" to include author pages in your sitemap if you have multiple content creators. Toggle "Add Category Pages in Sitemap" to include category pages in your sitemap for better organization and crawling of your content structure.
Configure Additional SEO Settings
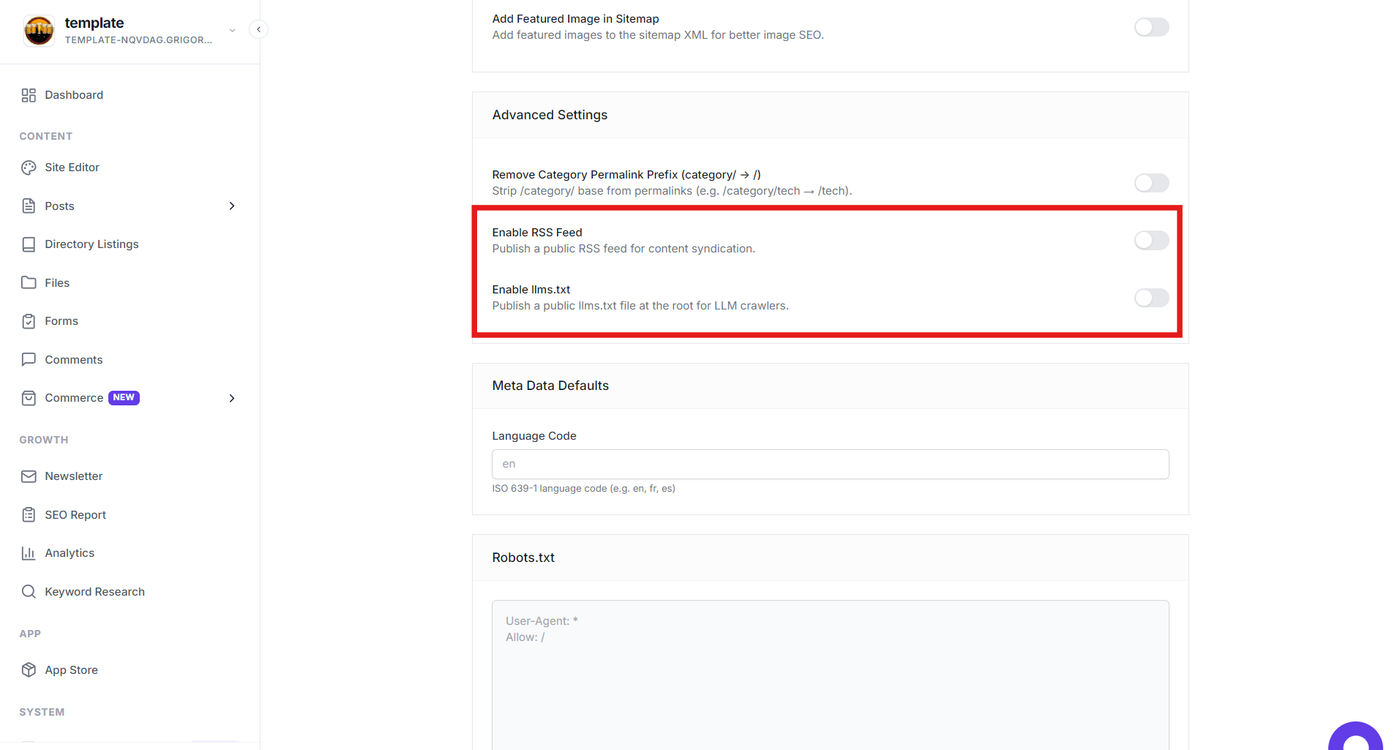
Step: Enable RSS Feed and llms.txt
Under Advanced Settings, enable the options you want to use for your website.
Enable RSS Feed – Publishes a public RSS feed for your site's content.
Enable llms.txt – Publishes an
llms.txtfile at the root of your website for LLM crawlers.
Enable these options according to your site's requirements.
Configure Local SEO
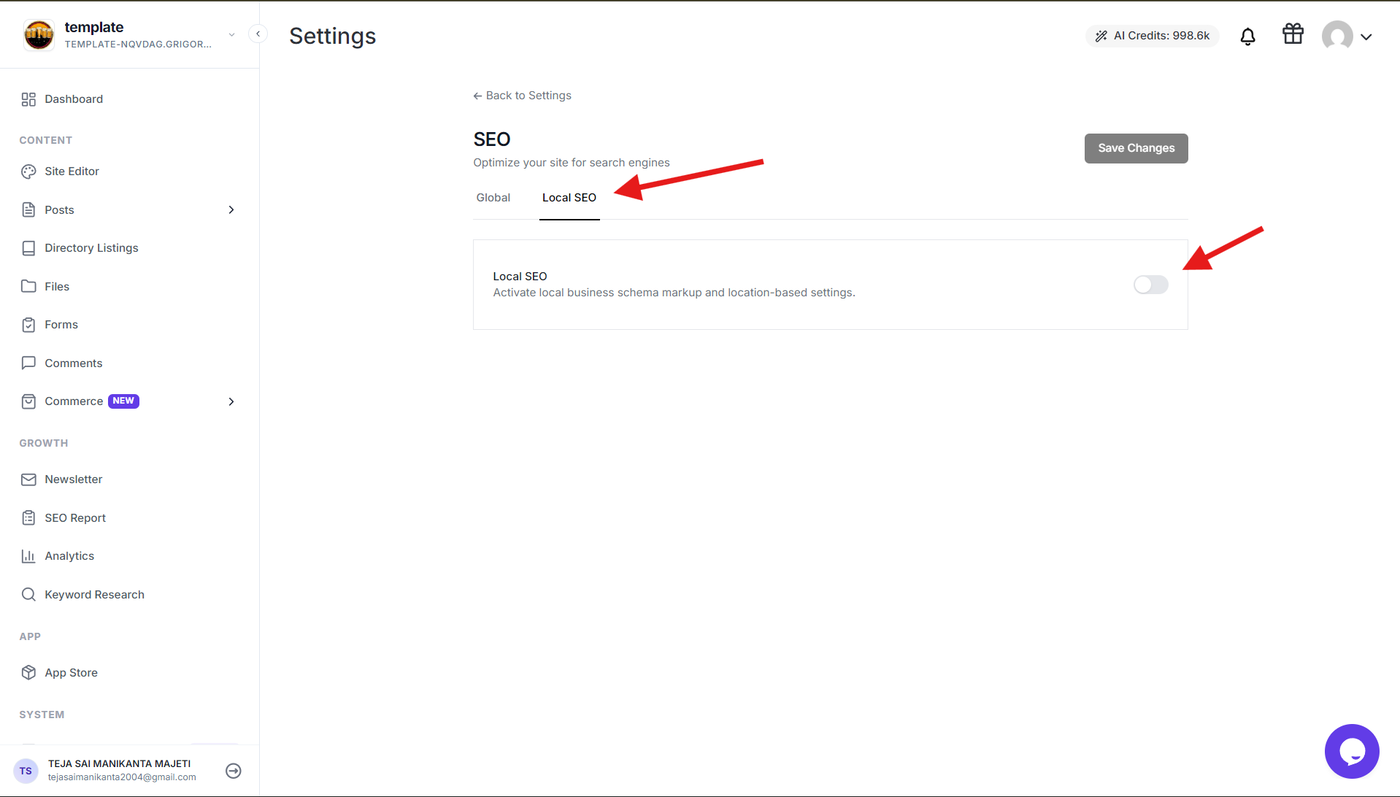
Step: Enable Local SEO
Open the Local SEO tab and enable the Local SEO toggle.
This activates local business schema markup and location-based SEO settings for your website.
Configure Business Information
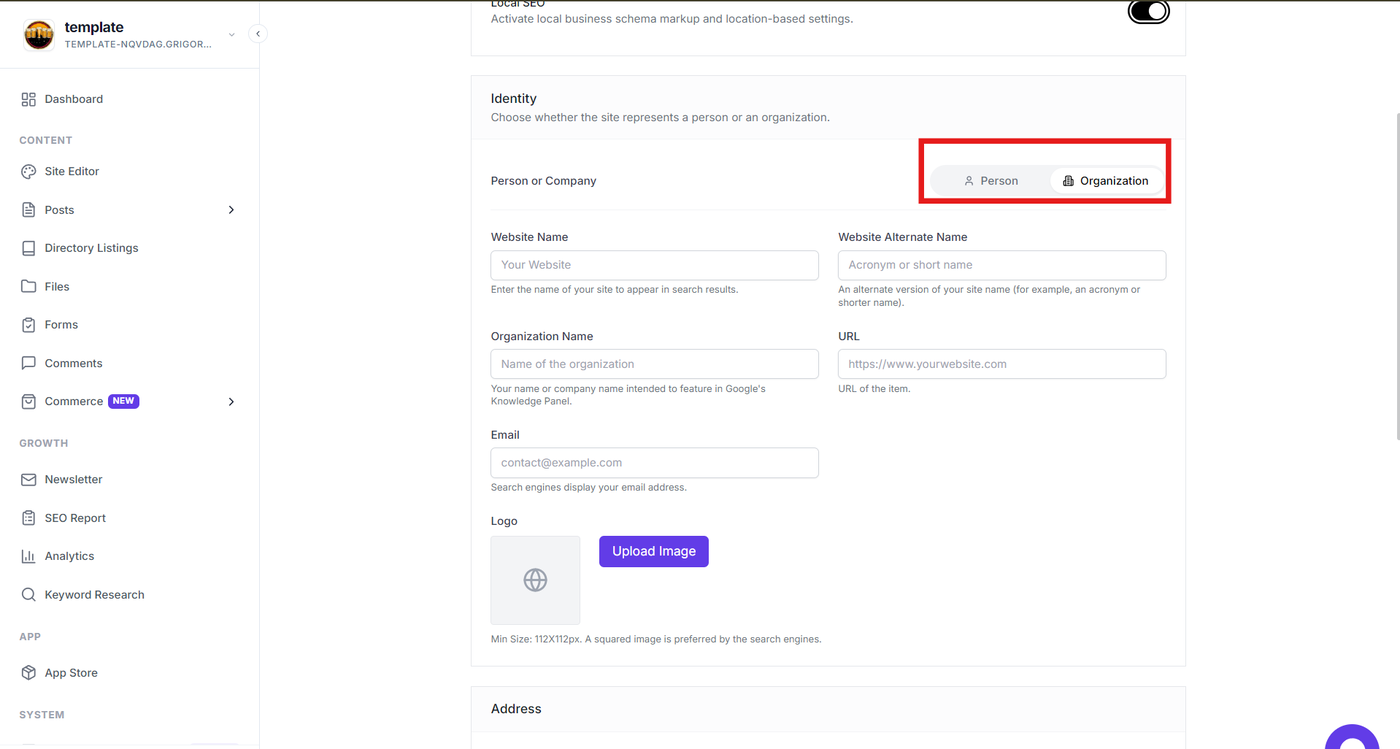
Step: Configure business details
If your website represents a business, configure the Business information under Local SEO.
Provide the important business details, such as:
Business Name
Website URL
Email
Logo
Business Address
Business Type
Phone Number
Opening Hours
Fill in the remaining fields with the relevant information about your business.
Configure Personal Information
Step: Configure personal information
If the website represents an individual rather than a business or organization, configure the Person information under Local SEO.
Provide the relevant details, such as:
Website Name
Website URL
Email
Logo
Address
Phone Number
Fill in the remaining fields with the appropriate personal information.
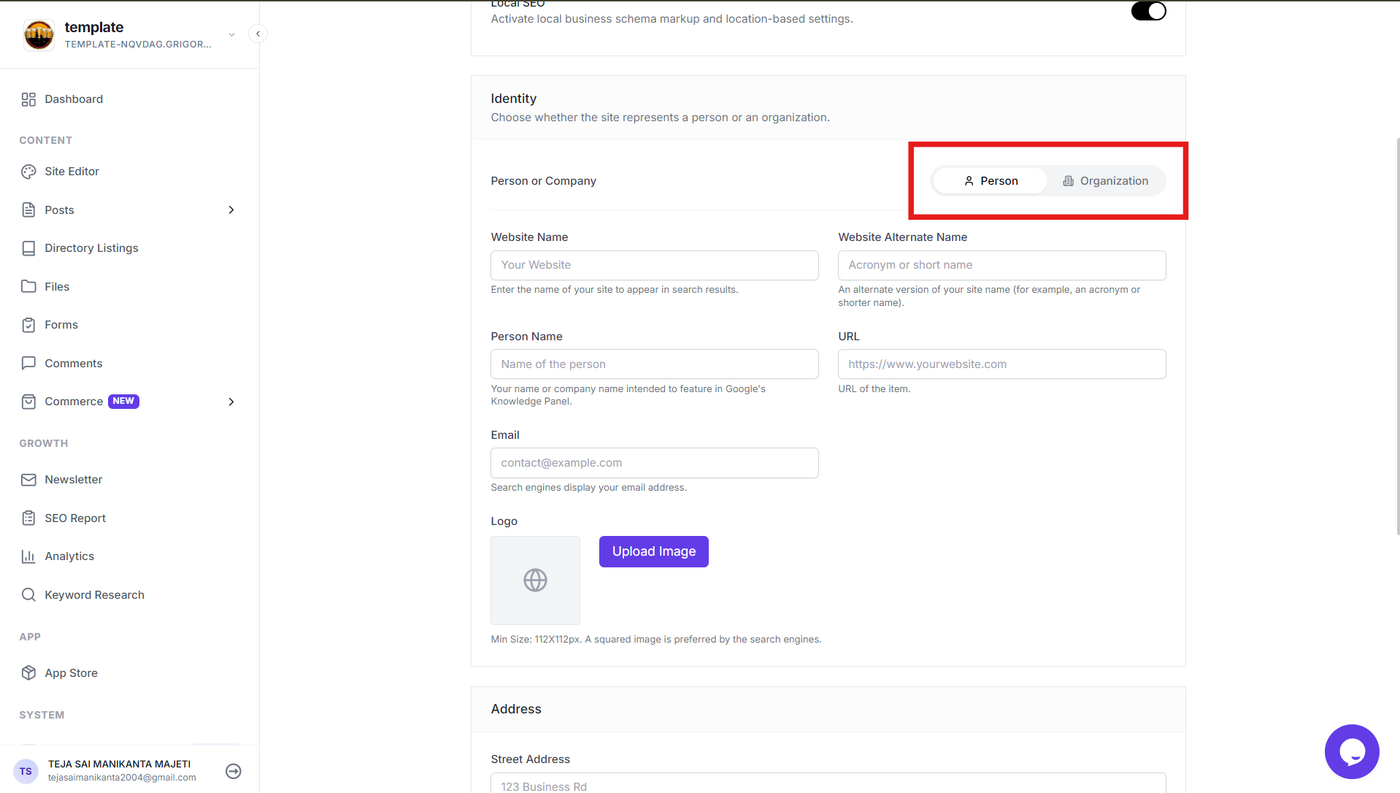
Note: Choose the option that best represents your website. If both business and personal information are relevant to your website, you can enable and configure both options with the appropriate details.
After configuring the required SEO and Local SEO settings, continue with the existing Save Changes step.
Final Steps
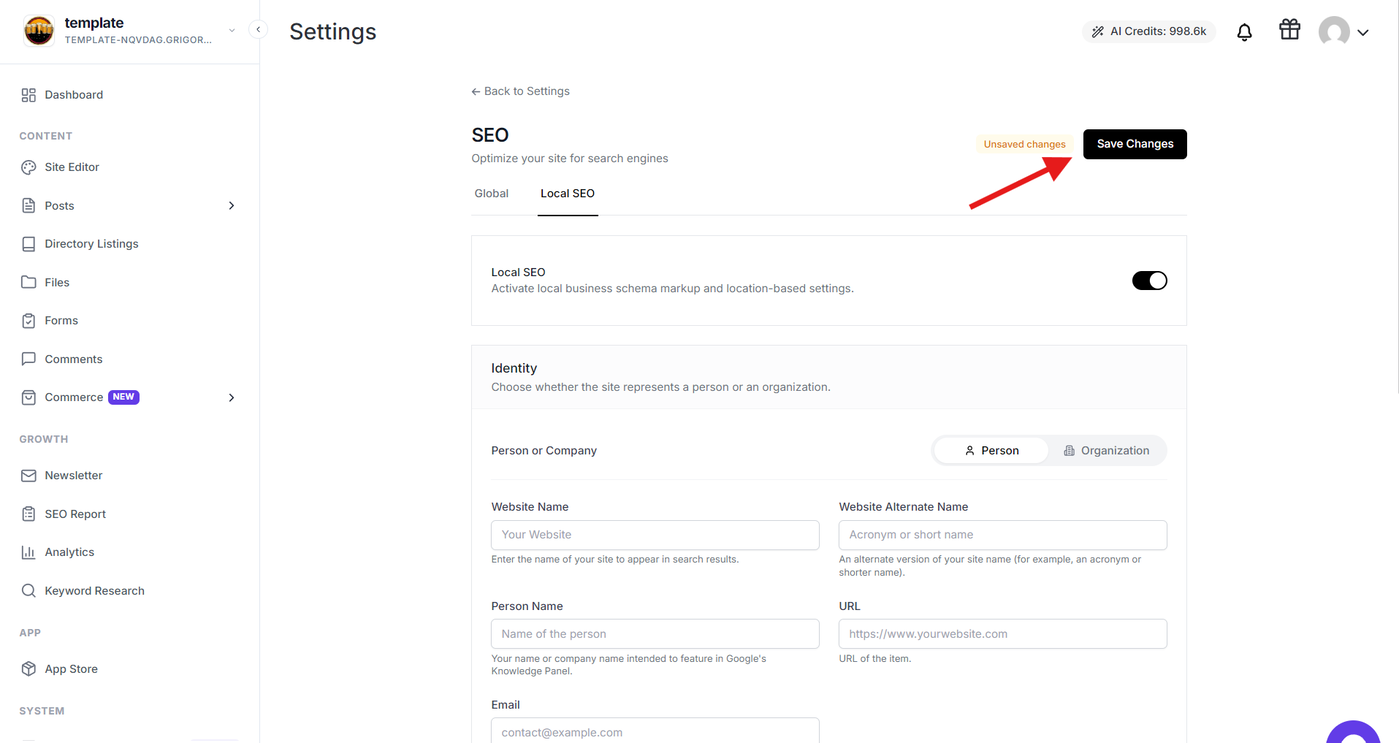
Click Save Changes to apply all changes and activate your SEO configuration. These settings will optimize your site's search engine performance and indexing behavior, helping search engines better understand and rank your content.
Pro Tip: Regularly review and update your sitemap settings as your content grows to ensure optimal search engine visibility and crawling efficiency.