
Once your custom domain is connected, you can start customizing the look and feel of your Grigora White Label platform to align with your brand identity. Follow these steps to rebrand the platform:
Step 1: Access the White Label Styling Settings
-
Log in to your Grigora dashboard.
-
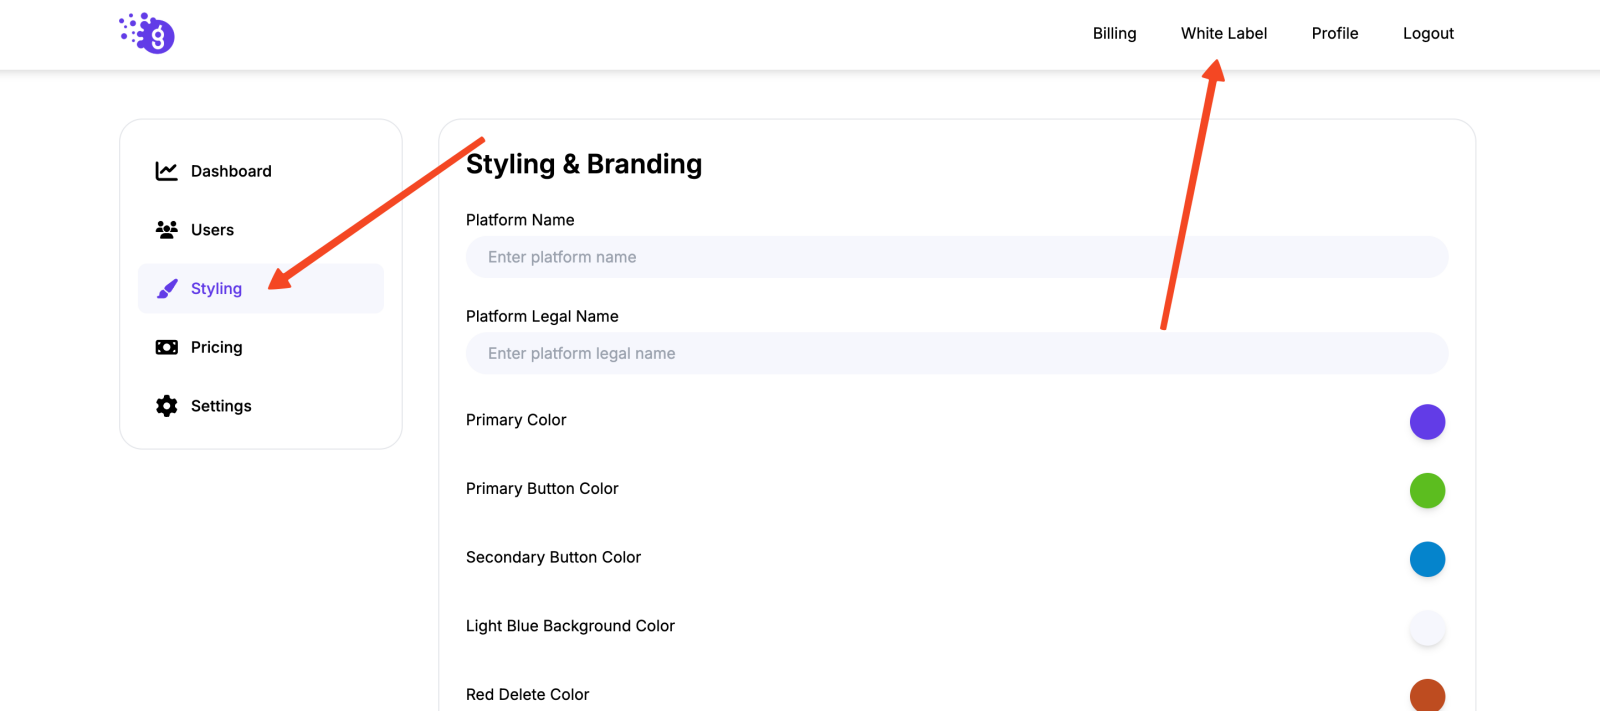
In the top navigation bar, click on Whitelabel.
-
From the left-hand navigation menu, click on the Styling tab.
Step 2: Update Your Branding Information
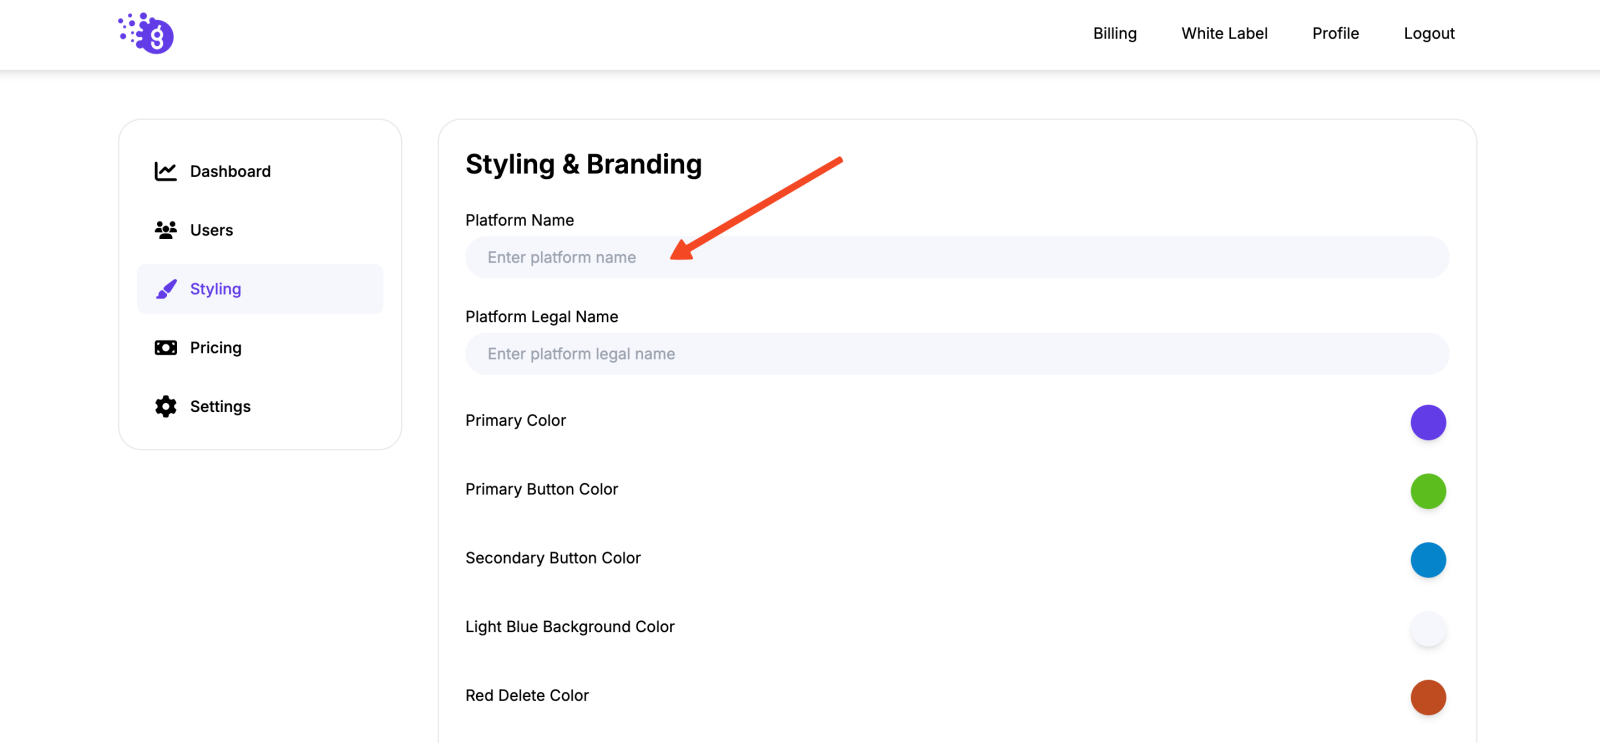
In the styling section, you'll find various fields to replace Grigora's branding with your own. Fill in the following details:
-
Platform Name: The name of your white-labeled platform.
-
Platform Legal Name: The legal name of your company.
-
Primary Color: Your brand's primary color.
-
Primary Button Color: The color for primary action buttons.
-
Secondary Button Color: The color for secondary buttons.
-
Light Blue Background Color: The background color for specific sections (e.g., call-to-action areas).
-
Red Delete Color: The color for delete or warning buttons.
Step 3: Upload Your Brand Assets
-
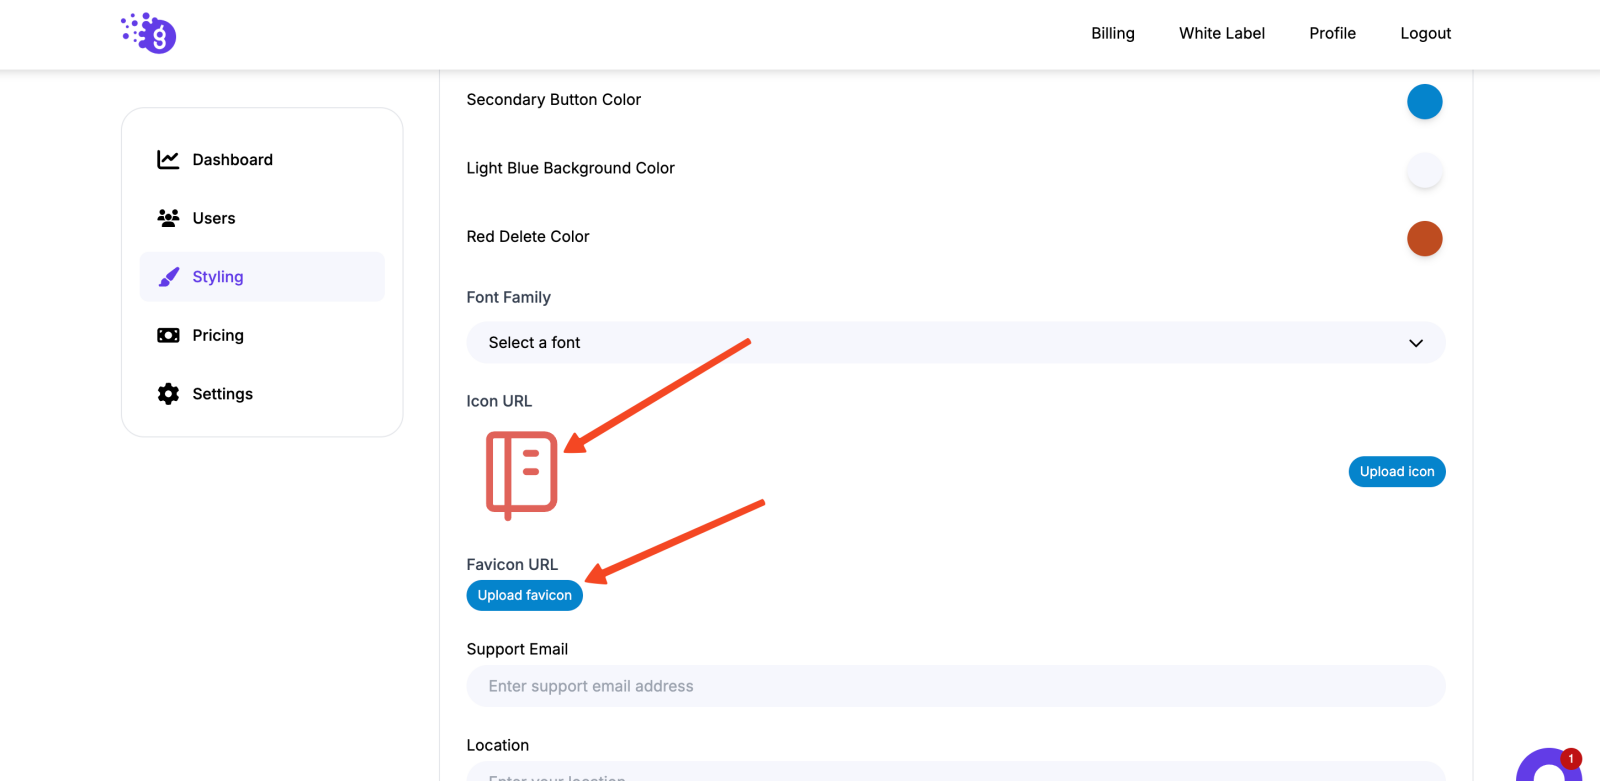
Icon URL: Upload your brand's icon.
-
Favicon URL: Upload your brand's favicon, which will appear in browser tabs.
Step 4: Configure Fonts and Support Information
-
Font Family: Select a font family from the dropdown menu that matches your brand's typography.
-
Support Email: The email address where your customers can reach your support team.
-
Location: Your company's location.
Step 5: Add Social Media and Resource Links
Social Media Links:
-
-
Facebook URL: Your Facebook page link.
-
Twitter URL: Your Twitter profile link.
-
LinkedIn URL: Your LinkedIn profile or company page link.
-
Instagram URL: Your Instagram profile link.
-
Dashboard Slider Links:
-
-
Documentation URL: The URL to your custom documentation.
-
Video Tutorials URL: The URL to your video tutorials.
-
Tips & Tricks URL: The URL to your tips and tricks page.
-
Latest Blog URL: The URL to your latest blog post.
-
Step 6: Add Miscellaneous Links
-
Contact Us URL: The URL to your custom contact page.
-
Privacy Policy URL: The URL to your privacy policy.
Step 7: Save and View Changes
-
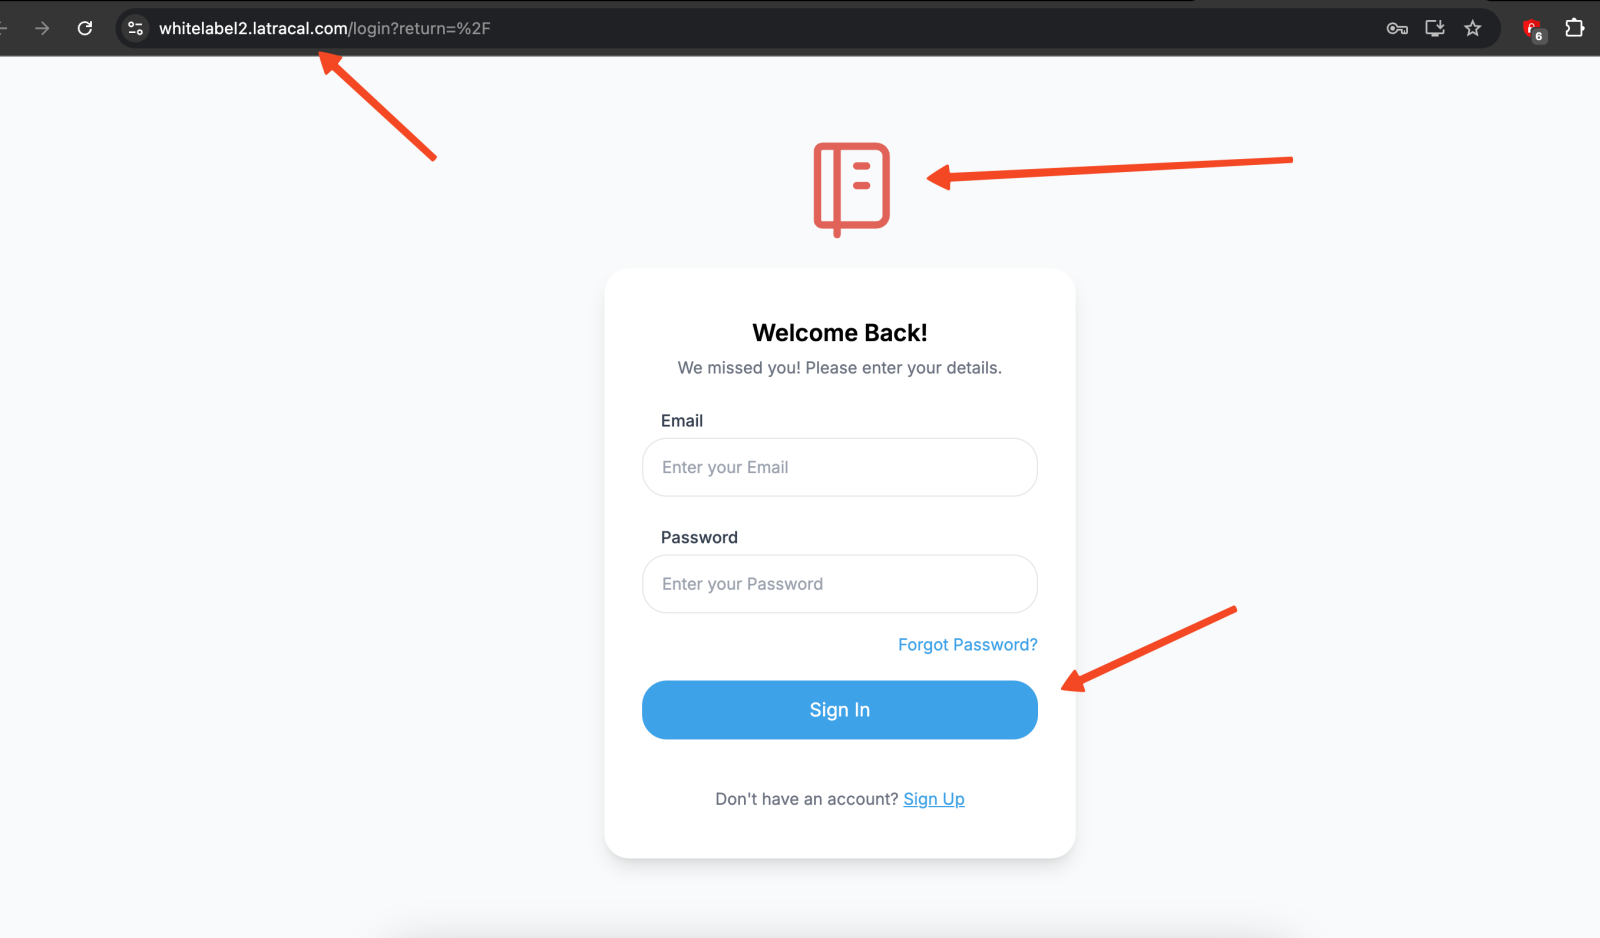
Once you have filled in all the branding details, click the Save button.
-
Refresh your white-labeled platform on your custom domain (
builder.yourwebsite.com). -
The platform will now display your new branding, colors, and links.
By following these steps, you can create a fully branded and customized version of the Grigora platform, providing a unique and professional experience for your customers.