

Once your Stripe payment gateway is connected, you can create customized pricing plans for your white-labeled platform. These plans will be presented to your customers, allowing them to sign up and pay for your services.
Step 1: Access the White Label Pricing Settings

-
Log in to your Grigora dashboard.
-
In the top navigation bar, click on Whitelabel.
-
From the left-hand navigation menu, click on the Pricing tab.
Step 2: Add a New Plan
-
Click on the Add Plan button to begin creating a new pricing plan.
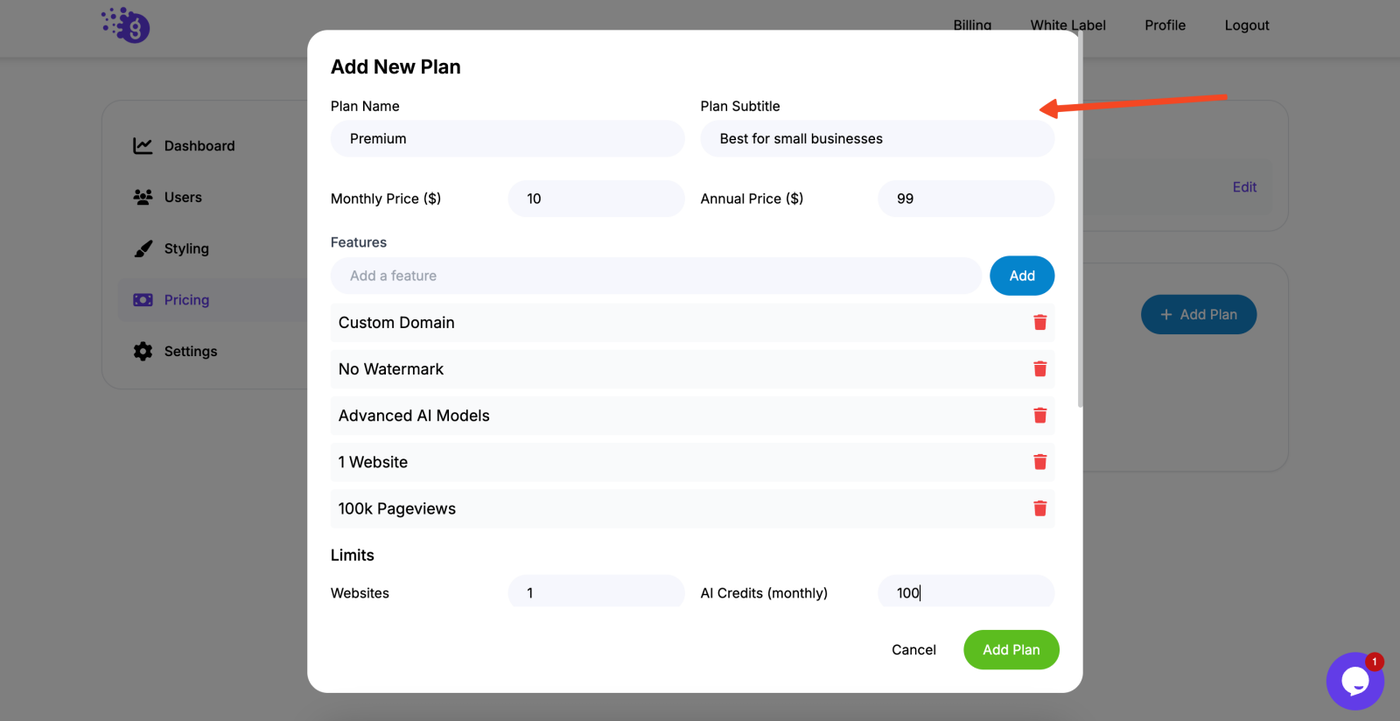
Step 3: Define Your Plan Information
Fill in the following details for your new plan:
-
Plan Name: A clear and descriptive name for your plan (e.g., "Basic," "Pro," "Business").
-
Plan Subtitle: A short, engaging subtitle to describe the plan's main value.
-
Monthly Price ($): The price of the plan on a monthly basis.
-
Annual Price ($): The price of the plan on an annual basis.
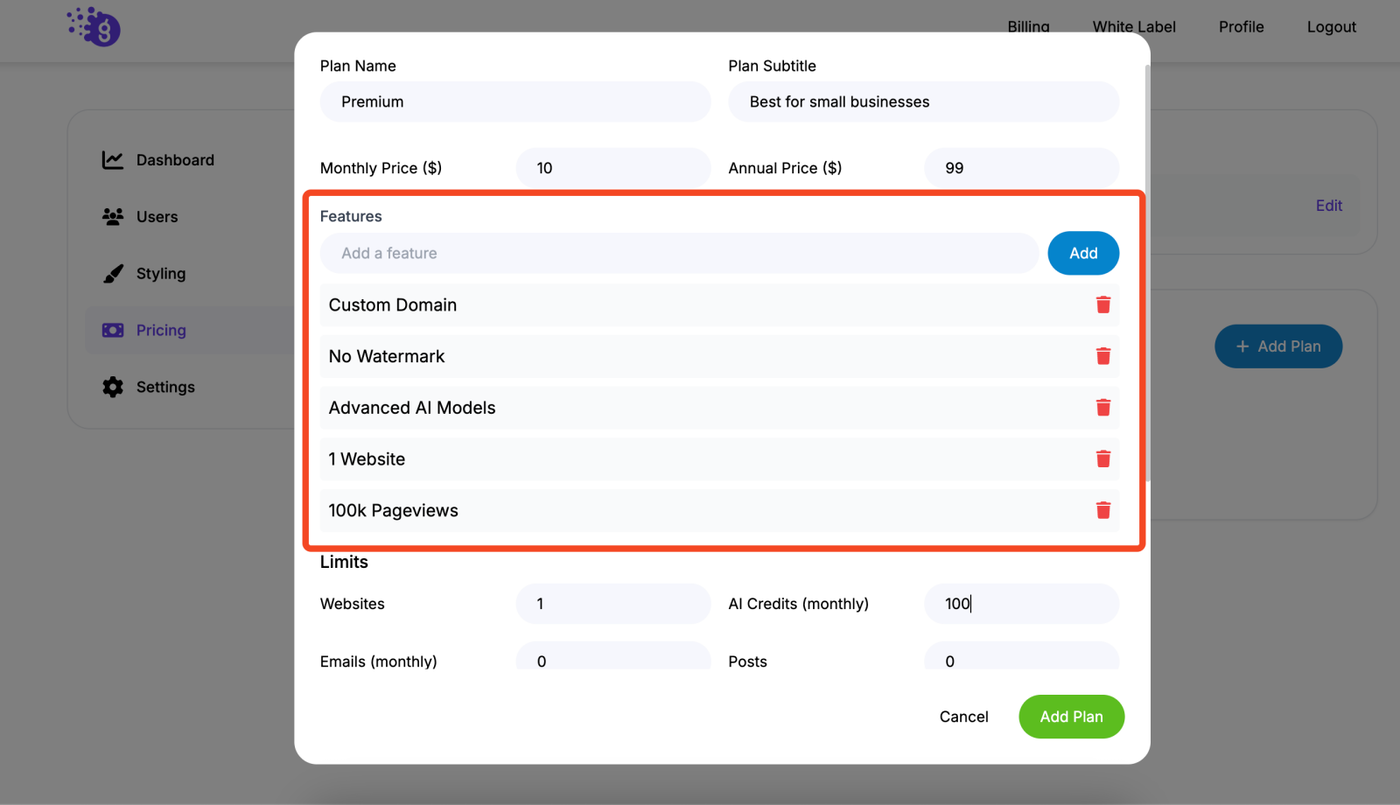
Step 4: Configure Plan Features and Limits
You can customize the features and set specific limits for each plan to match your business model.
Features:
-
-
Click Add to list key selling points for the plan. These will be displayed as plain text (e.g., "Unlimited Subscribers," "24/7 Priority Support").
-
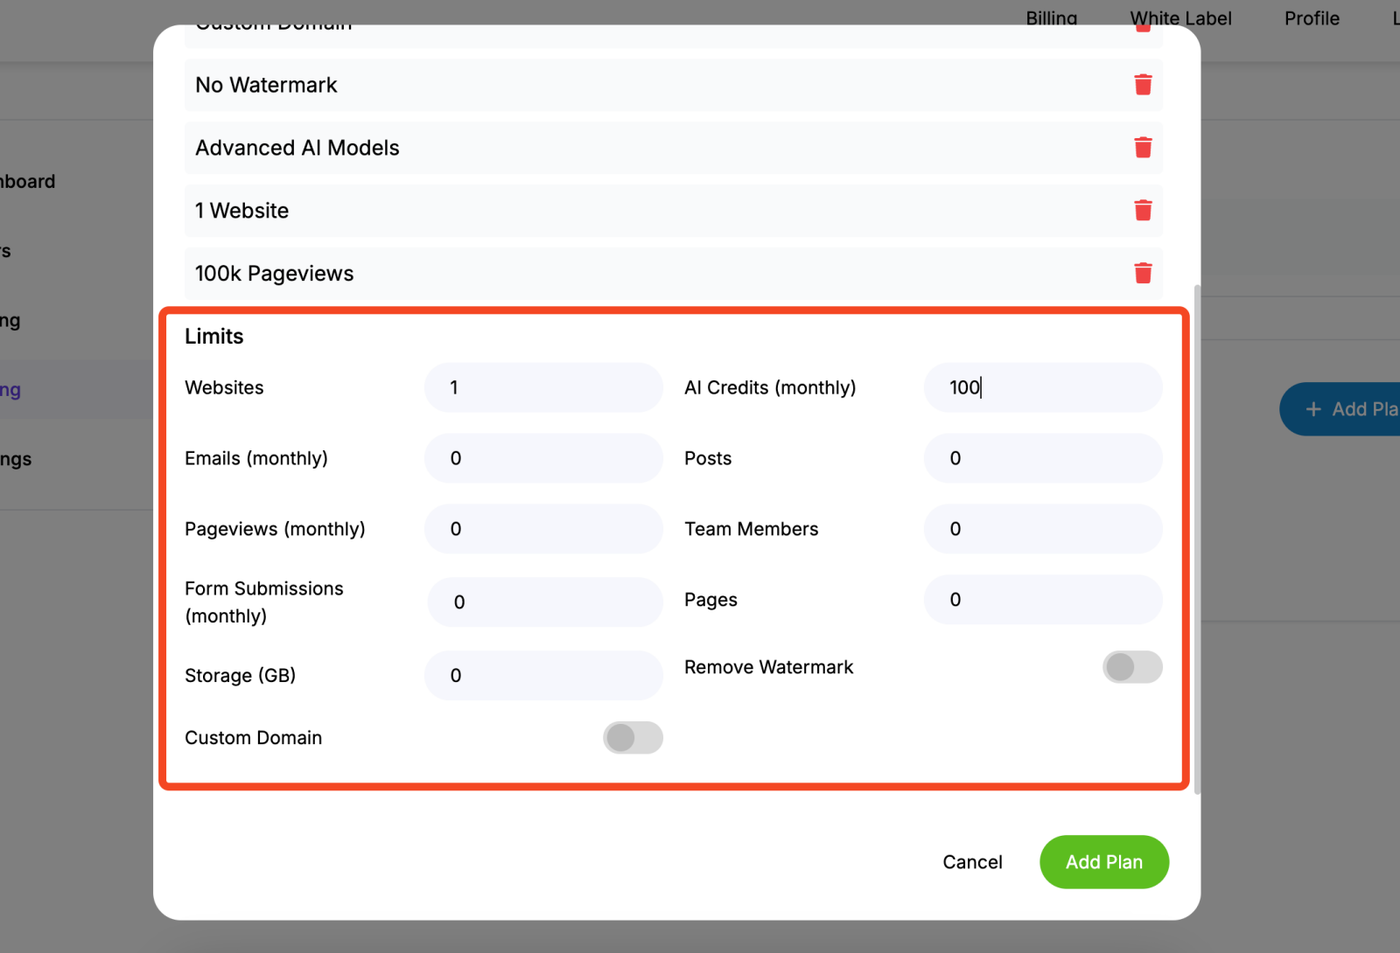
Limits:
-
-
Websites: Set the number of websites a customer can create.
-
AI Credits (monthly): The number of AI credits allocated per month.
-
Emails (monthly): The number of emails that can be sent per month.
-
Posts: The total number of blog posts allowed.
-
Pageviews (monthly): The monthly pageview limit.
-
Team Members: The number of team members a customer can invite.
-
Form Submissions (monthly): The number of form submissions allowed per month.
-
Pages: The total number of pages a customer can create.
-
Storage (GB): The total storage in gigabytes.
-
Remove Watermark: Use the toggle to enable or disable the Grigora watermark.
-
Custom Domain: Use the toggle to enable or disable the ability to connect a custom domain.
-
Step 5: Save and Activate
-
Once you have filled in all the plan details, click Save.
-
This action will automatically create the corresponding pricing plan in your linked Stripe dashboard.
Important Note: To maintain transparency with your customers, the pricing of a plan cannot be changed after it has been created. If you need to adjust pricing, you can simply archive the existing plan and create a new one with the updated pricing and features.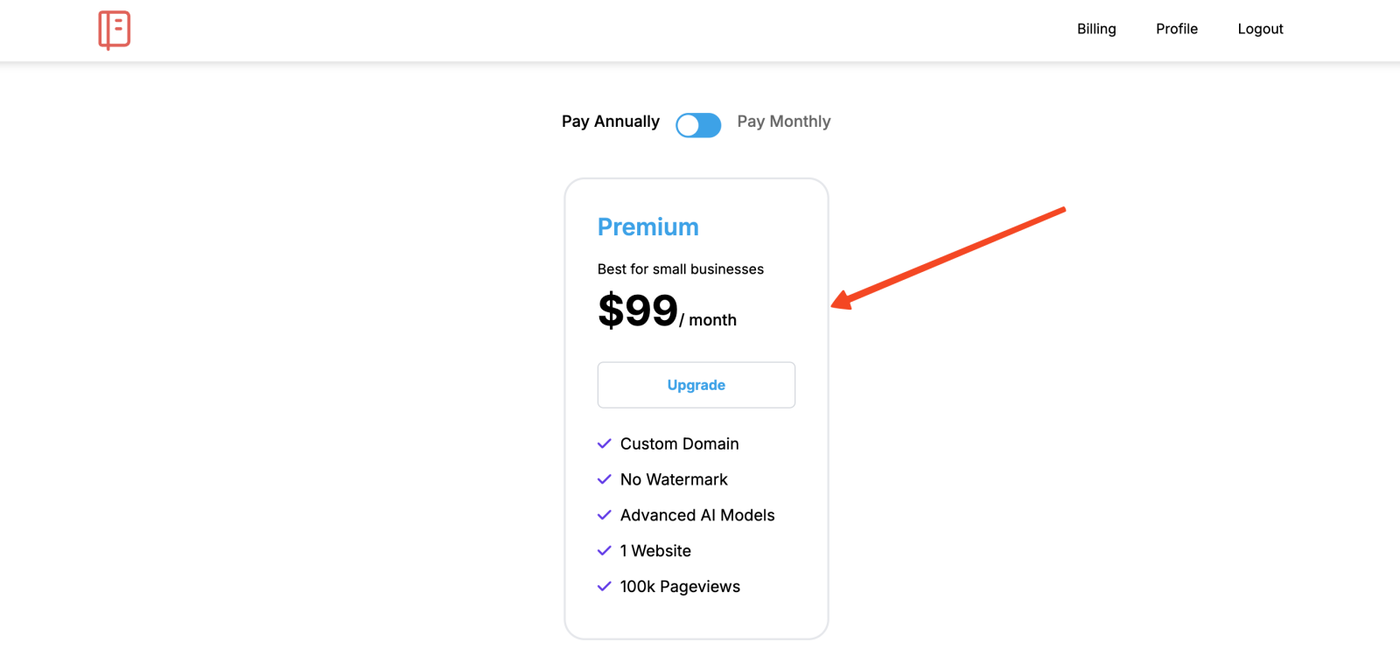
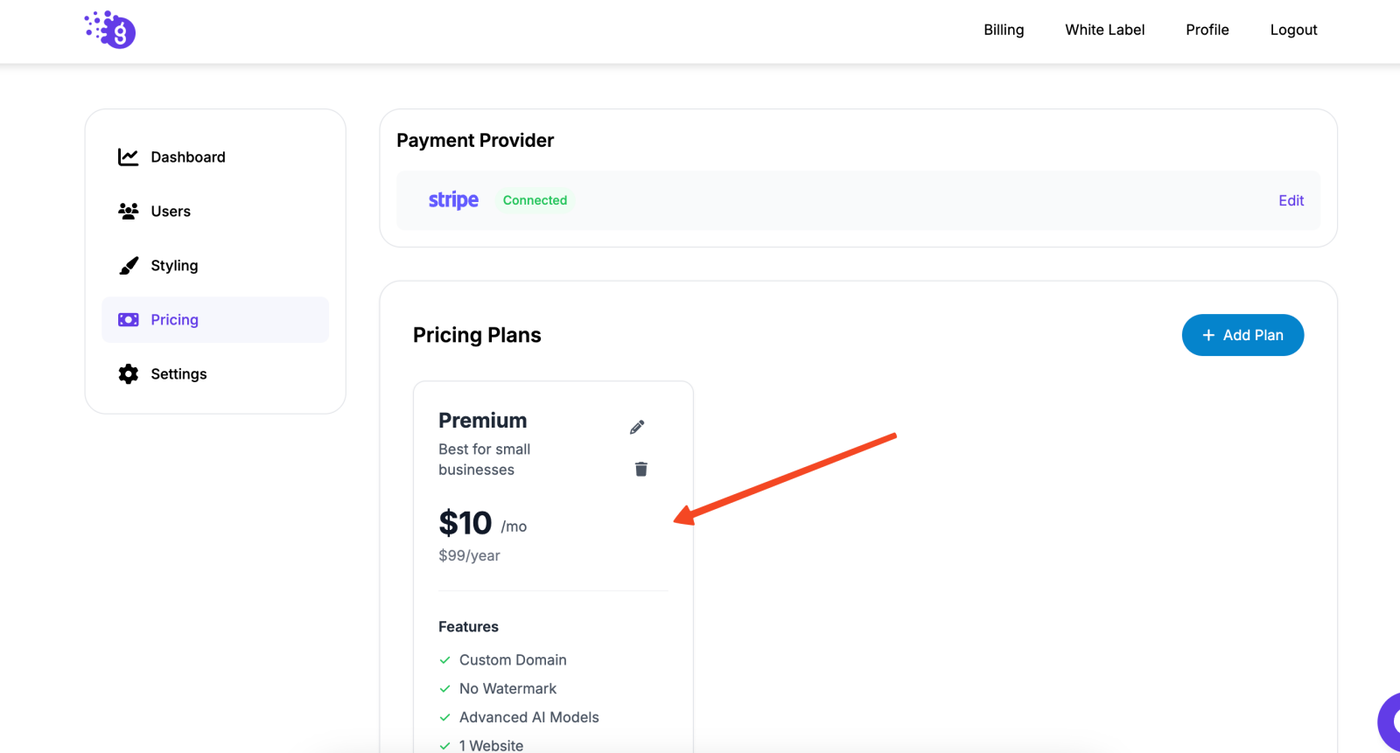
This is how the pricing plan will look like for customer using your white label platform.
After saving, your new plan will be live on your white-labeled platform, and customers can begin subscribing. You can add multiple plans to offer a tiered pricing structure that suits different customer needs.