

When refining your website with the AI editor, you do not need to rely only on written descriptions. Grigora gives you two direct visual tools in the prompt composer: Select an element to edit to point precisely at any button, heading, or card on the canvas, and Annotate the page to draw, box, and visually highlight edits directly over a snapshot of your site.
Option 1: Select an Element to Edit
Element selection lets you target a specific item on your live preview—such as a hero headline, a contact button, or a pricing card—so your next prompt applies specifically to that item.
1. Activating Element Selection Mode
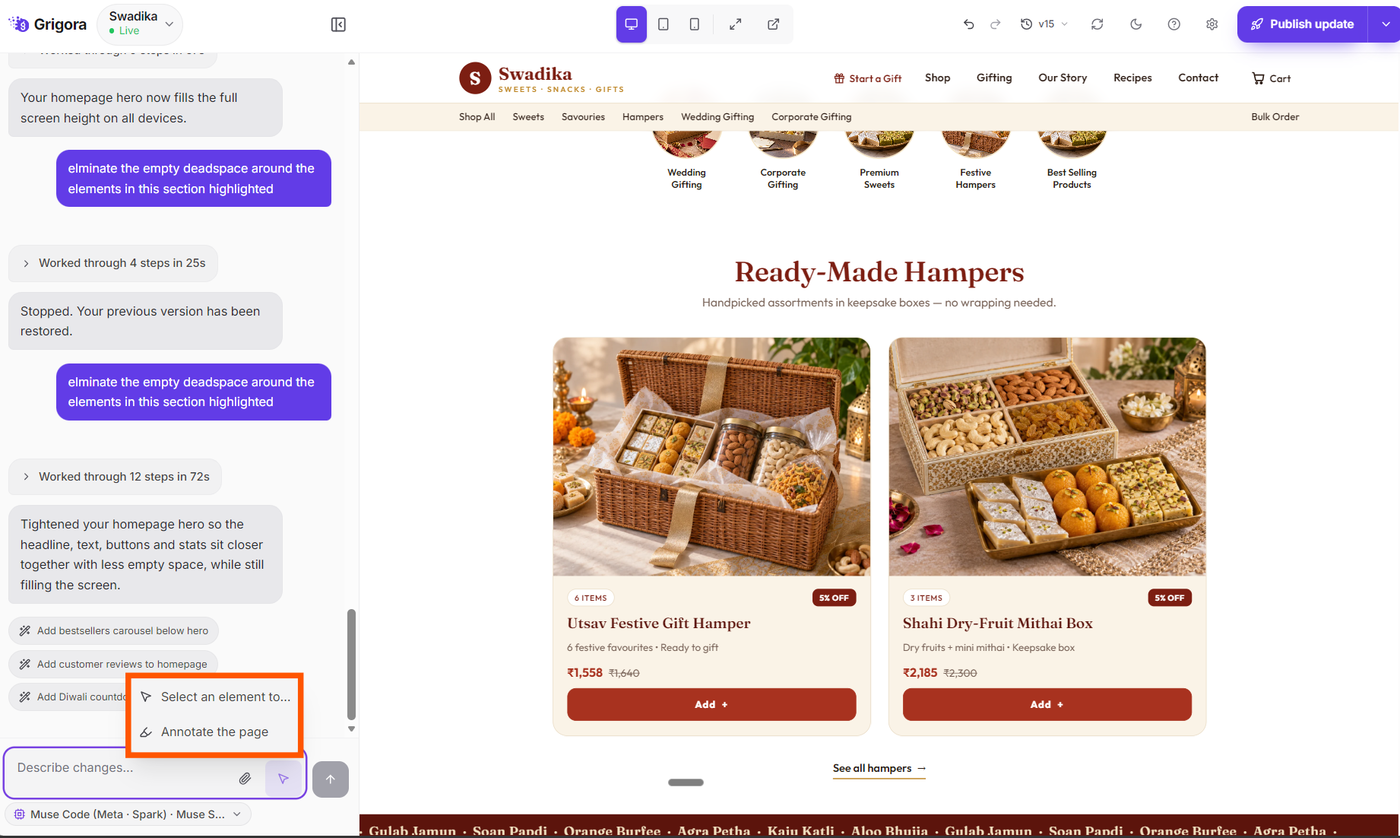
In the AI chat composer at the bottom of the screen, locate the Point at the site button (represented by a mouse cursor icon).
Click the button to open the tools menu, then click Select an element to edit. (If only selection is available, clicking the cursor button turns selection mode on immediately).
The cursor button highlights in purple to indicate that selection mode is active.
2. Highlighting Elements on the Canvas
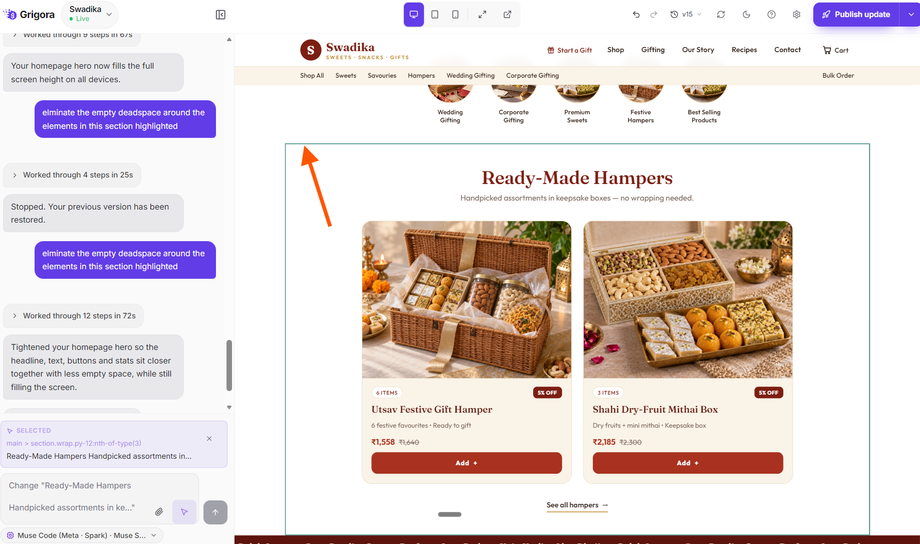
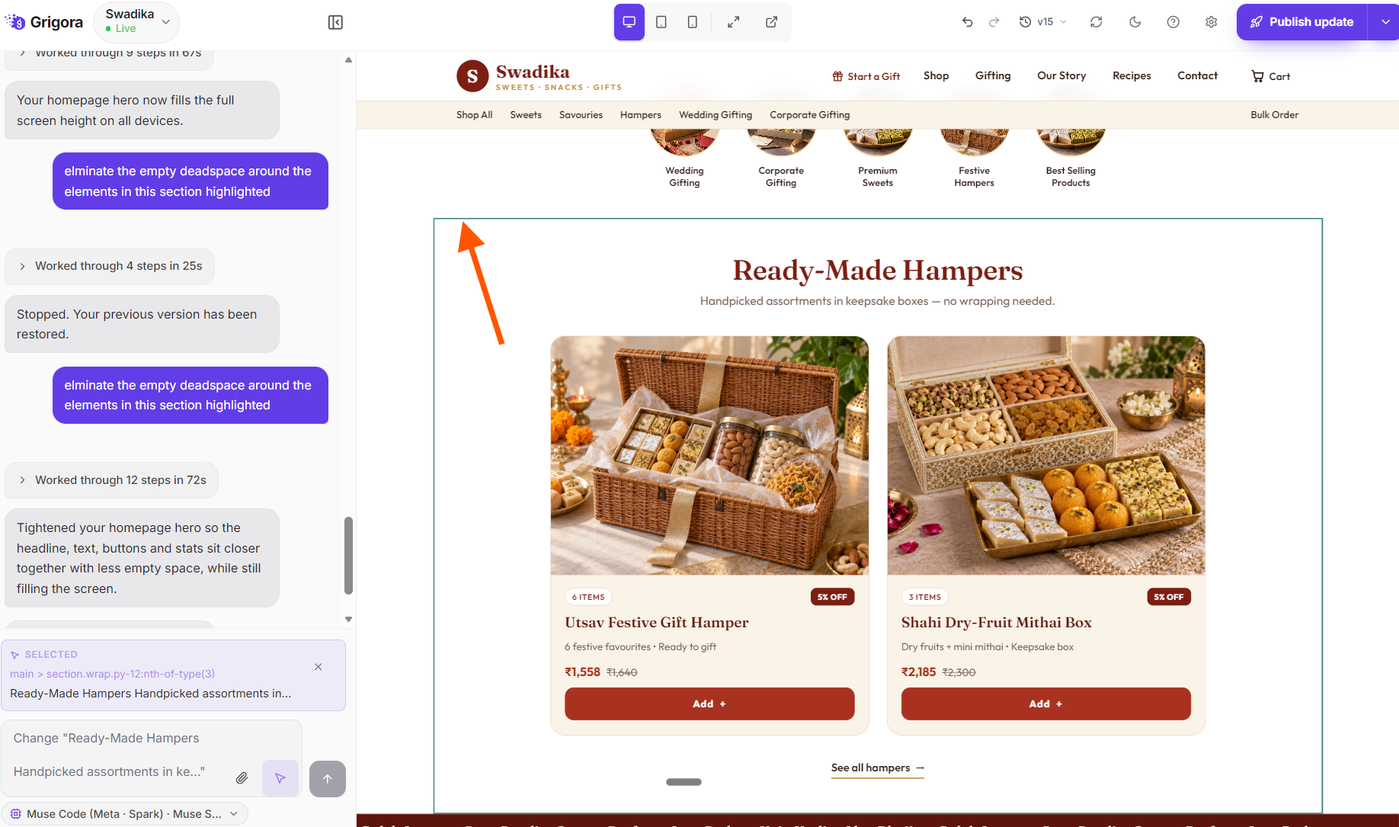
Move your mouse across the live website canvas. As your pointer hovers over headings, paragraphs, buttons, cards, or images, each element is outlined with a crisp purple highlight ring.
This visual halo confirms exactly which boundary and section the AI will focus on before you click.
3. Selecting and Panning the Element
Click on the highlighted element you wish to modify.
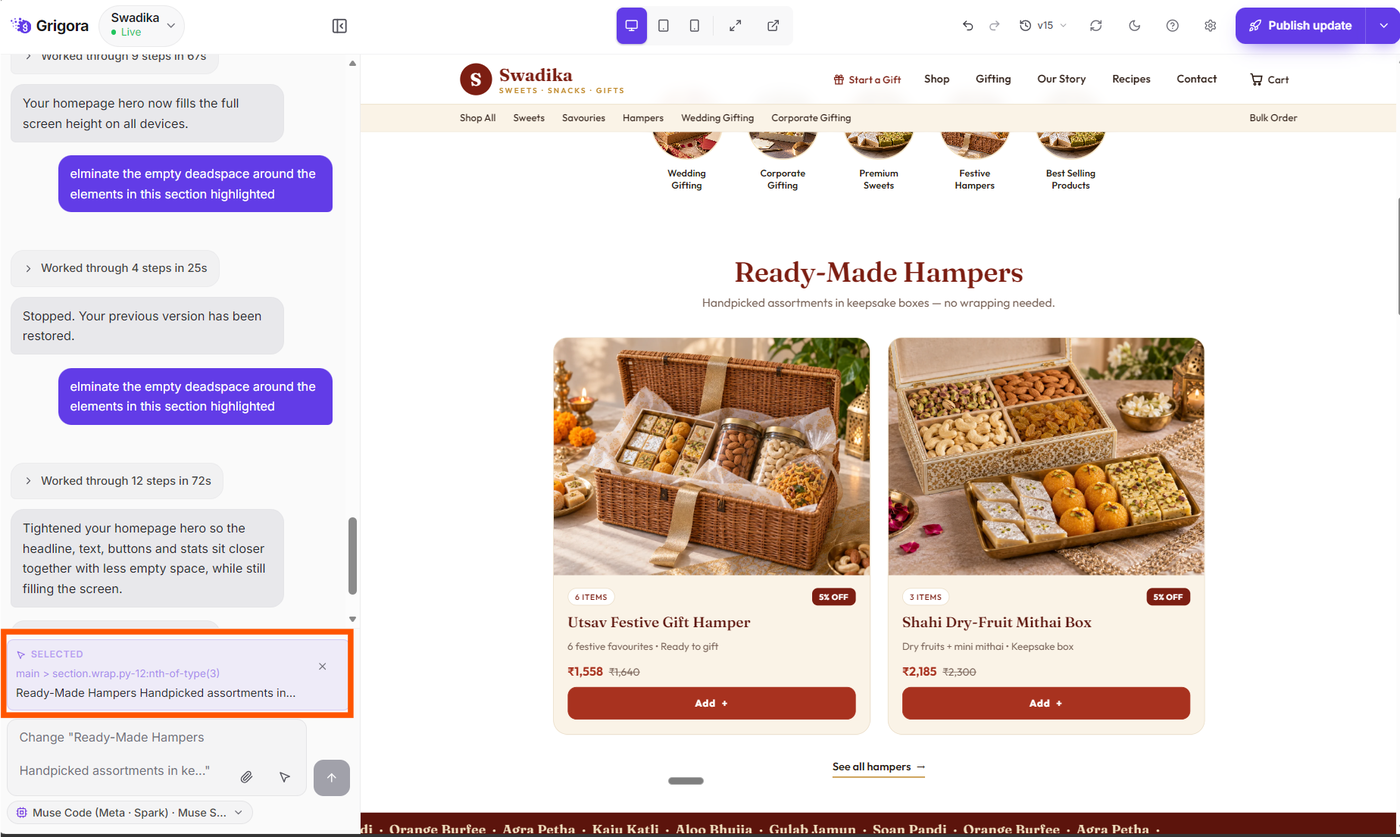
Immediately, a Selected Element badge appears directly above the prompt input in the chat composer. The badge displays:
The element category or tag (e.g.,
Selected: buttonor section selector).A text snippet showing the current content of that element.
The chat input placeholder automatically updates to suggest a targeted instruction (such as Change "...").
4. Prompting Your Targeted Edit
Type your revision into the prompt box (for example, "Make this button rounded with a glowing green accent and change the text to 'Join Free'") and submit your prompt.
The AI receives the exact element reference along with your prompt, updating only that targeted item without altering unrelated sections.
To cancel or deselect an element before sending, simply click the ✕ (Clear) button on the element badge, or click Stop selecting in the tool menu.
Option 2: Annotate the Page with Visual Markings
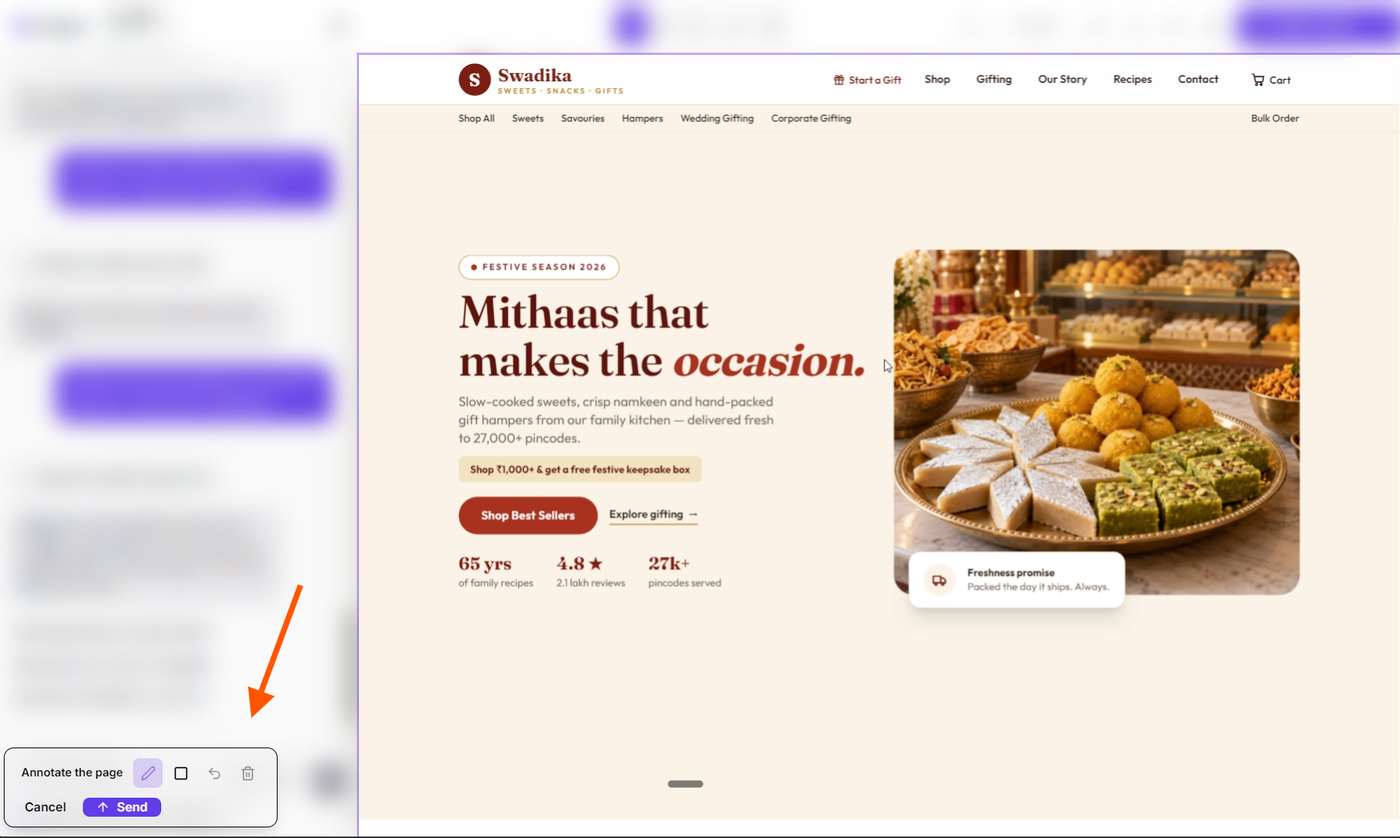
When you want to convey layout adjustments, move sections, or circle multiple areas simultaneously, visual annotation gives you a complete markup canvas over a fresh snapshot of your page.
1. Opening the Annotation Canvas
Click the Point at the site cursor button in the prompt composer.
From the flyout menu, click Annotate the page (represented by a highlighter icon).
Grigora takes an instant, high-resolution snapshot of your current preview (matching your active desktop, tablet, or mobile viewport). A focused markup canvas opens across your screen with a dimmed background.
2. Using the Annotation Toolbar
A floating controls toolbar appears at the bottom-left of the canvas with the following tools:
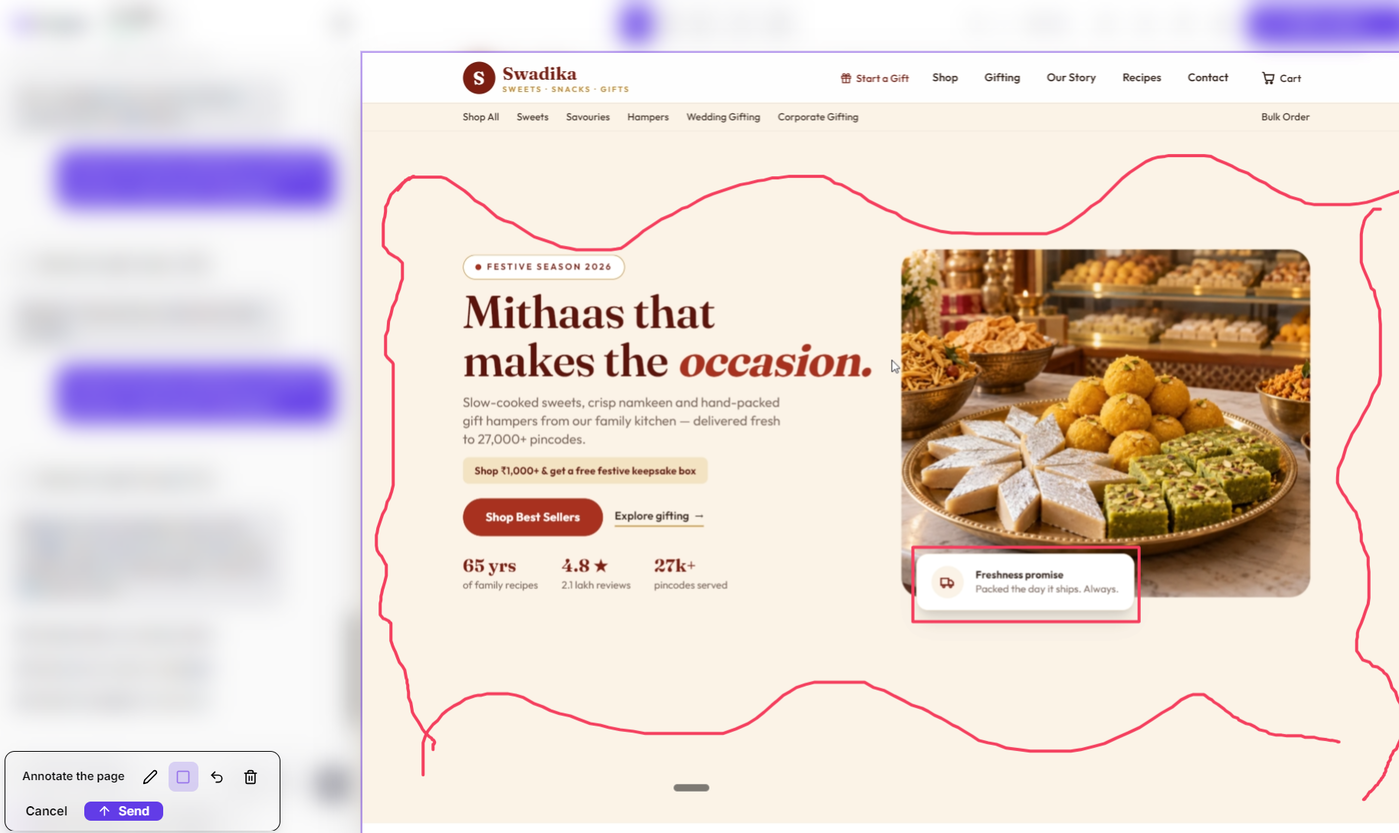
Draw (Pen icon): Freehand drawing tool with bright rose ink. Click and drag to circle words, sketch arrows, or draw emphasis lines anywhere on the page.
Box (Square icon): Rectangle tool. Click and drag across the preview to draw neat, sharp bounding boxes around entire sections, images, or cards.
Undo (Undo icon): Removes your most recent stroke or box one step at a time.
Clear (Trash icon): Wipes all annotations from the snapshot so you can start fresh.
3. Submitting the Annotated Snapshot to the AI
Once you finish marking the areas you want adjusted, click the primary Send button (represented by an arrow-up icon) in the bottom toolbar.
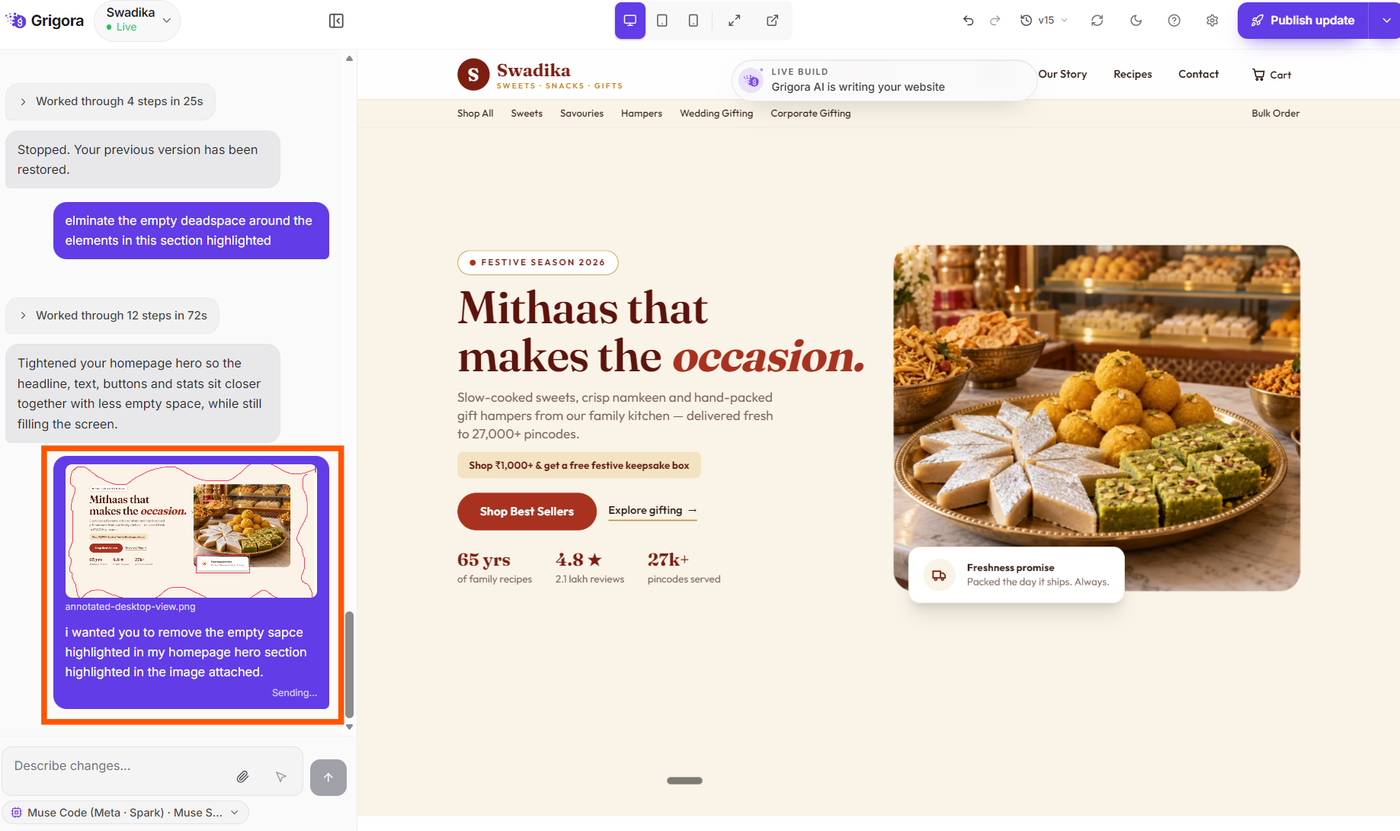
The annotated snapshot is automatically attached to your prompt input in the chat composer as an image attachment.
Add your accompanying written instruction (for example: "Swap the boxed testimonial section with the newsletter form, and restyle the circled button to match the brand color").
Click Send in the chat. The AI analyzes both your visual drawing and your written prompt to execute the exact redesign.
If you decide not to proceed with the annotation, click Cancel or press Escape to return to the editor without attaching anything.
When to Use Highlighting vs. Annotating
Workflow Goal | Recommended Tool | Why |
|---|---|---|
Rewriting a headline, paragraph, or button label | Select an element to edit | Directly locks the AI prompt onto the exact text container. |
Replacing a single image or changing a specific card background | Select an element to edit | Pins the exact media block for localized AI restyling. |
Rearranging sections or adjusting padding/layout across blocks | Annotate the page | Allows you to draw boxes and arrows indicating repositioning. |
Pointing out multiple design discrepancies at once | Annotate the page | Freehand drawing lets you circle all desired changes on a single screenshot. |
Next Steps
Learn more about working effectively with the Grigora AI Website Builder:
AI Website Editor Walkthrough: Interface Controls & Tools Explained — Explore every button, control, and tool available across the editor workspace.
How to Preview and Review Your Built Website in Grigora — Test responsive layouts across desktop, tablet, and mobile, and view your site in a dedicated browser window.
How to Manage Website Versions in Grigora — Inspect design history, compare revisions, and restore earlier website states.
Publishing Your Website for the First Time: Launch Sequence & Live Setup — Understand the real-time launch progress and configure search appearance and custom domains.