

Connect Google Antigravity to Grigora over Model Context Protocol (MCP) to give your AI coding assistant direct, secure access to your Grigora sites, CMS content, pages, e-commerce products, and newsletter features.
This updated guide walks you through the complete authentication workflow: configuring the Grigora server endpoint in mcp_config.json, authenticating via Antigravity's callback window, selecting the sites you want to authorize, obtaining your authentication token, and pasting it into Antigravity's settings to verify the connection.
Prerequisites
Google Antigravity installed on your computer.
An active Grigora account with at least one website project.
An active internet connection.
Step 1: Open the MCP Management Menu
Open Antigravity and locate the three-dot menu (…) at the top of the Agent chat panel on the right sidebar. Click it to view agent configuration options.
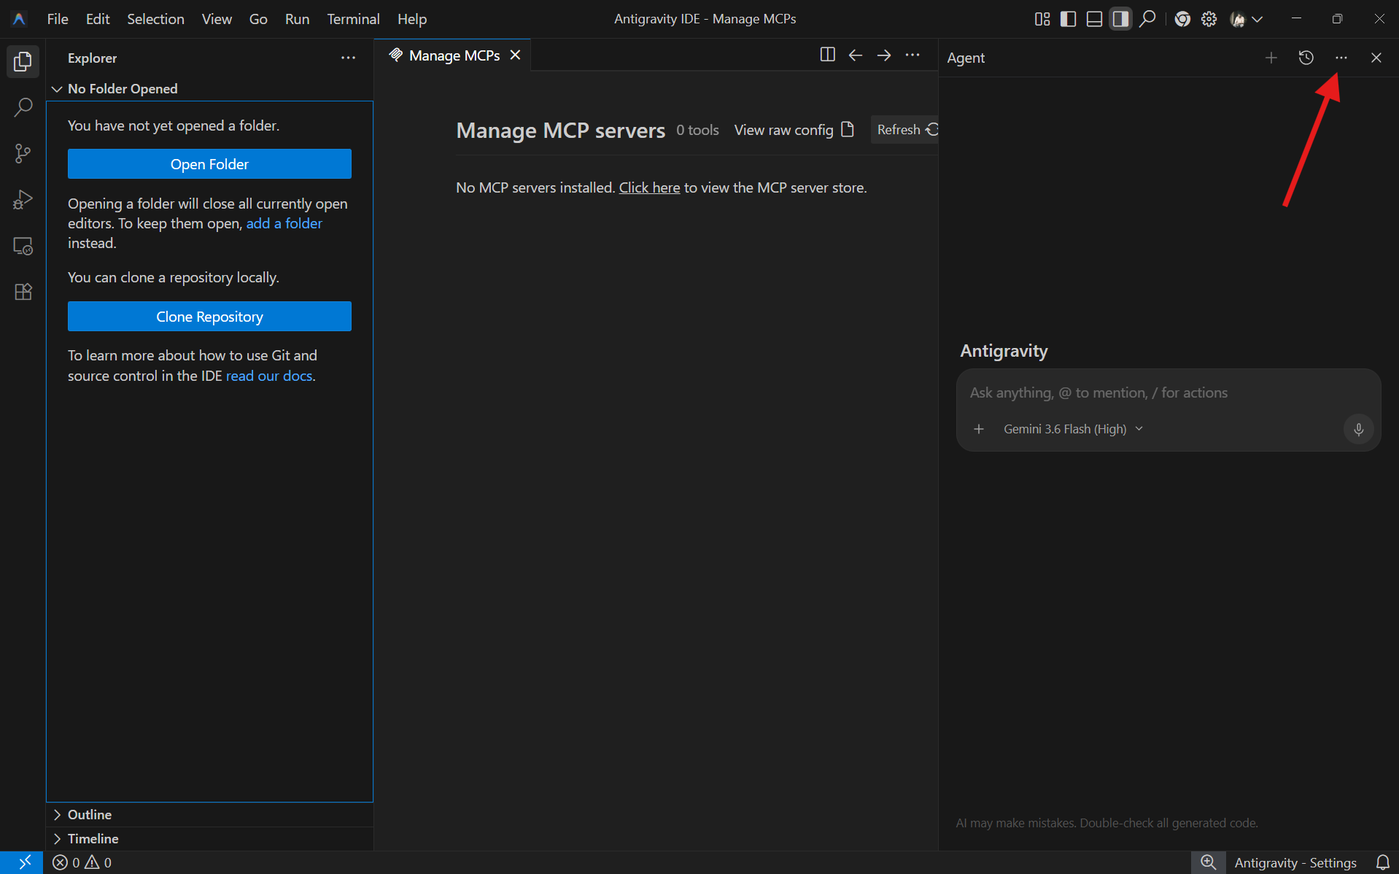
From the dropdown menu, select Manage MCP Servers.
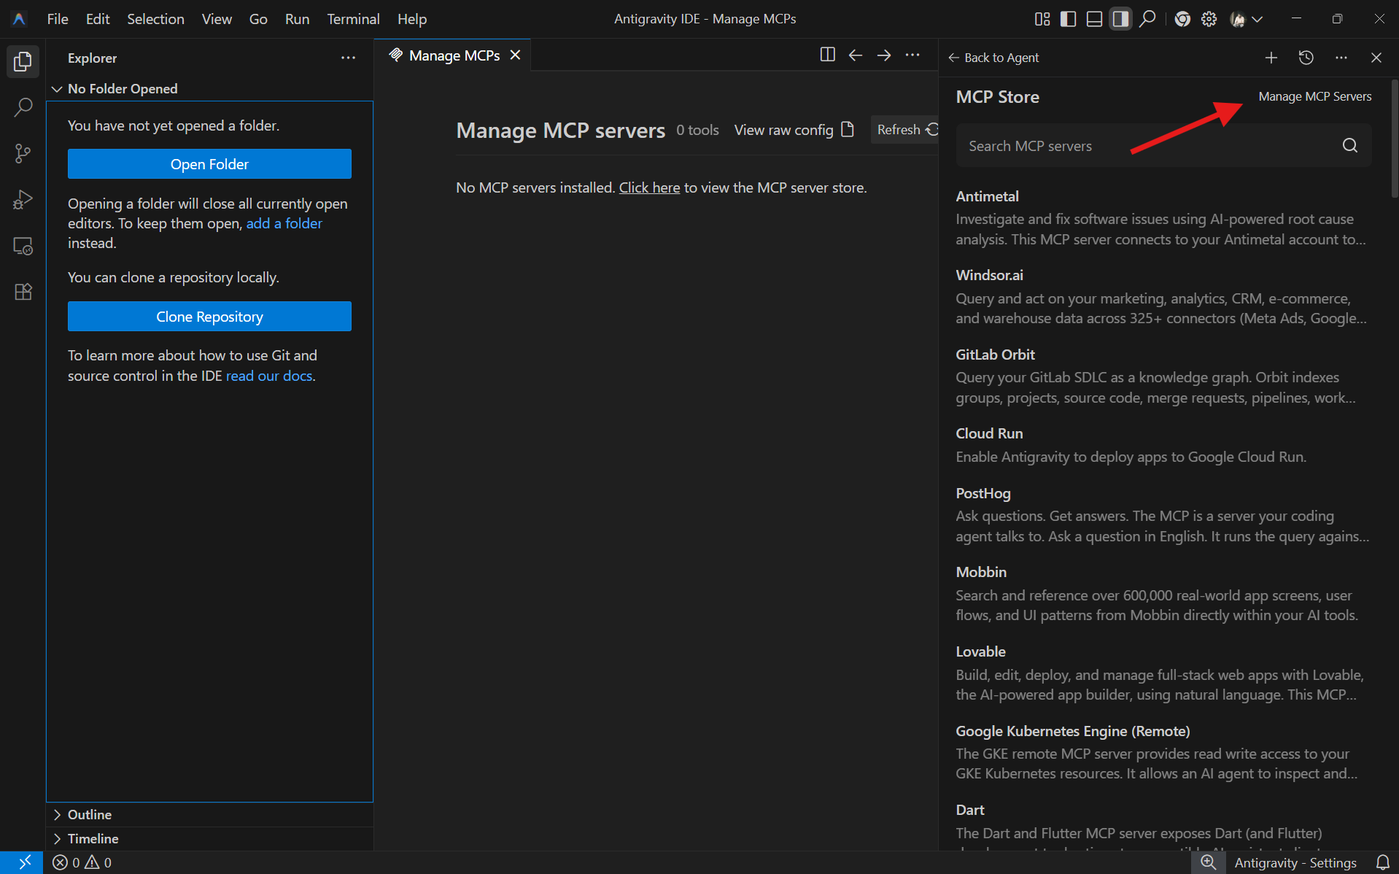
In the MCP management window, click View raw config to open the raw configuration file (mcp_config.json).
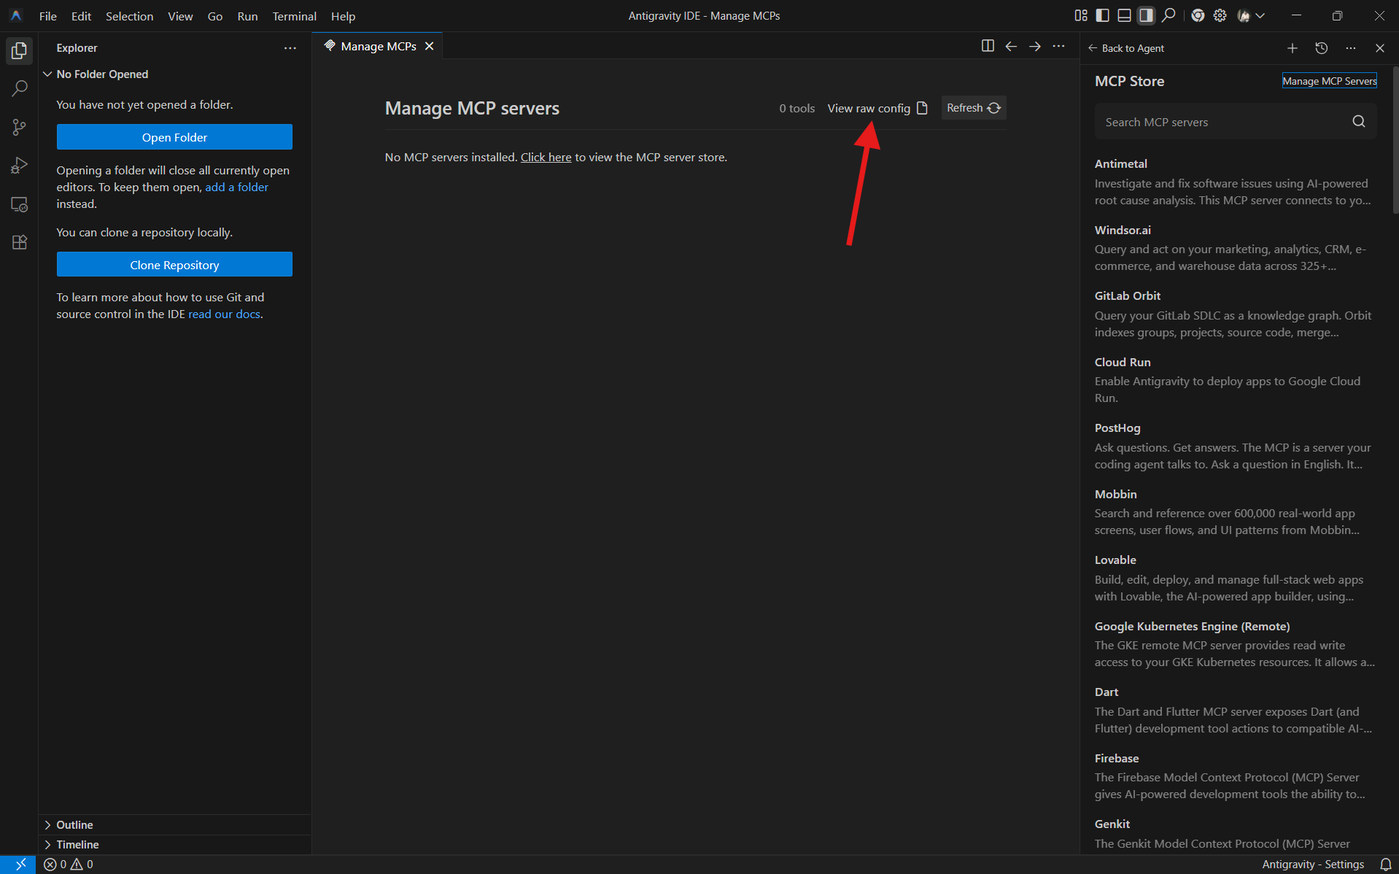
Step 2: Add Grigora MCP to mcp_config.json & Save
Inside the mcpServers object in mcp_config.json, add the Grigora MCP server configuration:
{ "mcpServers": { "grigora": { "serverUrl": "https://mcp.grigora.co/mcp" } }}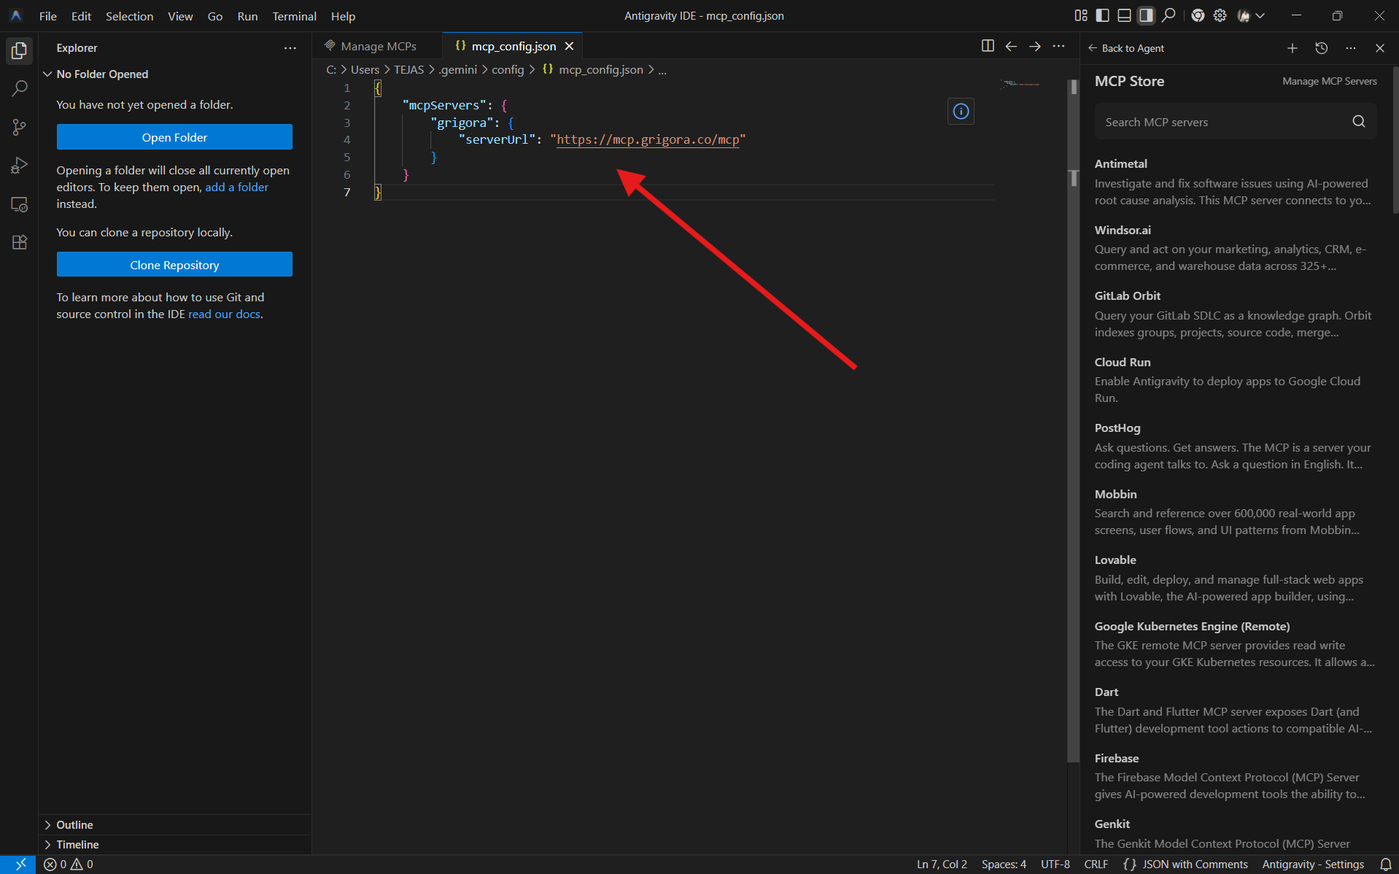
Press Ctrl+S (or Cmd+S on macOS) to save the mcp_config.json file.
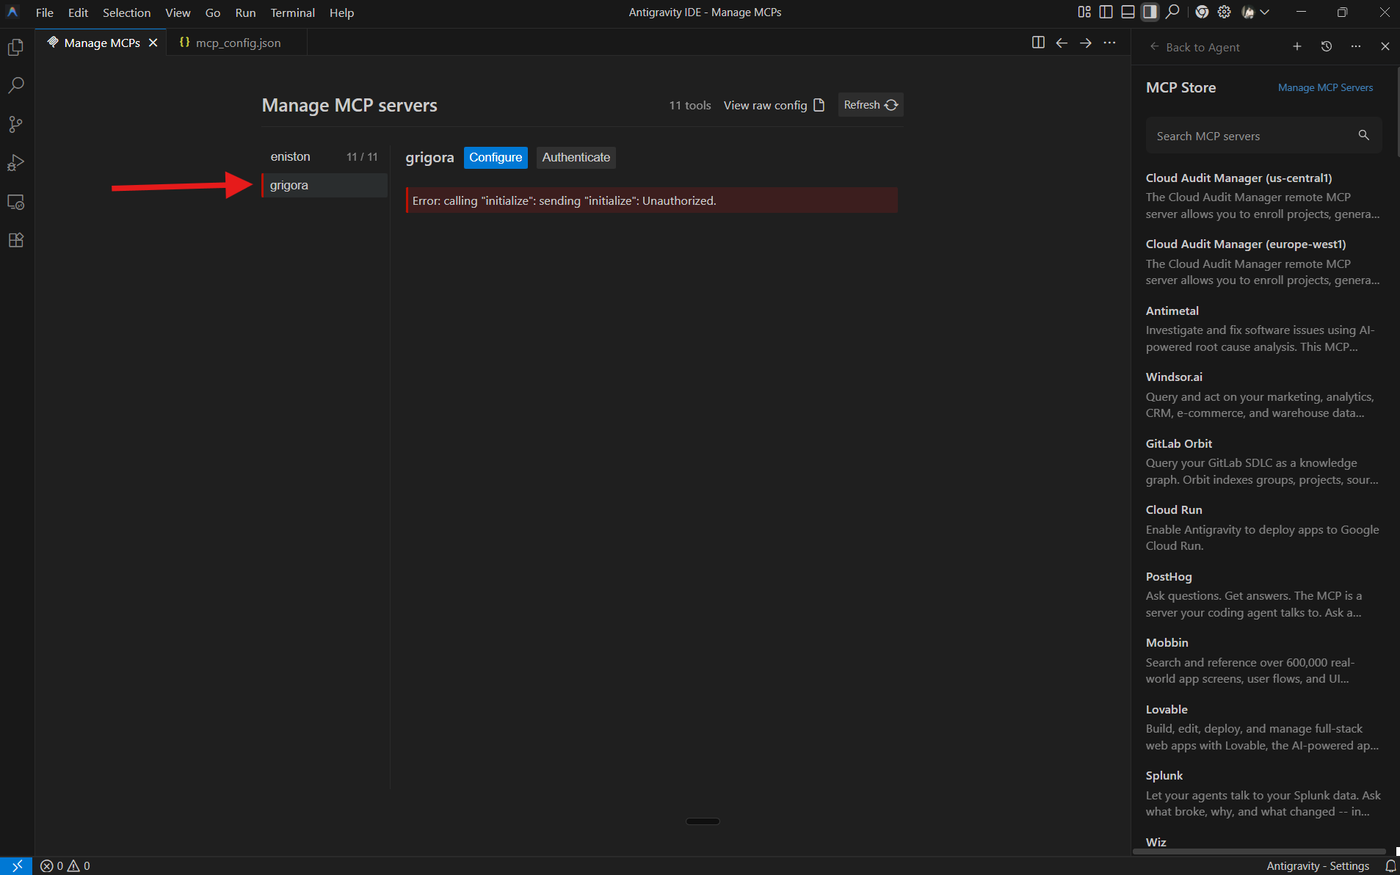
Step 3: Locate Grigora in Customizations Settings
Go to Antigravity's Settings > Customizations and navigate to the MCP section (Installed MCP Servers).
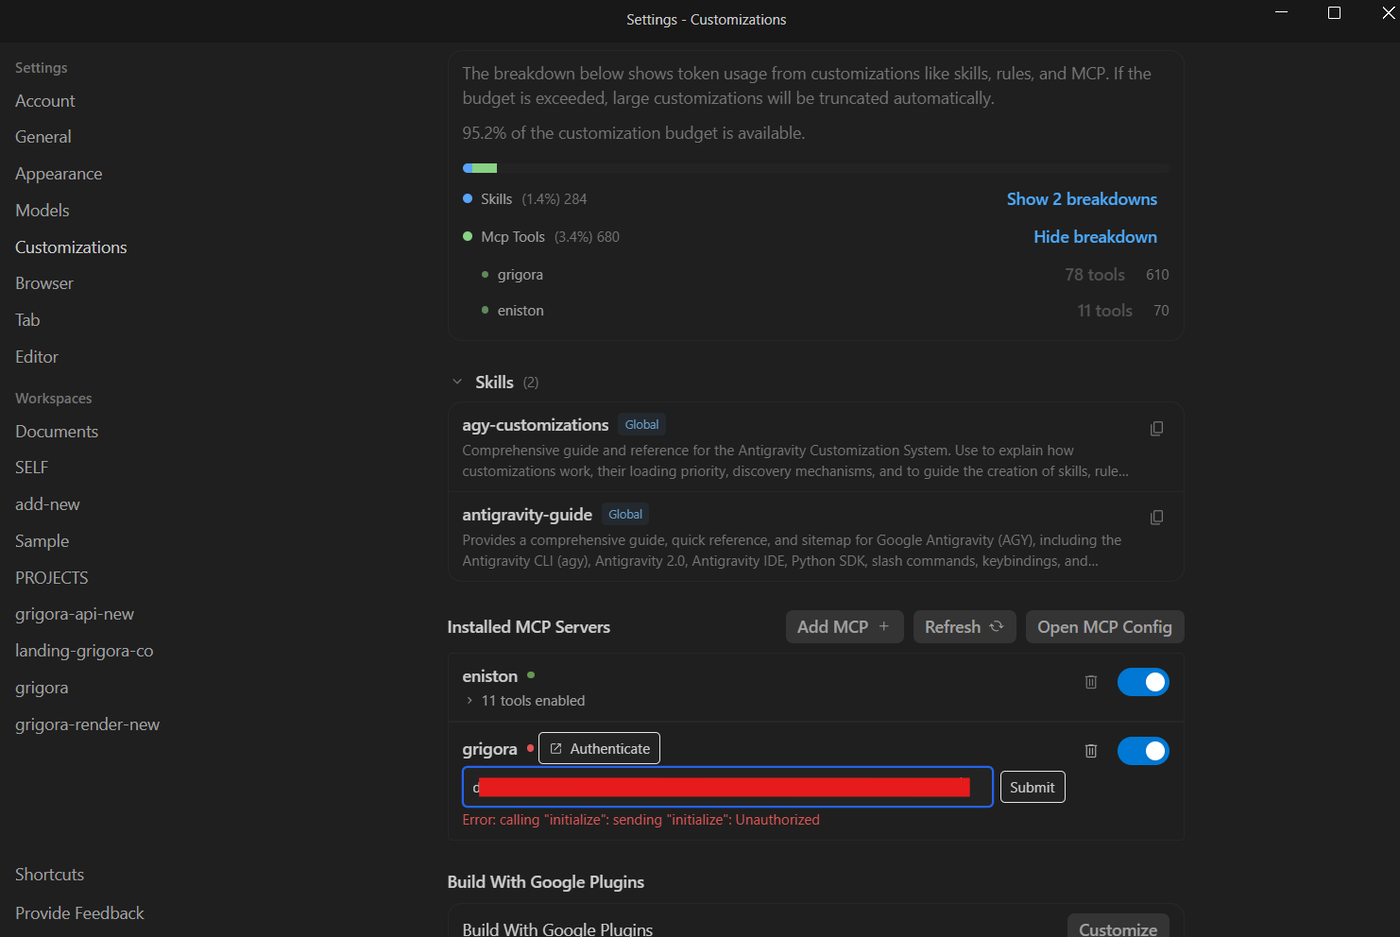
Because you added Grigora to the raw configuration file, Grigora will now appear in your list of MCP servers with an Authenticate button next to it.
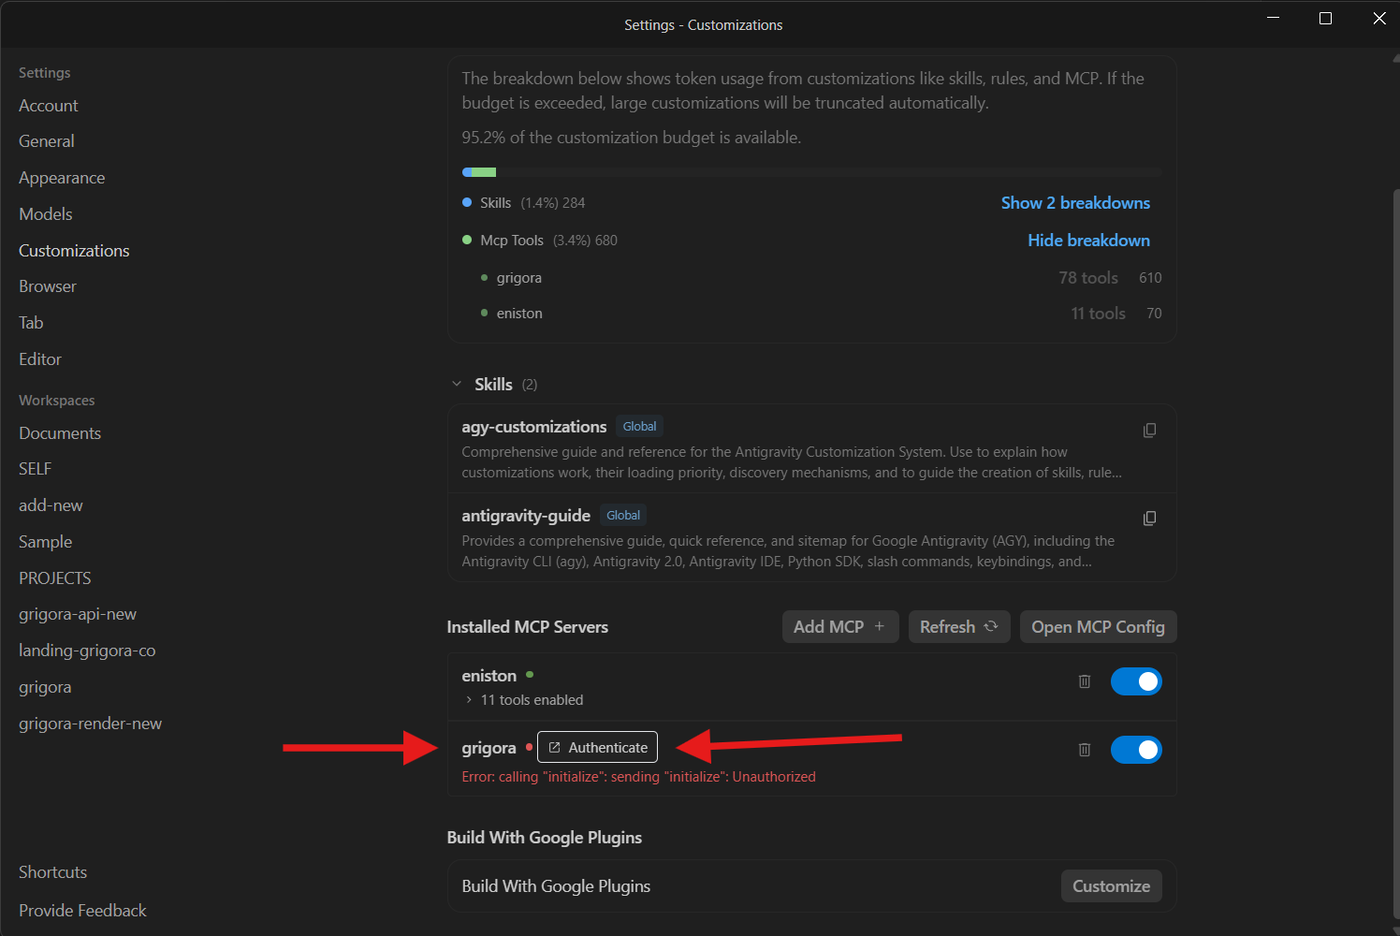
Step 4: Click 'Authenticate' to Open the Callback Page
Click the Authenticate button next to Grigora.
A browser pop-up window will open displaying the authentication and callback page. If you are not already logged in to Grigora in your browser, enter your Grigora account credentials (or sign in with Google/GitHub) to proceed.
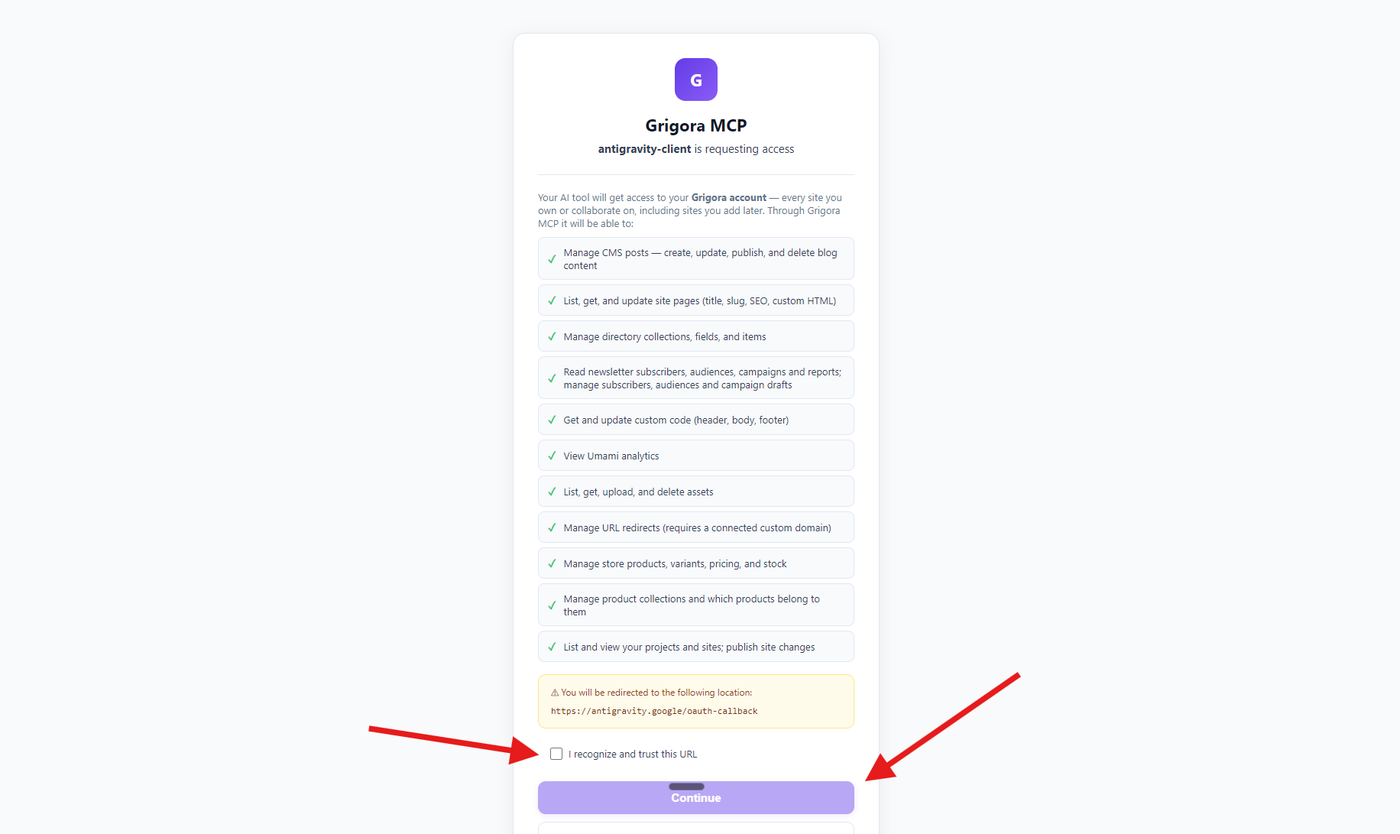
Step 5: Select Sites & Submit Consent
On the authorization screen:
Review the list of available websites under your Grigora account.
Select all the sites you want to grant Antigravity access to.
Review the requested permissions (e.g., reading site structures, managing CMS posts, retrieving project metadata).
Click Submit (or Authorize) to grant consent.
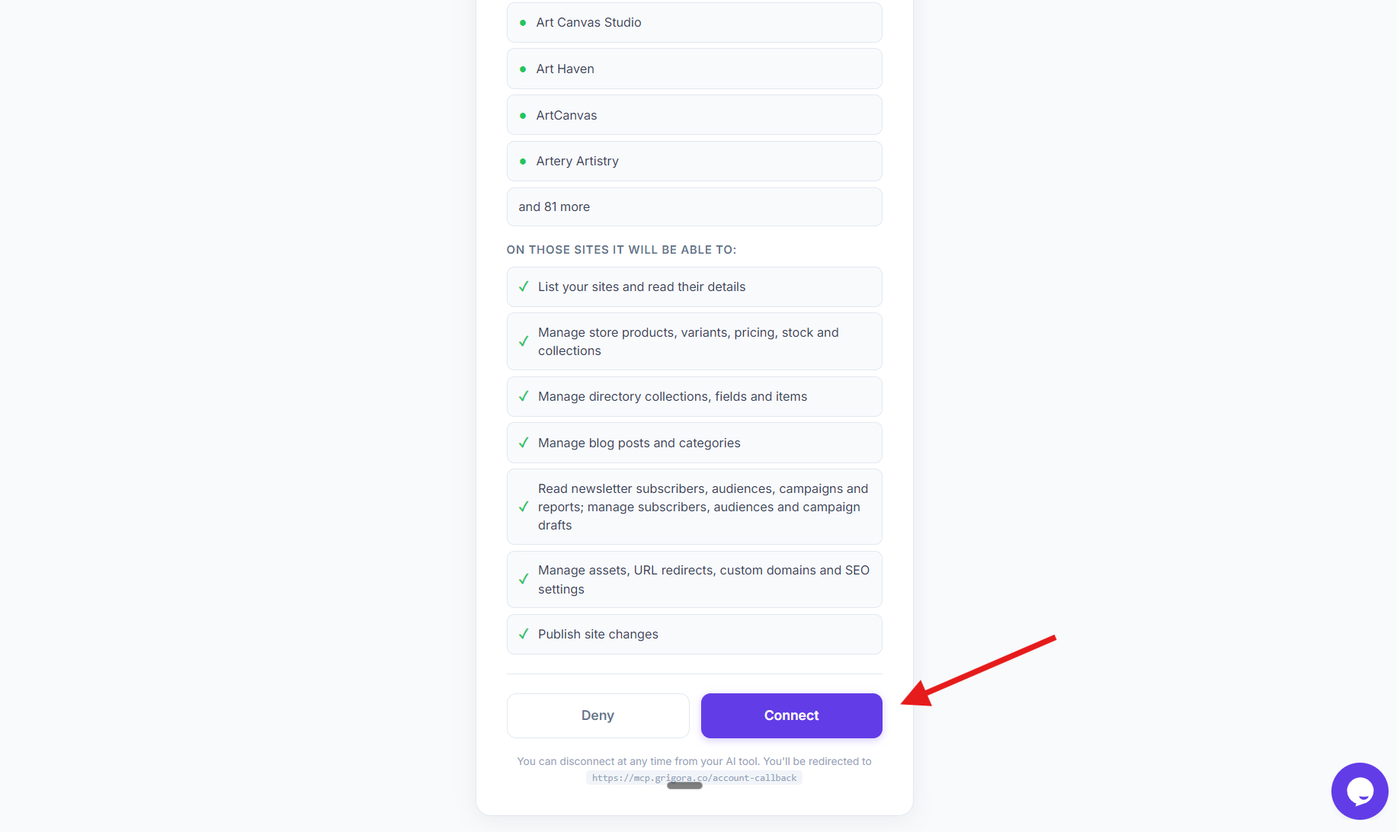
Step 6: Copy the Generated Authorization Token
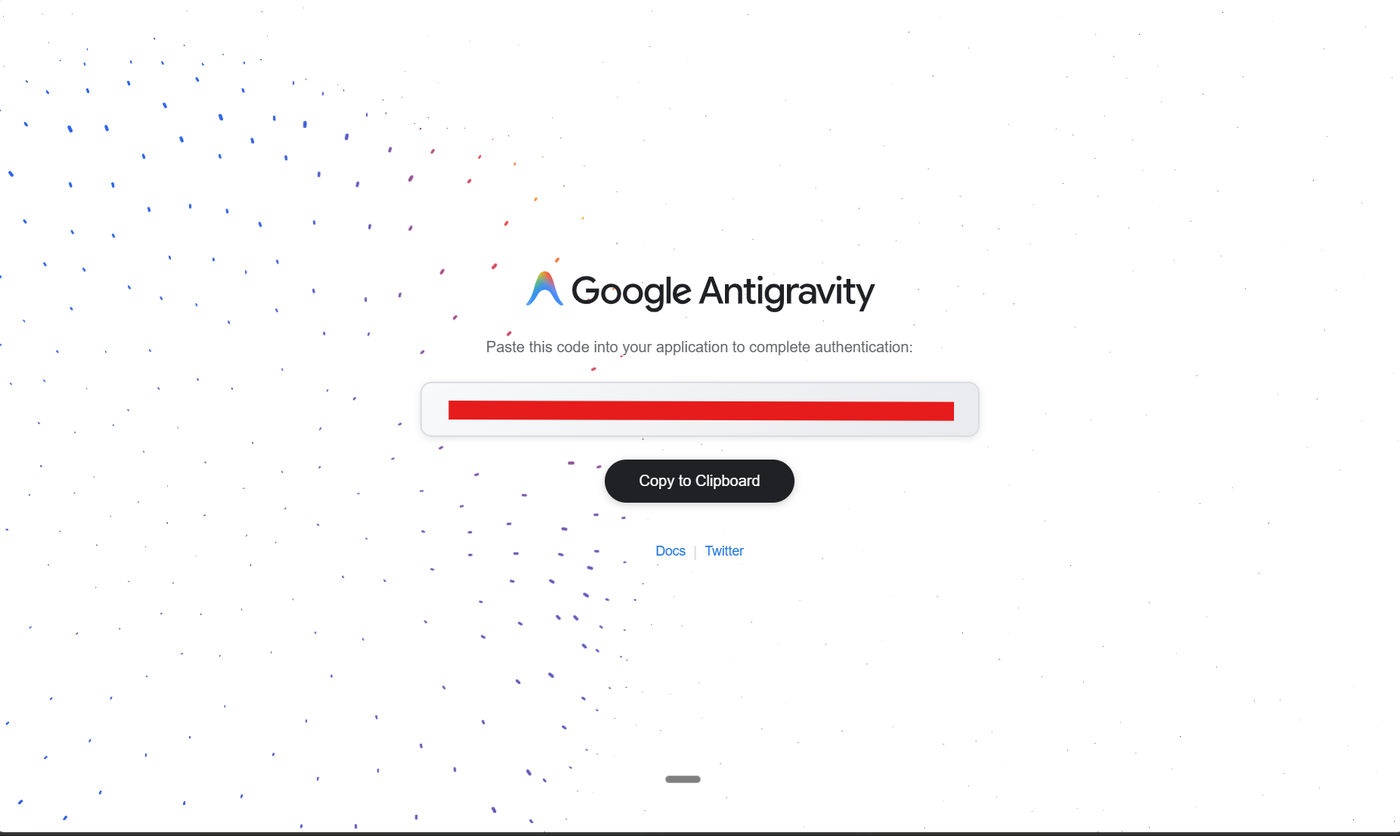
Once you submit consent, the callback page will generate an Authorization Token.
Click the Copy button (or select and copy the token string) to copy this authorization token to your clipboard.
Step 7: Paste the Token in Antigravity MCP Settings
Switch back to Antigravity and return to Settings > Customizations > MCP.
In the text input field provided next to Grigora, paste the authorization token you copied from the callback page, and confirm/save.
Step 8: Verify the Grigora MCP Connection
Antigravity will validate the token with Grigora. Once verified:
Grigora will display a green Connected or Authenticated status in your MCP server list.
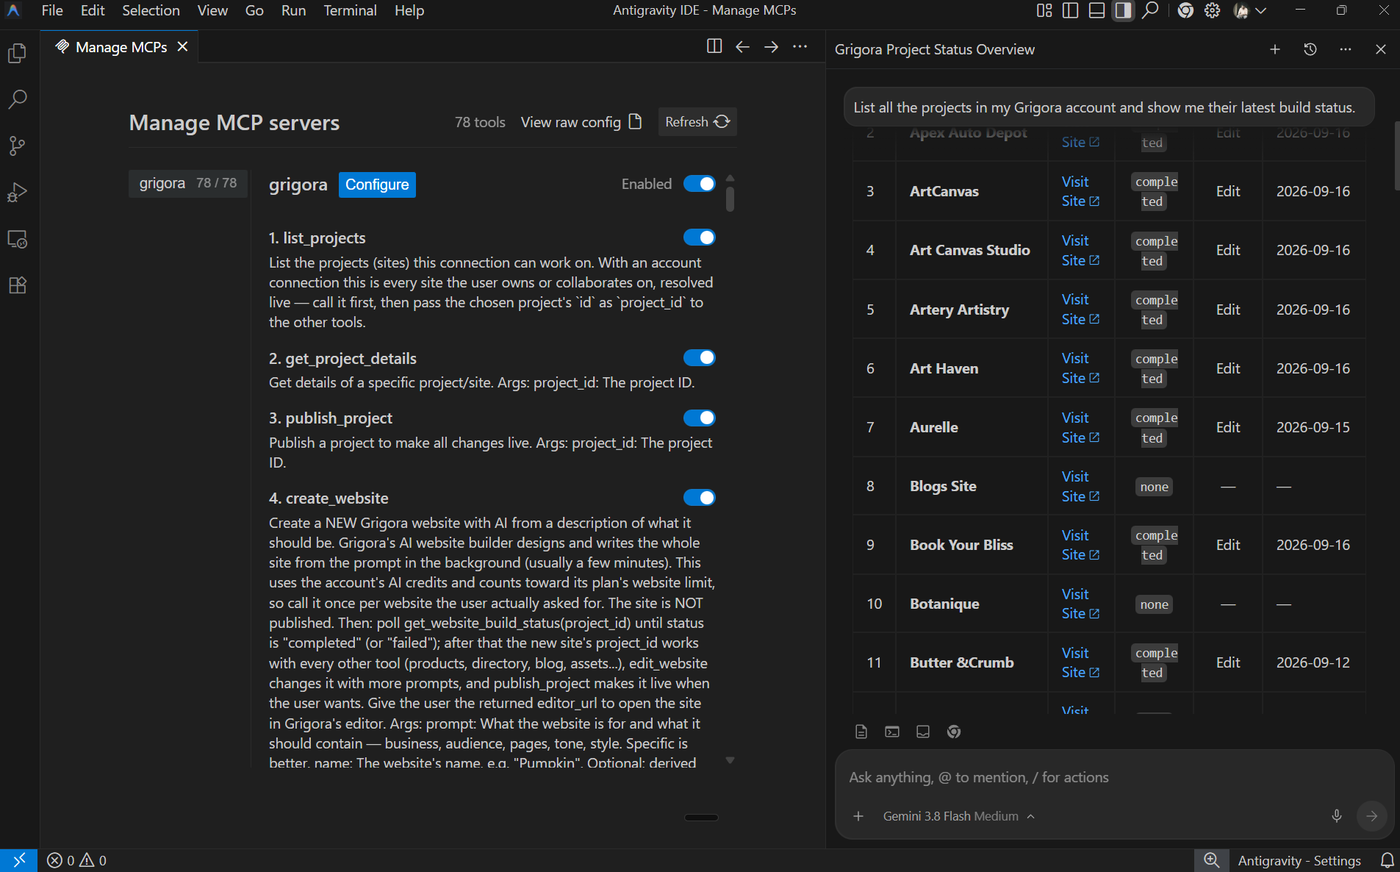
Open the Agent chat panel in Antigravity and run a test prompt requiring access to your Grigora account. For example:
"List all the projects in my Grigora account and show me their latest build status."
The Antigravity Agent will invoke the connected Grigora MCP tools and return your real-time site details directly in the chat!
Troubleshooting & FAQs
Pop-up Window Did Not Open: Ensure your browser or operating system is not blocking pop-up windows when clicking Authenticate.
Token Not Accepted / Invalid Token: Make sure you copied the entire token without extra spaces or line breaks. If the token expired, click Authenticate again to generate a fresh token.
Adding More Sites Later: To grant access to newly created sites or remove existing ones, re-authenticate through Settings > Customizations > MCP and select your updated site list.
Restarting Antigravity: If tools do not immediately appear in your Agent prompt after pasting the token, click the Refresh button or reload the Antigravity window.