

In this comprehensive guide, we'll walk you through how to connect Grigora MCP with ChatGPT. You'll learn how to add Grigora as a custom MCP server, configure the connection using Streamable HTTP, authenticate your Grigora account, and authorize ChatGPT to access your Grigora sites.
Once connected, you can use Grigora MCP directly from ChatGPT to interact with your Grigora projects, sites, CMS content, directory data, and other supported resources.
Prerequisites
Before you begin, make sure you have:
A ChatGPT account with access to MCP functionality.
A Grigora account.
Access to at least one Grigora site.
An active internet connection.
Step 1: Open MCP Settings
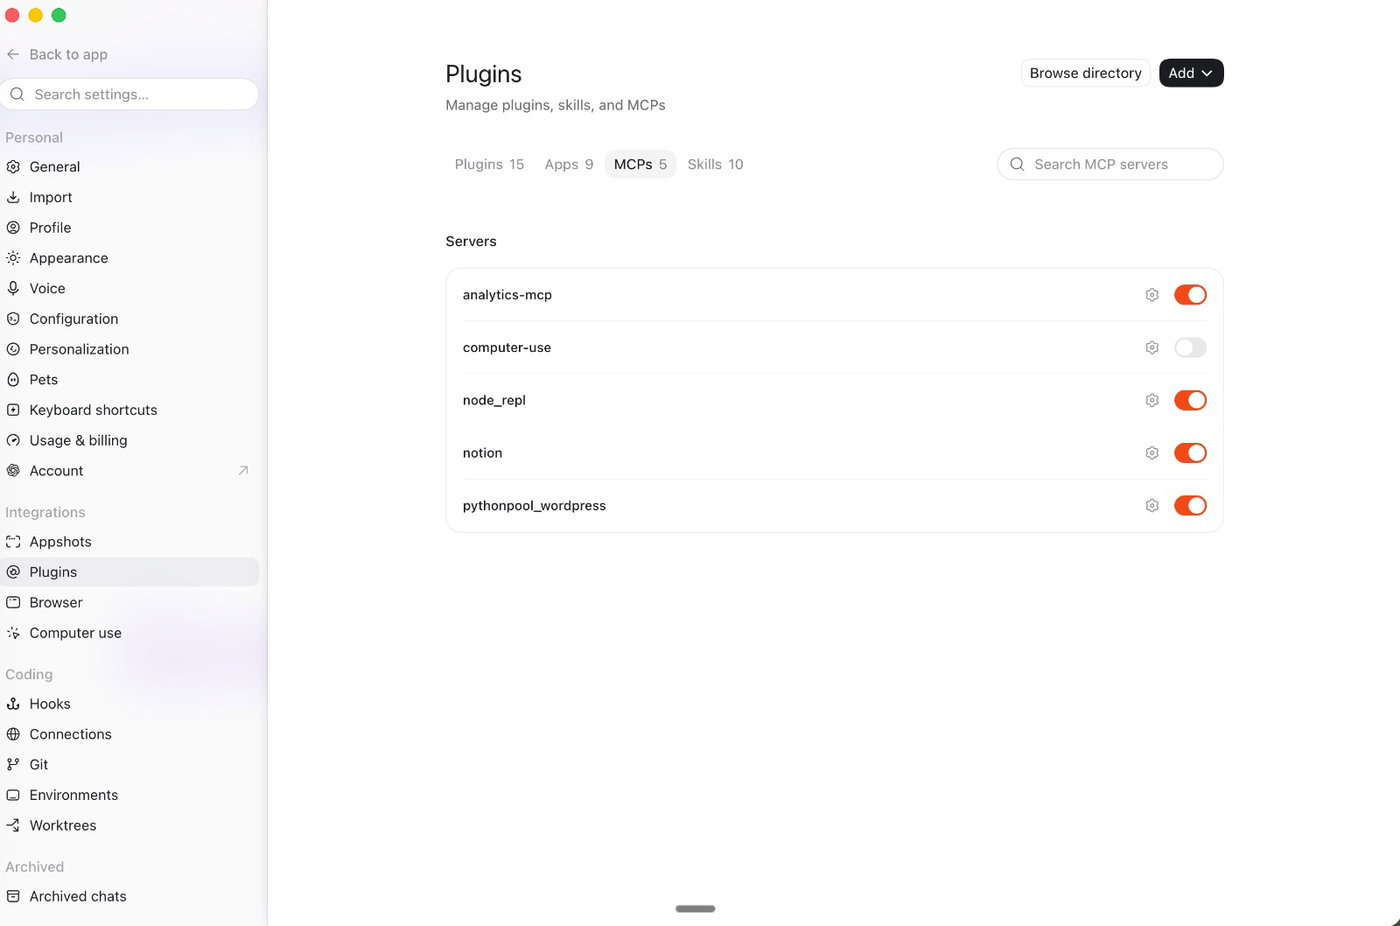
Open ChatGPT Settings and select Plugins from the sidebar.
On the Plugins page, select the MCPs tab to view and manage your MCP servers.
Step 2: Add a Custom MCP
On the MCPs page, click the Add button in the top-right corner.
Select the option to add a custom MCP.
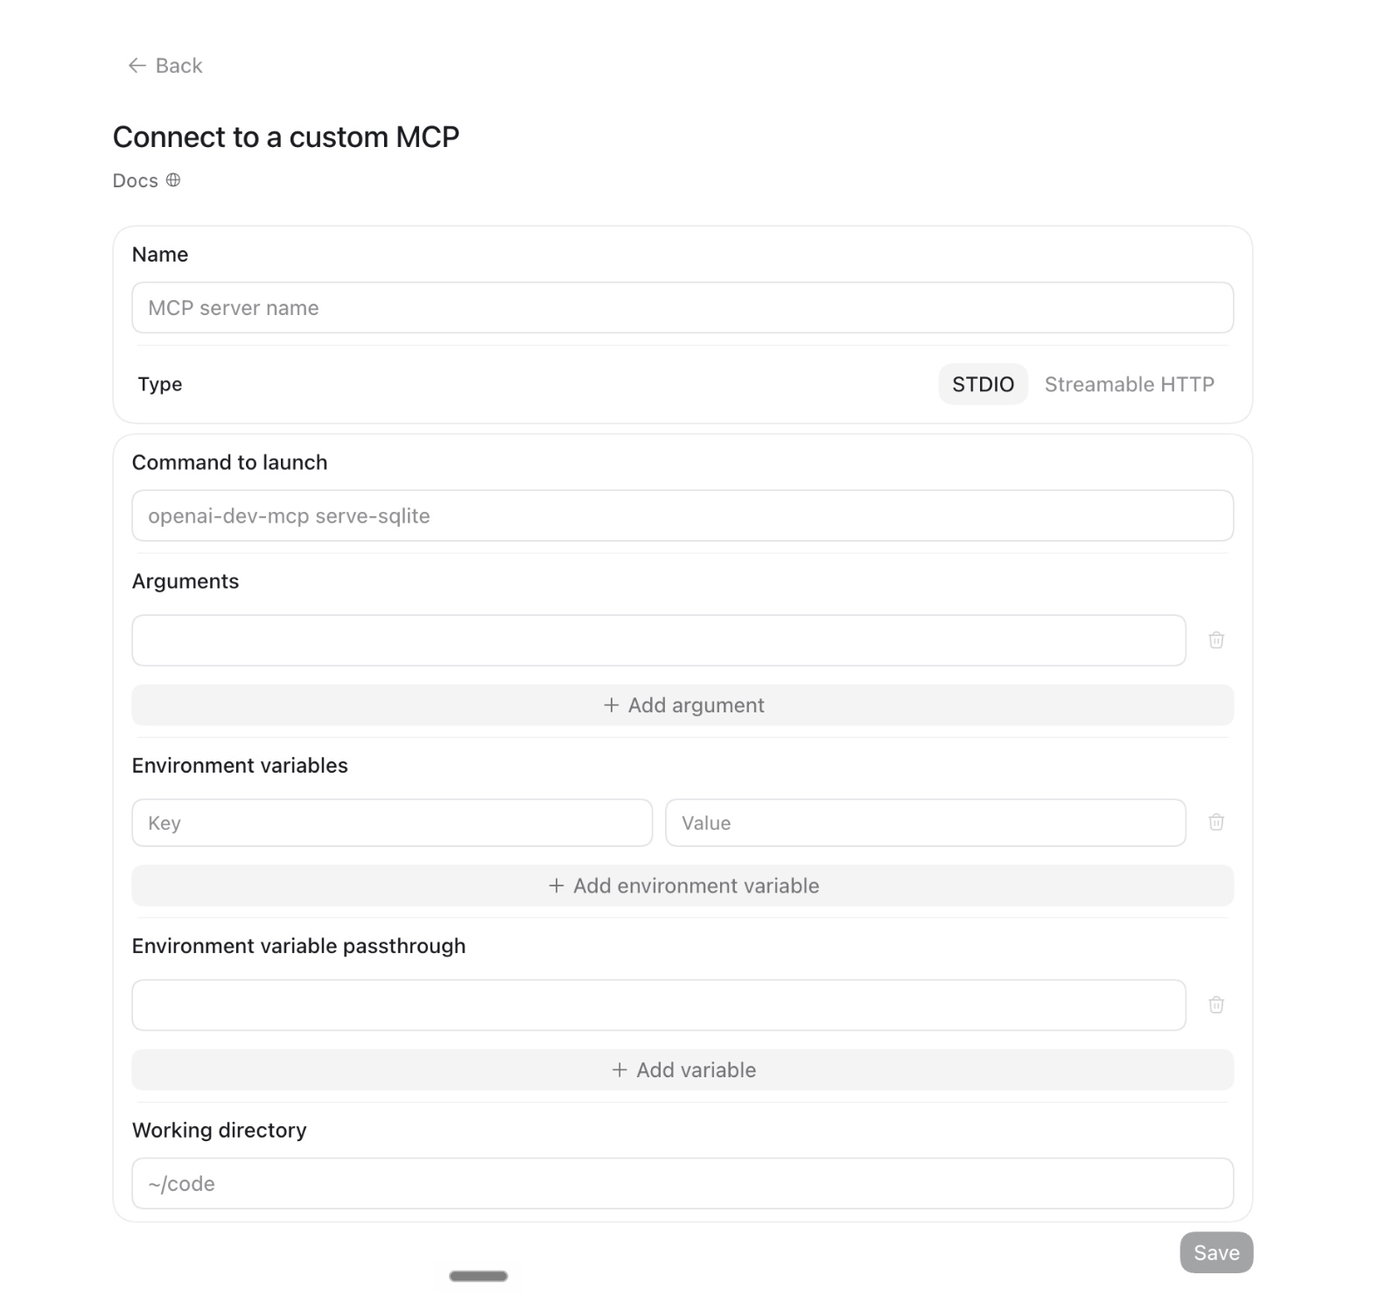
This will open the Connect to a custom MCP configuration page.
Step 3: Configure the Grigora MCP Server
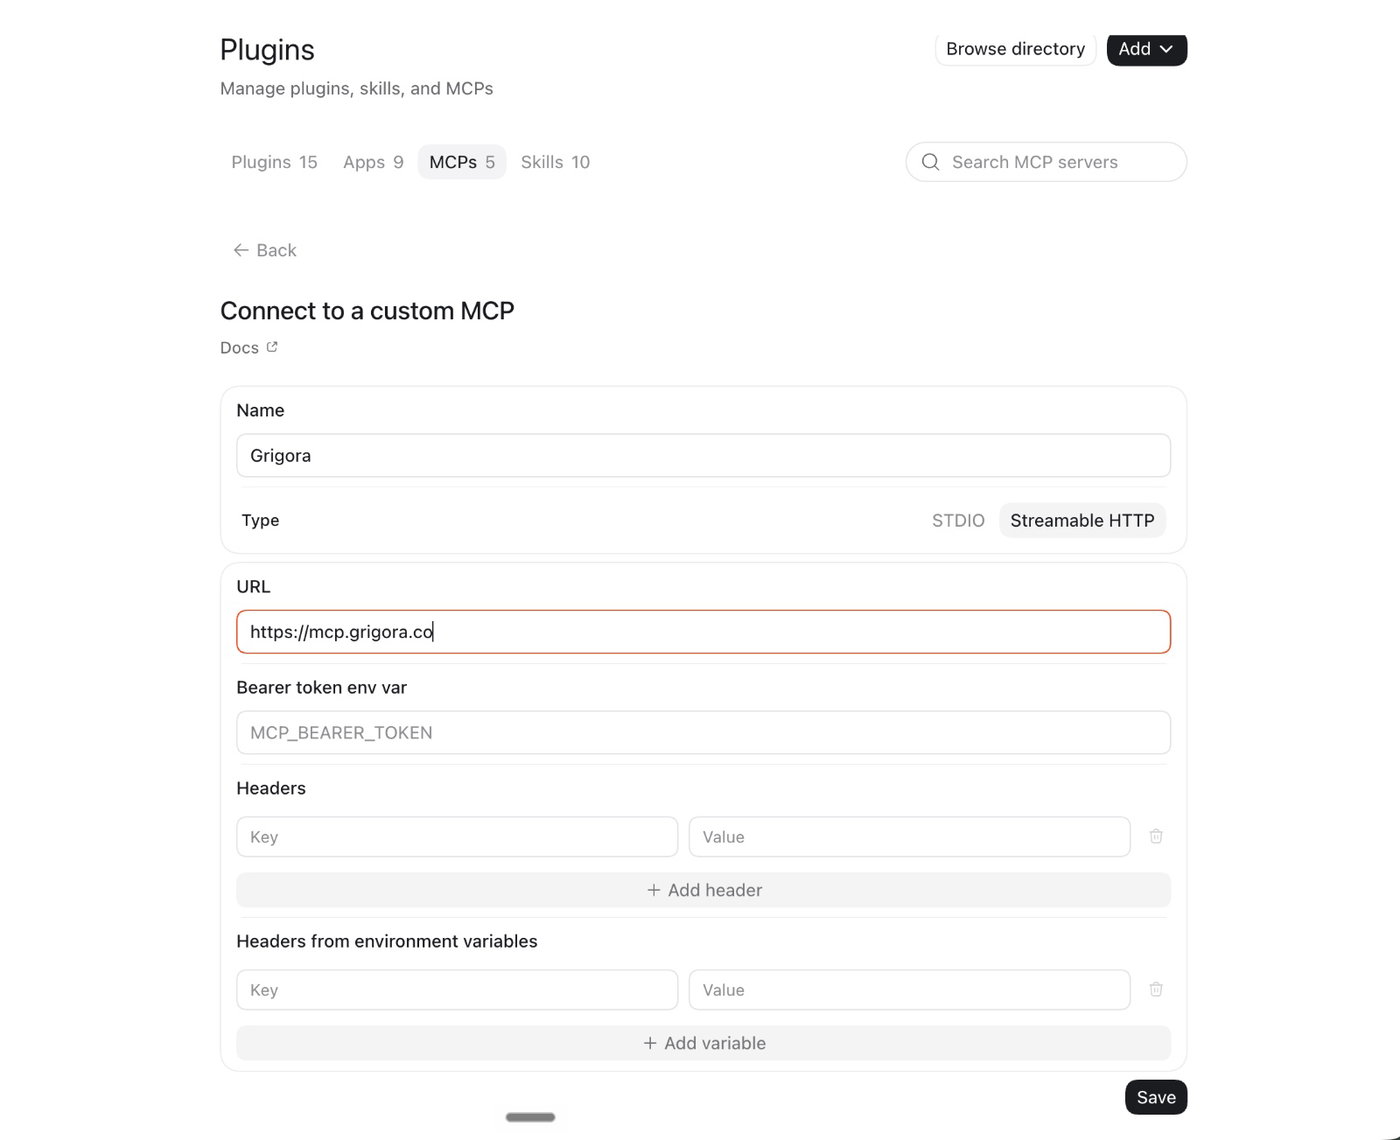
On the Connect to a custom MCP page, configure the server using the following details:
Name:
GrigoraType: Streamable HTTP
URL:
https://mcp.grigora.co/mcp
You don't need to configure a bearer token or additional headers because Grigora uses its authentication flow to authorize the connection.
Step 4: Save the MCP Configuration
After entering the Grigora MCP details, click Save.
ChatGPT will add Grigora to your list of MCP servers.
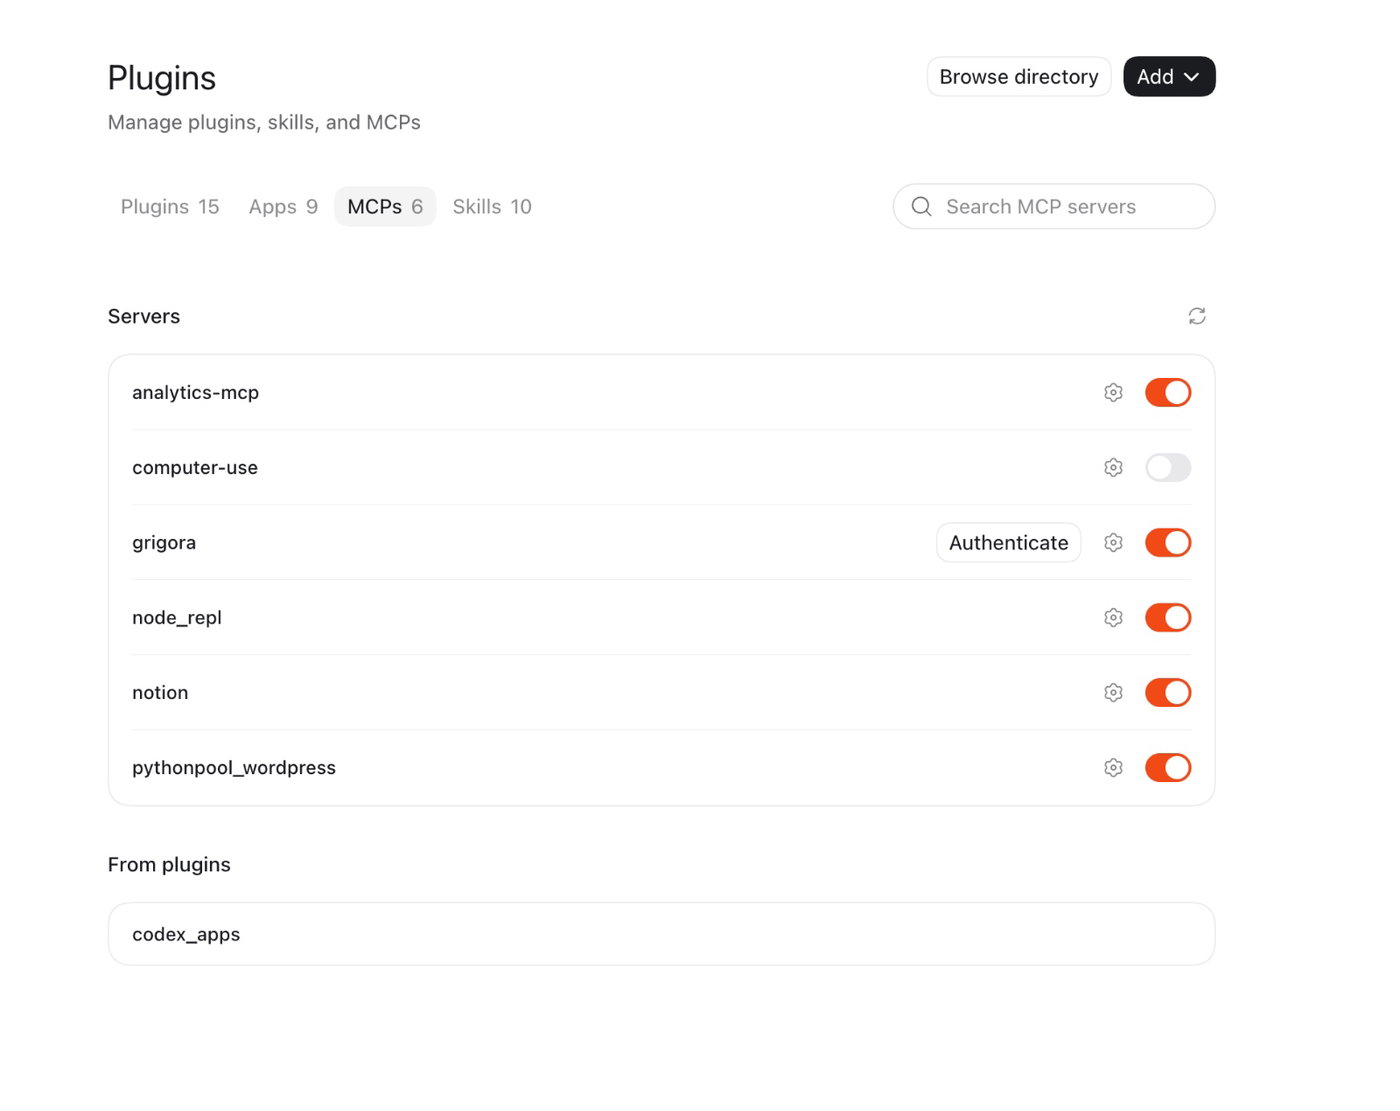
Once added, Grigora will appear in the MCP server list with an Authenticate option.
Step 5: Authenticate with Grigora
Click Authenticate next to the Grigora MCP server.
ChatGPT will redirect you to the Grigora authentication flow.
If you're not already logged in to Grigora, enter your account credentials and sign in. If you're already logged in, you'll be taken directly to the authorization page.
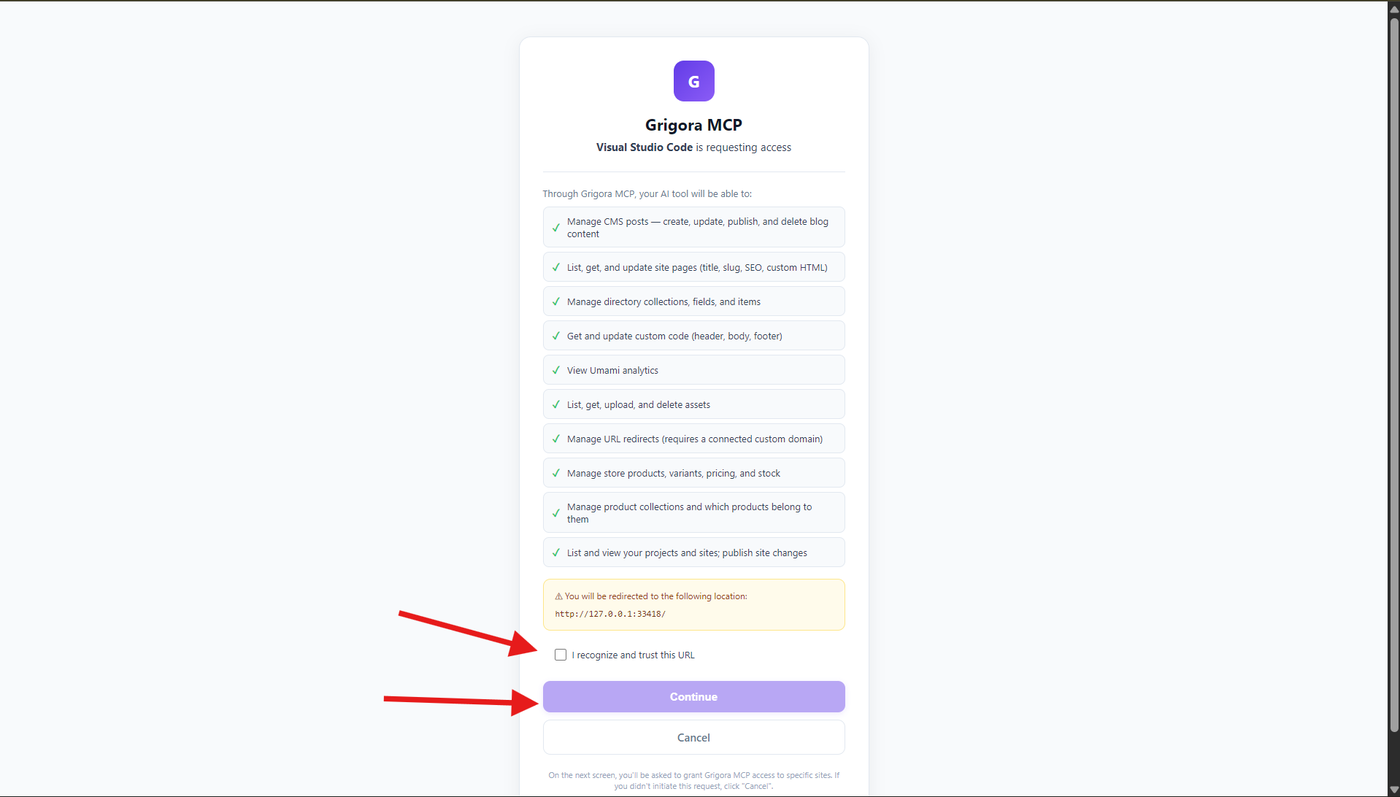
Step 6: Authorize Access
After signing in, Grigora will display the sites available for authorization along with the permissions requested by the MCP connection.
Select the site(s) you want ChatGPT to access and review the requested permissions.
Click Authorize to grant access.
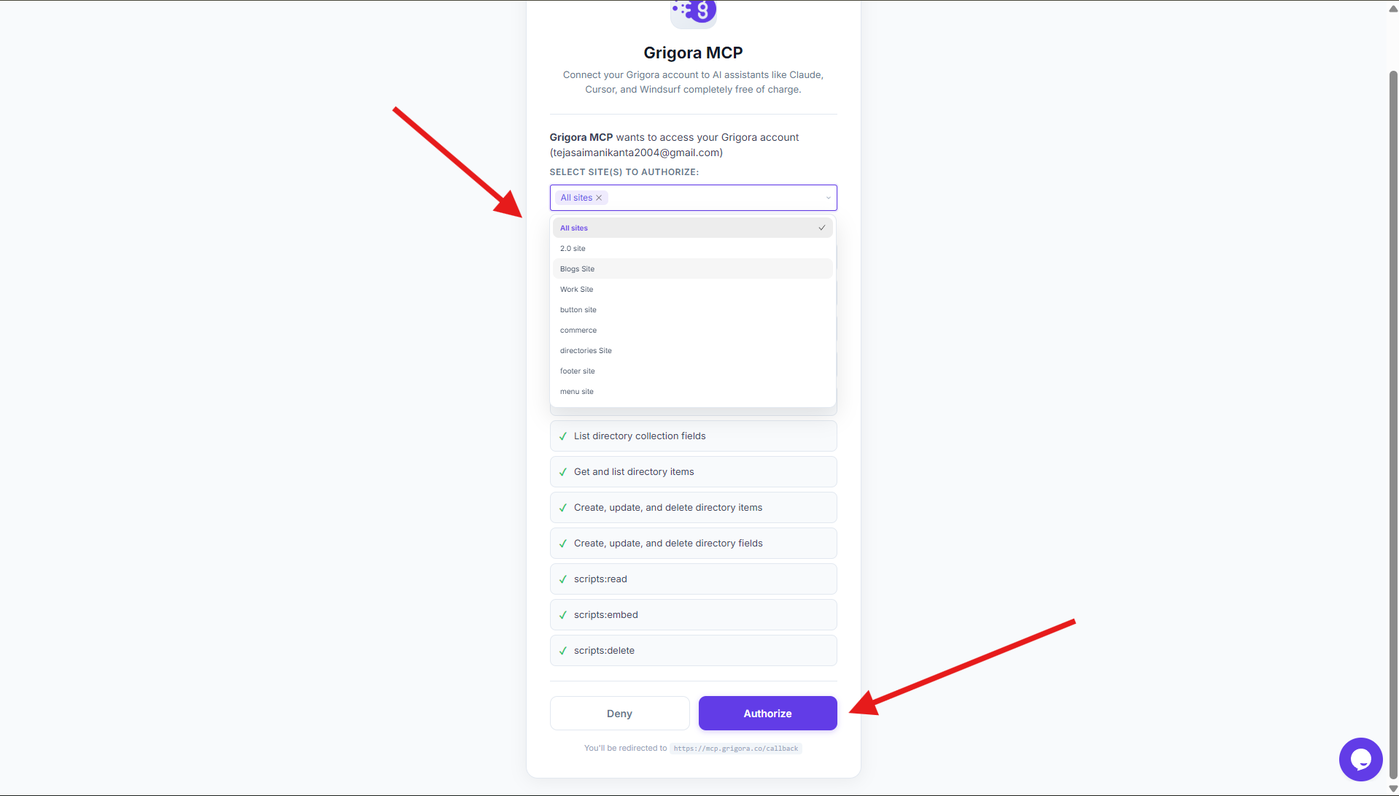
Step 7: Verify the Connection
After authorization is completed, return to ChatGPT and open Settings → Plugins → MCPs.
The Grigora server should now appear in your MCP server list as an authenticated connection.
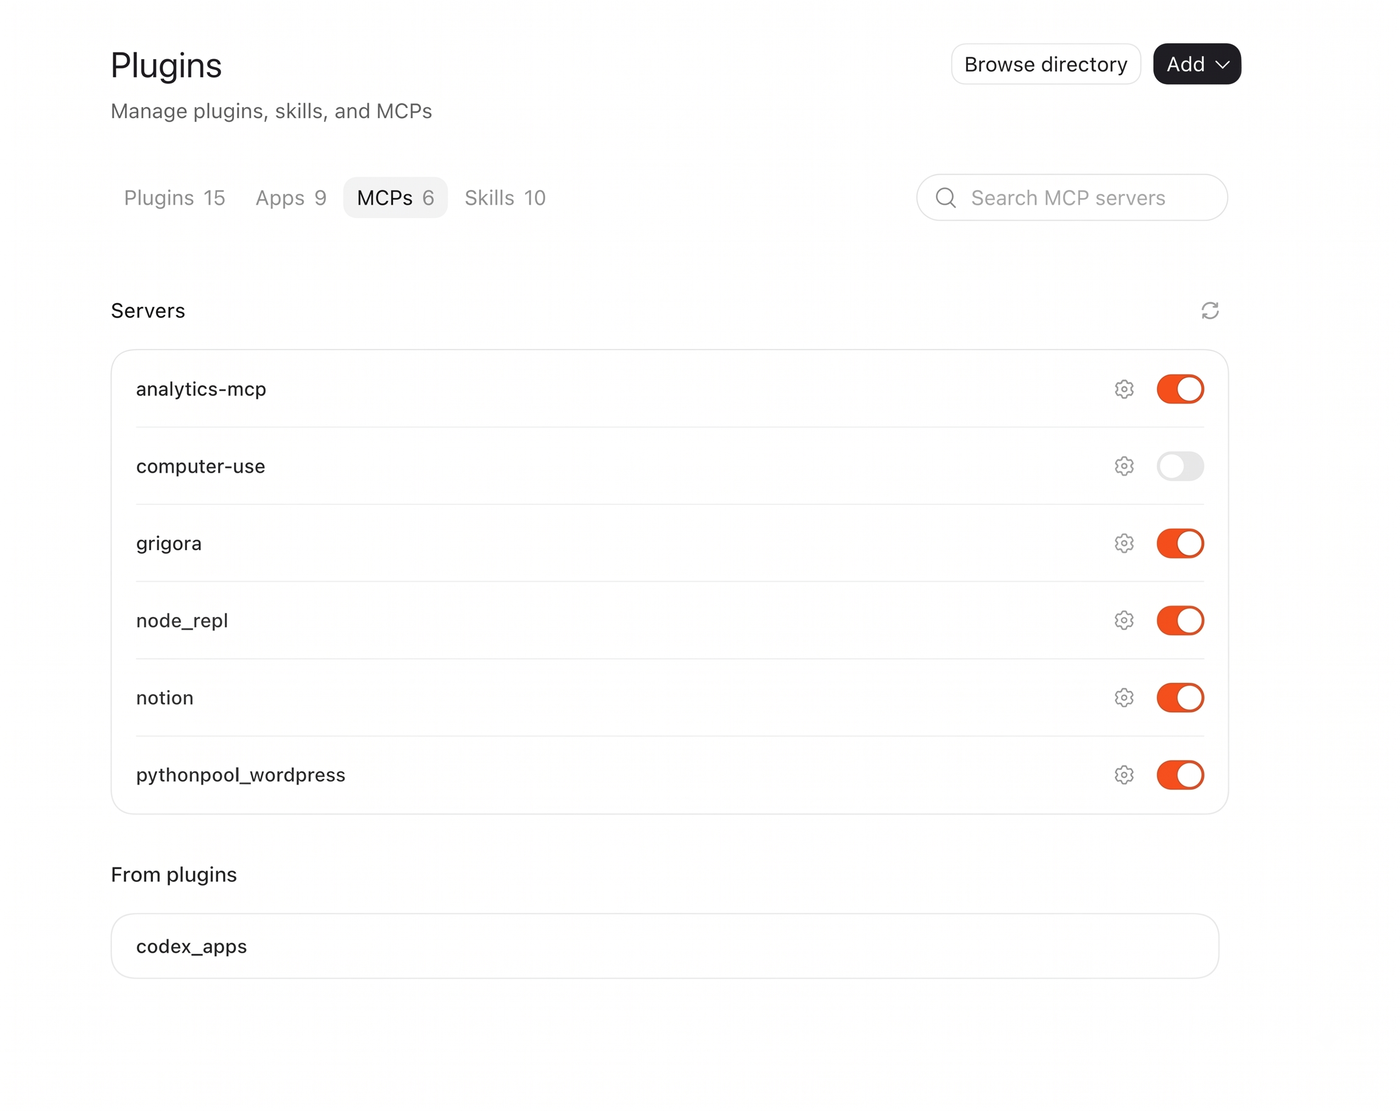
This confirms that Grigora MCP has been successfully connected to ChatGPT.
Step 8: Test the Grigora MCP Connection
Send a prompt that requires information from your Grigora account.
For example:
List the projects available in my Grigora Account.
ChatGPT should use the connected Grigora MCP server to retrieve the requested information.
If ChatGPT returns the projects from your Grigora account, your MCP connection is working successfully.
Troubleshooting
If Grigora MCP doesn't connect or the tools aren't available, try the following:
Verify the MCP URL
Make sure the server URL is entered exactly as:
https://mcp.grigora.co/mcpDo not add Markdown formatting, brackets, or additional characters to the URL.
Re-authenticate Grigora
If Grigora appears in the MCP list but requires authentication, click Authenticate again and complete the Grigora authorization flow.
Verify Site Access
Make sure you selected the correct Grigora site during the authorization process and that your account has access to that site.
Check the MCP Server
Return to Settings → Plugins → MCPs and verify that the Grigora server is enabled.
Refresh ChatGPT
If authentication succeeds but Grigora doesn't immediately appear as available, reload ChatGPT and open a new conversation.
Reconnect the Server
If the problem persists, remove the Grigora MCP configuration and add it again using the same Streamable HTTP configuration:
Name: GrigoraType: Streamable HTTPURL: https://mcp.grigora.co/mcpThen authenticate and authorize the connection again.
Start Using Grigora MCP
Once the connection is established, you can interact with your Grigora account directly through ChatGPT using natural-language prompts.
For example:
List the projects available in my Grigora Account.
You can then use Grigora MCP to work with the capabilities exposed by the server without manually switching between ChatGPT and your Grigora dashboard.