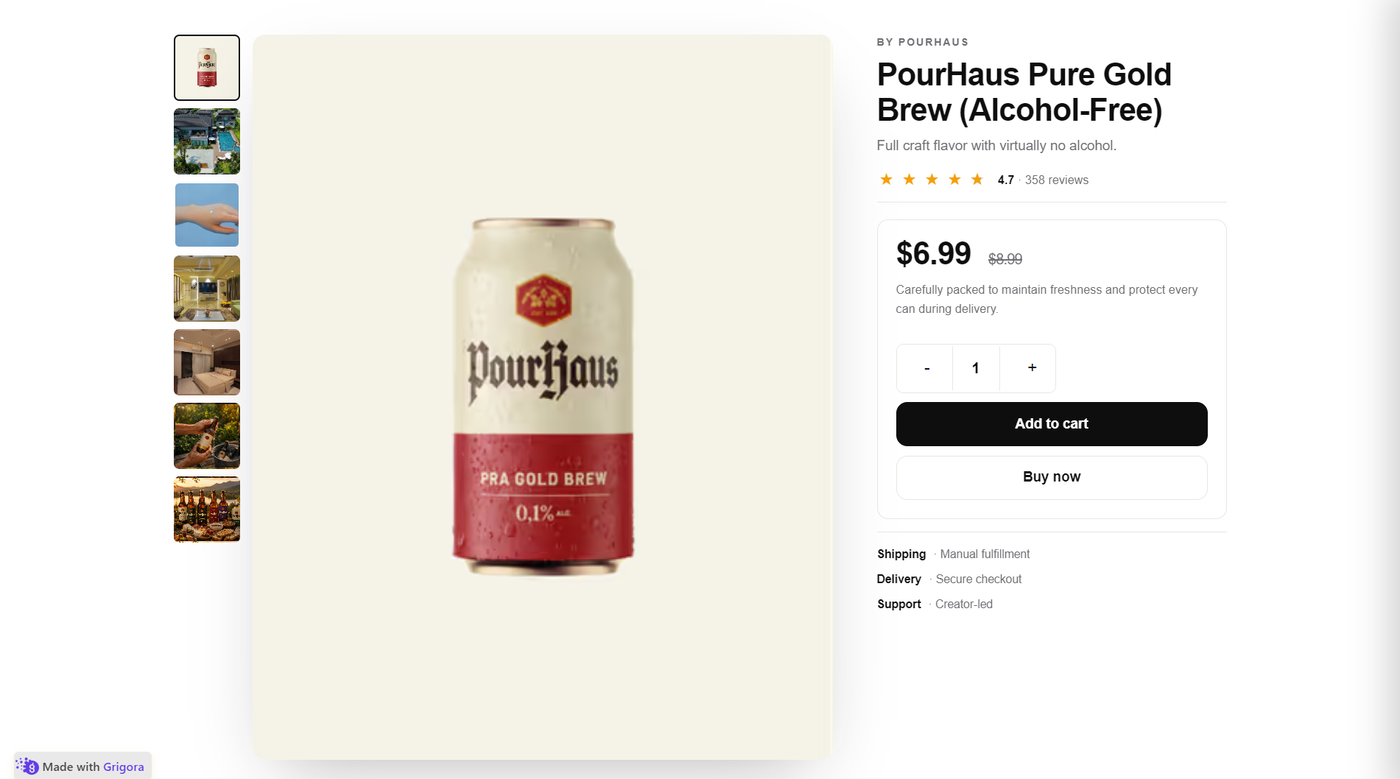
Product media in Grigora Commerce lets you manage the images and videos displayed for your products. You can set a main product image, add gallery images and videos, configure alternative text, and control store-wide media defaults and video playback behavior.
Open Product Media
Step 1: Open the product
From the Grigora dashboard, expand Commerce and select Products. Open the product whose media you want to manage.
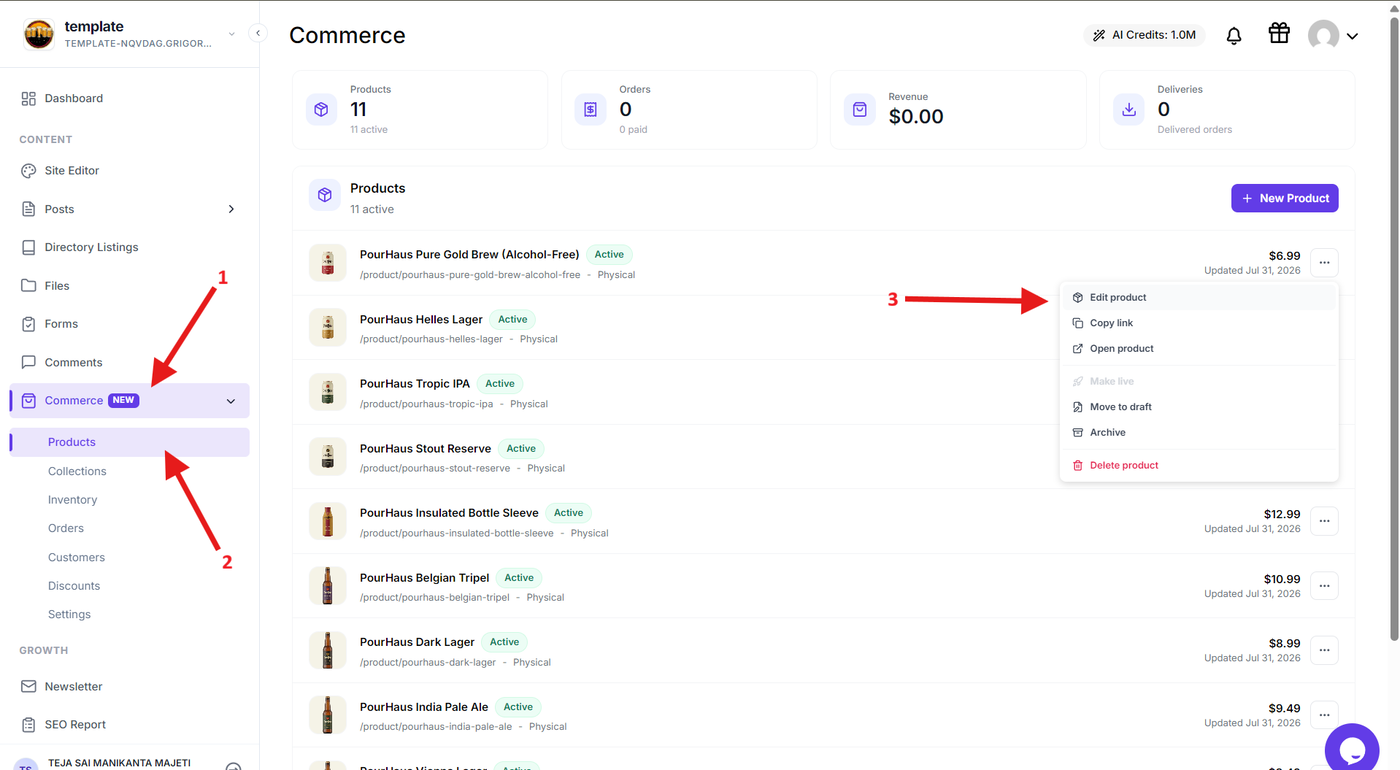
Step 2: Open the Media section
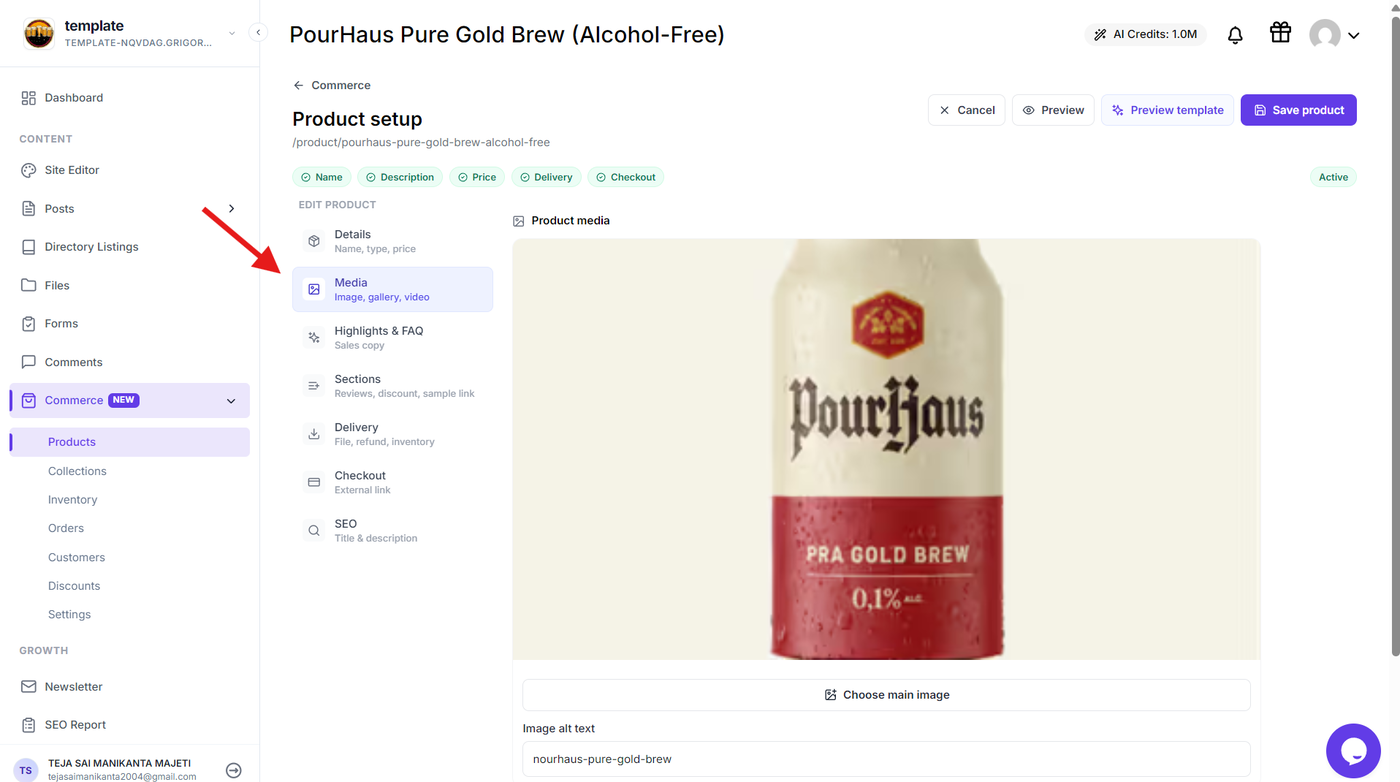
In the product editor, select Media from the product settings.
The Media section contains the product's main image, image gallery, and gallery video options.
Add and Configure Product Media
Step 3: Set the main product image
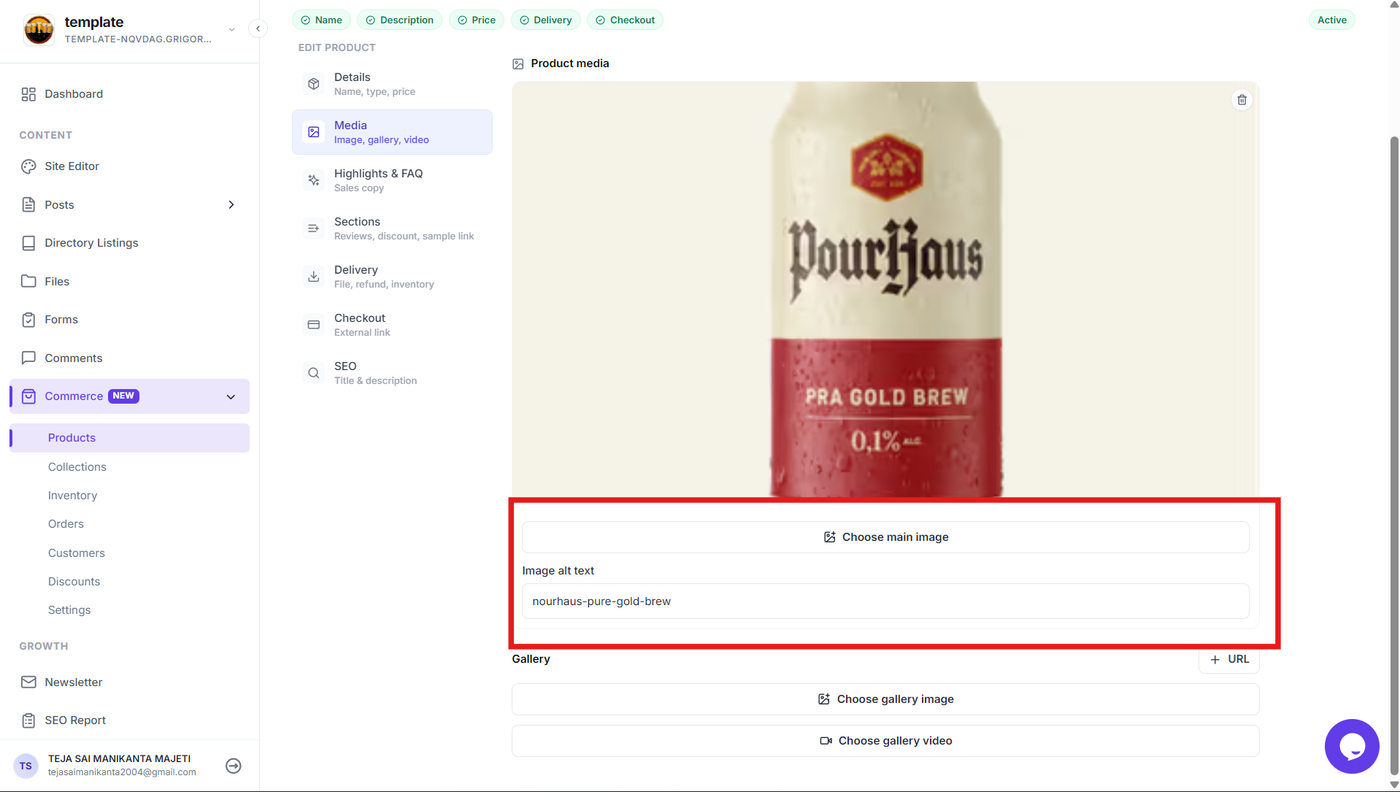
Under Product media, click Choose main image to select the primary image for the product.
Add descriptive Image alt text for the selected image to provide an accessible text description.
Step 4: Add gallery images and videos
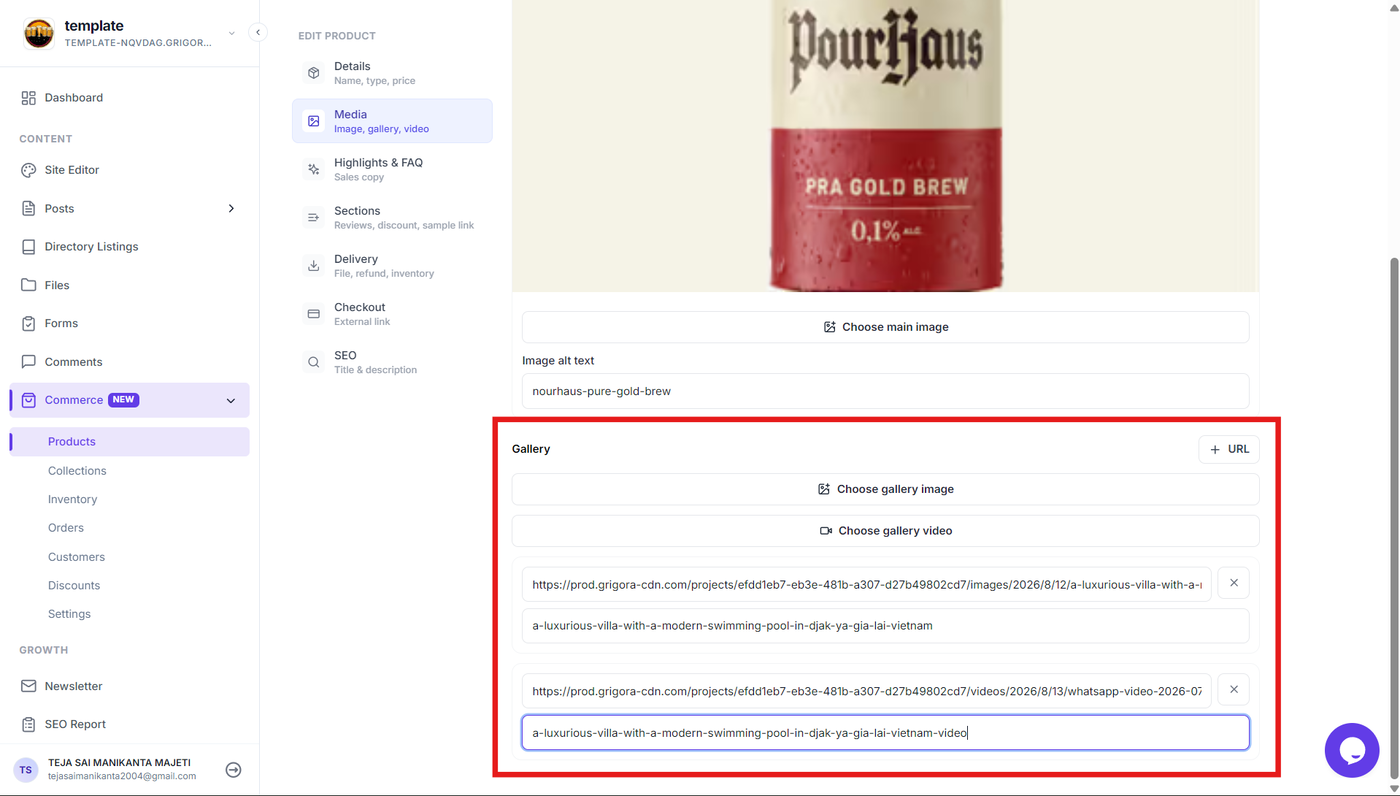
Use the Gallery section to add additional product media.
Click Choose gallery image to select an image, or use + URL to add an image using its URL. To add a video, click Choose gallery video and select the required video.
Gallery images and videos provide additional views and information that complement the main product image.
Step 5: Review and save product media
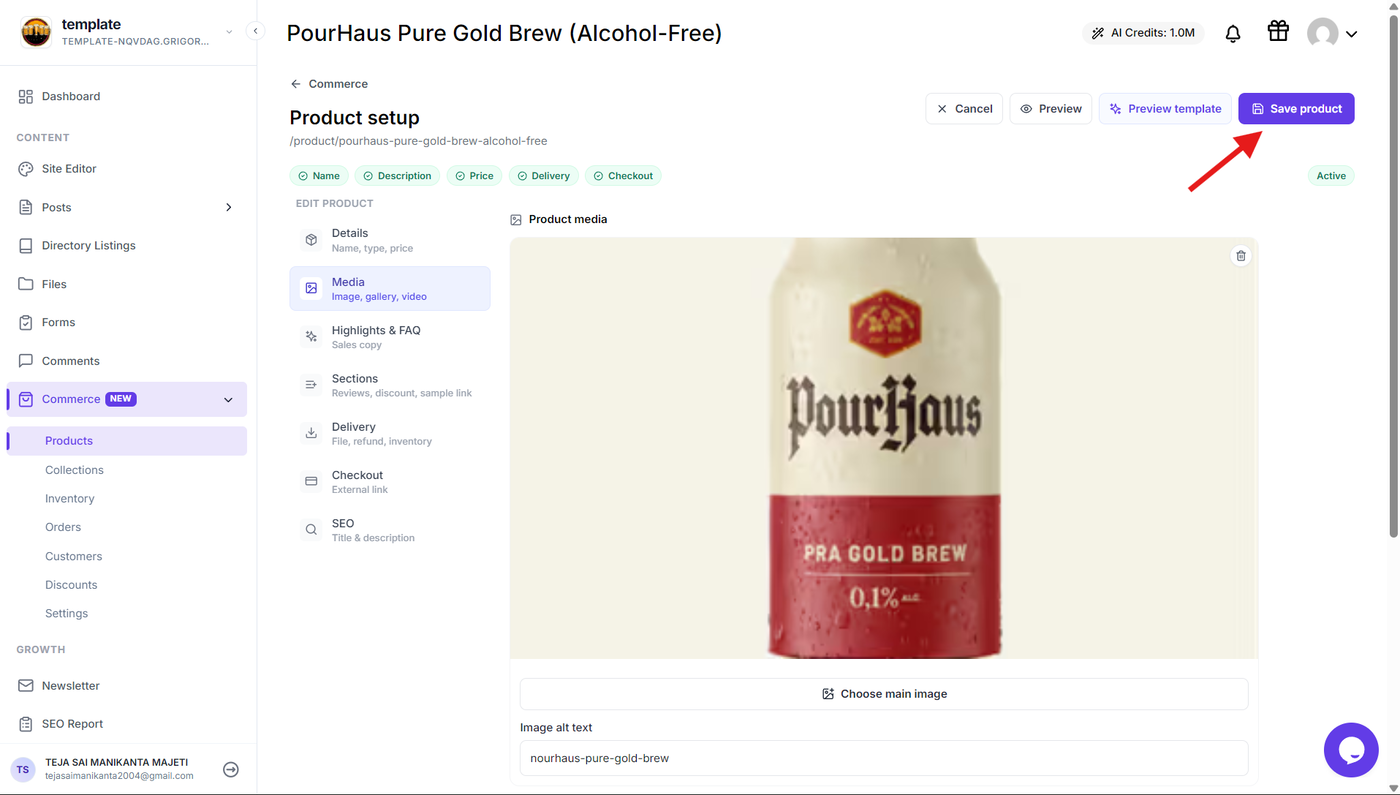
Review the media associated with the product and make any necessary changes. You can replace the main image, remove existing media, or add additional gallery items.
Once you are satisfied with the media, click Save Product to save the changes.
Configure Store-Wide Media Settings
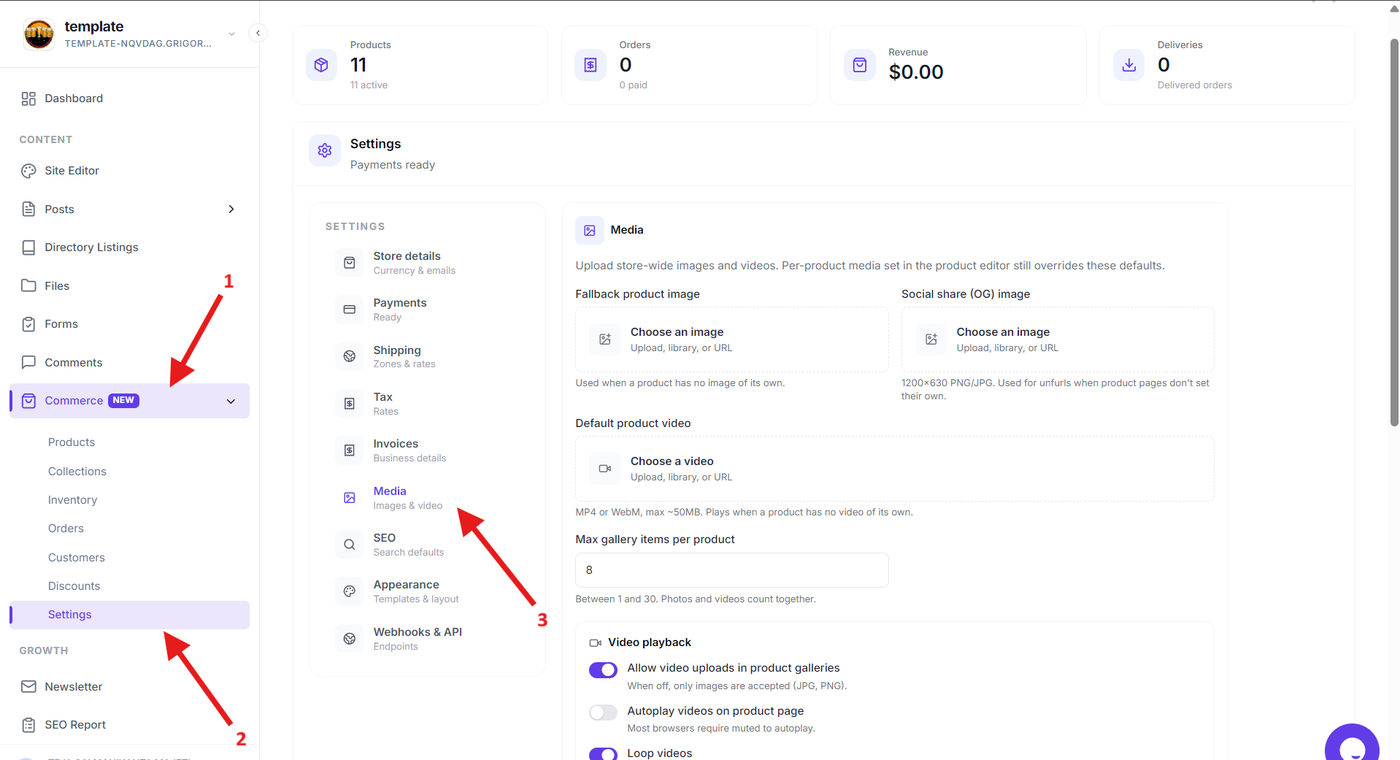
Step 6: Open Commerce Media settings
From the Grigora dashboard, expand Commerce, select Settings, and open Media.
The Media settings provide default media options and controls that apply across your store. Product-level media configured in the product editor can override the applicable defaults.
Step 7: Configure default product media
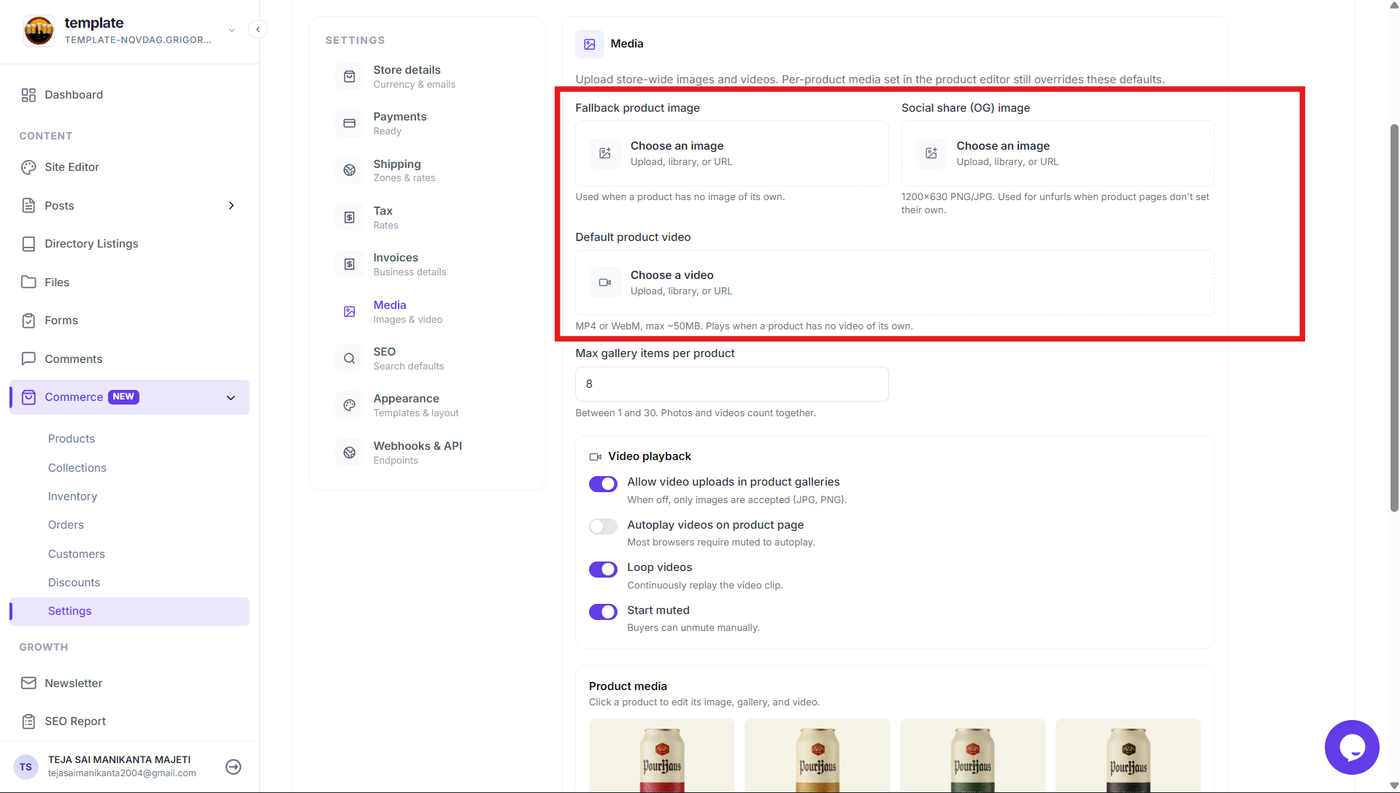
Configure the available default media options:
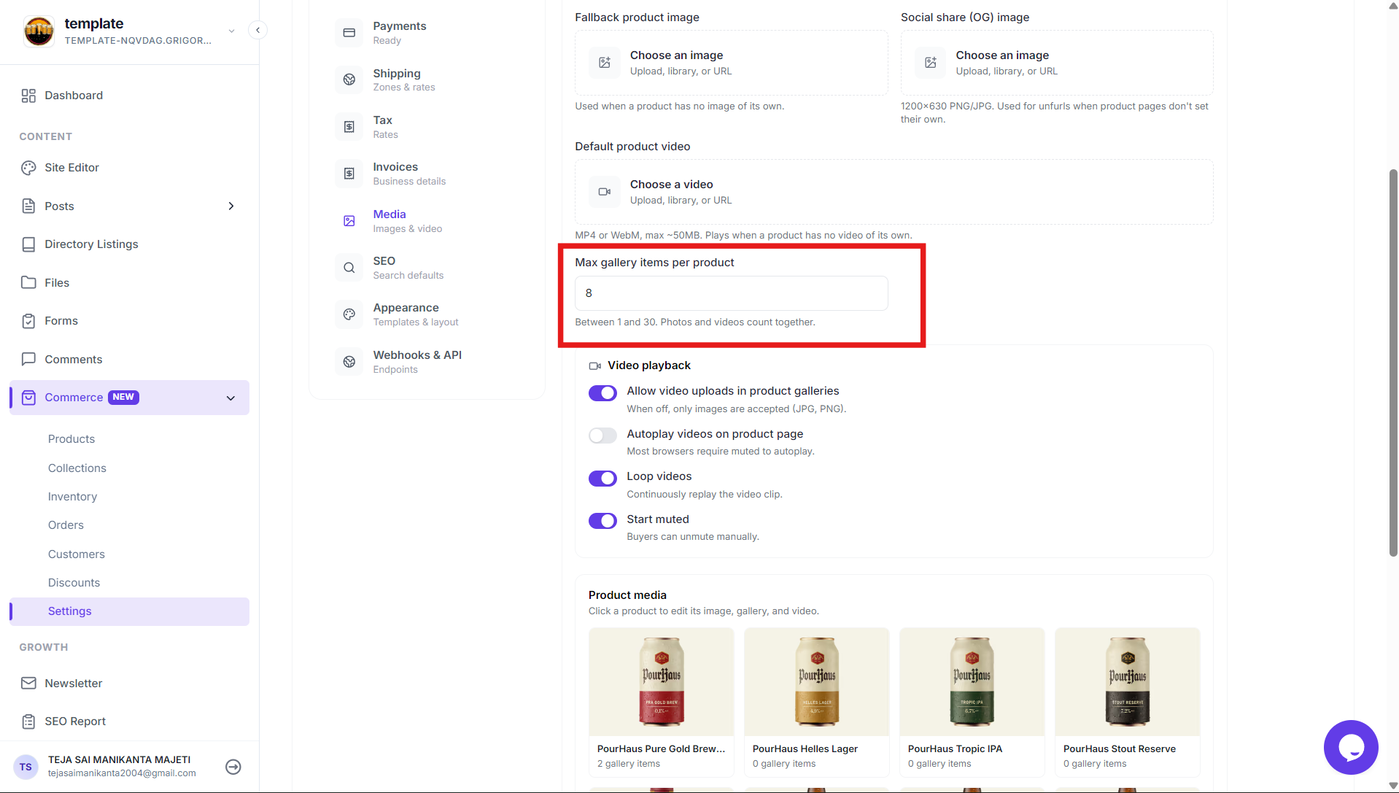
Fallback product image – Select an image to display when a product does not have its own image.
Social share (OG) image – Select the default image used for social sharing when a product page does not have its own social share image.
Default product video – Select a default video to play when a product does not have its own video.
You can choose media from an upload, your library, or a URL, depending on the available option.
Step 8: Set the maximum gallery items
Use Max gallery items per product to specify how many images and videos a product gallery can contain.
Enter a value between 1 and 30. Both photos and videos count toward this limit.
For example, setting the value to 8 allows a product to have up to eight combined gallery images and videos.
Step 9: Configure video settings
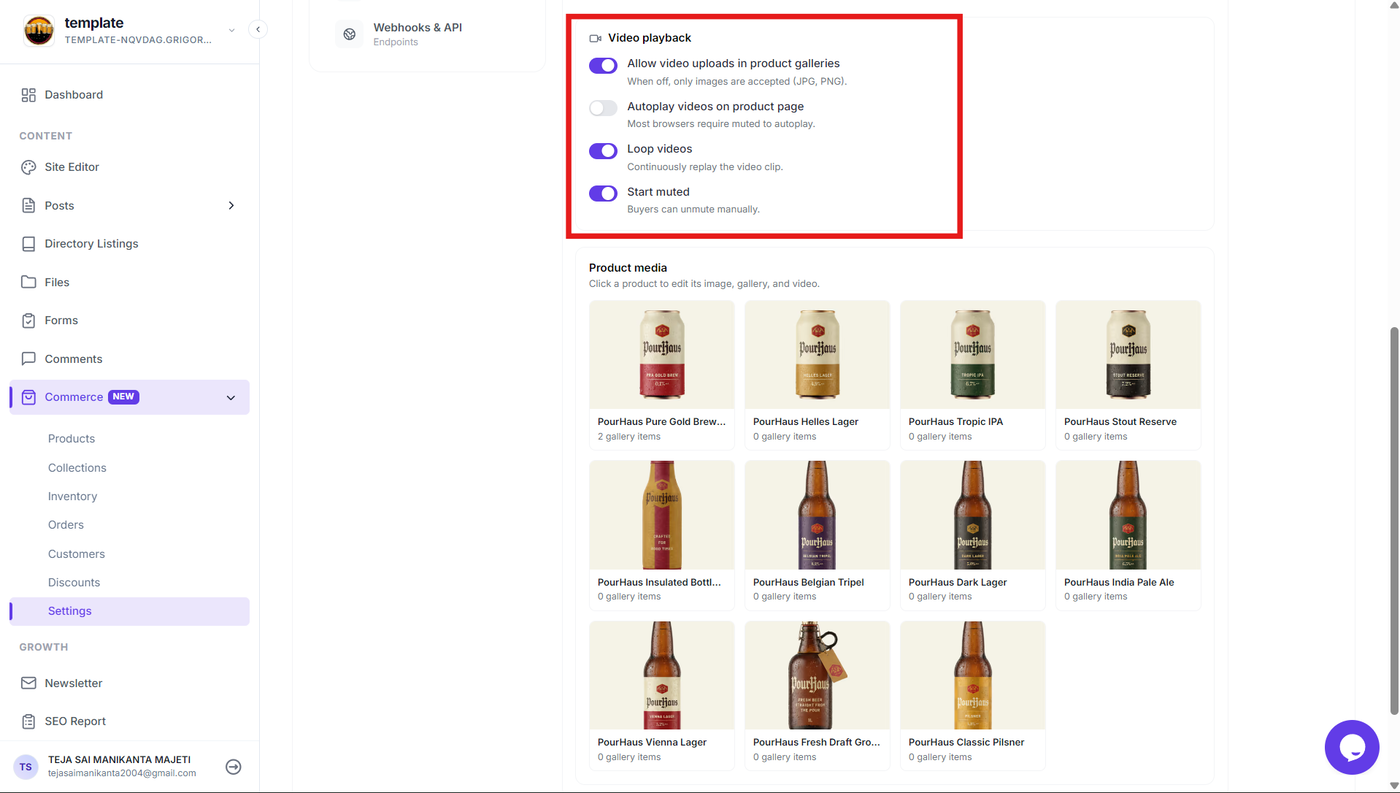
Use the Video playback settings to control whether videos can be added to product galleries and how they behave on the product page.
Allow video uploads in product galleries – Enable this option to allow videos in product galleries. When disabled, only supported image formats such as JPG and PNG are accepted.
Autoplay videos on product page – Automatically starts videos when supported by the browser.
Loop videos – Continuously replays the video after it reaches the end.
Start muted – Starts videos without sound, allowing customers to unmute them manually.
Configure these options based on how you want product videos to behave for customers.
Verify Product Media
Step 10: Preview the product page
Open the product page after completing the media configuration and verify that the main image, gallery items, and videos are displayed correctly.
Check that the configured fallback media, gallery limit, and video playback behavior work as expected. Make any required changes from the product's Media section or the Commerce Media settings.