

Your subscriber list is the foundation of your email marketing. In Grigora, the Contacts dashboard provides a unified view of every person who has signed up through your website forms, imported from third-party tools, or subscribed to your newsletter.
This guide explains how to navigate the Contacts dashboard, understand contact lifecycle statuses (Subscribed, Pending, Unsubscribed, Cleaned, and Complained), inspect individual subscriber details, and perform bulk management actions.
Navigating to the Contacts Dashboard
Open your website project in the Grigora dashboard.
Click on Newsletter in the sidebar.
In the top sub-navigation, click on the Contacts tab.
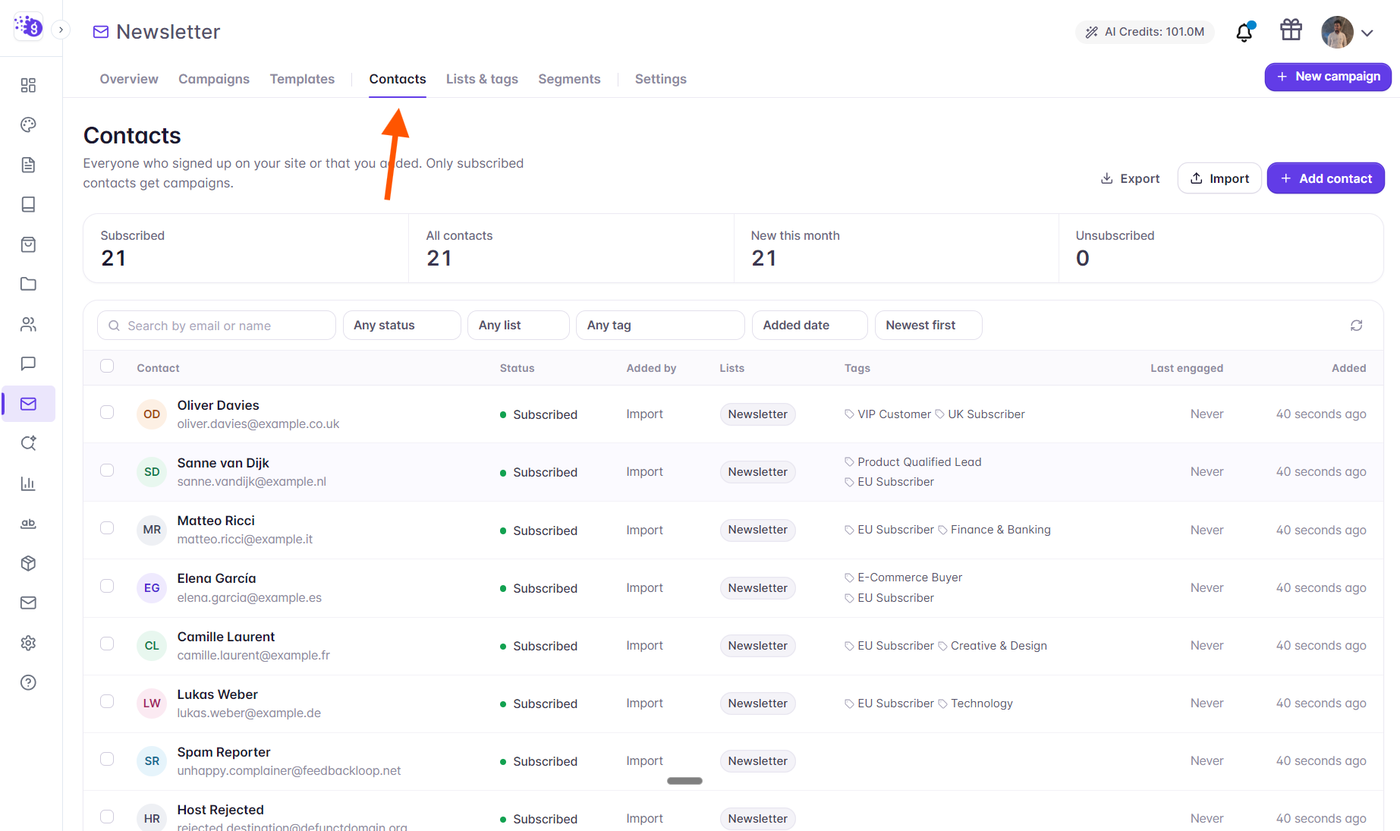
At the top of the Contacts page, stat tiles display your total subscriber counts broken down by status, giving you an immediate health check of your audience.
Understanding Subscriber Lifecycle Statuses
Every contact in Grigora carries a specific status that determines whether they can receive email campaigns:
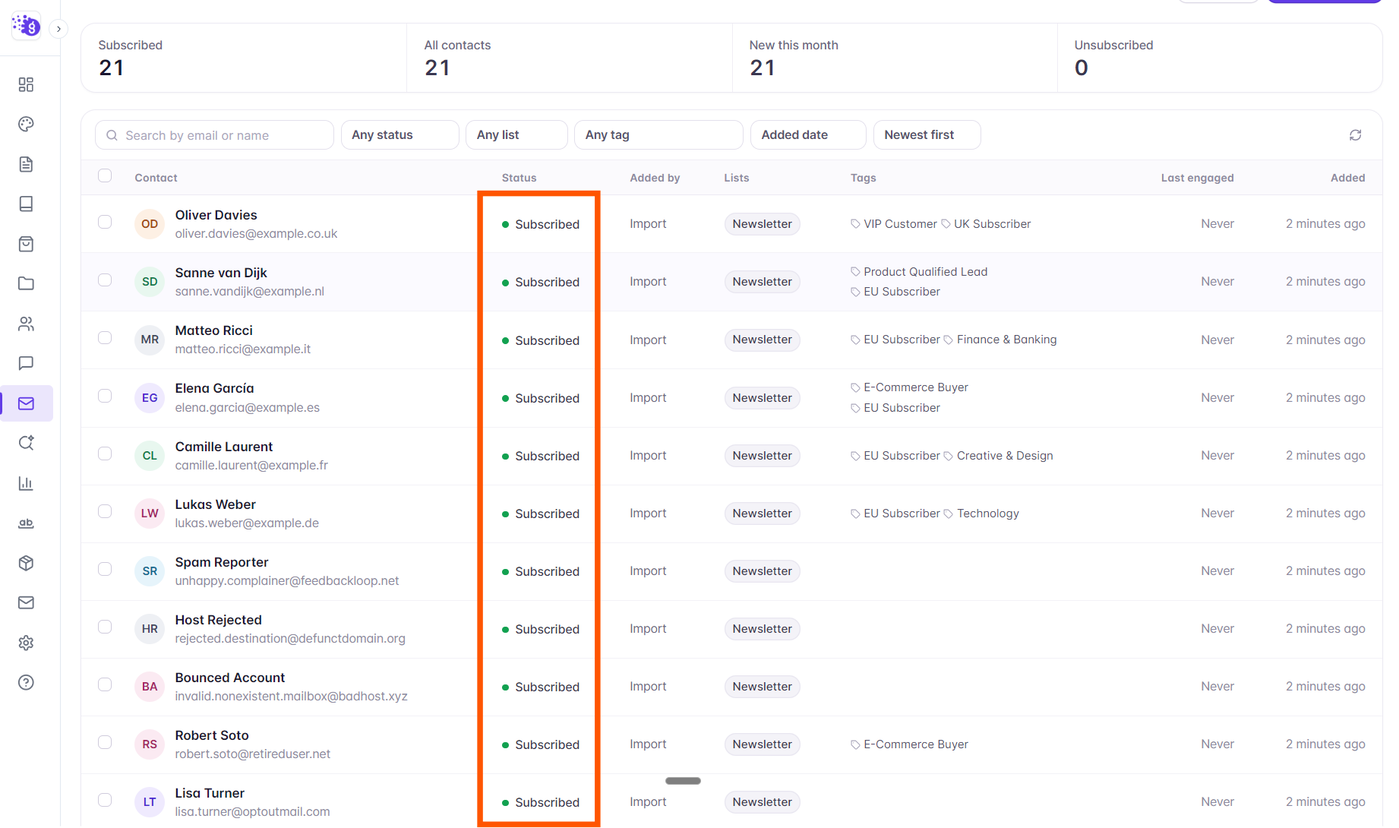
Status | Indicator | Can Receive Campaigns? | Description |
|---|---|---|---|
Subscribed | Green Pill | Yes | Active, verified subscribers who have consented to receive your broadcasts. |
Pending | Amber Pill | No | Subscribers who signed up via a list with double opt-in enabled and have not yet clicked the confirmation link in their verification email. |
Unsubscribed | Slate Pill | No | Contacts who clicked the unsubscribe link in a campaign footer or were manually unsubscribed by an administrator. |
Cleaned | Red Pill | No | Email addresses that encountered a permanent delivery failure (hard bounce), invalid mailbox, or domain error. Automatically suppressed. |
Complained | Red Pill | No | Recipients who marked a campaign as spam. Permanently excluded from all future sends to protect your sender score. |
Searching and Filtering Contacts
Grigora offers powerful search and multi-layer filtering tools to quickly locate specific subscribers:
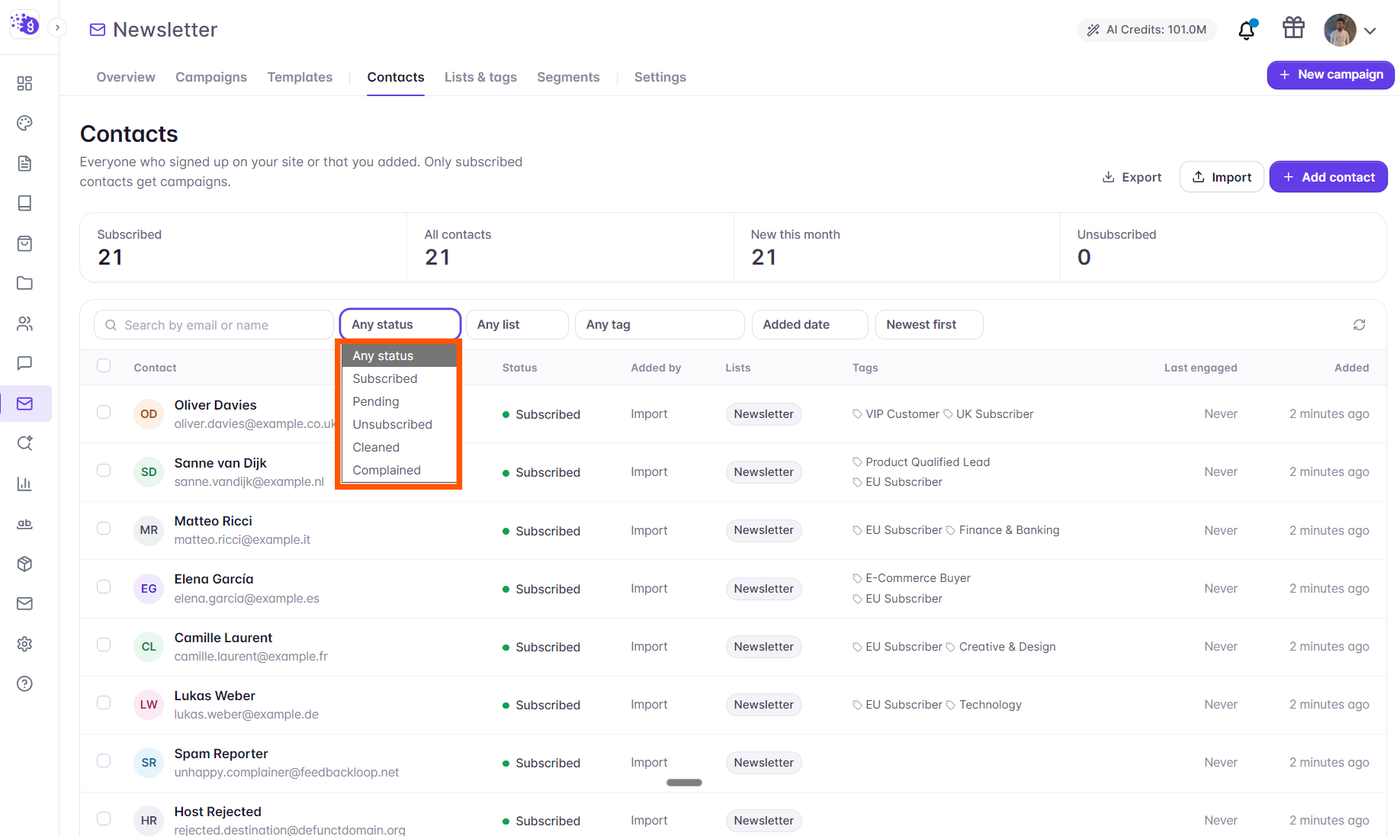
Instant Search: Search across email addresses, first names, last names, and phone numbers.
Status Filter: Filter your table by Subscribed, Pending, Unsubscribed, Cleaned, or Complained.
List Filter: Filter by specific audience lists (e.g., Newsletter, VIP Customers).
Tag Filter: Narrow down contacts by custom tags.
Viewing Subscriber Details & History (Contact Drawer)
Click on any contact row to open the Contact Drawer on the right side of the screen:
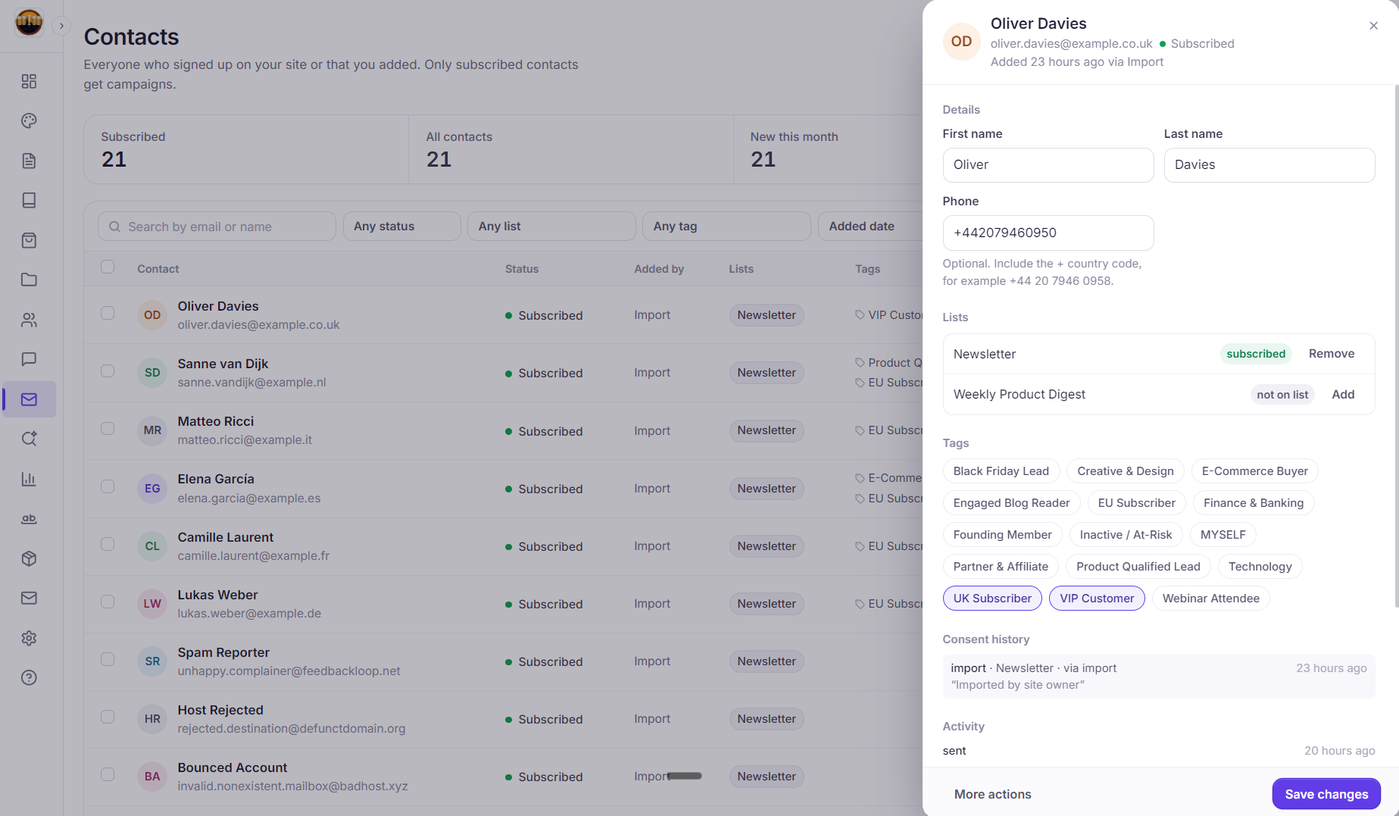
The drawer reveals comprehensive profile information:
Core Info: Full email address, name, phone number, and join date.
List & Tag Memberships: Active lists and tags assigned to this contact.
Custom Fields: Values for custom subscriber attributes defined in your settings (e.g., Company, Birthday, Tier).
Consent Audit: Timestamp and wording of the consent statement the subscriber agreed to upon signup.
Engagement Summary: Total campaigns received, open rates, and link click history.
Adding Contacts Manually
To add an individual subscriber directly without importing a file:
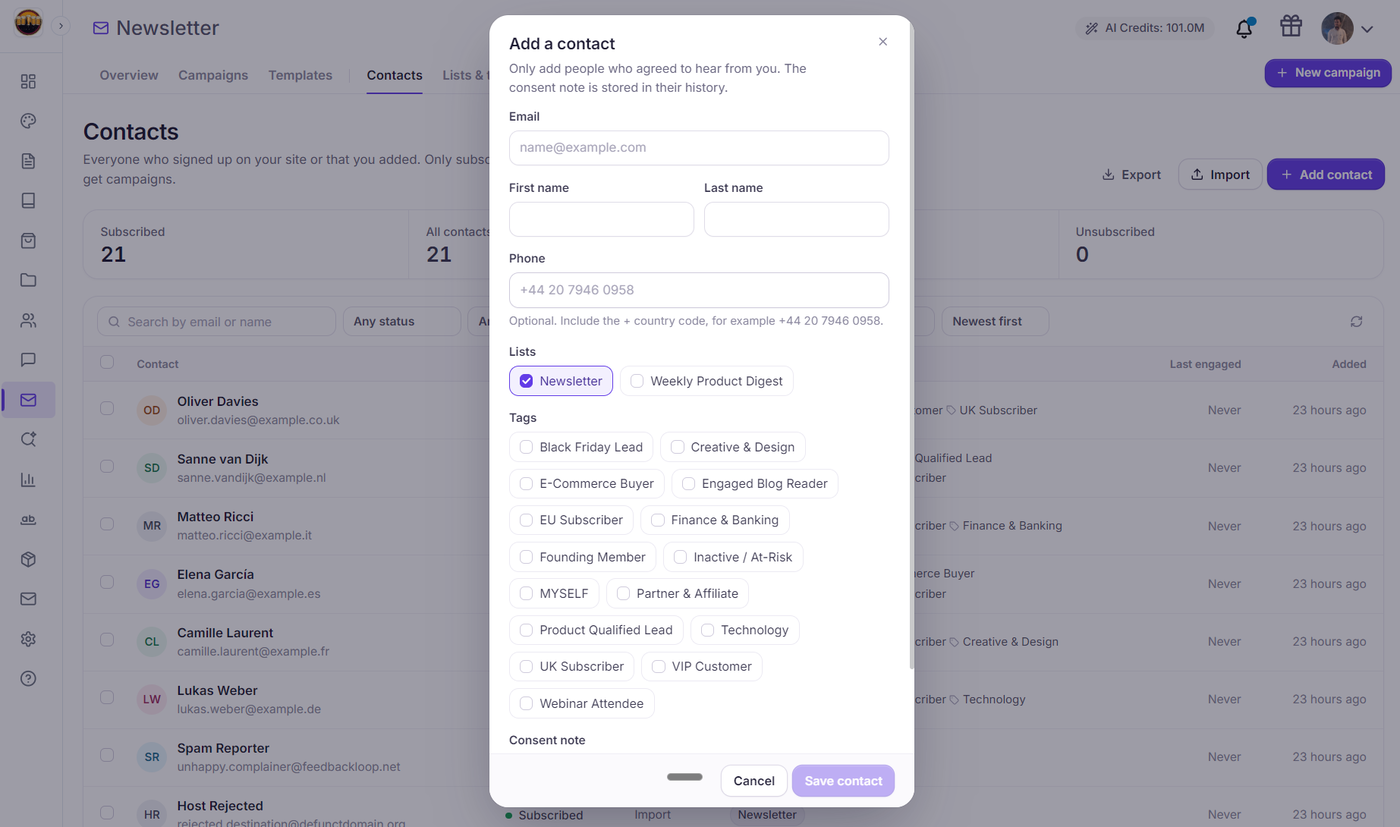
Click the Add contact button at the top of the table.
Enter the subscriber's email address (required), first name, last name, and phone number.
Select which list(s) to add them to and assign any relevant tags.
Click Save contact.
Performing Bulk Actions
Select multiple contacts using the checkboxes on the left of the table to activate the bulk action toolbar:
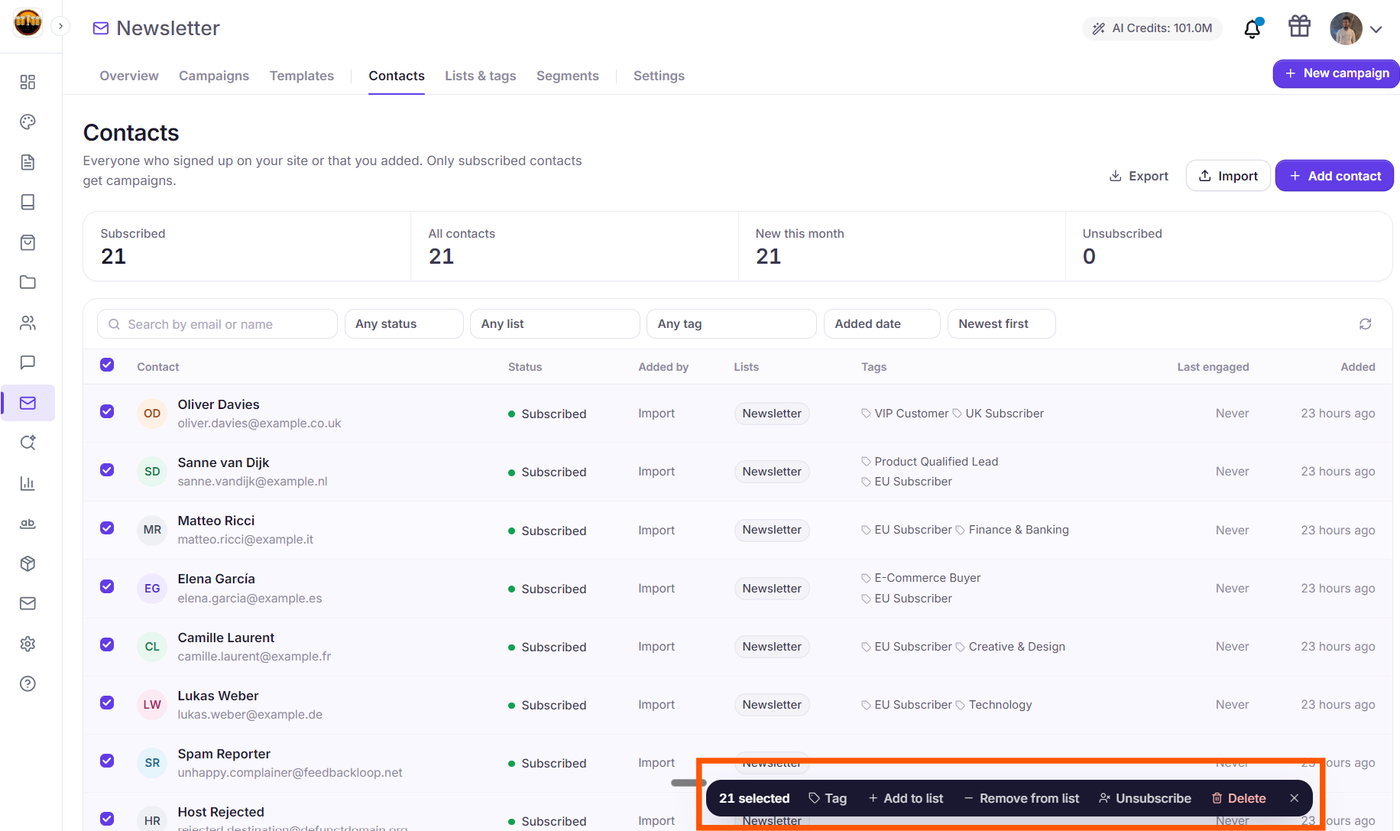
Add to List: Assign selected contacts to an existing list.
Apply / Remove Tags: Add or remove tags in bulk.
Unsubscribe: Set status to unsubscribed for all selected contacts.
Delete: Permanently remove the contacts from your database.
Next Steps
How to Import Contacts into Grigora Using the CSV Import Wizard
How to Create and Organize Subscriber Lists in Grigora
How to Build Targeted Audience Segments with Multi-Condition Rules