

In this comprehensive guide, we'll walk you through how to connect Grigora MCP with Cursor. We'll show you how to access Cursor's MCP configuration, add the Grigora MCP server, and verify that the connection is working.
Prerequisites
Before you begin, make sure you have Cursor installed and a Grigora account with a project.
Step 1: Open Cursor Settings
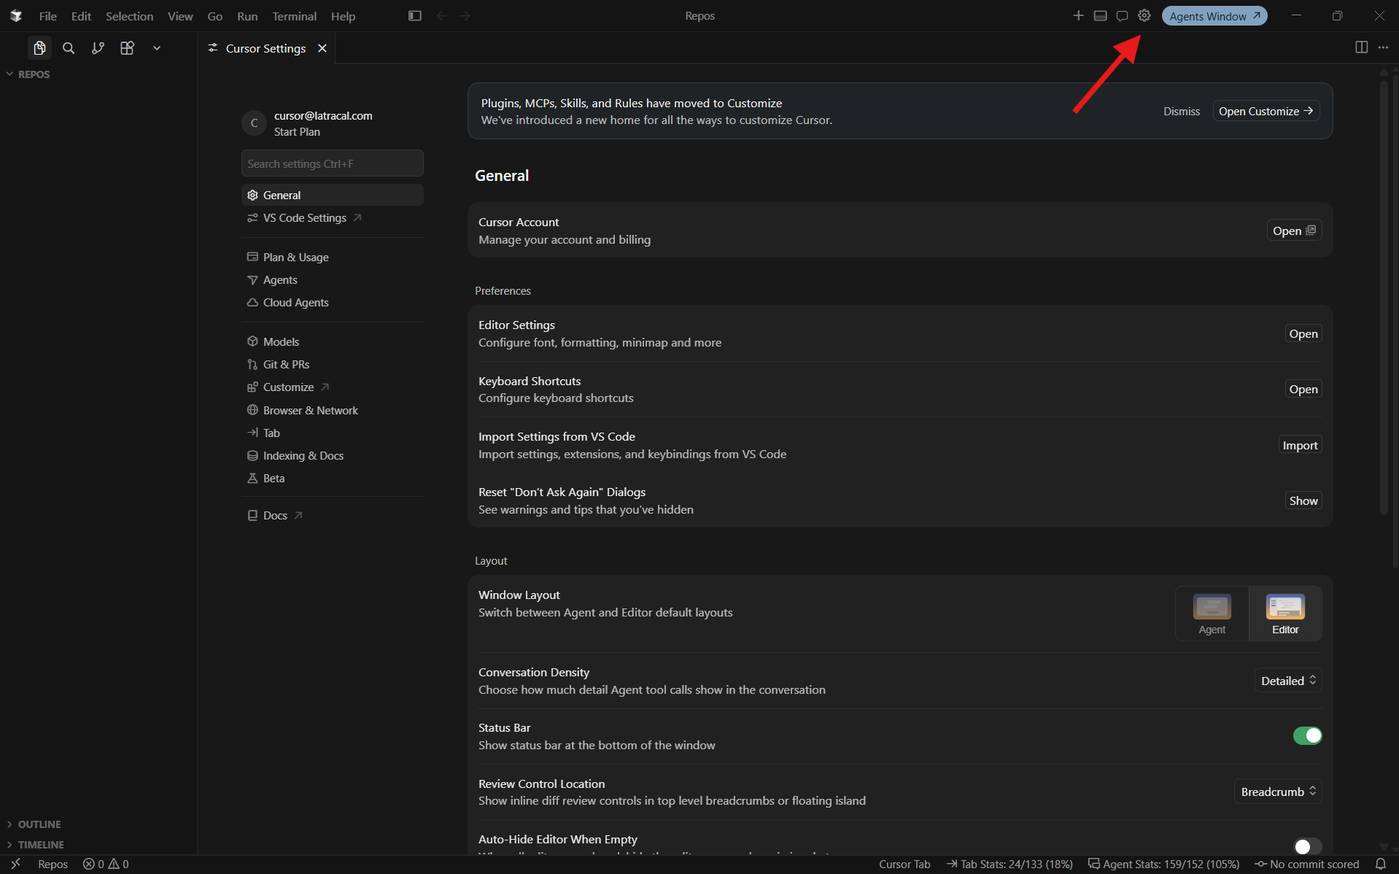
Open Cursor and click the Settings icon. You can also open Settings using the keyboard shortcut Ctrl + Shift + J.
Step 2: Open MCP Settings
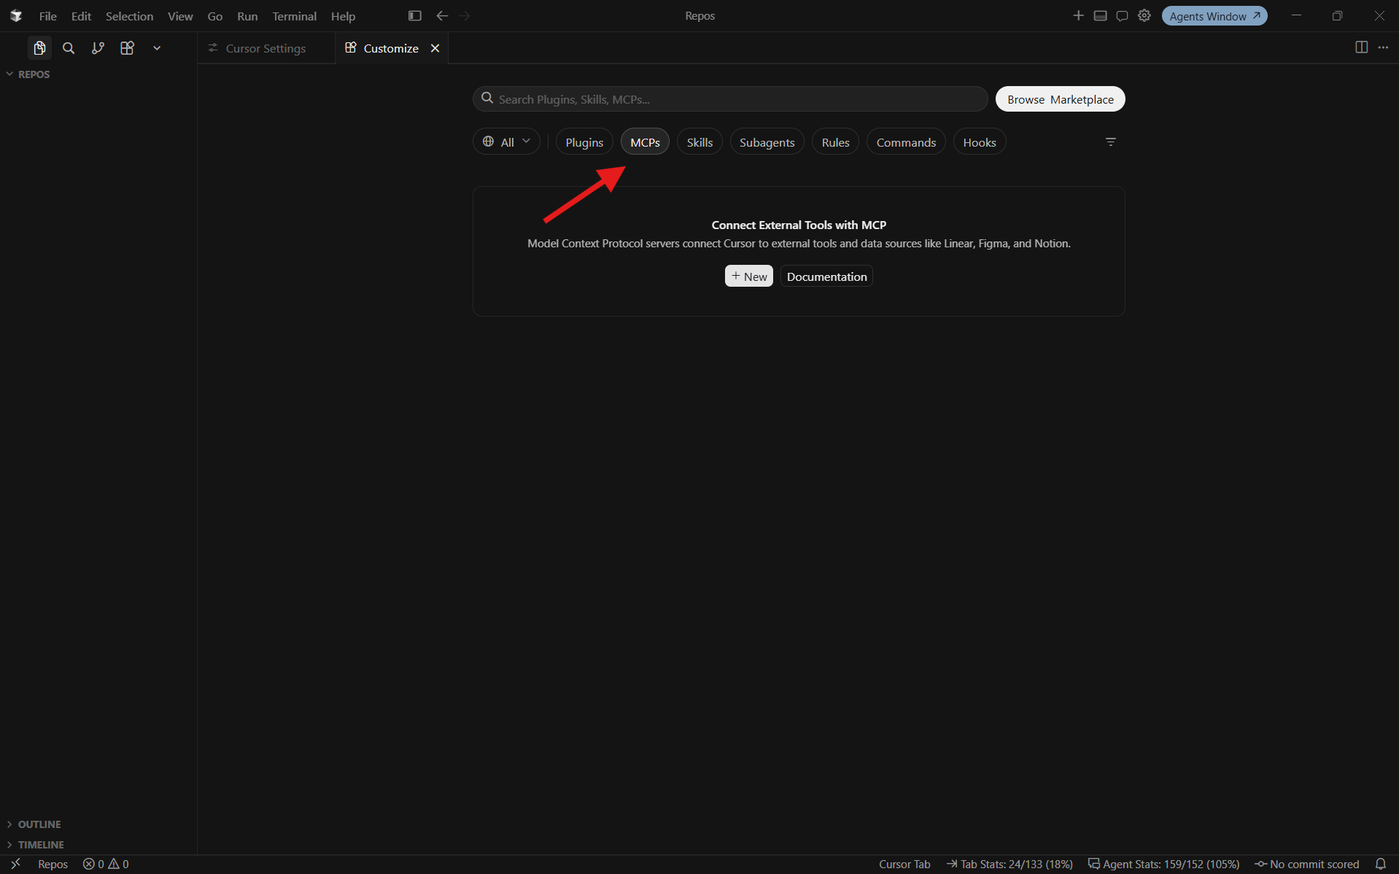
In Cursor Settings, use the Search Settings bar to search for MCP, or select Customize from the sidebar.
Then select the MCPs tab to open the MCP configuration page.
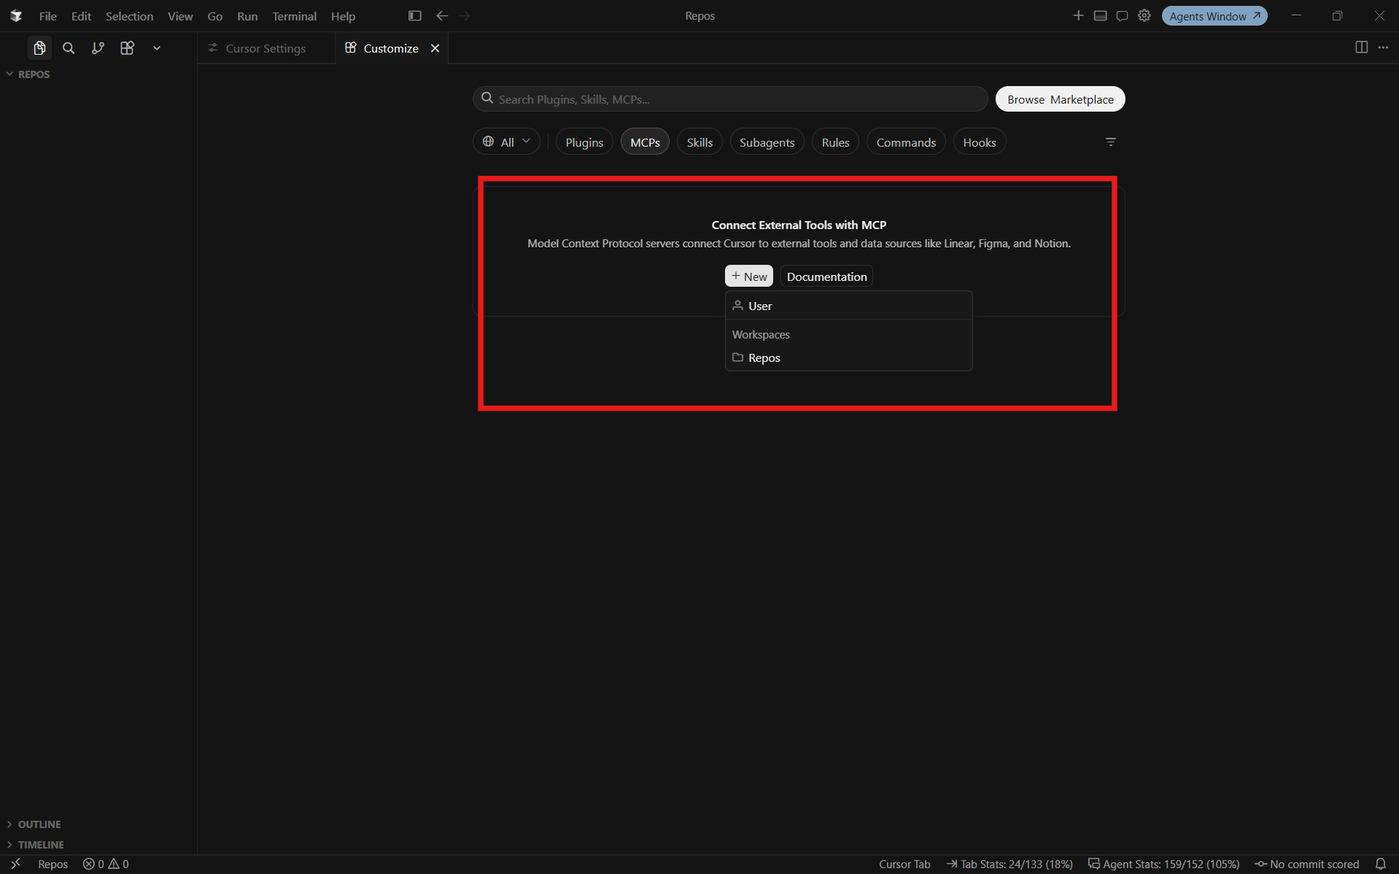
Click + New under Connect External Tools with MCP. Cursor will ask where you want to add the MCP configuration:
User – Add the MCP server globally so it can be used across your Cursor projects.
Repos – Add the MCP server to a specific workspace or repository.
For this guide, select User to make Grigora MCP available globally in Cursor.
Step 3: Open the MCP Configuration
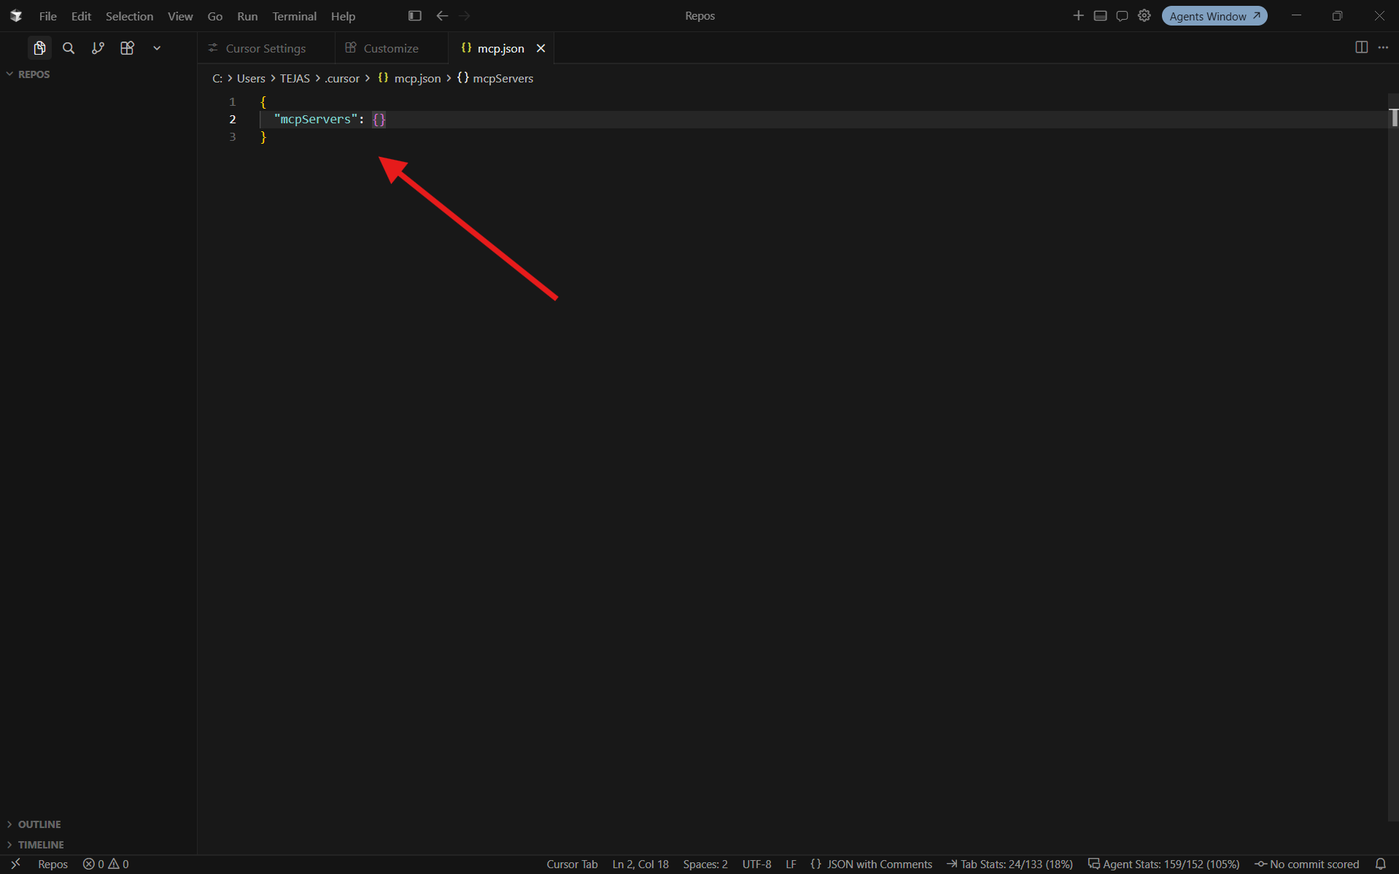
After selecting User, Cursor will open the MCP configuration file where you can add your MCP server details.
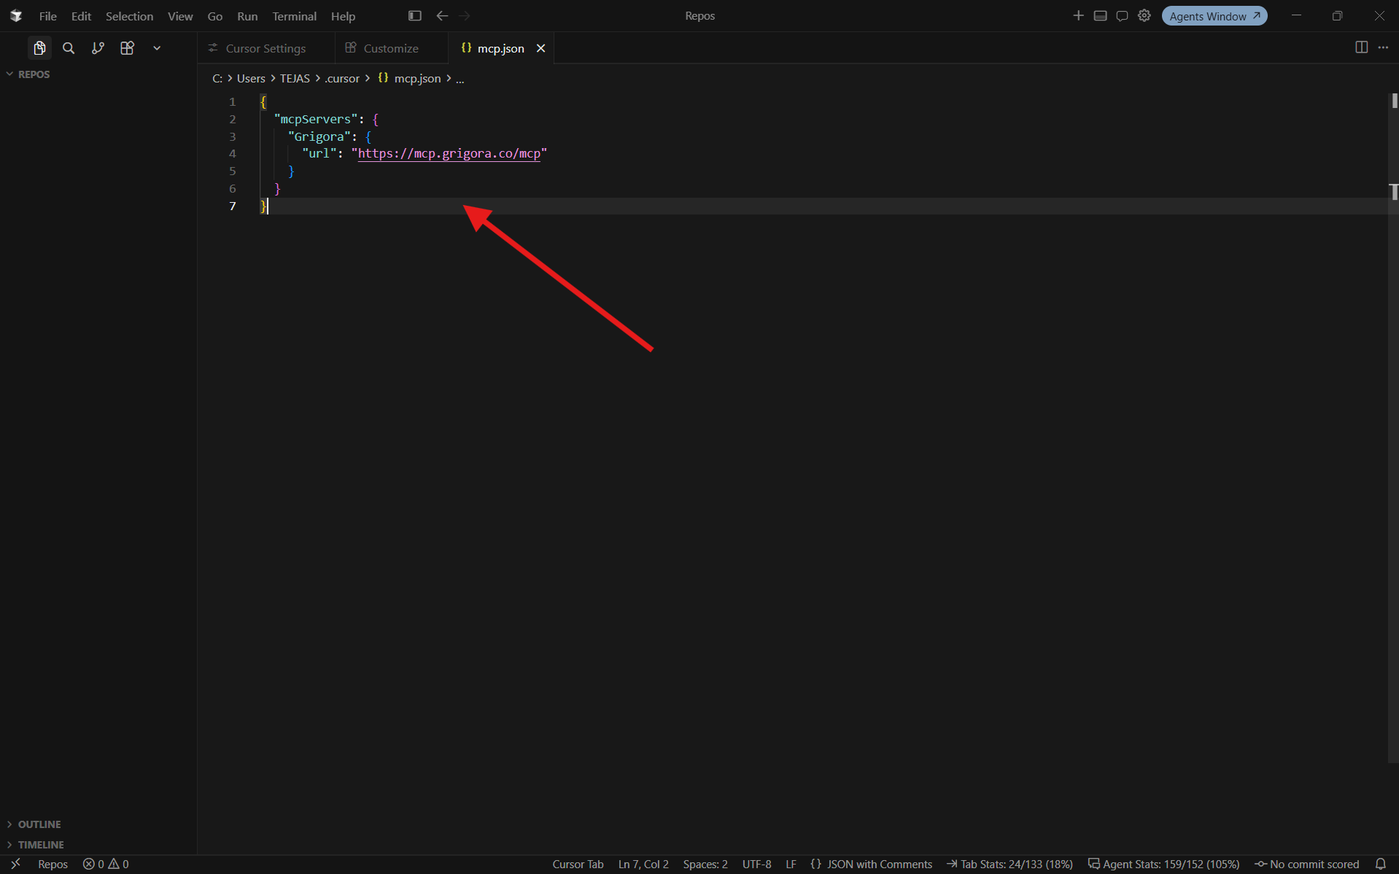
The configuration file will contain the mcpServers section. This is where you need to add the Grigora MCP server.
Step 4: Add Grigora MCP
Inside mcp.json, add the following Grigora MCP configuration:
{ "mcpServers": { "Grigora": { "url": "https://mcp.grigora.co/mcp" } }}The url points Cursor to Grigora's remote MCP server.
Step 5: Authenticate Grigora MCP
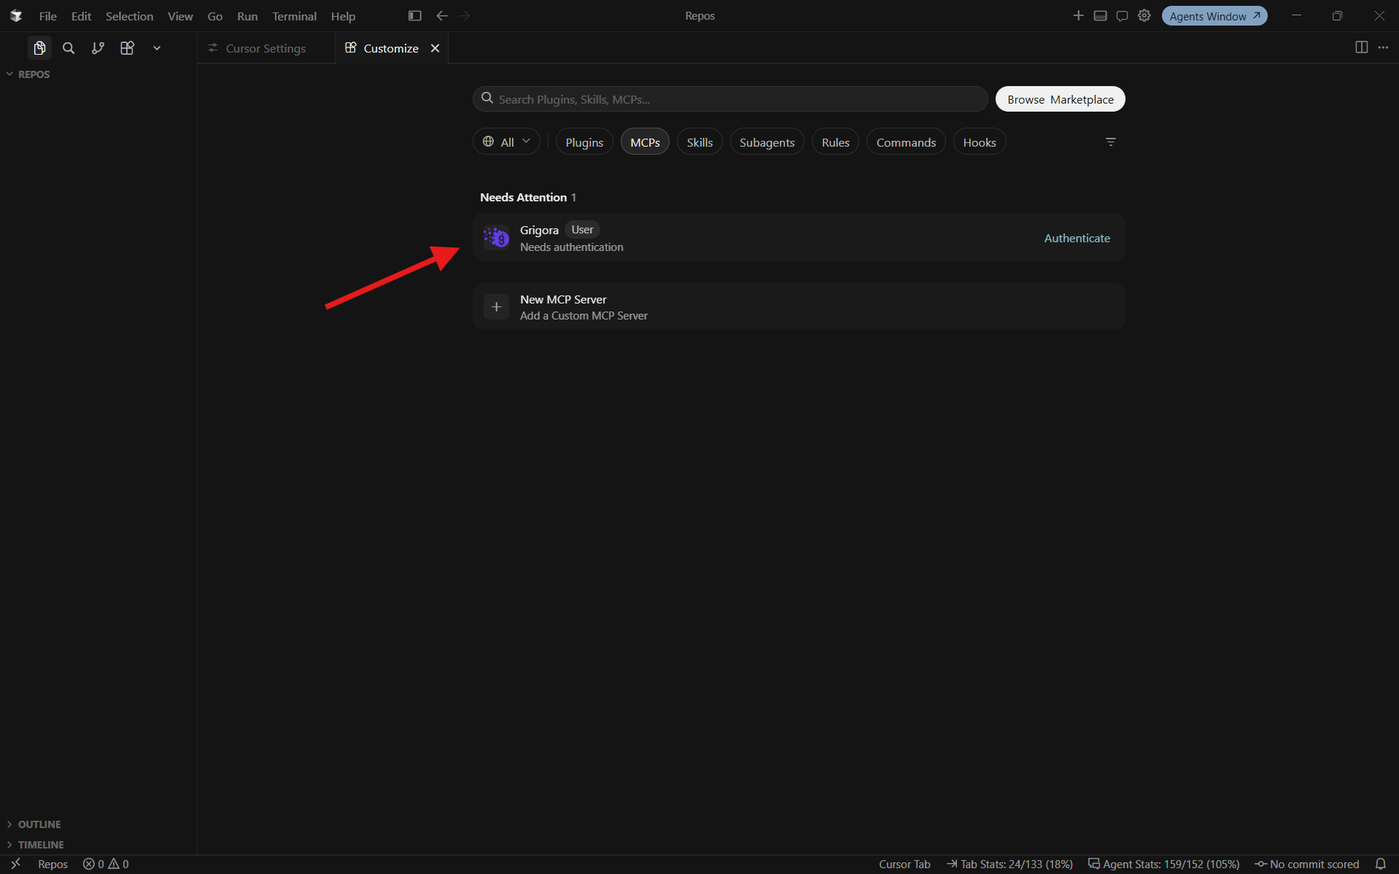
After adding the Grigora MCP configuration, return to Customize → MCPs. You will see Grigora listed under Needs Attention with an Authenticate button.
Click Authenticate to begin the authorization process.
Step 6: Grant Access to Grigora MCP
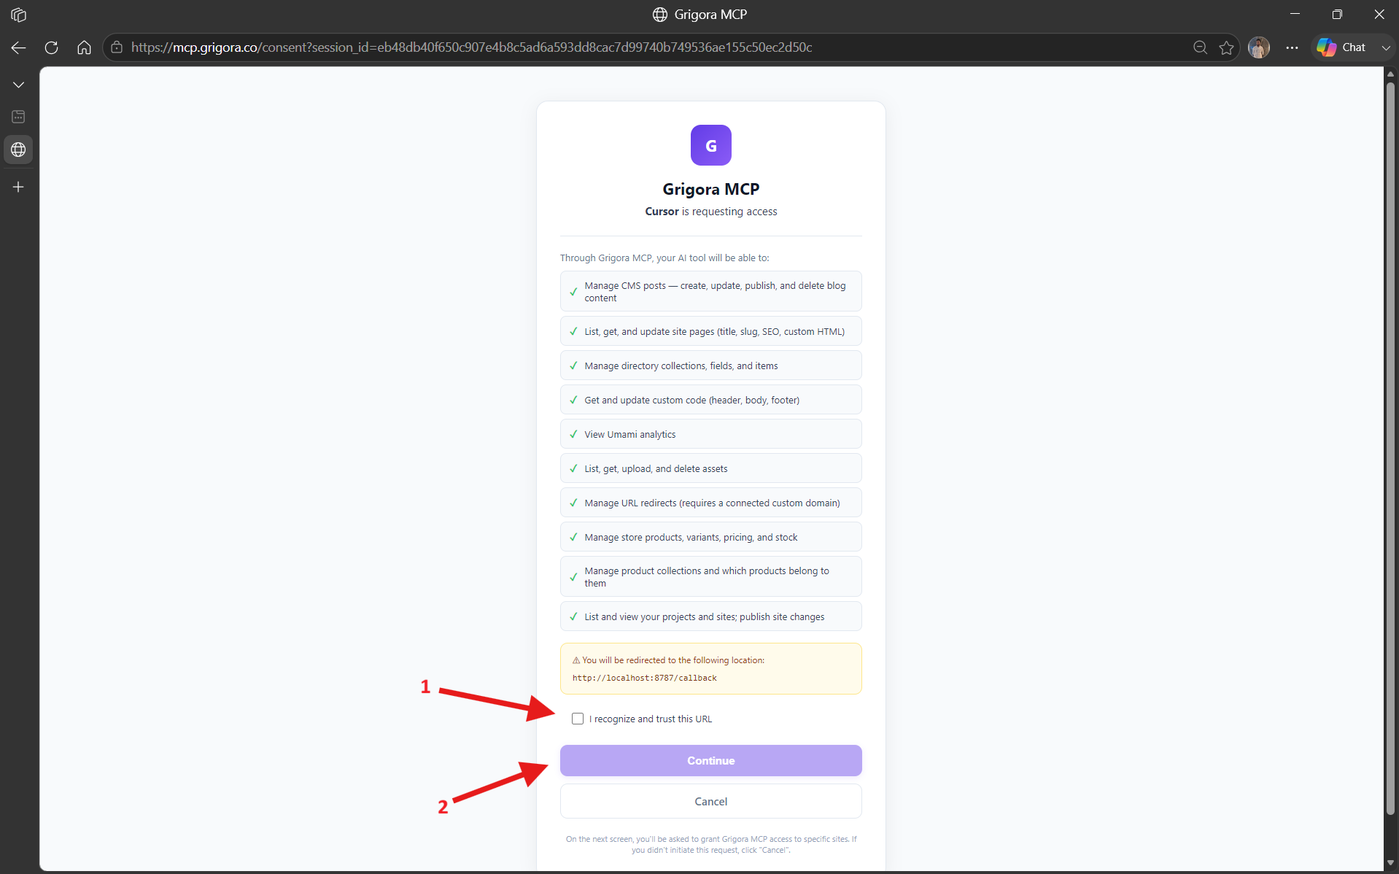
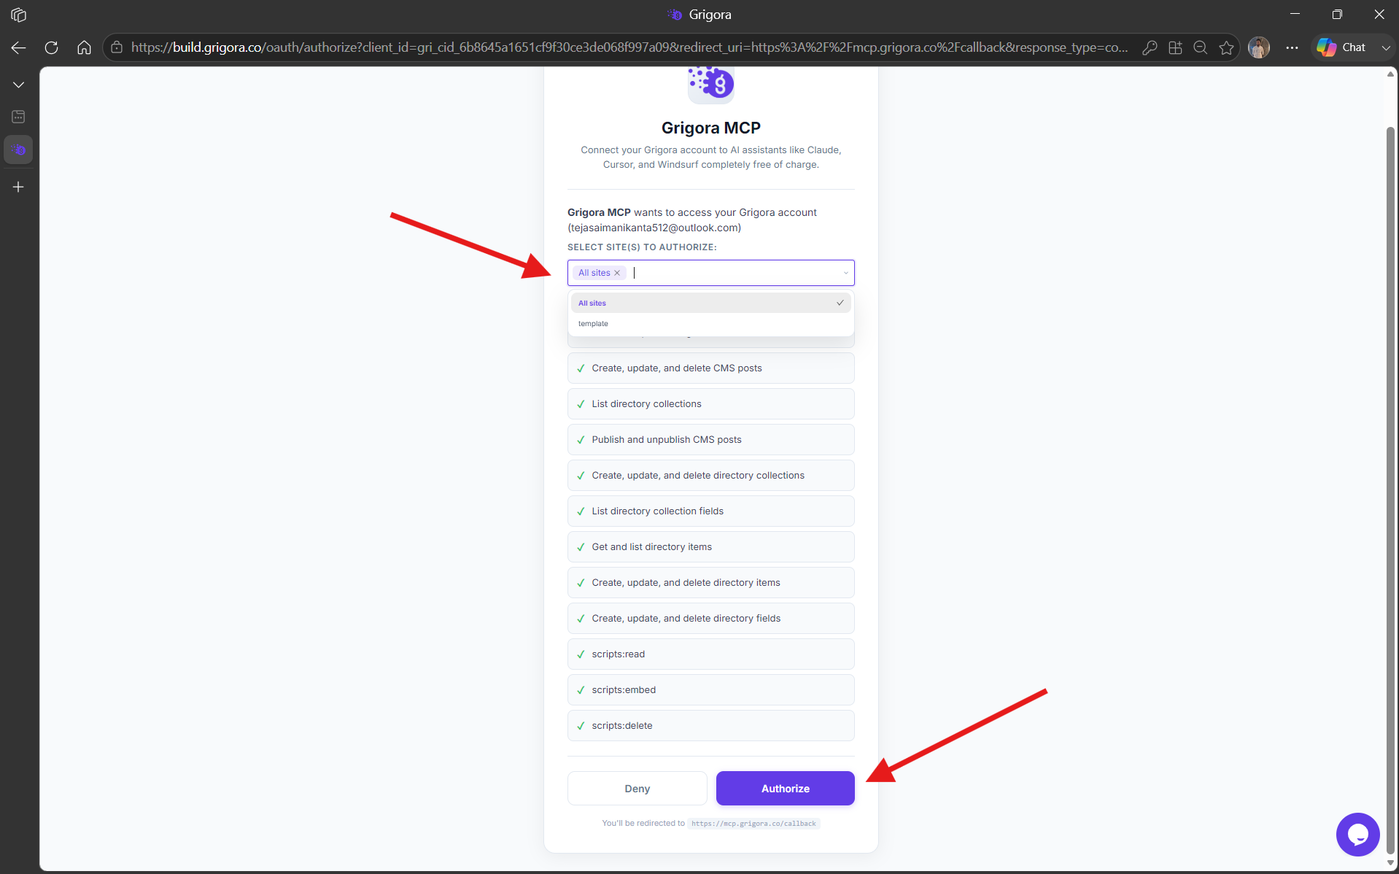
You will be redirected to the Grigora MCP authorization page. Select the site(s) you want to authorize and review the permissions requested by Cursor.
Click Authorize to grant access.
Step 8: Confirm the Connection
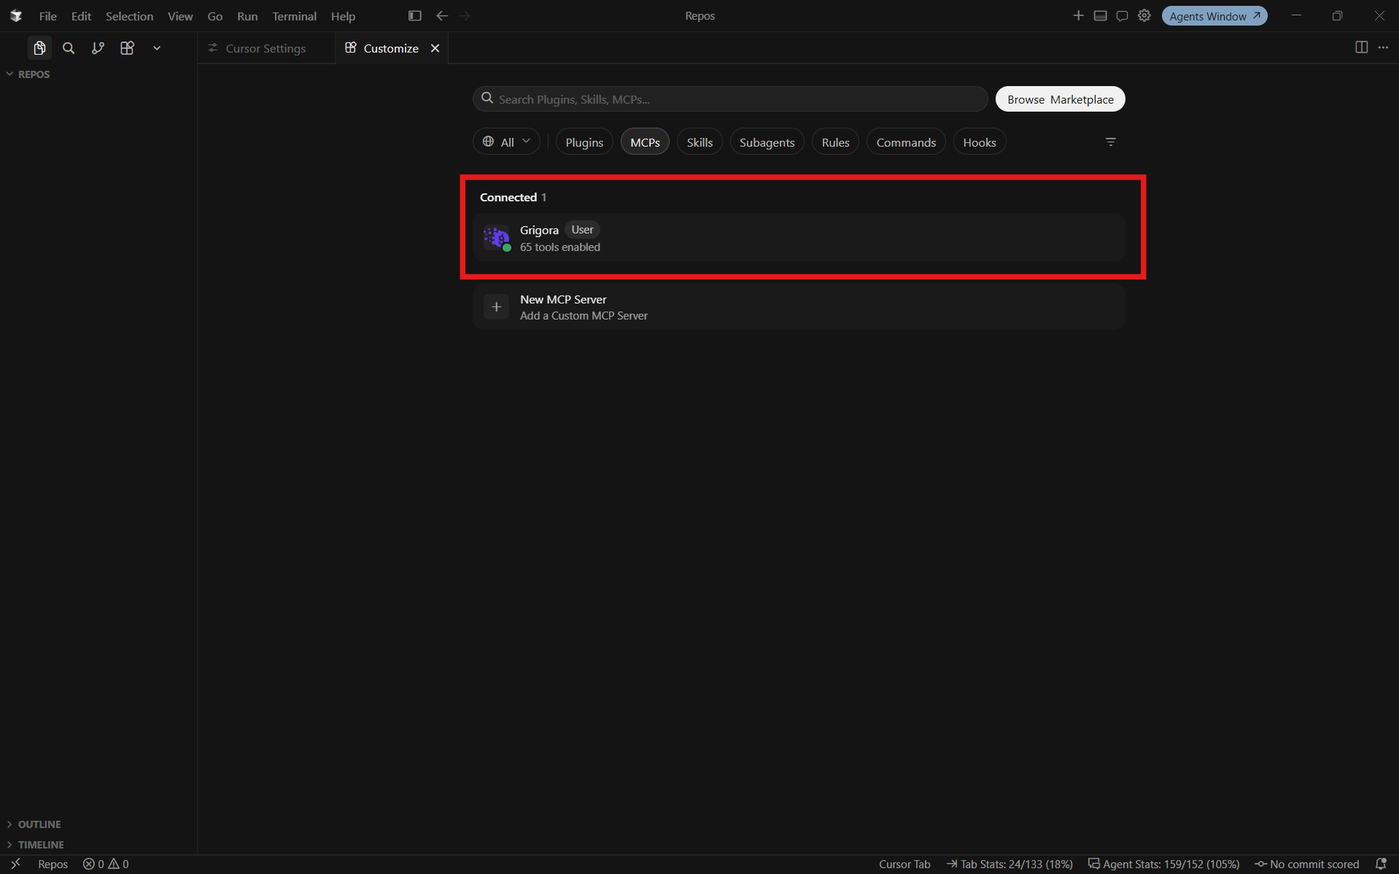
Once authorization is complete, you will be redirected back to Cursor. Grigora will now appear under Connected, along with the number of tools enabled.
This confirms that Grigora MCP has been successfully connected to Cursor.
Step 9: Start Using Grigora MCP
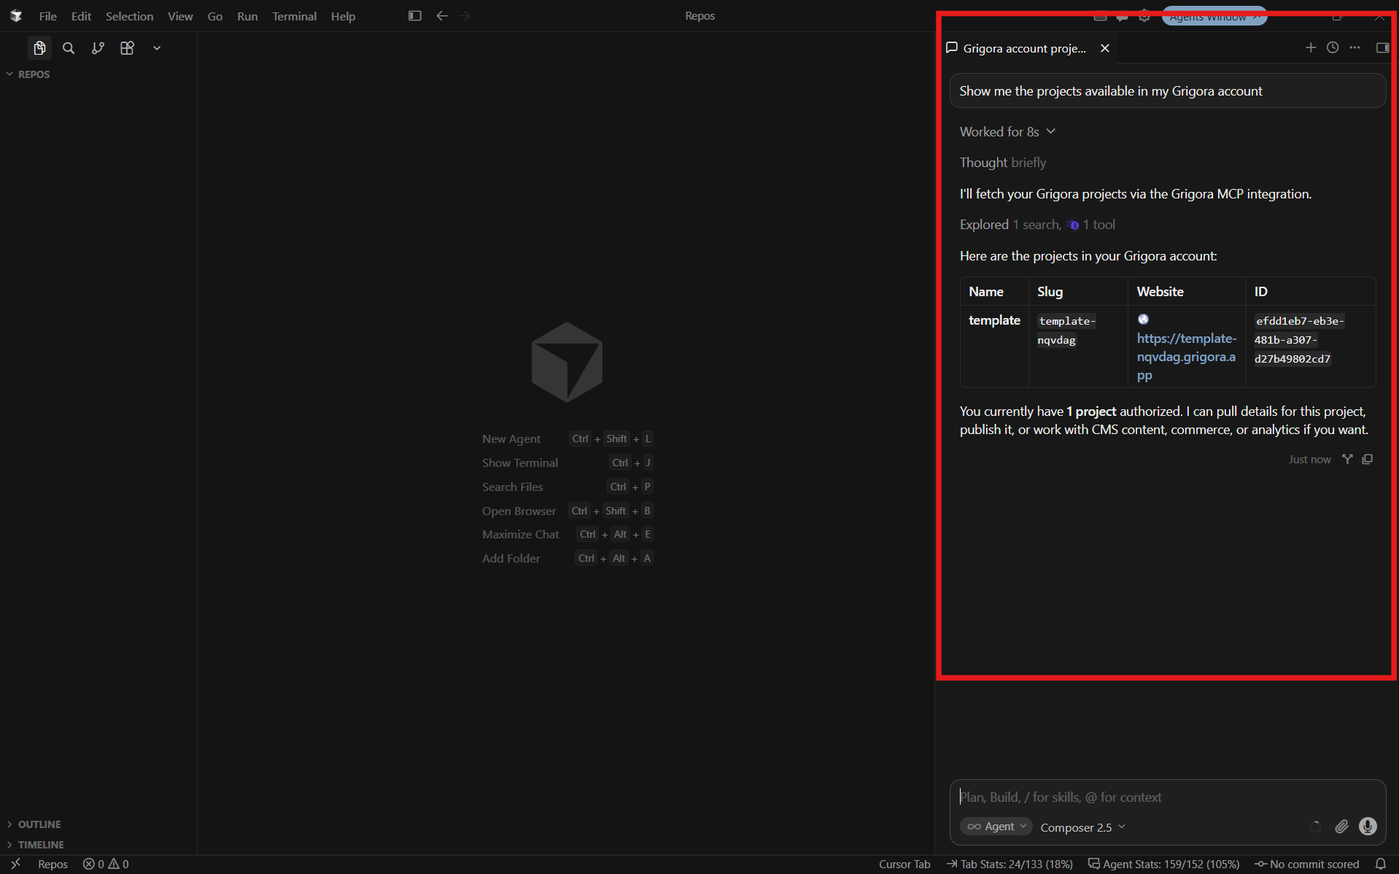
You can now open Cursor's Agent and use Grigora MCP to interact with your Grigora project.
For example, ask:
"Show me the projects available in my Grigora account."
Troubleshooting
If Grigora MCP does not appear as connected after completing the authentication process, try the following:
Reload Cursor: Refresh the Cursor window after completing the authorization process to allow the updated MCP connection status to load.
Restart Cursor: If reloading does not resolve the issue, completely close Cursor and open it again.
Check the MCP Status: Go to Customize → MCPs and confirm that Grigora appears under Connected.
Re-authenticate: If Grigora still appears under Needs Attention, click Authenticate again and complete the authorization process.
Verify the MCP URL: Make sure the configured server URL is
https://mcp.grigora.co/mcp.Check Your Grigora Access: Ensure you have access to the Grigora project or site you selected during authorization.