

When collecting email subscribers on your website, choosing the right opt-in strategy impacts both your list growth speed and your inbox deliverability. In Grigora, you can choose between Single Opt-in and Double Opt-in on a per-list basis or set a site-wide default.
This guide explains the differences between the two methods and shows you how to customize the confirmation email sent to prospective subscribers.
Understanding Single vs. Double Opt-in
Feature | Single Opt-in | Double Opt-in |
|---|---|---|
Subscriber Flow | User submits form → immediately added as | User submits form → marked as |
Growth Speed | Fastest. Zero friction. | Moderate (some users forget to confirm). |
List Hygiene | Higher risk of typos, invalid addresses, or bot spam. | Near 100% clean list with verified inboxes only. |
Legal Compliance | Compliant in most regions with proper consent text. | Strictly recommended in Germany and strict GDPR jurisdictions. |
How the Double Opt-in Process Works in Grigora
A visitor submits their email on your website's signup form.
Grigora adds the contact to your database with the status Pending (indicated with an amber pill). Contacts in pending status never receive regular marketing broadcasts.
Grigora dispatches an automated verification email containing a secure, single-use confirmation button.
Once the recipient clicks the confirmation button, their status updates to Subscribed (green pill), and they become eligible for campaigns.
Configuring Double Opt-in on a List
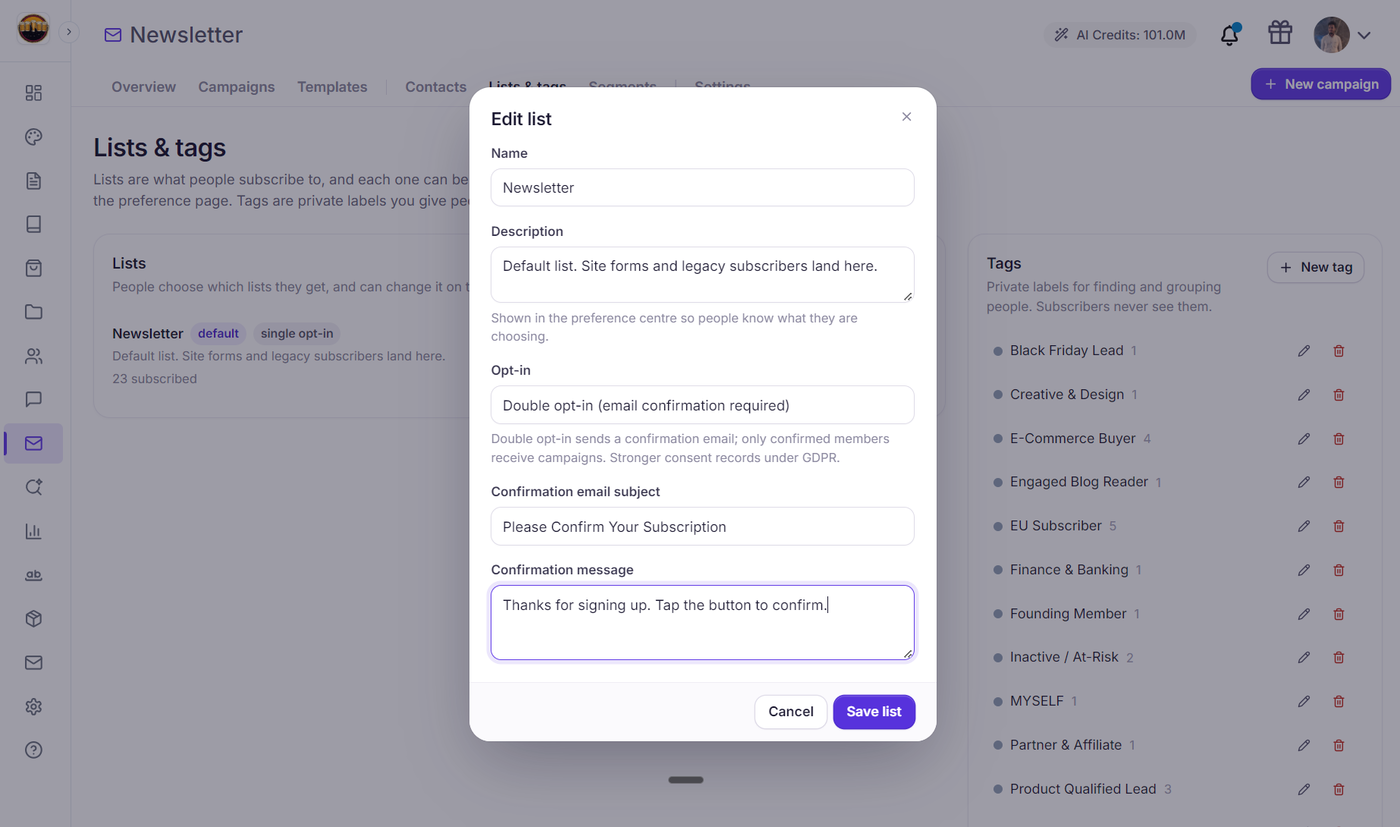
In your Grigora dashboard, go to Newsletter > Lists & tags.
Click New list or click Edit on an existing list.
In the Opt-in mode dropdown, select Double opt-in.
Two customizable email fields will appear:
Confirmation Subject: e.g.,
Confirm your subscription to Acme Weekly.Confirmation Message: e.g.,
Thanks for signing up! Please confirm your email address by clicking the button below so we know where to send your updates.
Click Save list.
Managing Pending Subscribers
You can review all contacts currently awaiting confirmation by navigating to Newsletter > Contacts and selecting Pending from the status filter.
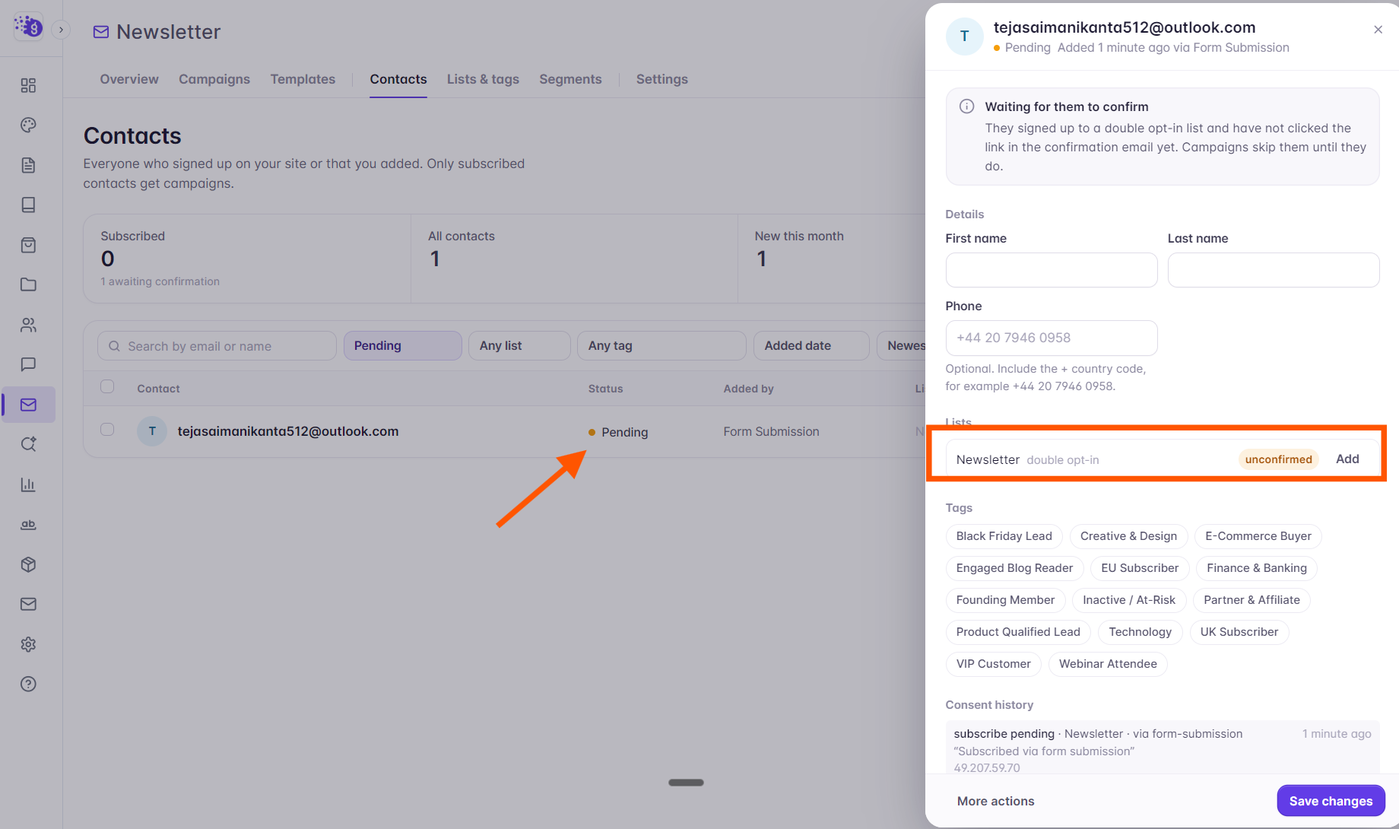
Pending contacts do not count against your billable sending limits.
If a subscriber contacts your support team stating they cannot find their confirmation email, you can manually verify their subscription inside their contact profile drawer.
Next Steps
How to Manage Contacts in Grigora: Understanding Statuses & Lifecycles
How to Add Newsletter Signup Forms in the Grigora Website Editor
How to Create and Organize Subscriber Lists in Grigora