

In this comprehensive guide, we'll walk you through how to connect Grigora MCP with Visual Studio Code. We'll show you how to add the Grigora MCP server, configure the connection, authenticate your Grigora account, and verify that the connection is successful.
Prerequisites
Before you begin, make sure you have:
Visual Studio Code installed.
A Grigora account with access to at least one project.
An active internet connection.
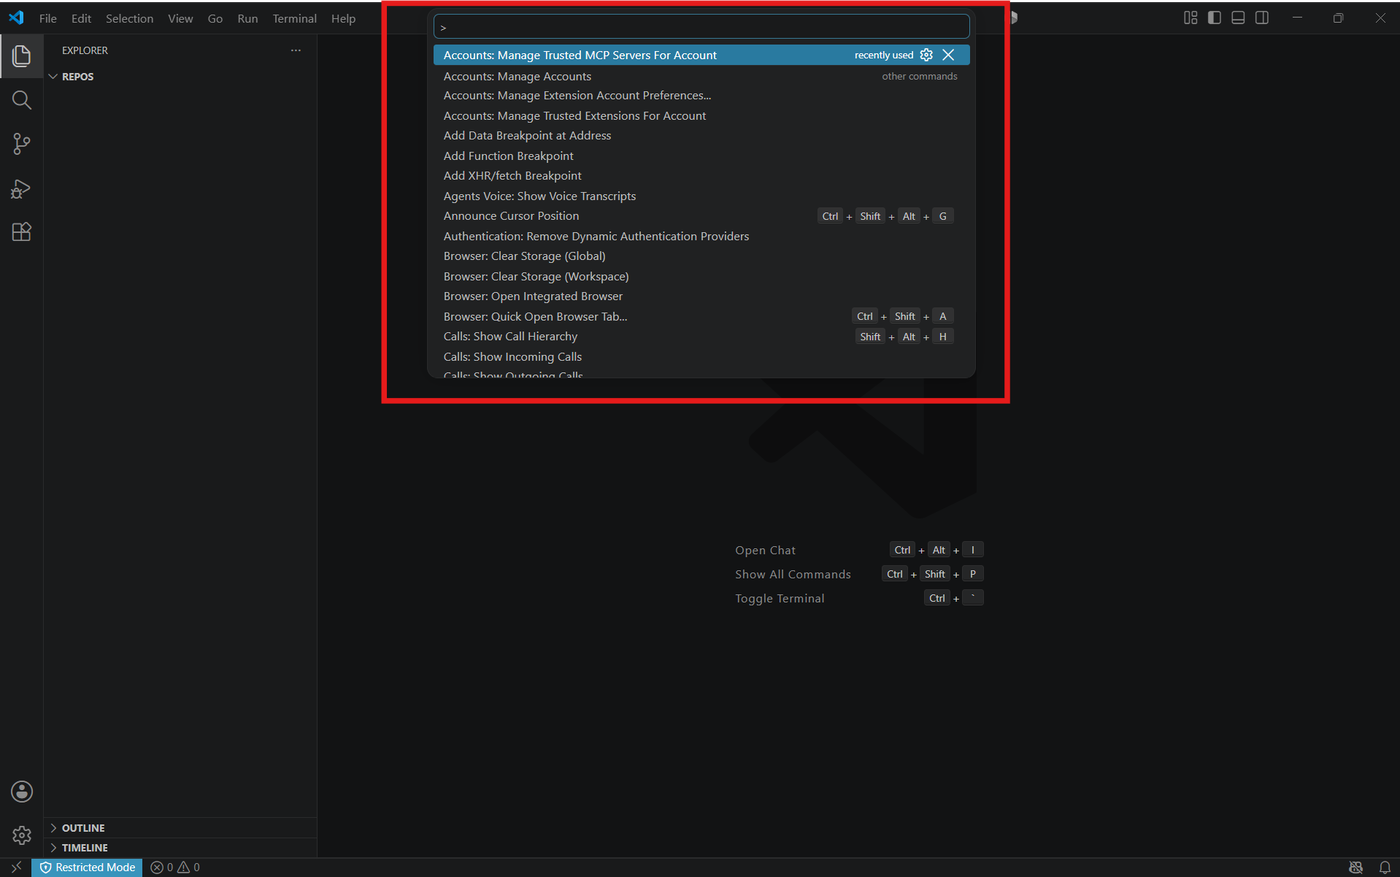
Step 1: Open the Command Palette
Open Visual Studio Code and press Ctrl + Shift + P to open the Command Palette.
Step 2: Add an MCP Server
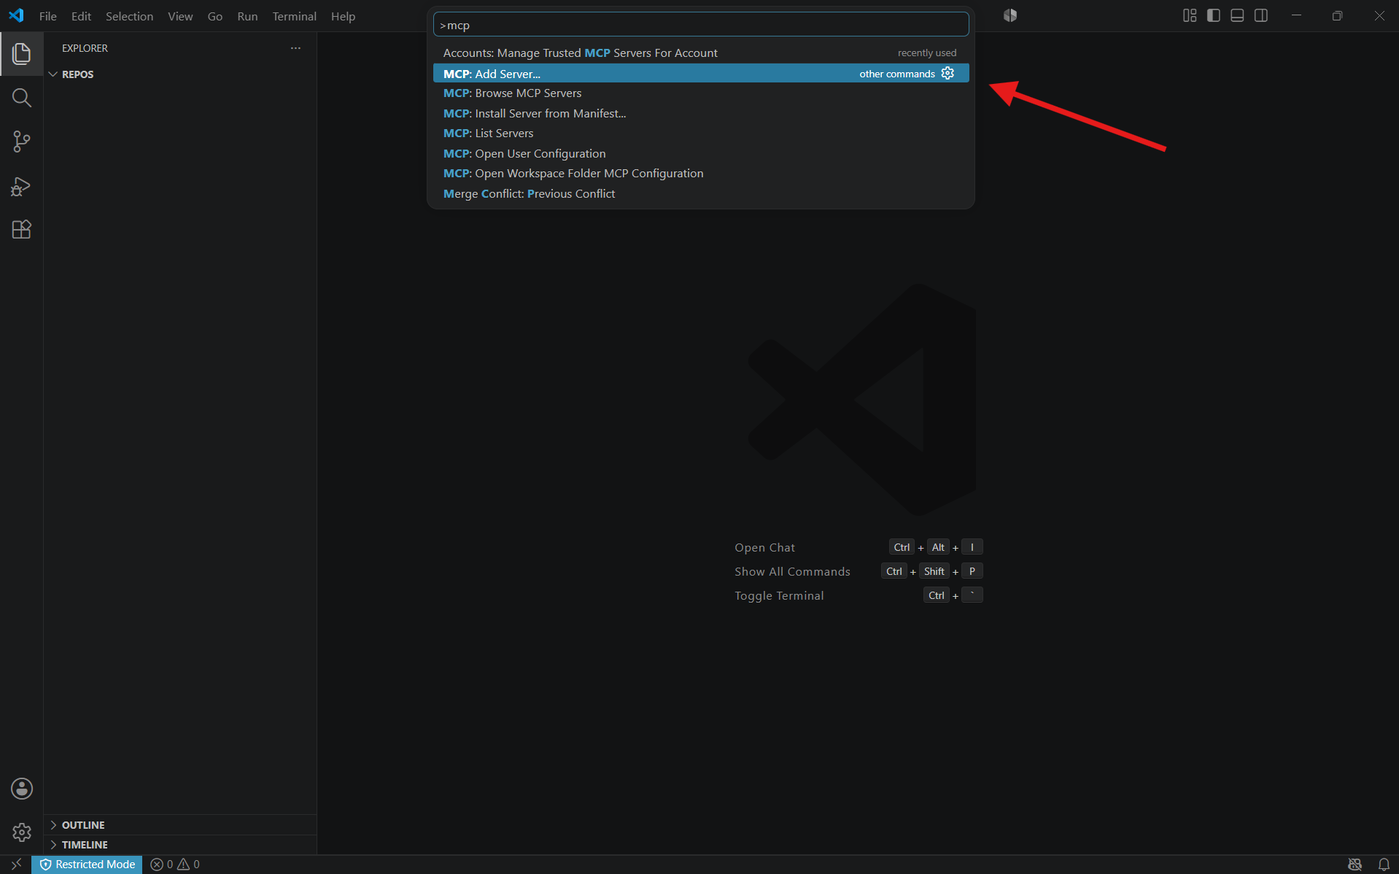
In the Command Palette, search for MCP: Add Server and select it.
VS Code will open the guided setup for adding a new MCP server. (Visual Studio Code)
Step 3: Select HTTP as the Server Type
When VS Code asks you to choose the server type, select HTTP.
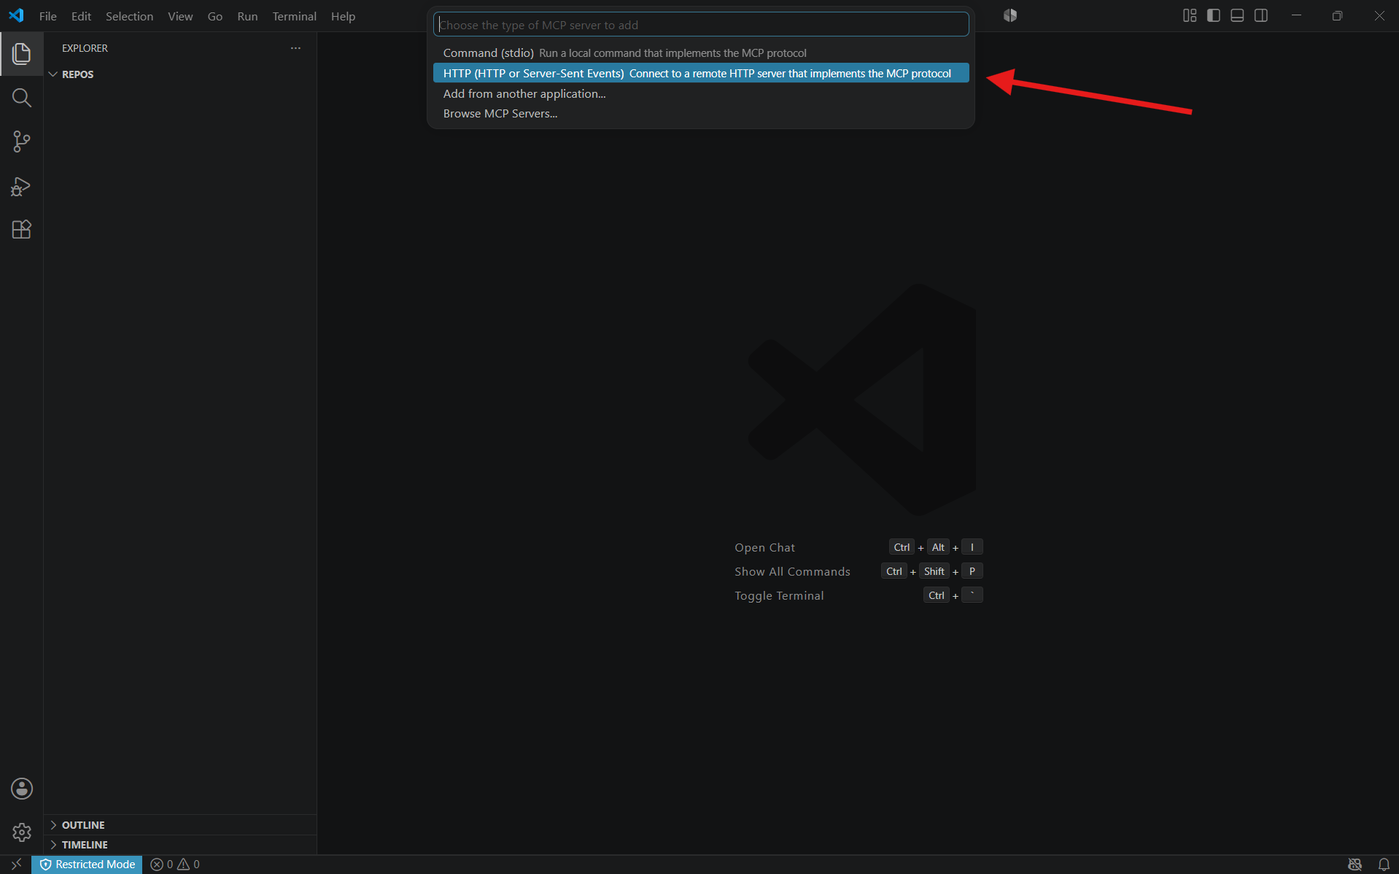
Grigora MCP is a remote MCP server, so it should be configured using the HTTP transport.
Step 4: Enter the Grigora MCP URL
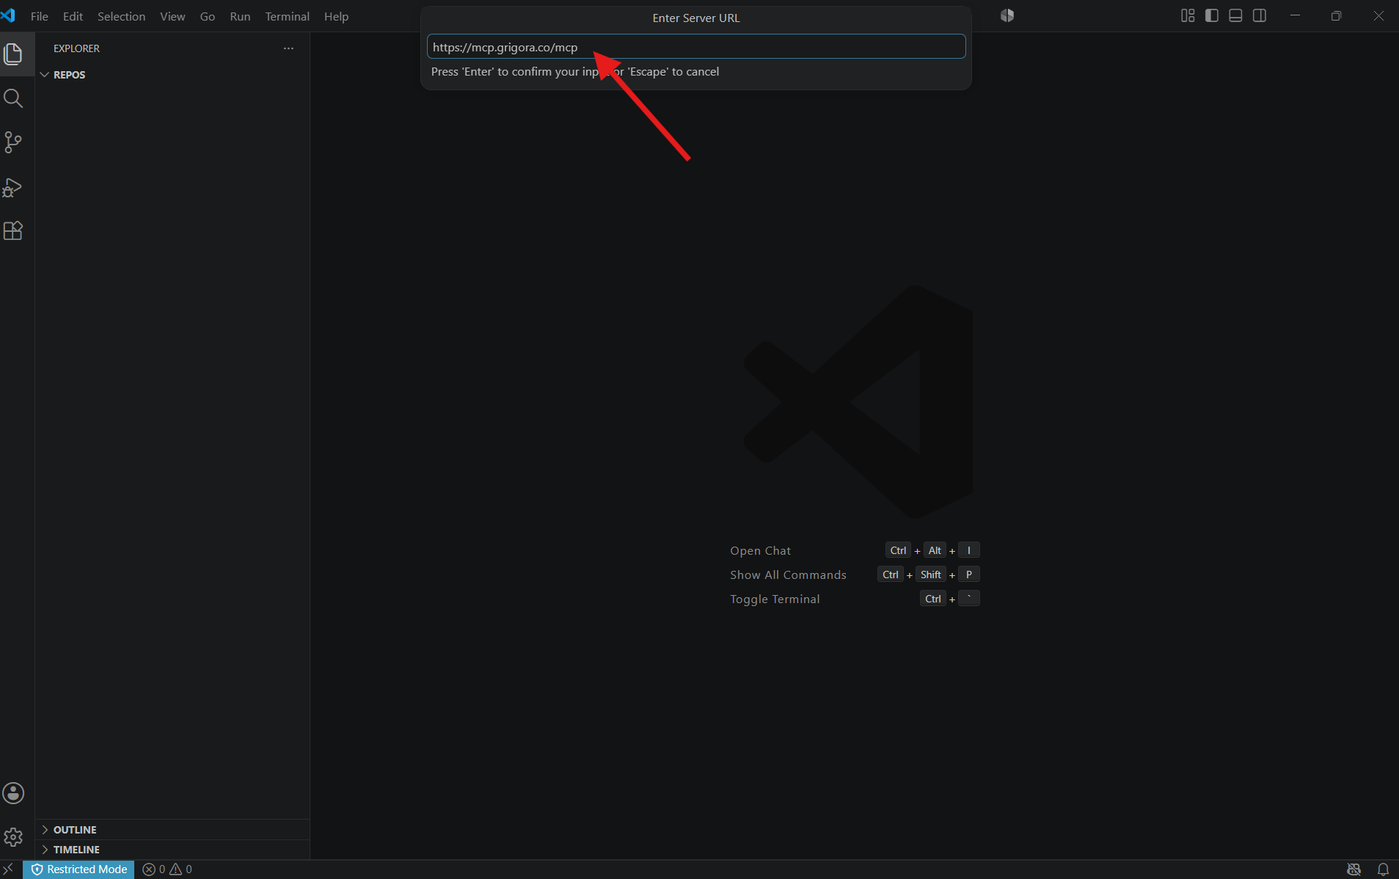
Enter the following URL when prompted:
https://mcp.grigora.co/mcpThis is the Grigora MCP server endpoint.
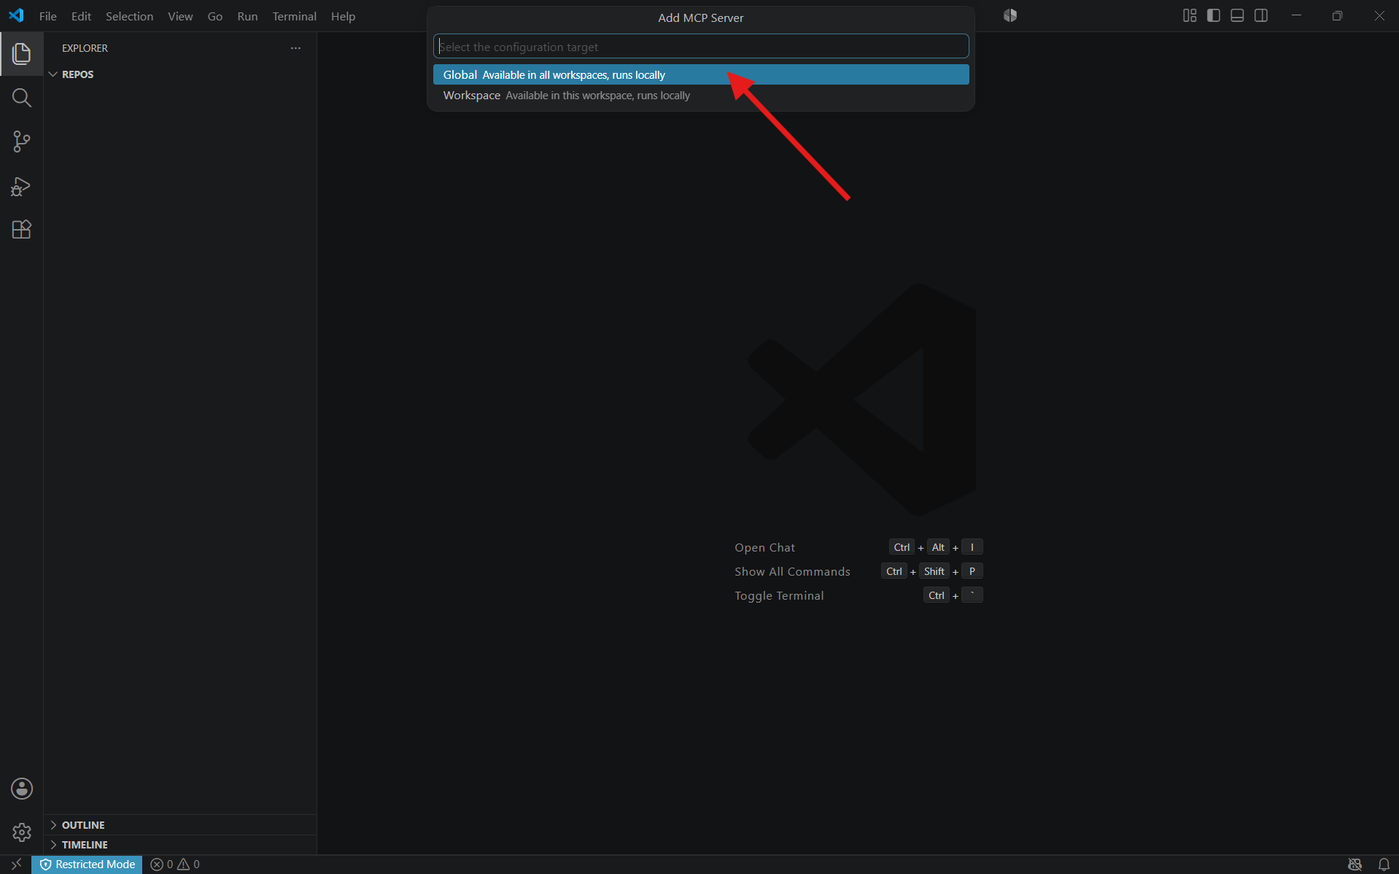
Step 5: Choose the Configuration Scope
VS Code will ask where you want to add the MCP server.
Select Global to make Grigora MCP available across your VS Code projects.
VS Code also allows MCP servers to be configured for a specific workspace through .vscode/mcp.json. (Visual Studio Code)
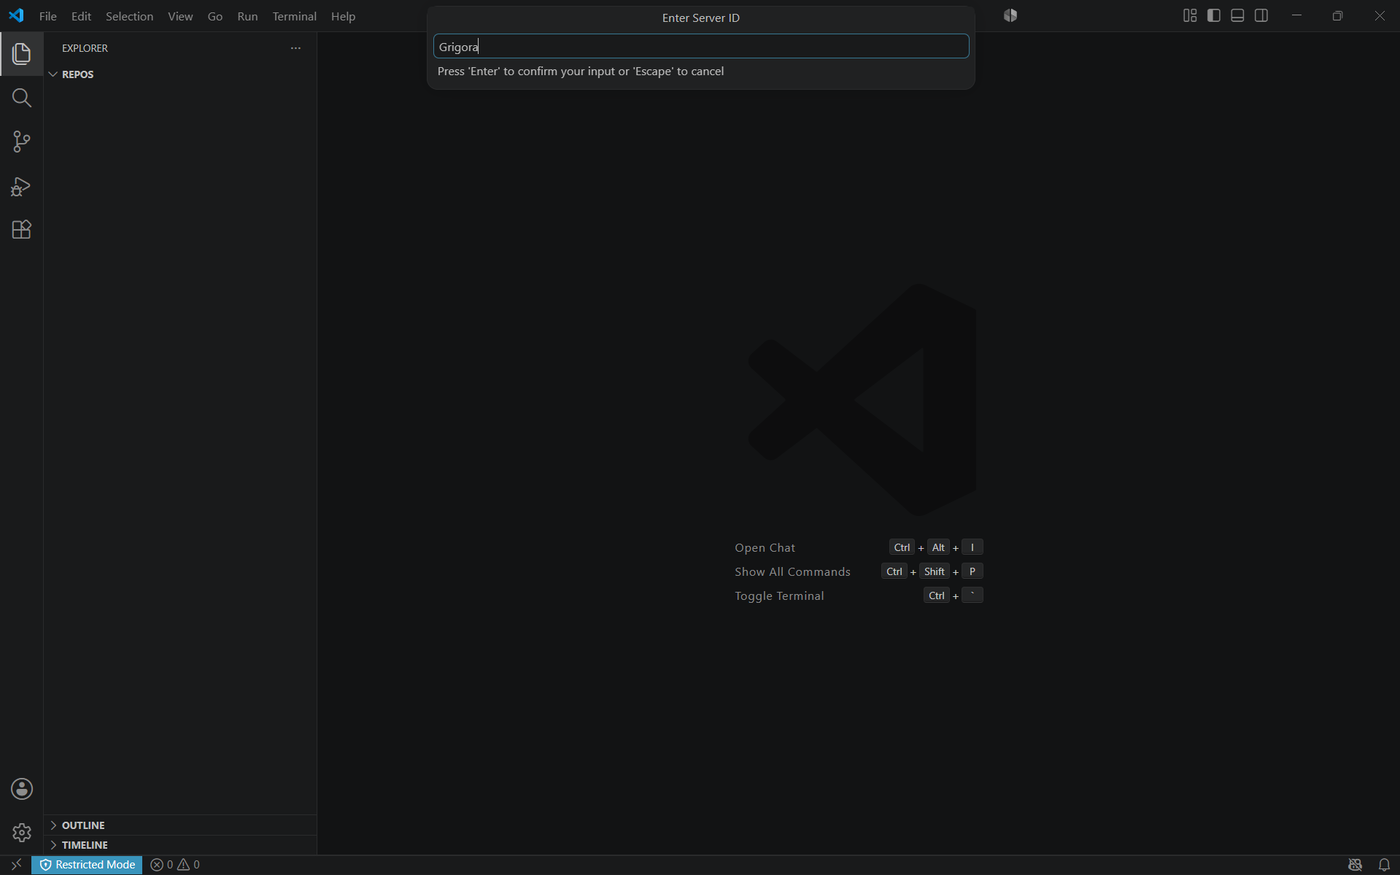
Step 6: Enter the Server Name
This name will be used to identify the MCP server within VS Code.
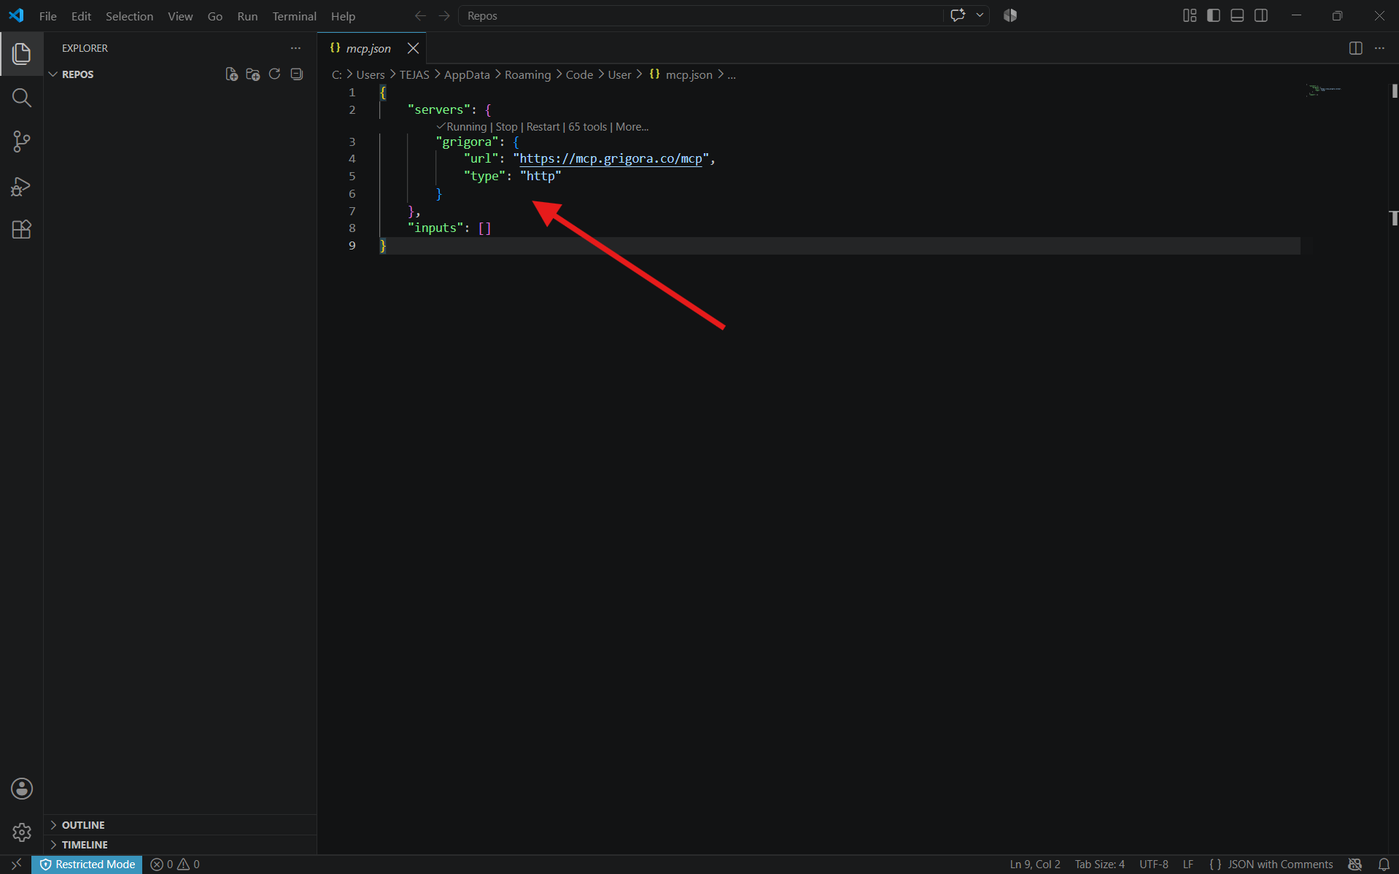
Step 7: Review the MCP Configuration
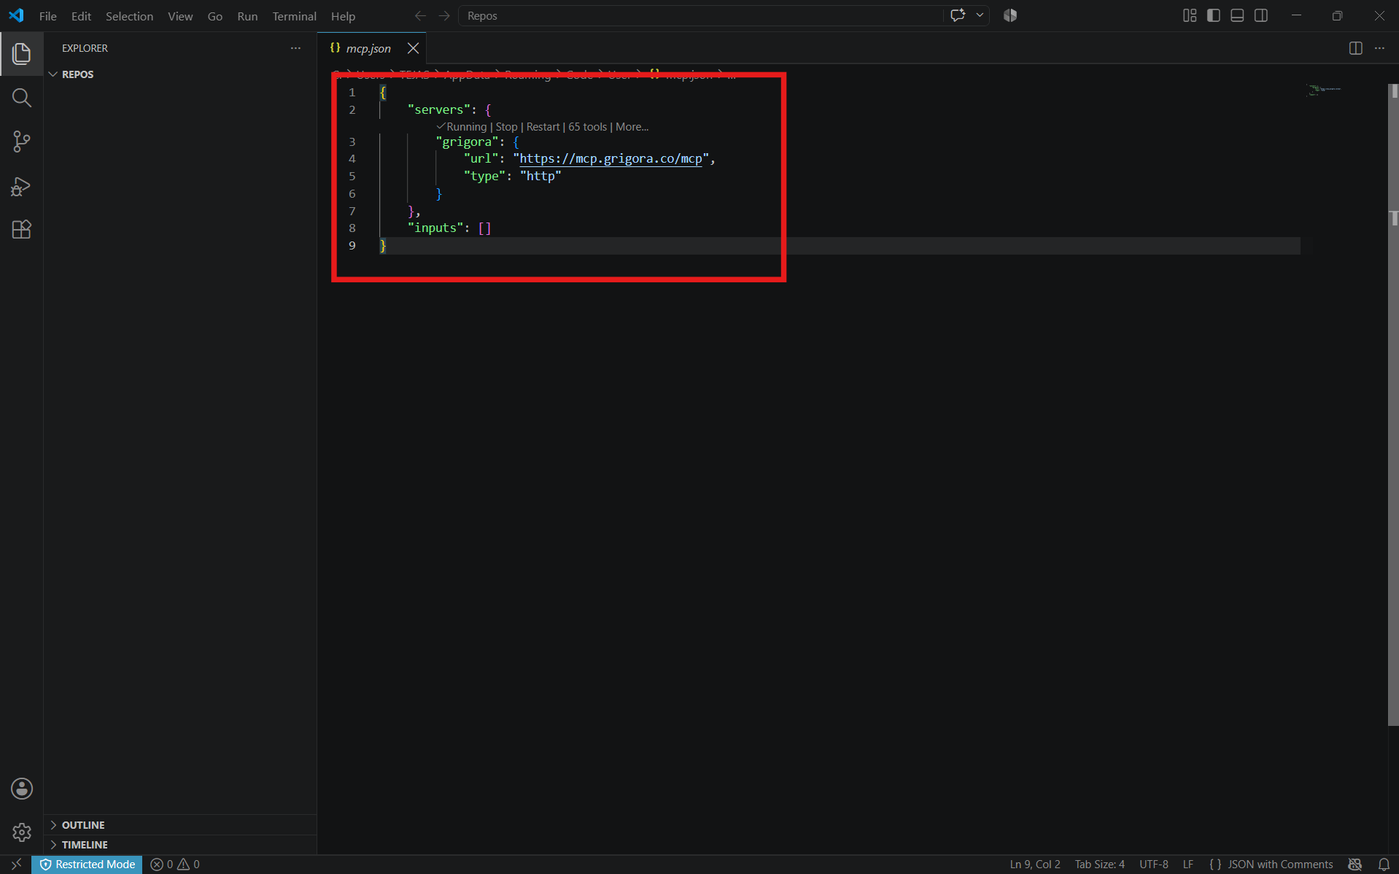
VS Code will create or open the mcp.json configuration file.
The Grigora configuration should look like this:
{ "servers": { "Grigora": { "type": "http", "url": "https://mcp.grigora.co/mcp" } }}VS Code uses the servers object for MCP server definitions, with type: "http" and the server url for remote HTTP MCP servers. (Visual Studio Code)
Step 8: Start the Grigora MCP Server
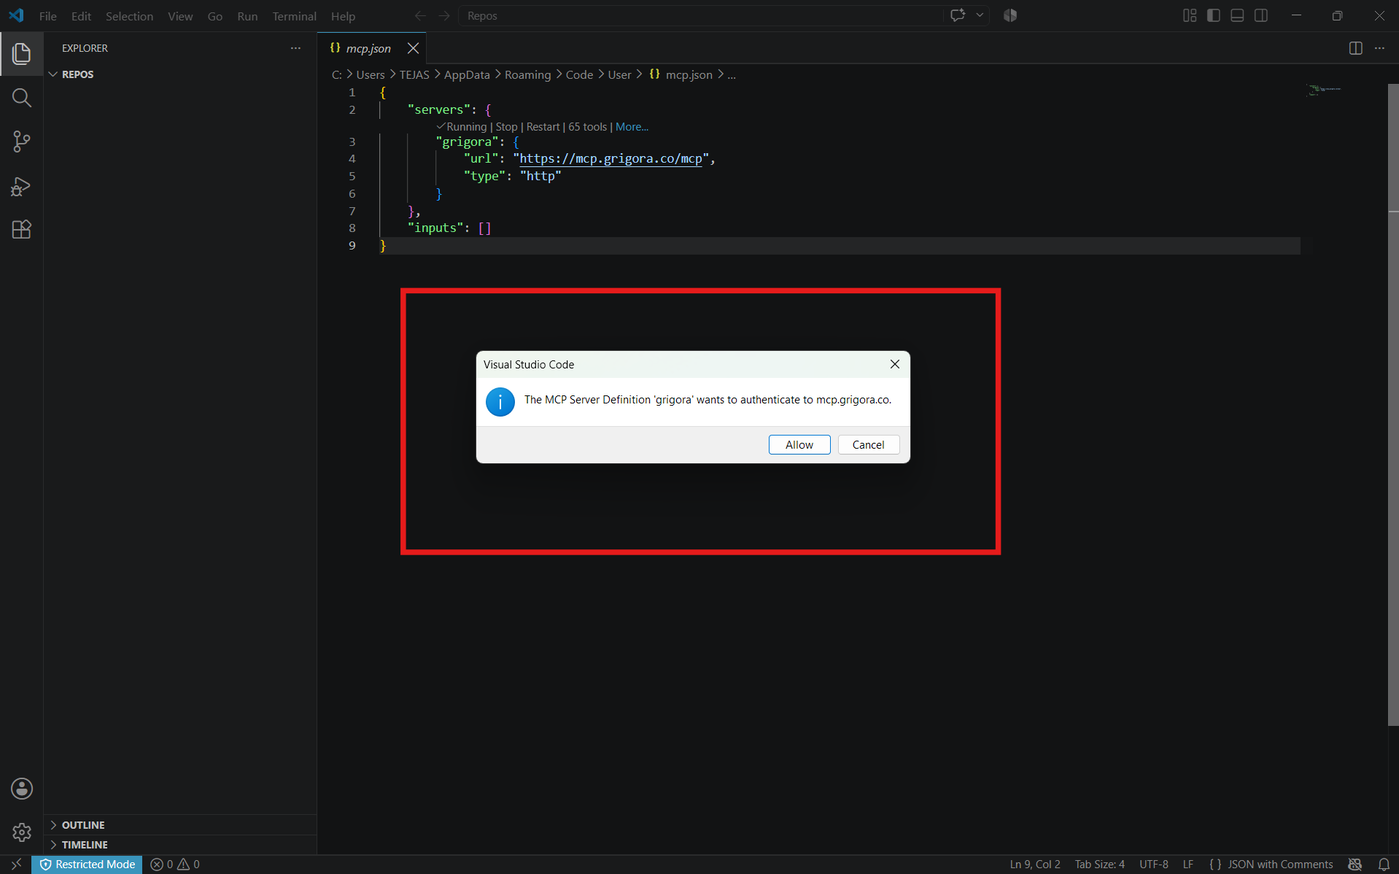
After adding the Grigora MCP server, VS Code may automatically display a confirmation popup asking you to allow the Grigora MCP server to authenticate.
Click Allow to continue.
[Image Placeholder: VS Code authentication popup with the “Allow” button highlighted]
If the popup does not appear automatically, open the MCP server controls and click Start next to the Grigora server to initiate the connection.
Step 9: Authenticate with Grigora
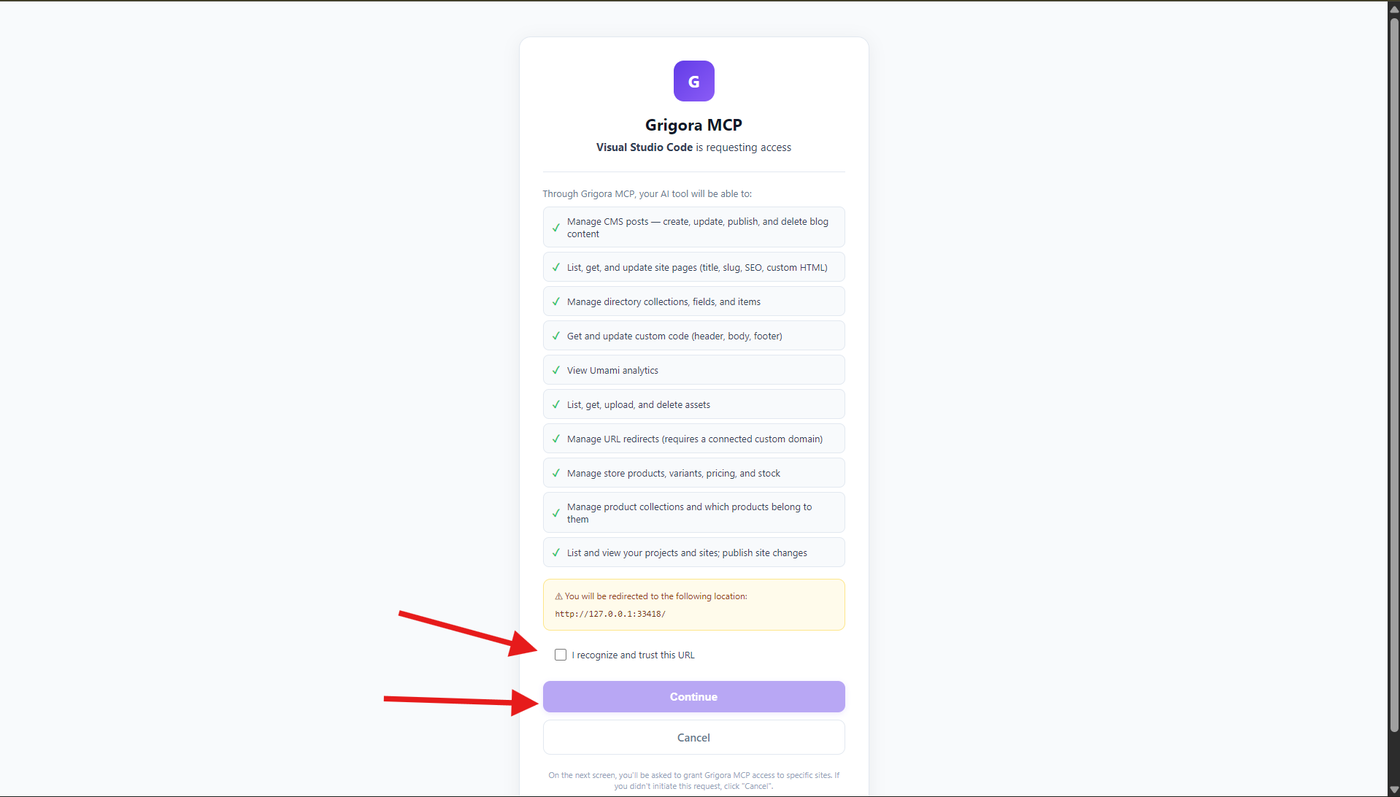
After allowing the connection, VS Code will start the Grigora authentication flow and open your browser.
Continue with the authentication process to connect your Grigora account.
Step 10: Select the Site to Authorize
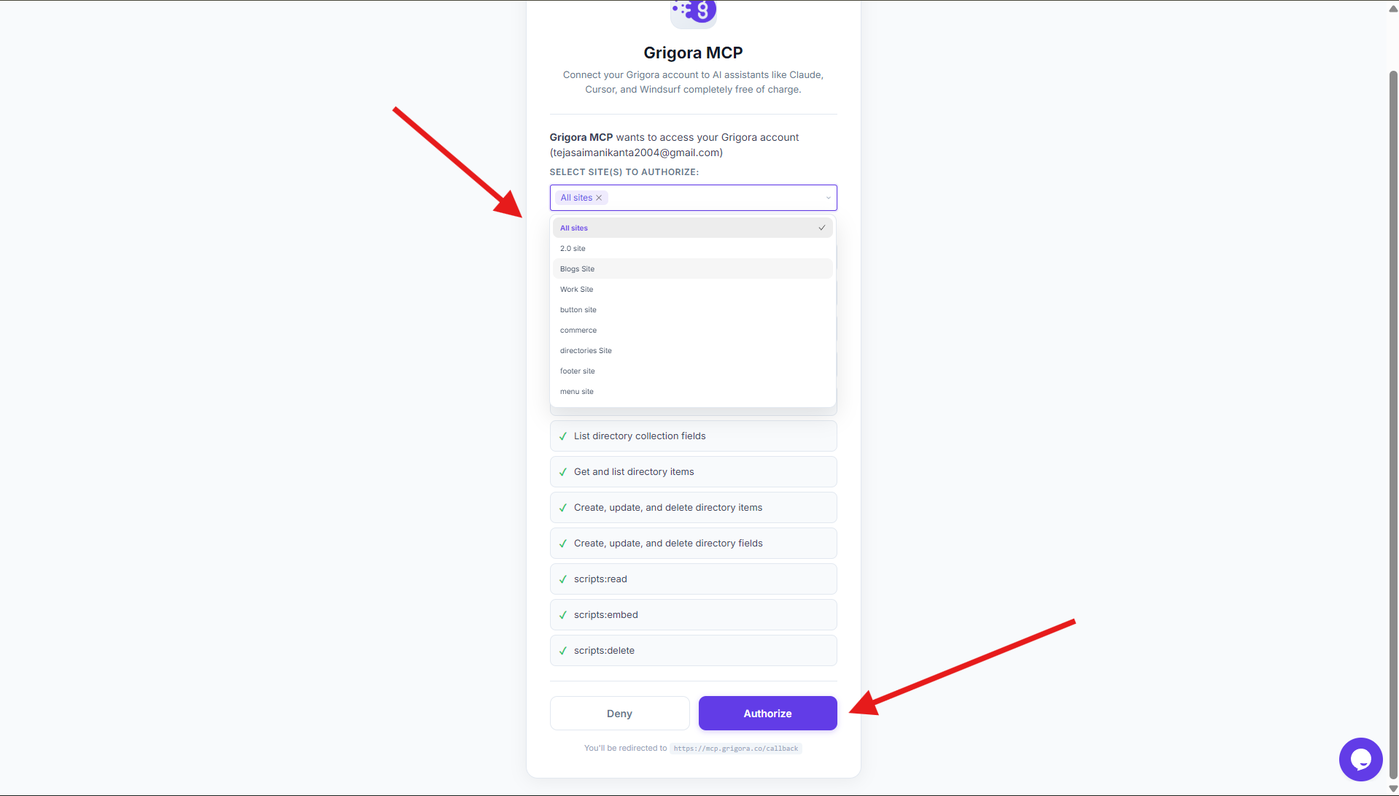
After signing in, select the site(s) you want to authorize for Grigora MCP access.
Review the permissions requested for the selected site(s) before continuing.
Step 11: Confirm the Connection
After authorization is completed, you will be redirected back to VS Code.
Check the Grigora MCP server in VS Code to verify that it is connected and its available tools are displayed.
Step 12: Test Grigora MCP
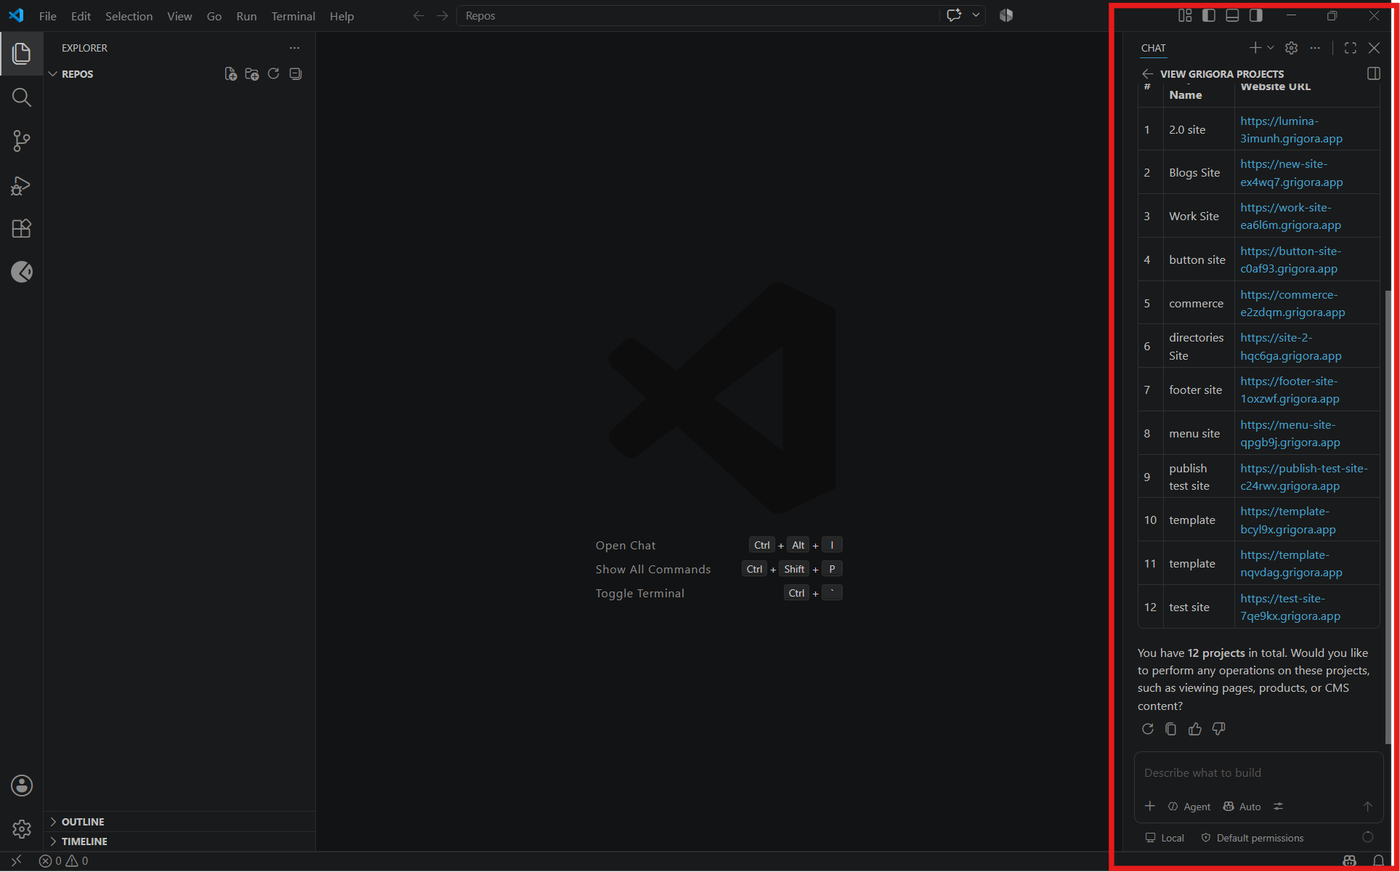
Open the Chat view in VS Code and switch to Agent mode.
Make sure the Grigora MCP tools are enabled, then enter a prompt such as:
Show me the projects available in my Grigora account.
If VS Code successfully uses the Grigora MCP tools and returns your project information, the connection is working correctly.
Troubleshooting
If Grigora MCP does not connect or its tools are unavailable:
Verify that the MCP URL is
https://mcp.grigora.co/mcp.Check that the Grigora server is started.
If the authentication popup does not appear, manually click Start for the Grigora MCP server.
Complete the Grigora authentication flow again if required.
Reload the VS Code window after authentication.
If the issue persists, completely close and reopen VS Code.
Check that the Grigora tools are enabled in Agent mode.
Verify that you authorized the correct Grigora site.