

The Commerce Product block lets you dynamically display products from your Grigora Commerce store inside a section. Instead of creating individual product cards manually, you can design one product layout and let the loop populate it with your Commerce products.
Note: Before creating a Commerce Product loop, make sure you have added the products you want to display from Commerce → Products. The loop uses your existing Commerce product data to populate the section dynamically.
Add the Commerce Product Block
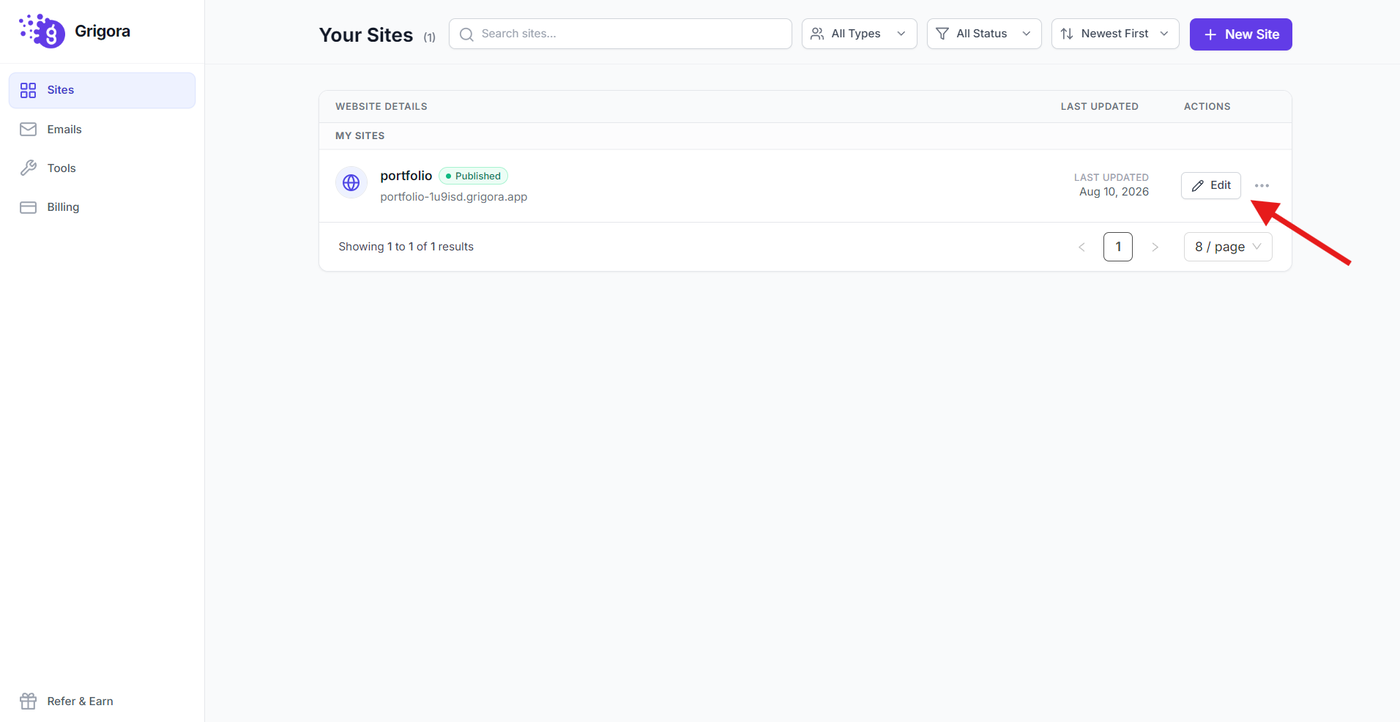
From your Grigora dashboard, select the project where you want to create the product loop.
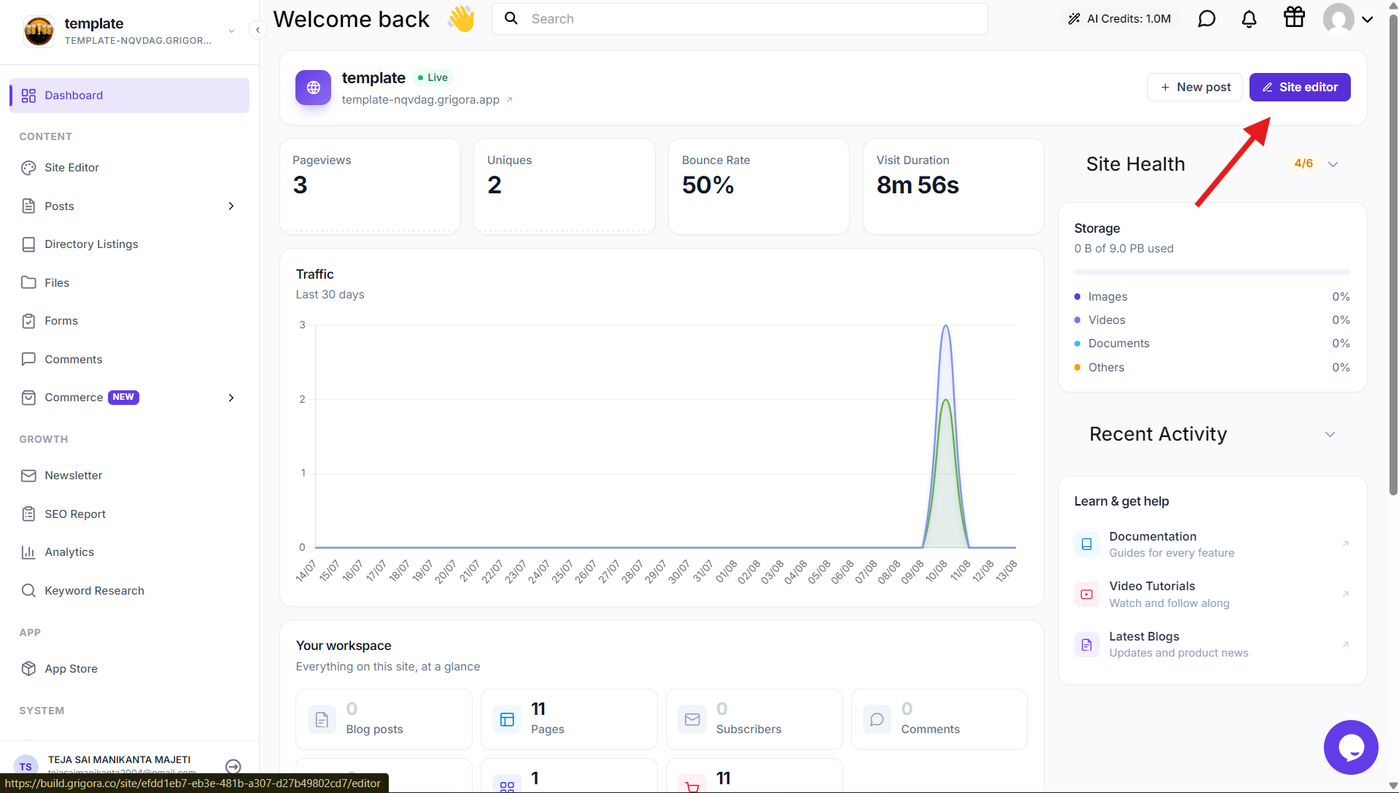
Click Site Editor to open the website editor.
Step 2: Open Elements
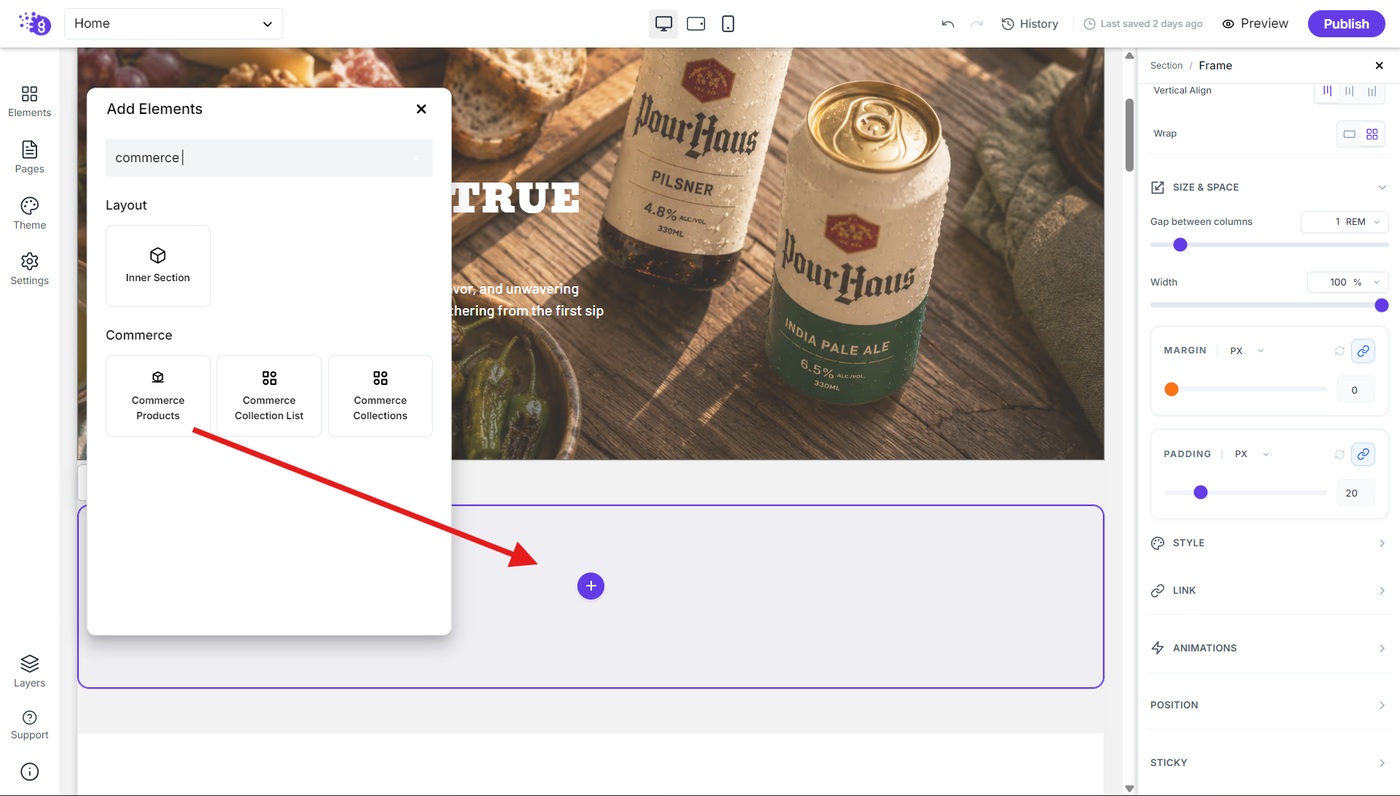
In the Site Editor, open Elements to view the available blocks.
Search for Commerce Product and add it to the section where you want to display your products.
Configure the Commerce Product Loop
Step 3: Configure Commerce Product settings
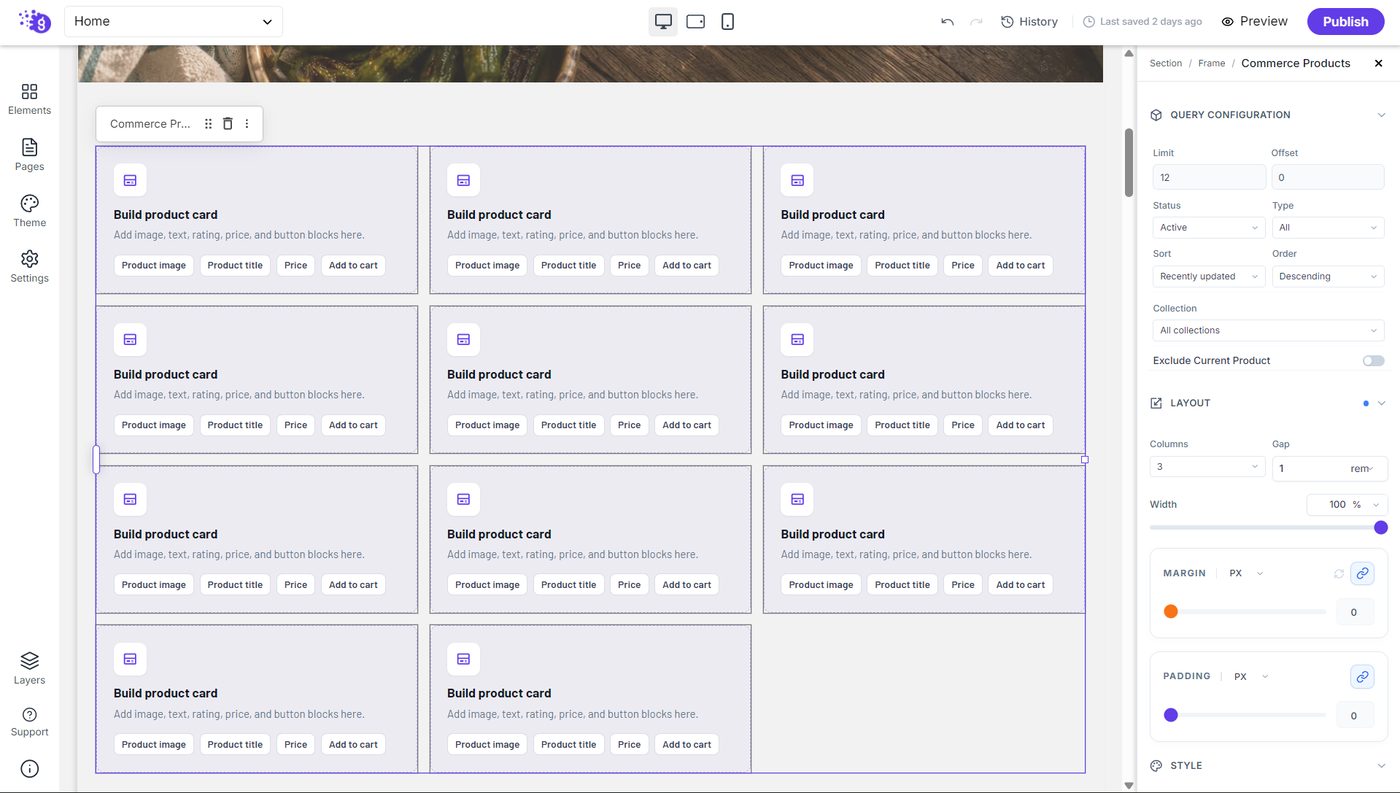
Select the Commerce Product block and configure its available settings.
Set the number of products you want to display and use the available offset, order, order by, and filter options to control which products appear in the loop and how they are arranged.
Build the Product Card
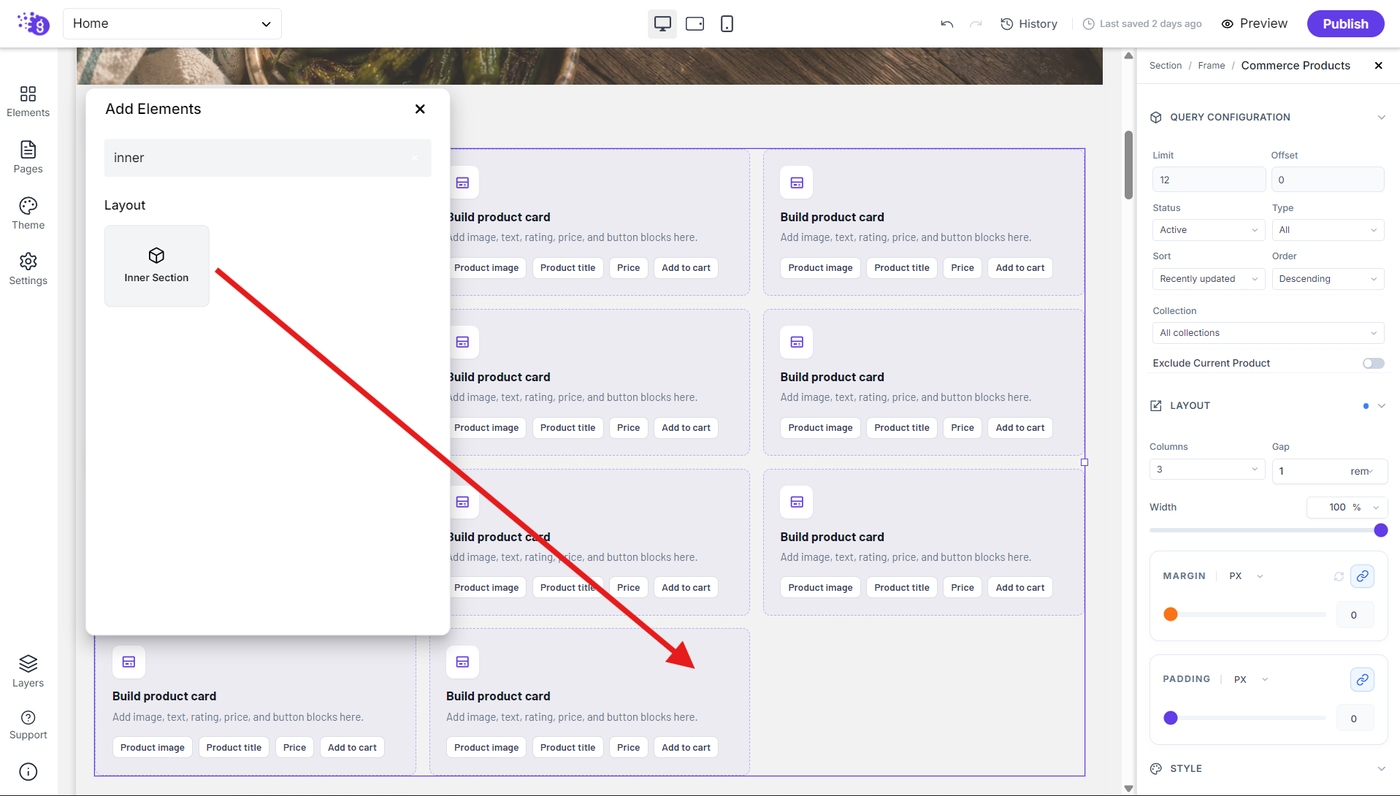
Step 4: Add an Inner Section
Open Elements, add an Inner Section, and place it inside the Commerce Product block.
The Inner Section acts as the container for the individual product card. The elements added inside it will be repeated for each product in the loop.
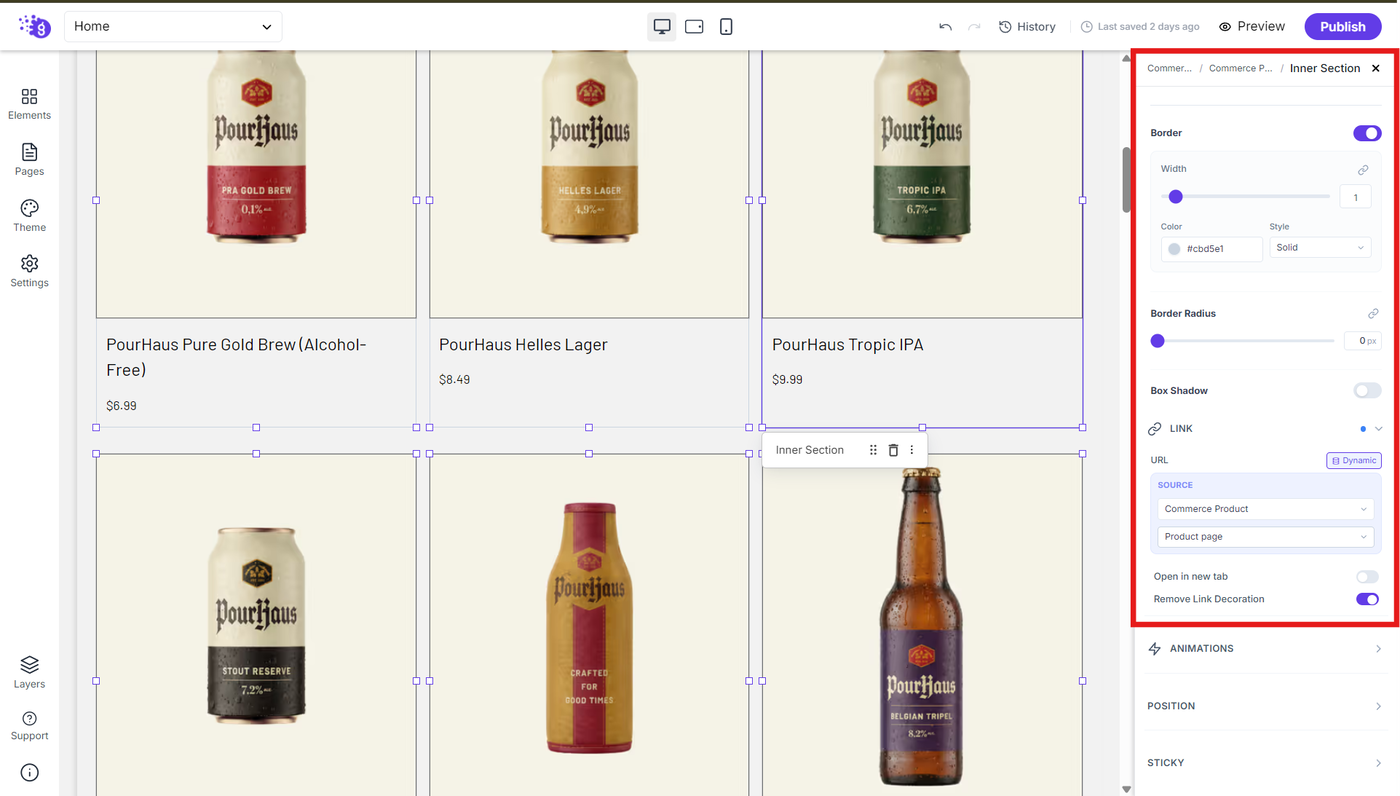
Step 5: Link the product card dynamically
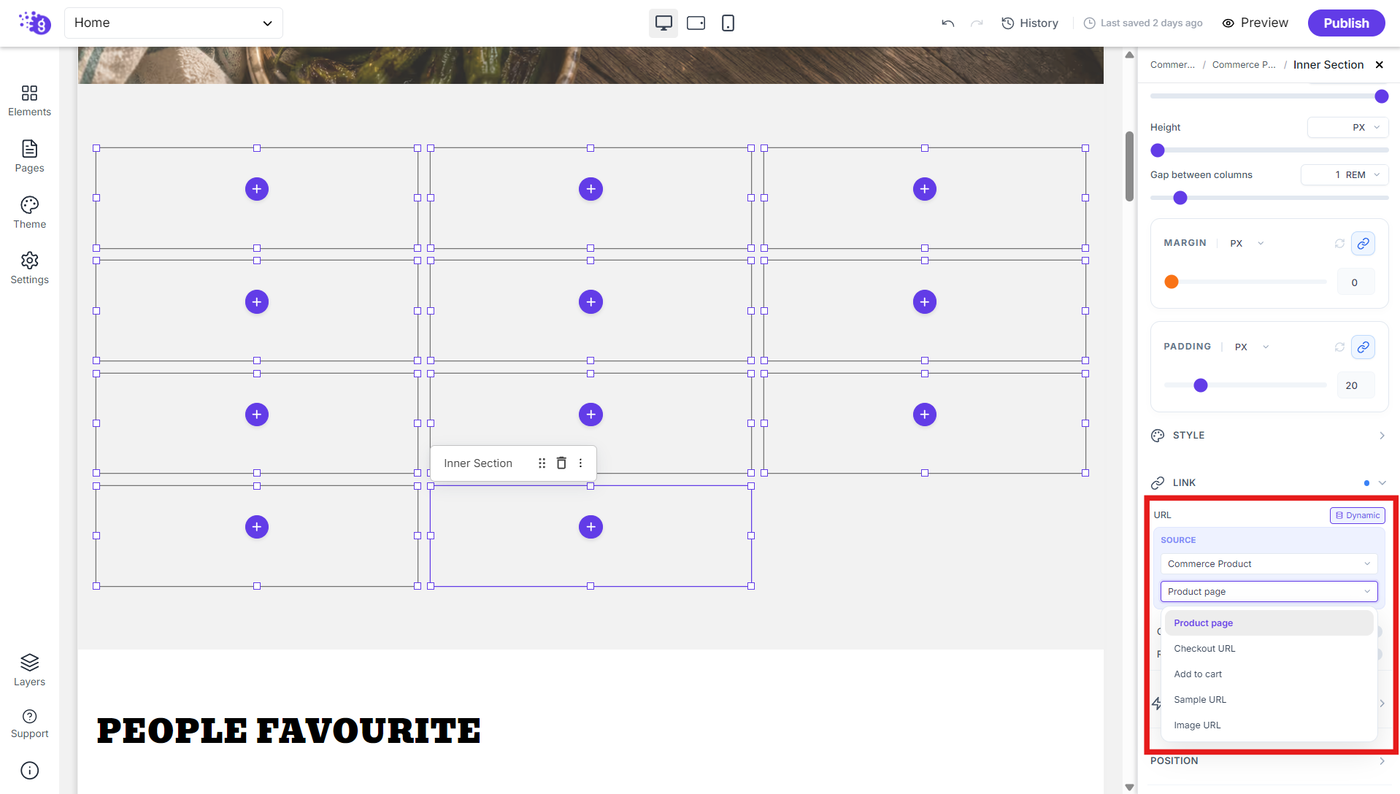
Select the Inner Section and open its Links settings.
Enable the dynamic link option and select the available Commerce product source so that each product card links to its corresponding product page.
Add Dynamic Product Information
Step 6: Add the product image
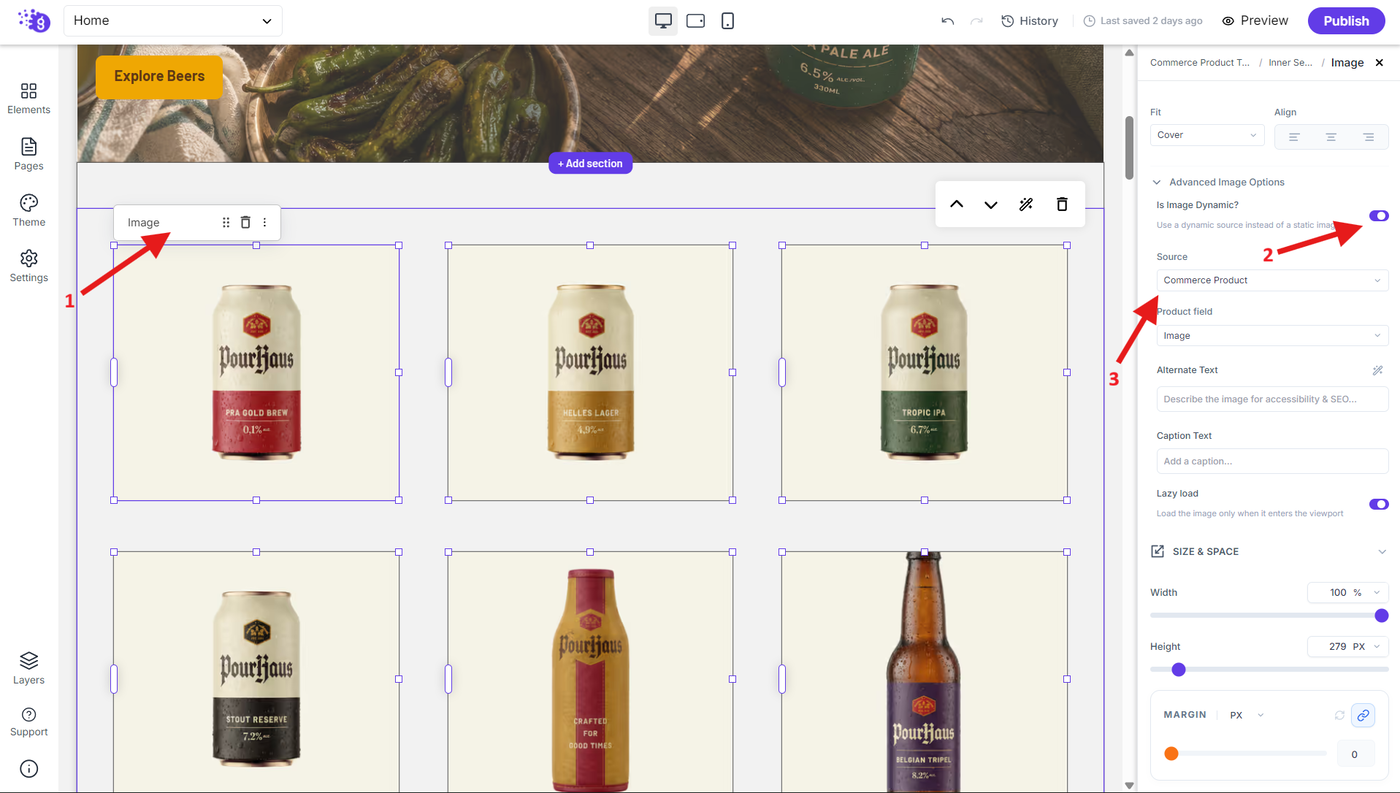
Add an Image block inside the Inner Section.
Enable the available dynamic option in the image settings and select the Commerce product image as the dynamic source.
The image will automatically change based on the product currently being displayed in the loop.
Step 7: Add the product title
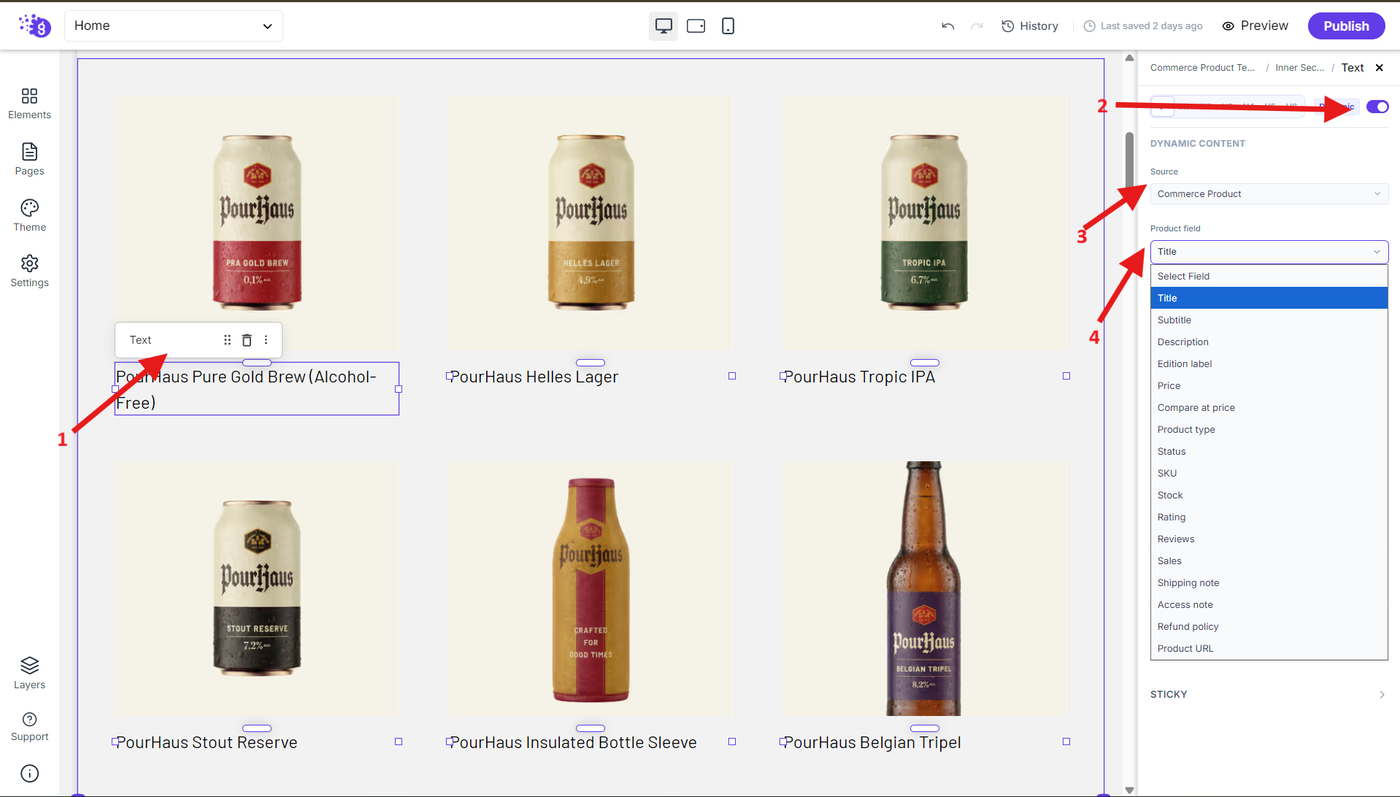
Add a Text block below the product image.
Enable the Dynamic option and select the Commerce product title as the source. Each product card will then display the corresponding product name automatically.
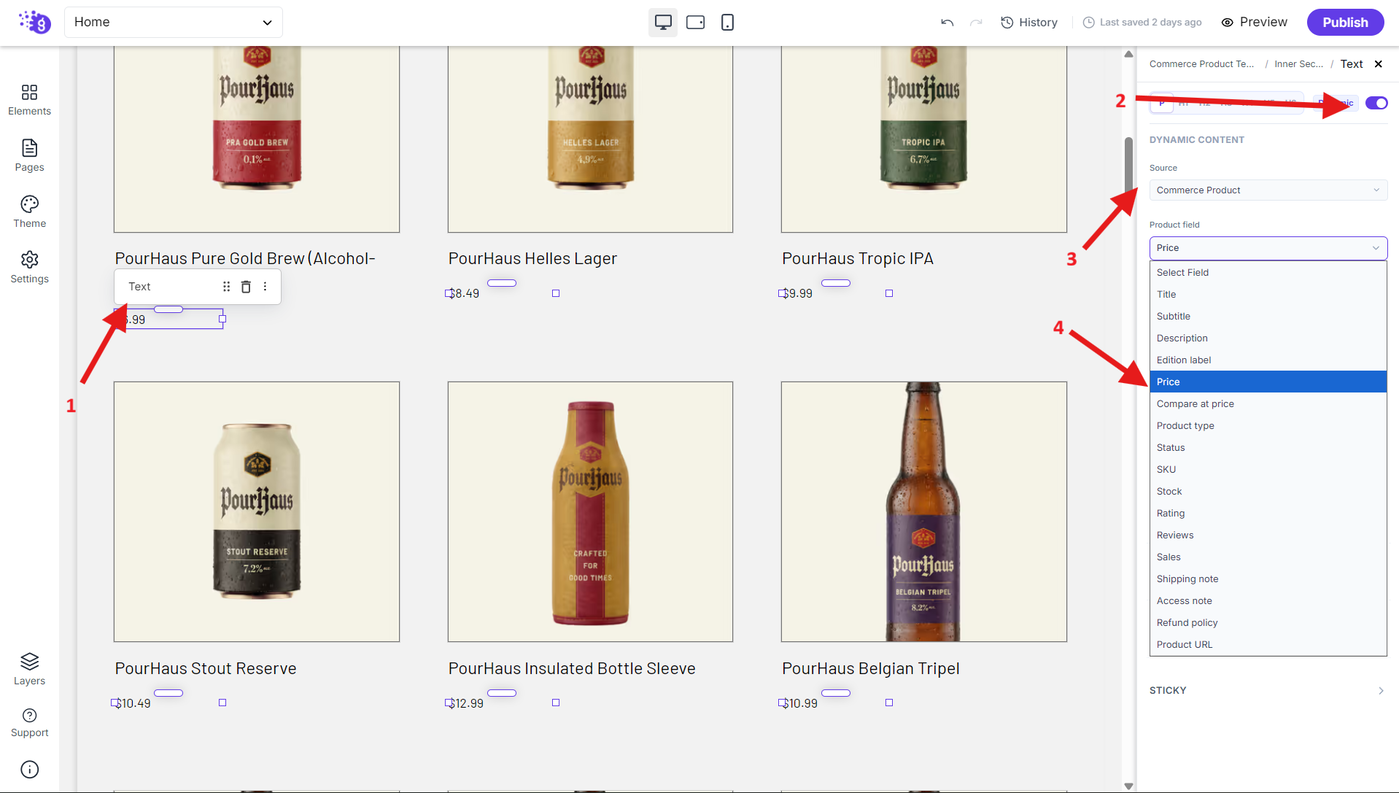
Step 8: Add the product price
Add another Text block for the product price.
Enable the Dynamic option and select the available Commerce product price source. The price will be populated automatically for each product in the loop.
Customize the Product Card
Step 9: Style the product card
Customize the Inner Section and its elements to create the desired product card design.
Adjust the available spacing, typography, alignment, borders, backgrounds, and other styling properties to match your website design.
The same card design will automatically be applied to every product generated by the loop.
Use a Pre-Built Product Section
Step 10: Add a pre-built Commerce section
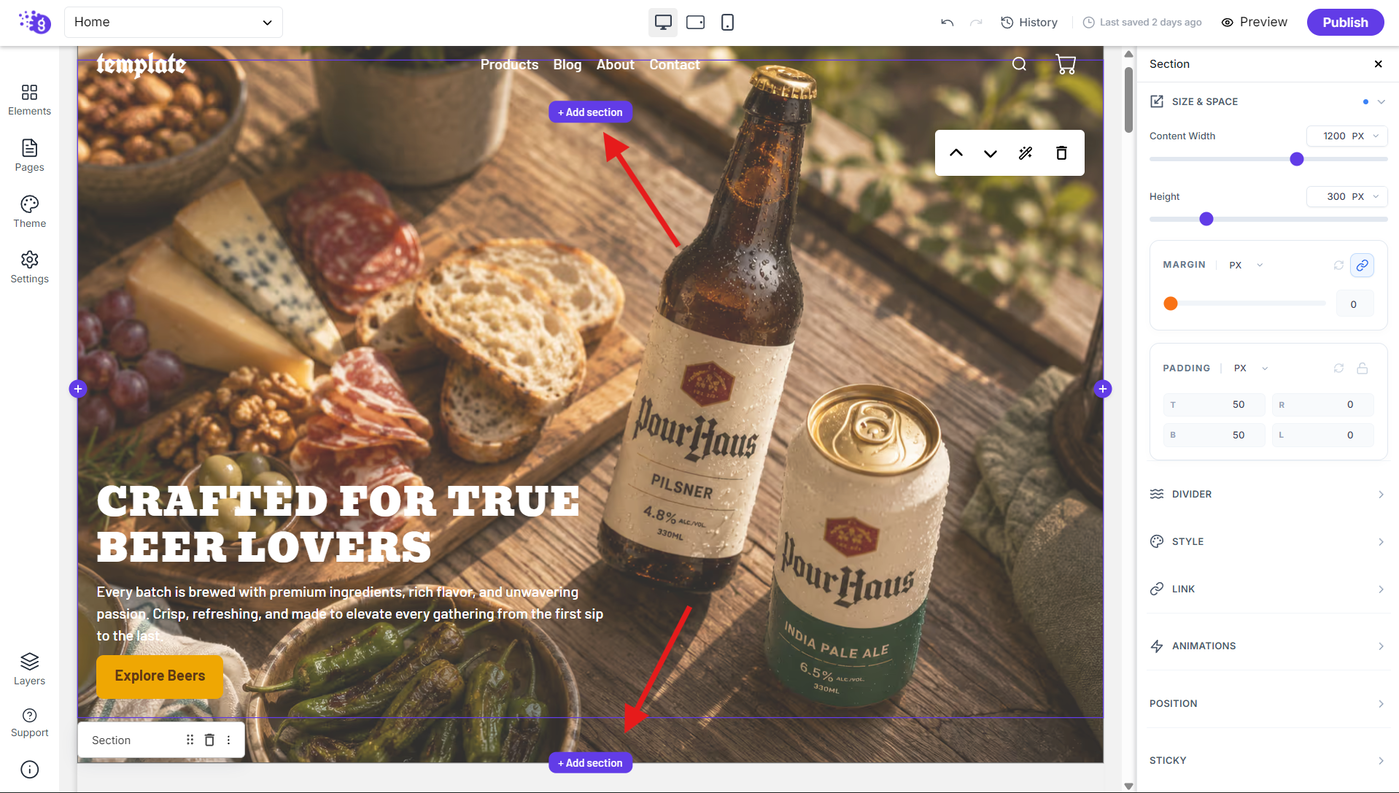
If you do not want to build the product layout from scratch, you can use a pre-built section from the section library.
Click the + Add section button at the location where you want to add the new section to the page.
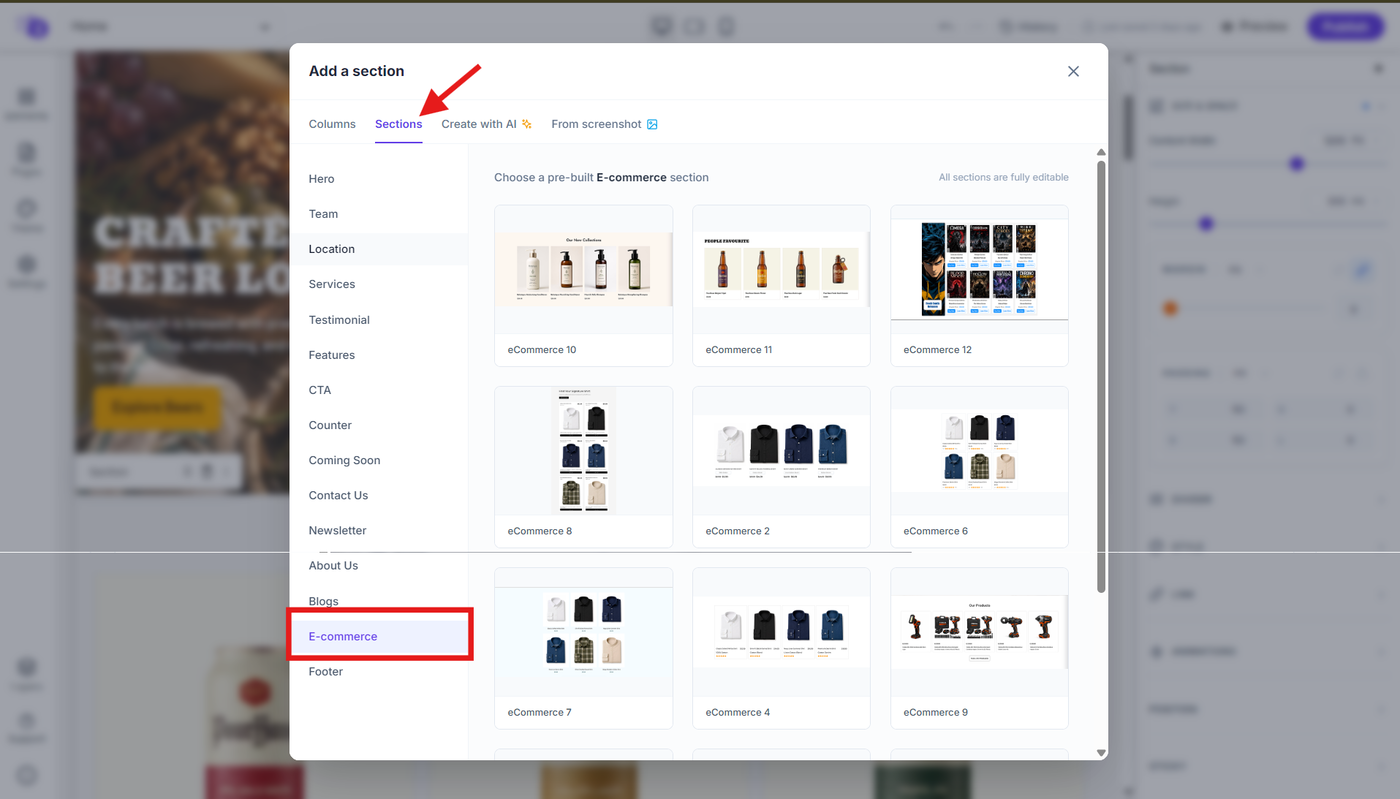
Step 11: Choose an e-commerce section
Then a Modal Pops Up, select Sections, then choose E-commerce from the available categories. Browse the available e-commerce layouts and click the specific section you want to add to the page.
Preview the Product Loop
Step 12: Preview the product loop
Preview the page to verify that the Commerce products are being populated correctly.
Check that the product image, title, price, additional details, and product link are displayed correctly for each product.
Make any required layout or styling adjustments before publishing.
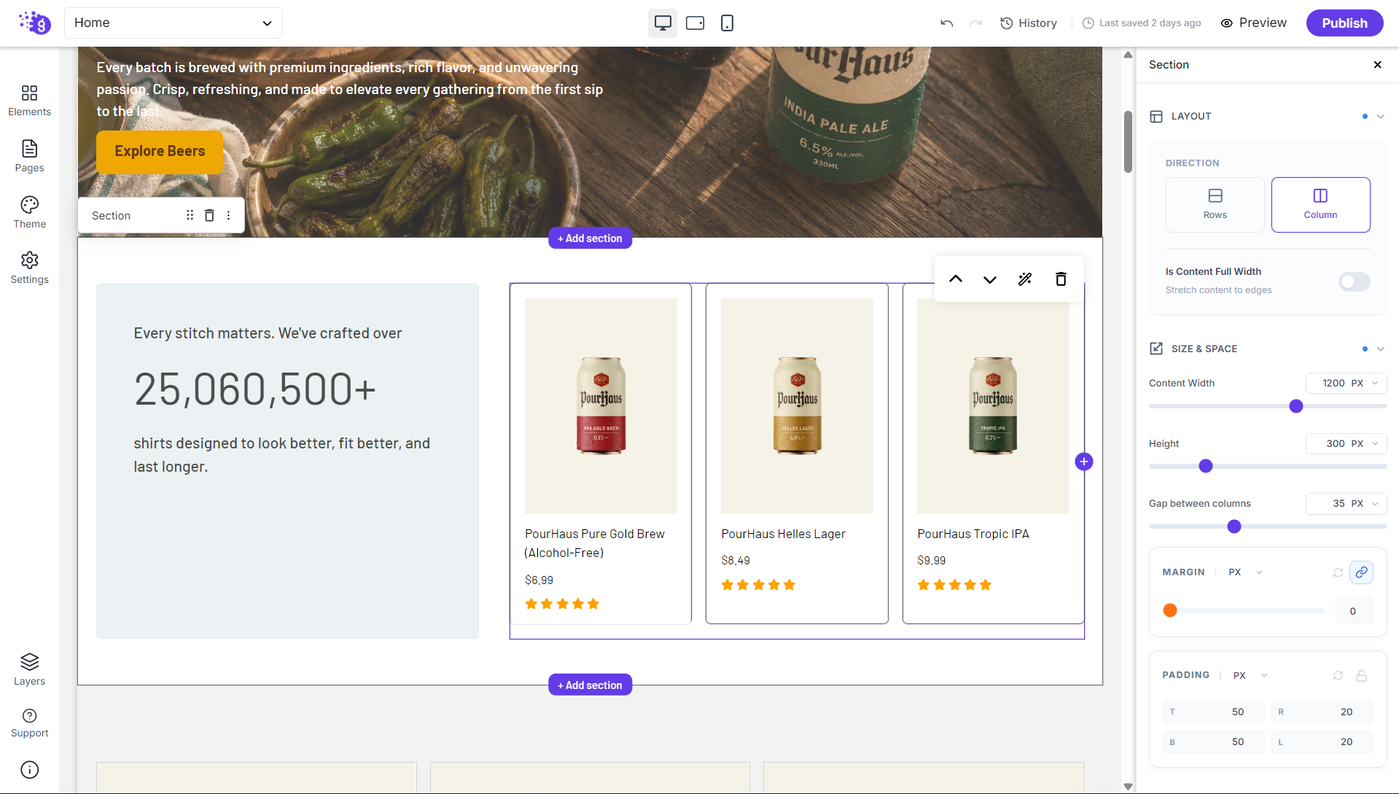
Once the product loop is configured, you can use the same Commerce product data to build other storefront sections and collection templates in the Site Editor.
Save and Publish Site
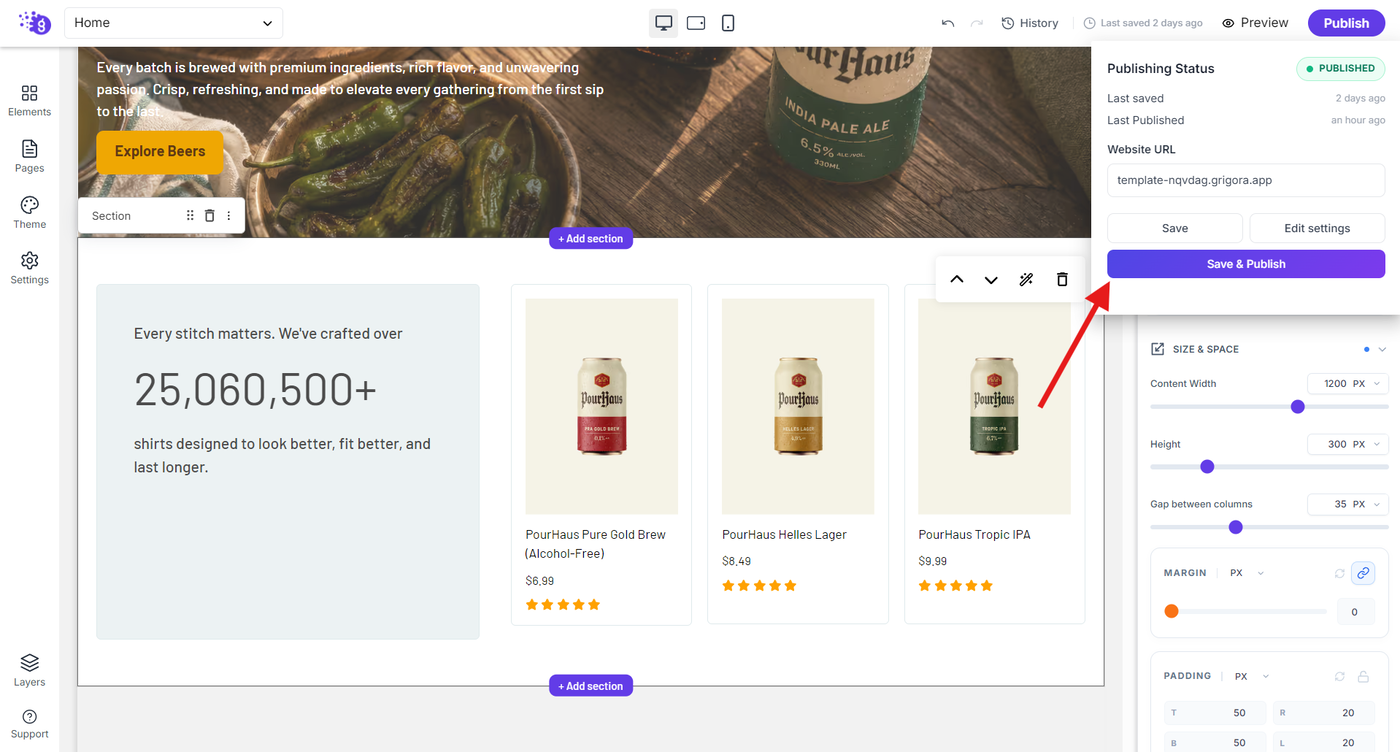
After reviewing to make the changes live click on Save and Publish to reflect changes in live site.