

Ready to start selling products directly from your Grigora website? This guide will show you how to get started with Grigora Commerce and understand the main tools available for managing your online store. From creating products and collecting payments to managing orders, customers, inventory, discounts, and store settings, Grigora gives you everything you need to set up and manage your store without complexity.
Accessing Commerce in Grigora
Open your Grigora dashboard and select Commerce from the left sidebar. This opens the Commerce dashboard, where you can access all the tools required to manage your store.
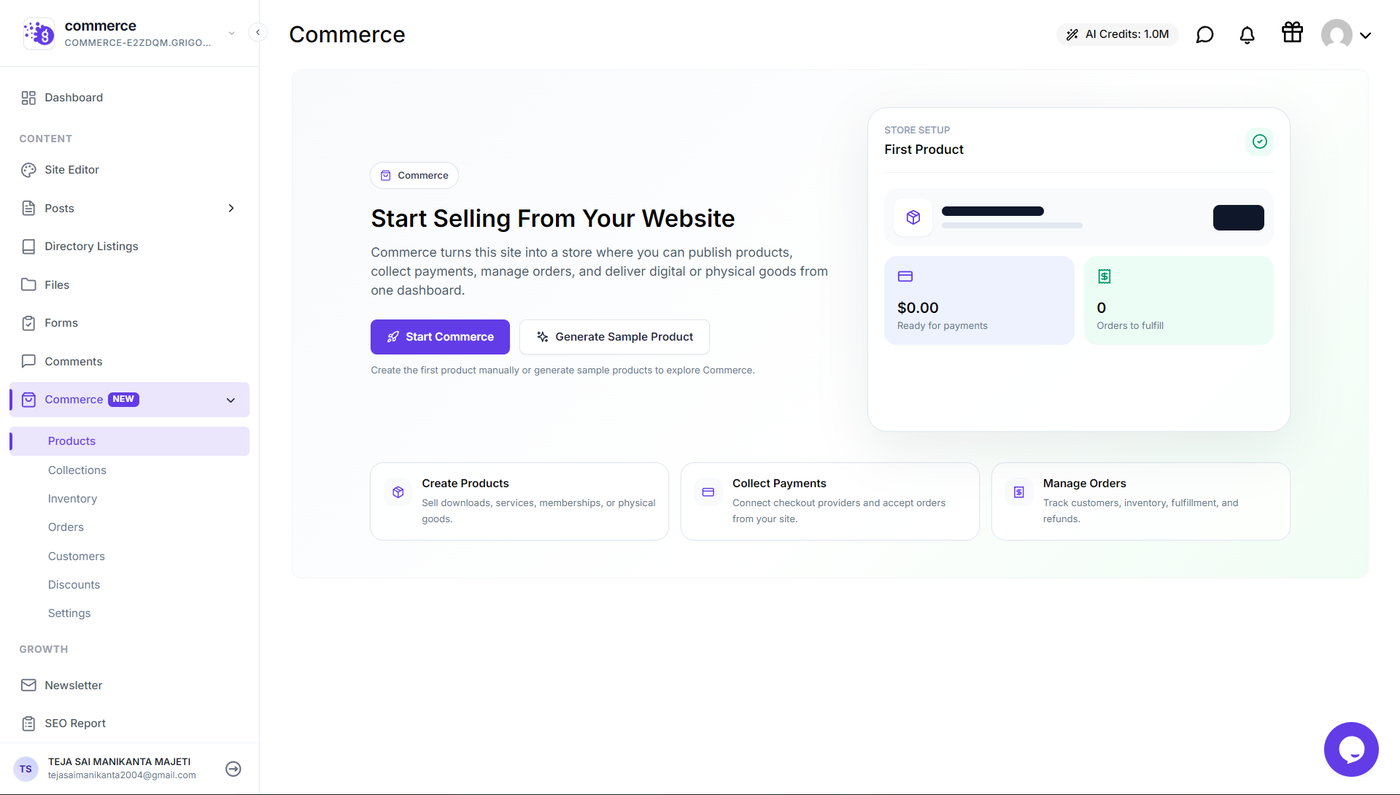
The Commerce section includes the following areas:
Products: Create and manage the products you want to sell.
Collections: Group related products into categories for easier browsing and storefront organization.
Inventory: Manage product and variant stock.
Orders: View and manage orders received through your configured checkout providers.
Customers: View buyer profiles created through successful purchases.
Discounts: Create and manage coupon codes for your customers.
Settings: Configure store details, payments, shipping, taxes, invoices, media, SEO, appearance, and webhooks.
Understanding the Commerce Dashboard
When Commerce has not been fully configured yet, the dashboard provides a starting point for setting up your store.
The main section highlights Start Selling From Your Website, along with options to:
Start Commerce to begin setting up your store.
Generate Sample Product to create sample products and explore Commerce.
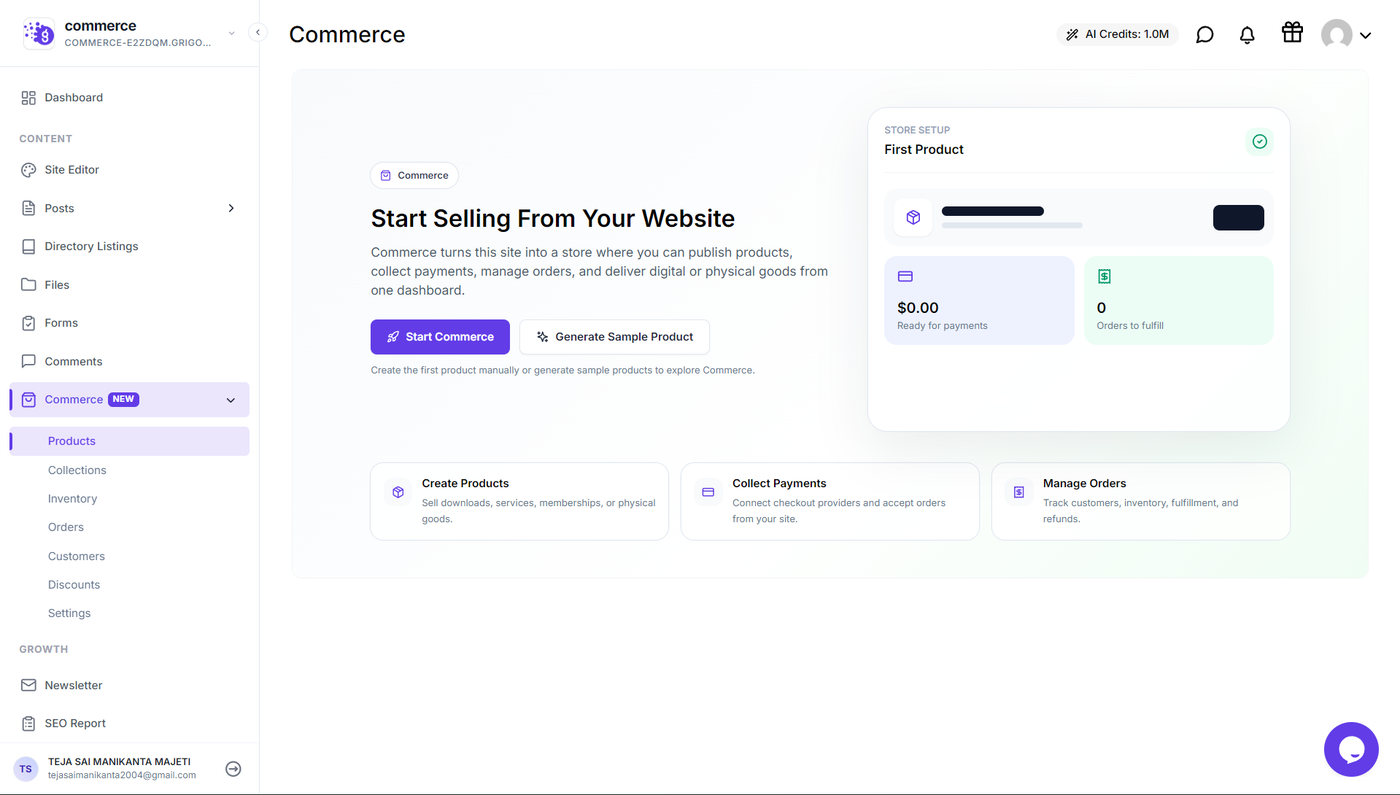
The dashboard also highlights three key areas of Commerce:
Create Products
Create products that you can sell through your website, including digital products, services, memberships, or physical goods.
Collect Payments
Connect supported checkout providers so customers can make payments for your products.
Manage Orders
Track customer purchases and manage order-related information after payments are received.
Creating Your First Commerce Product
To begin selling, open Products under the Commerce section and create a new product.
Grigora provides a guided product creation process divided into four steps:
Describe → Delivery → Checkout → Polish
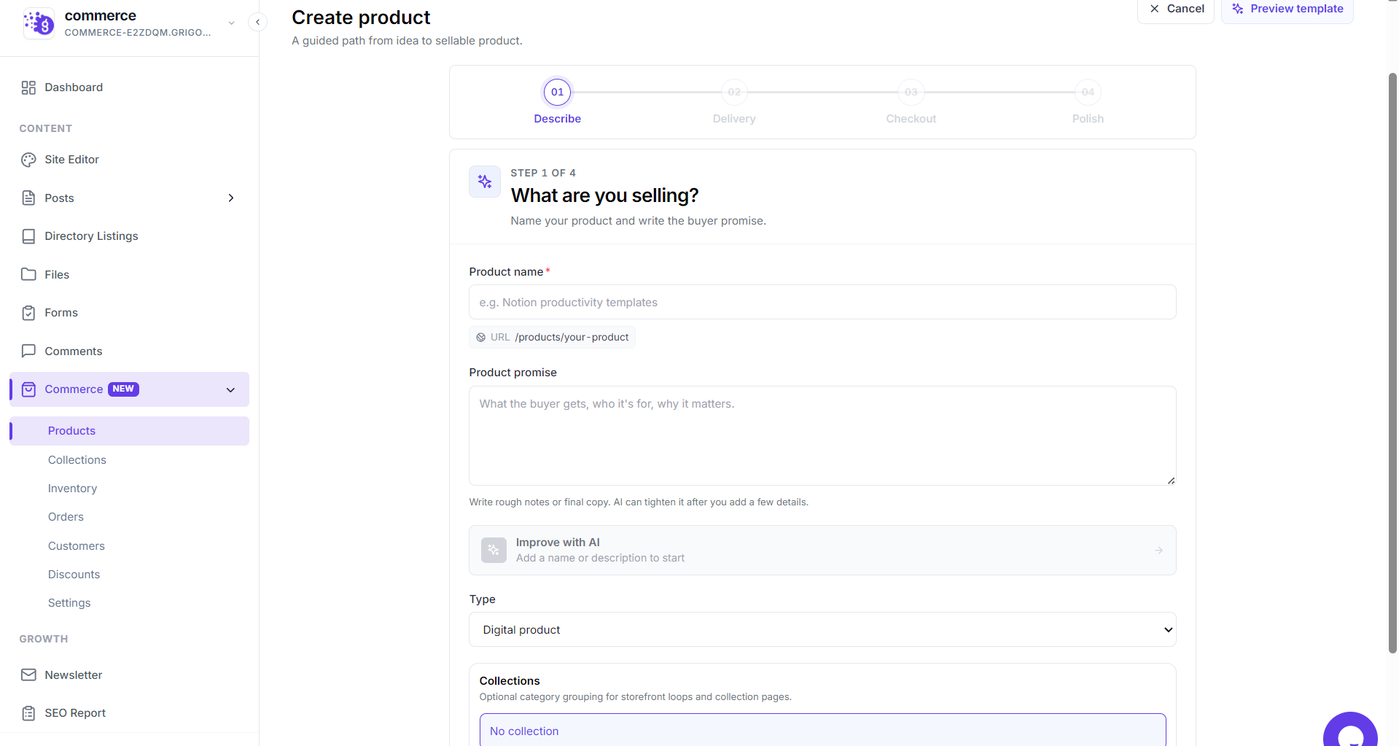
Each step handles a different part of setting up your product, making it easier to complete the required information before publishing.
Setting Up Your Product Details
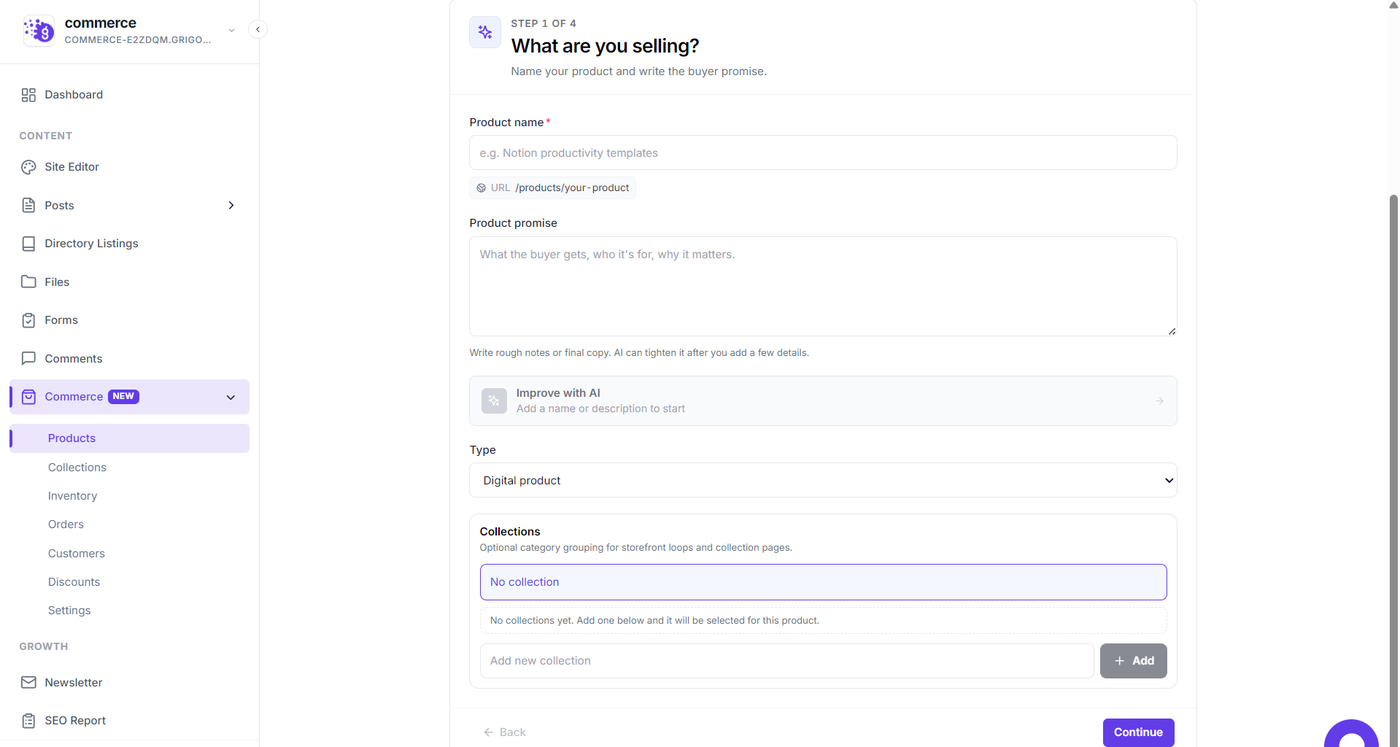
In the Describe step, provide the basic information about what you are selling.
You can configure:
Product Name: Enter the name customers will see.
Product Promise: Explain what the buyer gets, who it is for, and why it matters.
Product Type: Select the appropriate product type.
Collections: Assign the product to an existing collection or create a new collection.
Grigora also provides an Improve with AI option that can help refine your product name or description.
Choosing Product Delivery
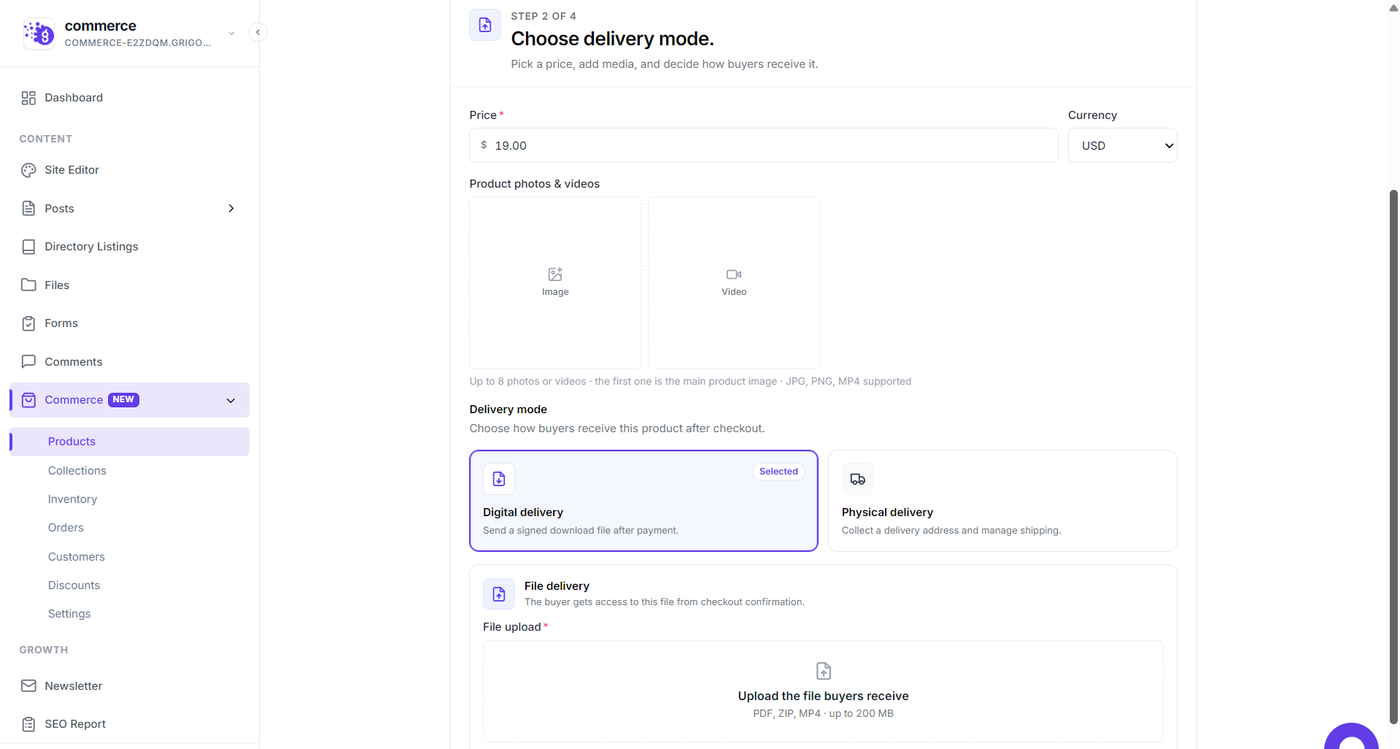
The Delivery step lets you configure pricing, product media, and how customers receive the product.
You can configure:
Product price
Currency
Product photos and videos
Digital delivery
Physical delivery
For digital products, you can upload the file customers will receive after checkout. Grigora supports files such as PDF, ZIP, and MP4, with the upload size shown in the product setup interface.
For physical products, you can configure the product for shipping and collect the customer's delivery address during checkout.
Connecting a Payment Provider
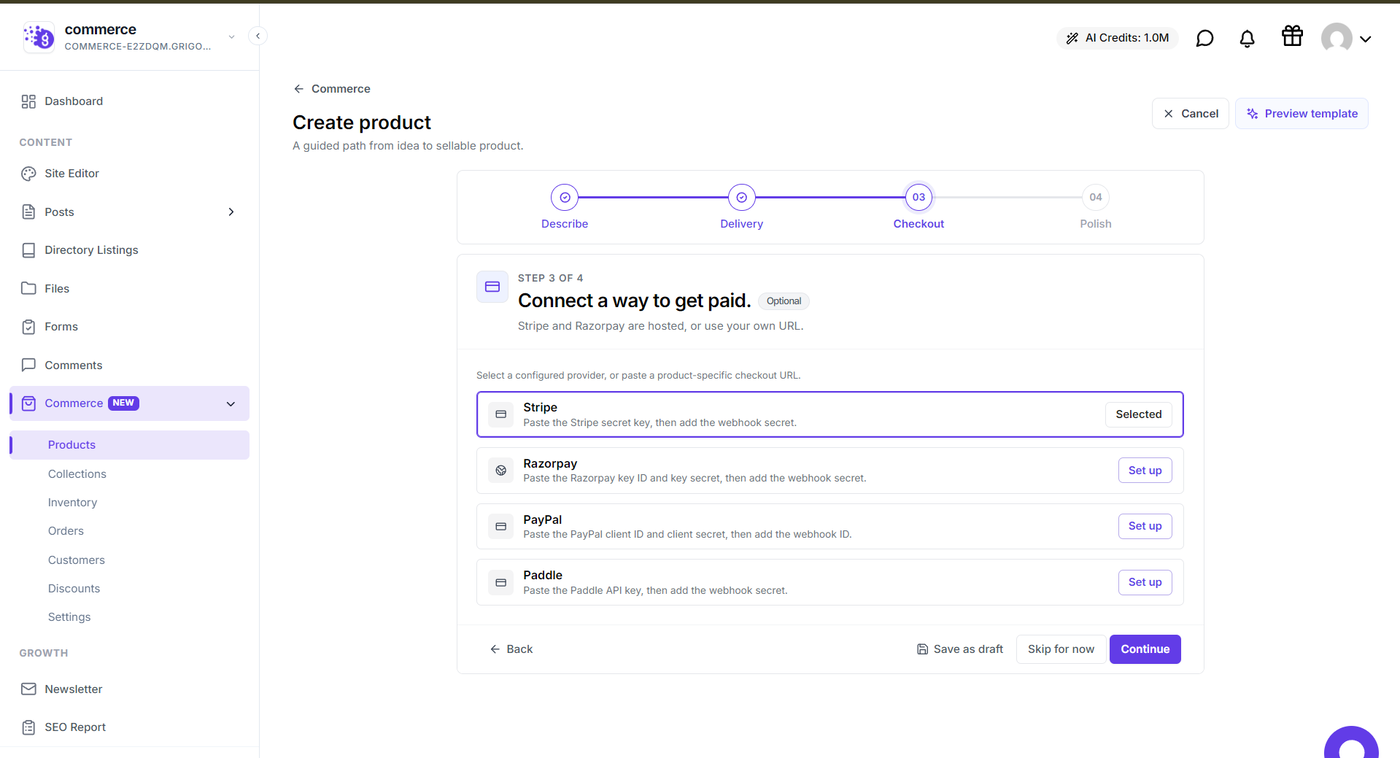
The Checkout step allows you to connect a payment provider to your product.
Grigora Commerce supports:
Stripe
Razorpay
PayPal
Paddle
You can select a configured provider or set up a provider when creating the product. This step can also be skipped and configured later from Commerce settings.
Polishing and Publishing Your Product
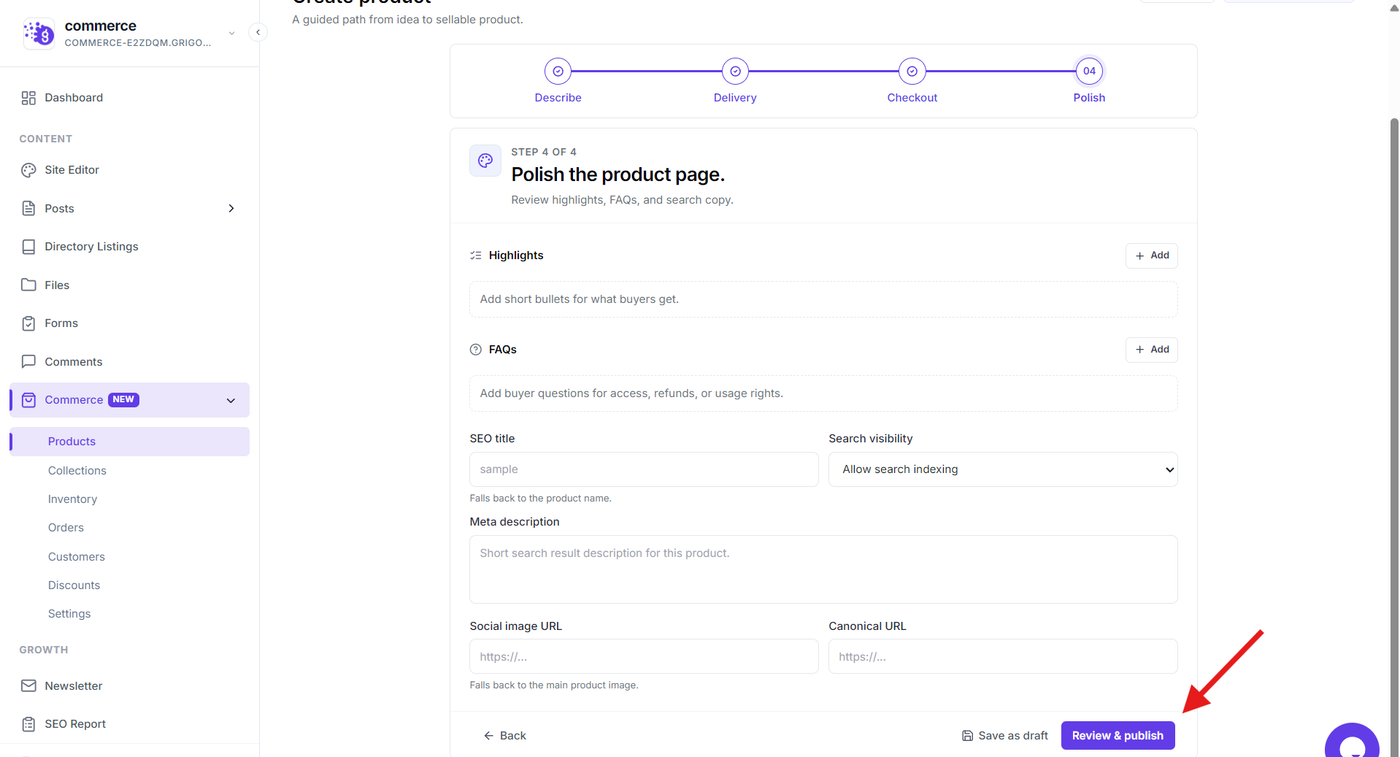
The final Polish step lets you prepare the product page before publishing.
You can add:
Highlights to explain what buyers receive.
FAQs to answer common buyer questions.
SEO title for search engines.
Search visibility settings.
Meta description for search results.
Social image URL for social sharing.
Canonical URL when required.
Once everything is ready, select Review & publish to review the product before making it available.
Managing Product Collections
Use Collections to group related products together. Collections can be useful for organizing catalogs and creating filtered product sections on your storefront.
When creating a collection, you can configure:
Collection title
Optional slug
Collection image
Description
Products assigned to the collection
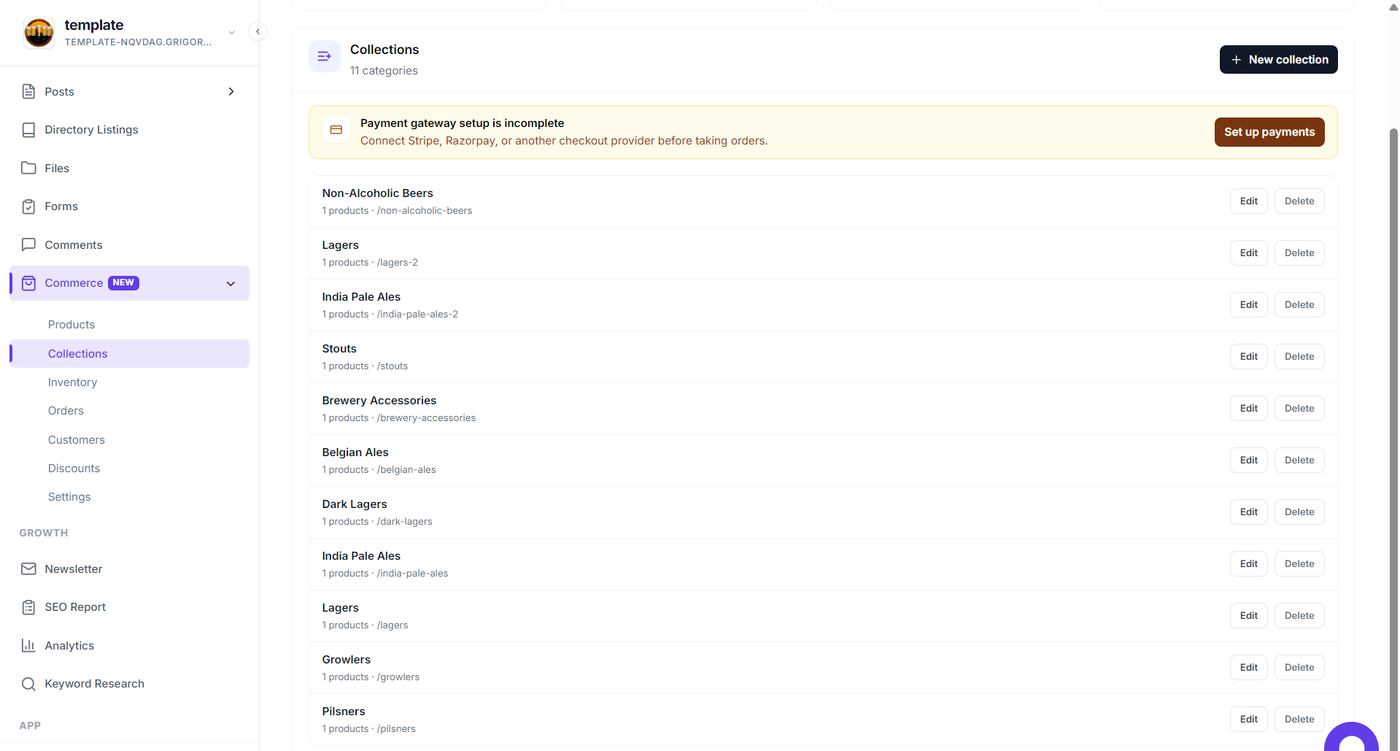
You can also create a collection directly while creating a product, allowing you to organize products without leaving the product creation workflow.
Managing Inventory
The Inventory section provides a central place to manage product and variant stock.
Once products that require inventory are created, their stock information can appear here.
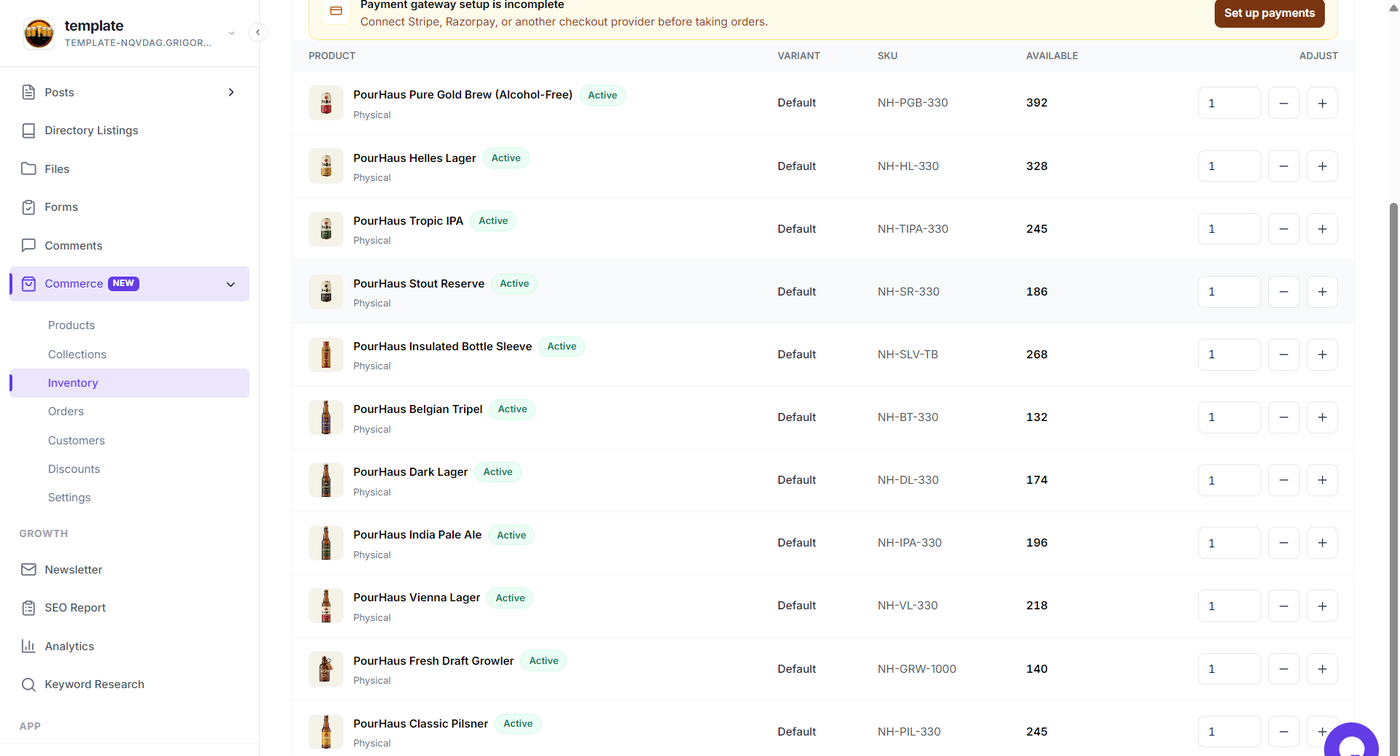
Inventory is especially useful when managing physical products or products with different variants and stock quantities.
Managing Orders and Customers
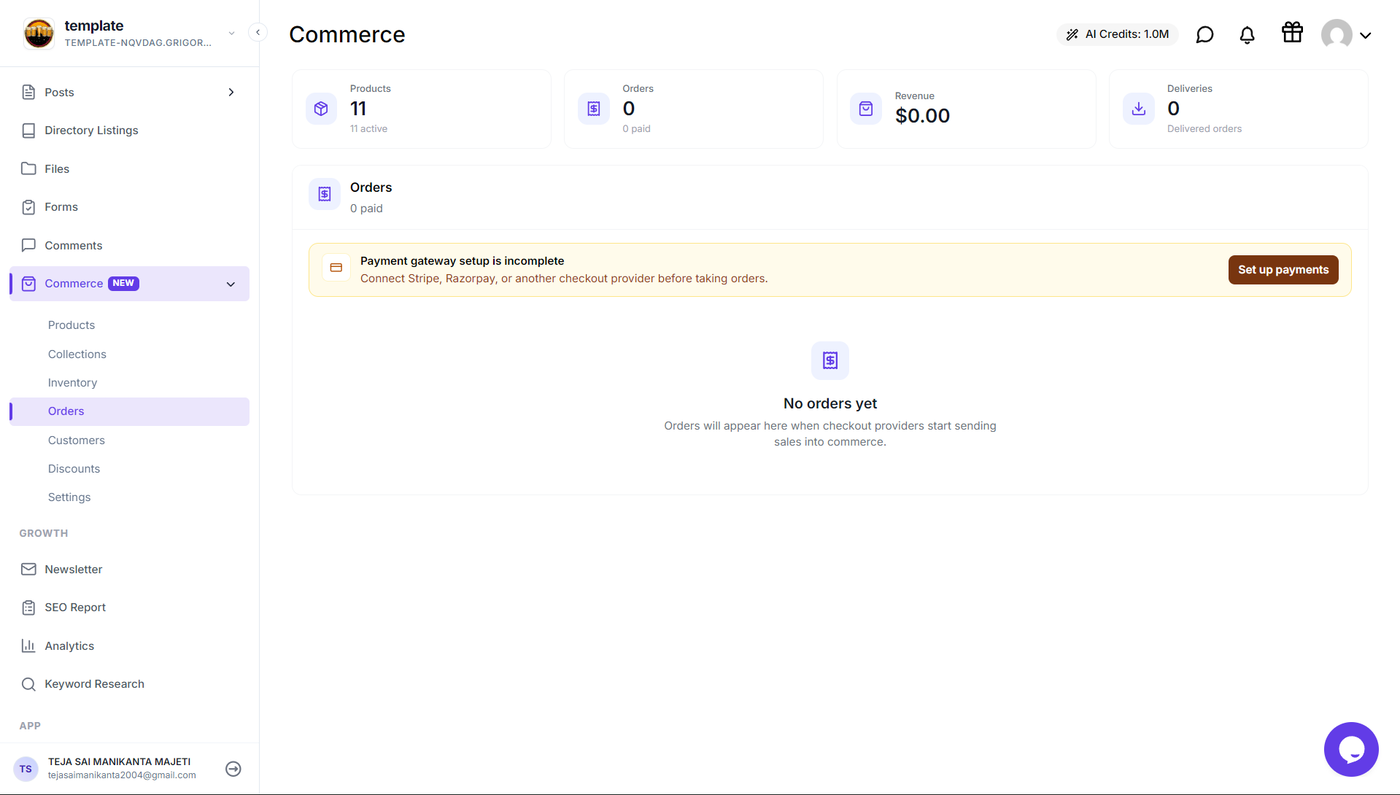
The Orders section provides a central place to view purchases received through your configured checkout providers.
The Customers section contains buyer profiles created after successful purchases and checkout events.
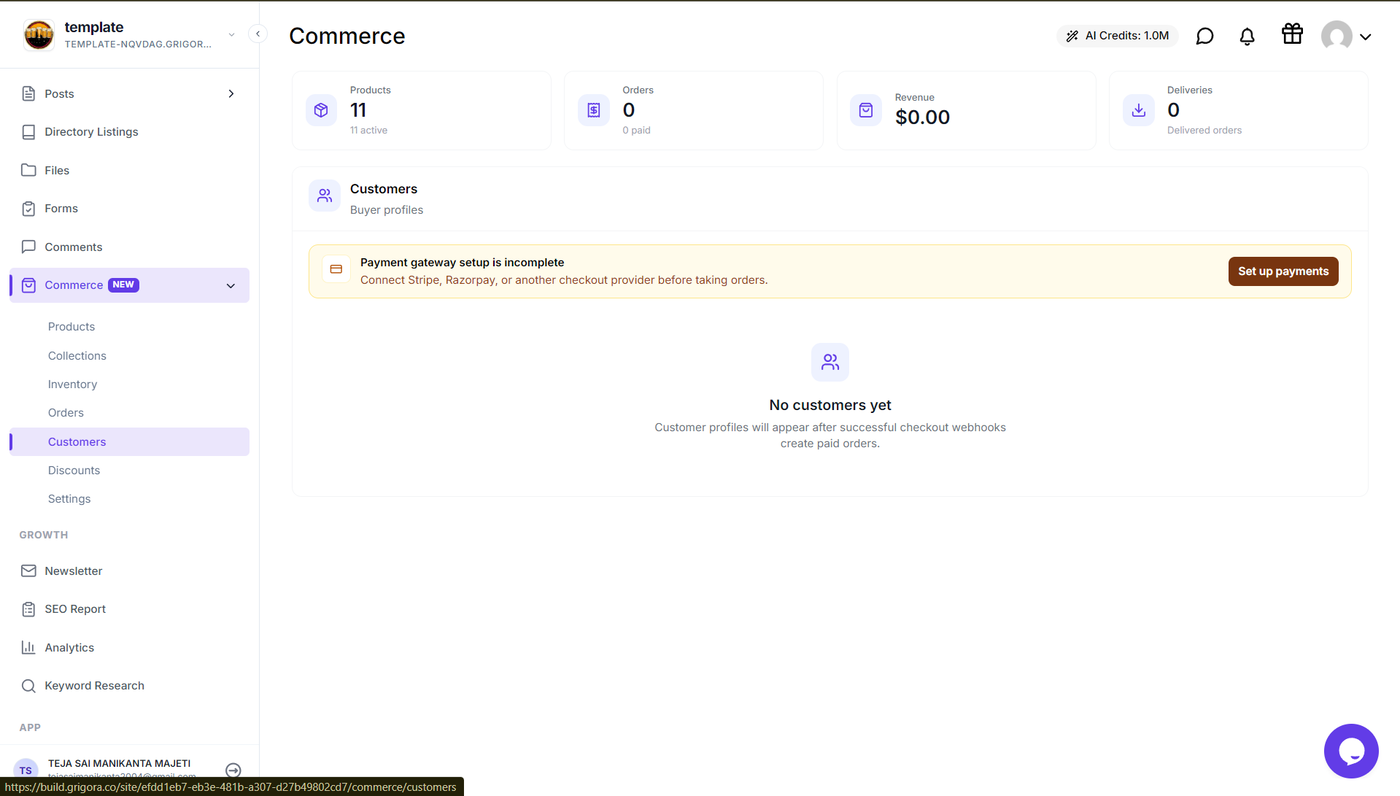
Together, these sections make it easier to track purchases and understand who is buying from your store.
Creating Discount Codes
Use Discounts to create coupon codes that customers can apply during checkout.
You can configure options such as:
Discount code
Discount type
Percentage or fixed discount
Minimum subtotal
Maximum redemptions
Expiration date
Products the discount applies to
Active or inactive status
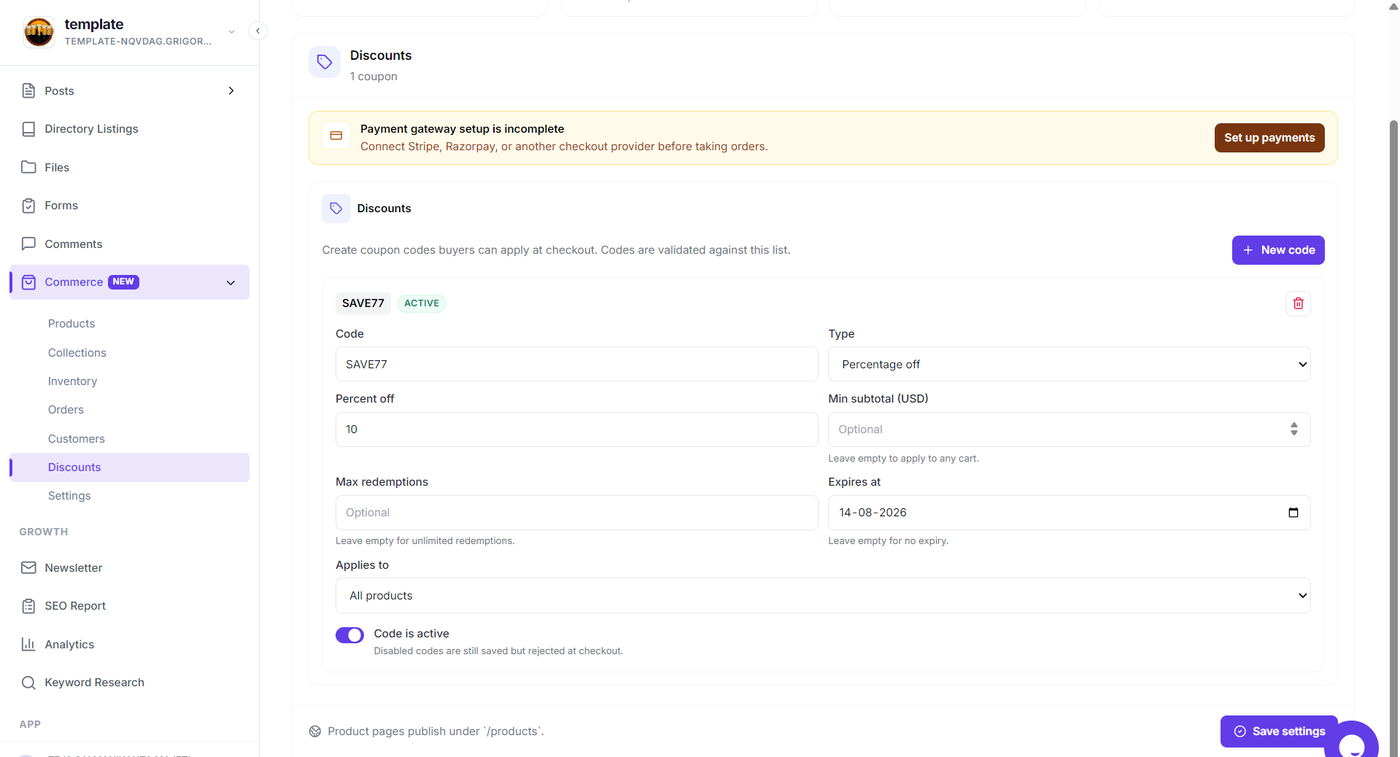
Discount codes can be enabled or disabled without deleting them, allowing you to control when customers can use a particular promotion.
Configuring Your Store Settings
Commerce provides a dedicated Settings area for configuring how your store operates.
The available settings include:
Store Details: Configure currency and store email information.
Payments: Connect and configure payment providers.
Shipping: Define shipping zones and rates.
Tax: Configure tax behavior and country-specific rates.
Invoices: Customize invoice information and formatting.
Media: Configure store-wide product images and videos.
SEO: Set default product-page SEO options.
Appearance: Customize product-page templates and visual styling.
Webhooks & API: Access Commerce integration and webhook endpoints.
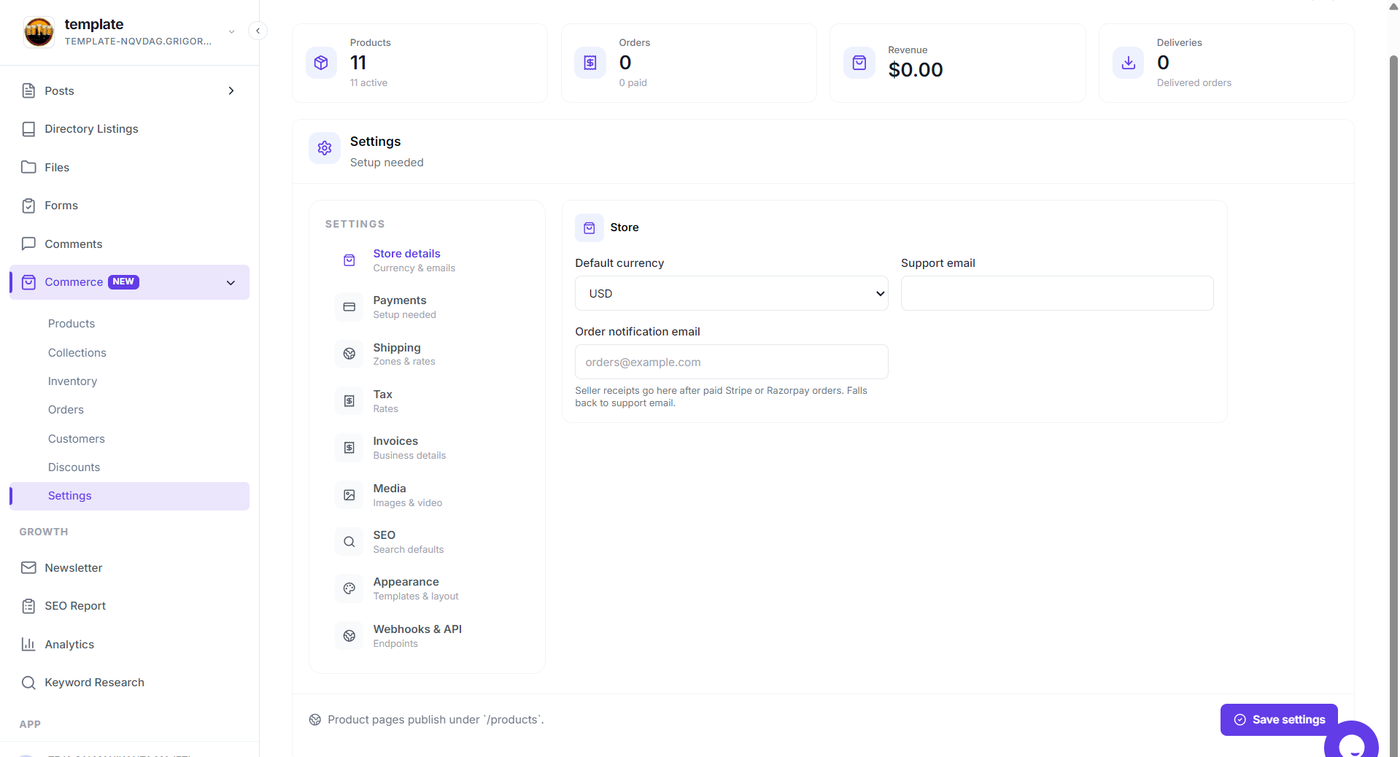
Configuring Payments
Open Settings → Payments to configure the payment provider used by your store.
You can select a primary provider from:
Stripe
Razorpay
PayPal
Paddle
You can also select the appropriate payment mode, such as test mode, when supported by your configuration.
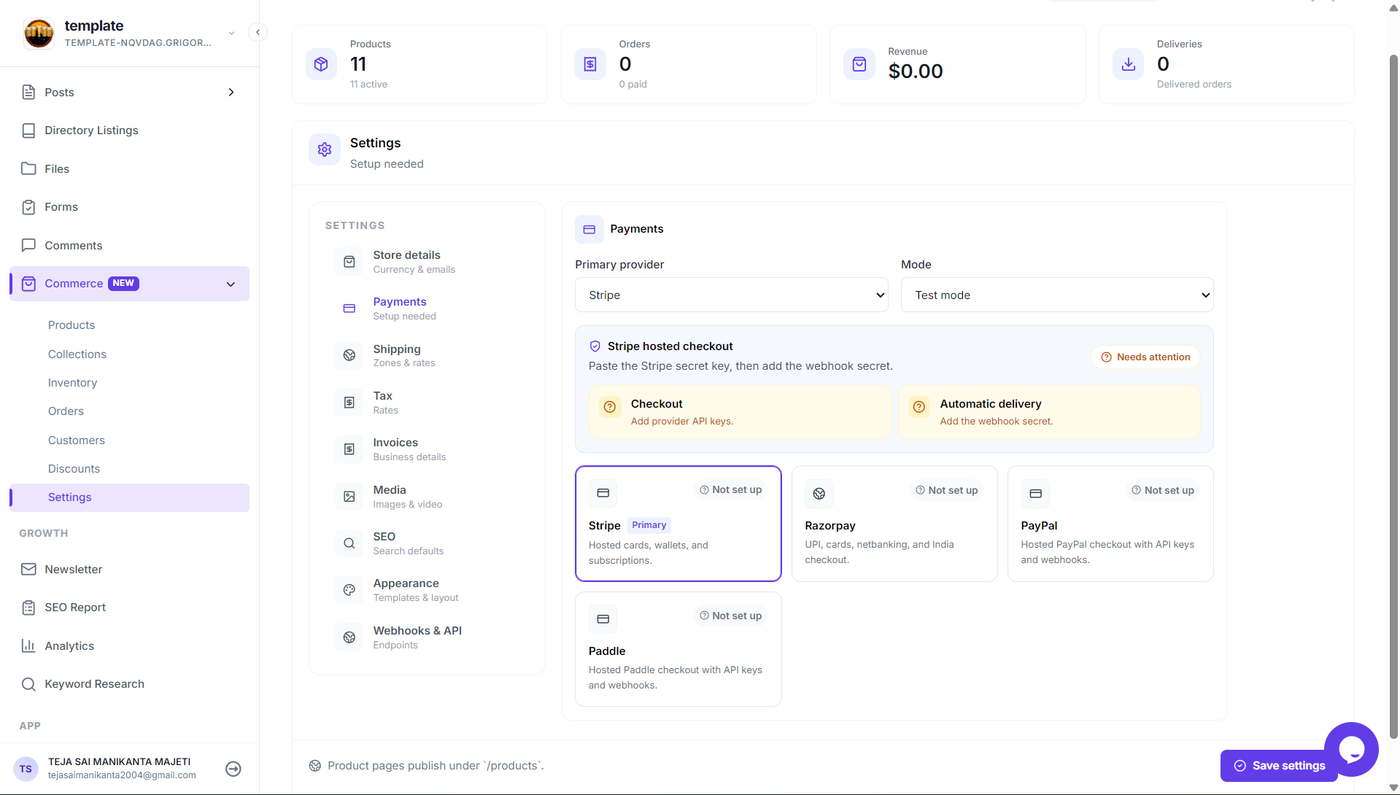
Payment configuration is important for accepting orders and enabling automated order and delivery processing through provider webhooks.
Configuring Shipping
If you sell physical products, use Settings → Shipping to define where you ship and how shipping rates are calculated.
You can create shipping zones and configure:
Zone name
Countries using ISO country codes
Shipping rates
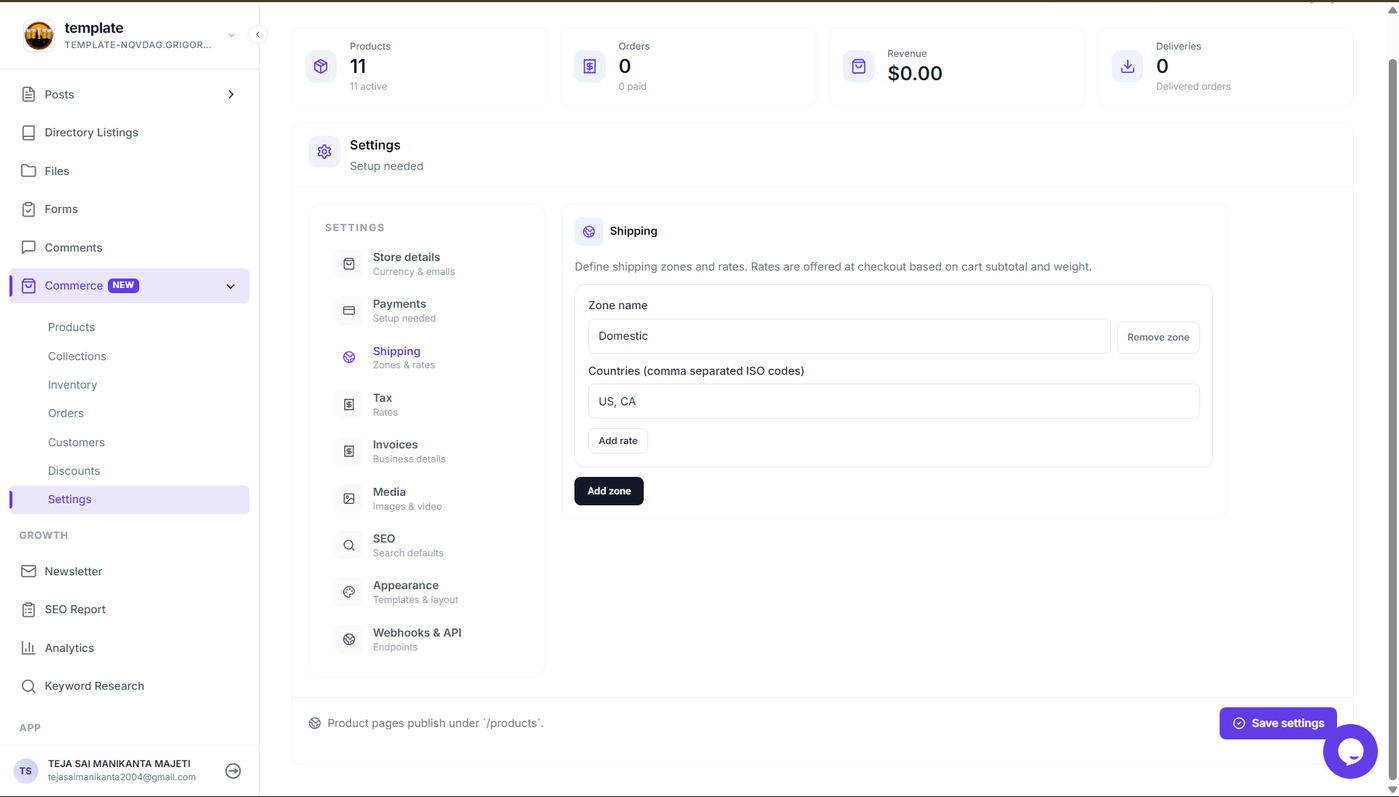
Shipping rates can be offered at checkout based on factors such as cart subtotal and product weight.
Configuring Taxes
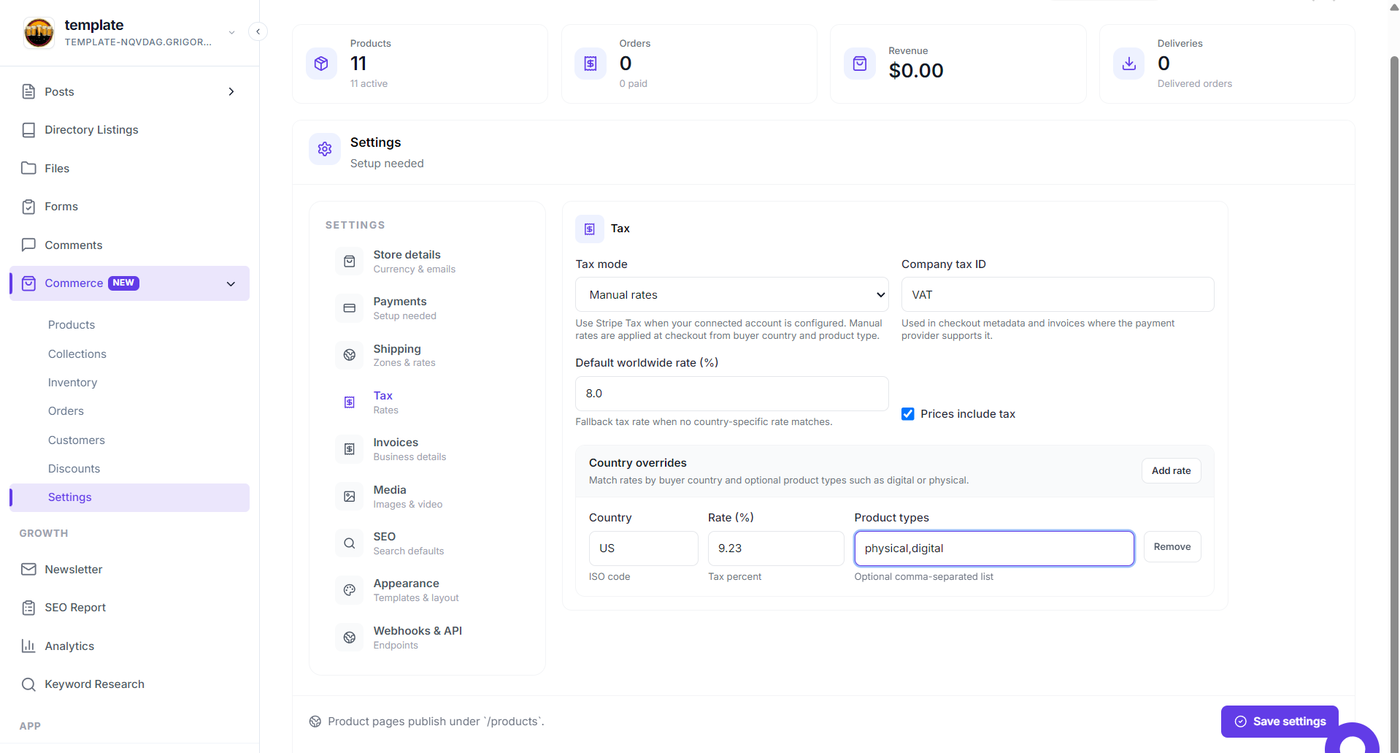
Use Settings → Tax to configure how taxes are handled during checkout.
Grigora provides options for:
No tax
Stripe Tax
Manual tax rates
Manual tax configuration allows you to define a default worldwide rate and add country-specific overrides when needed.
You can also configure:
Company tax ID
Whether prices include tax
Country-specific tax rates
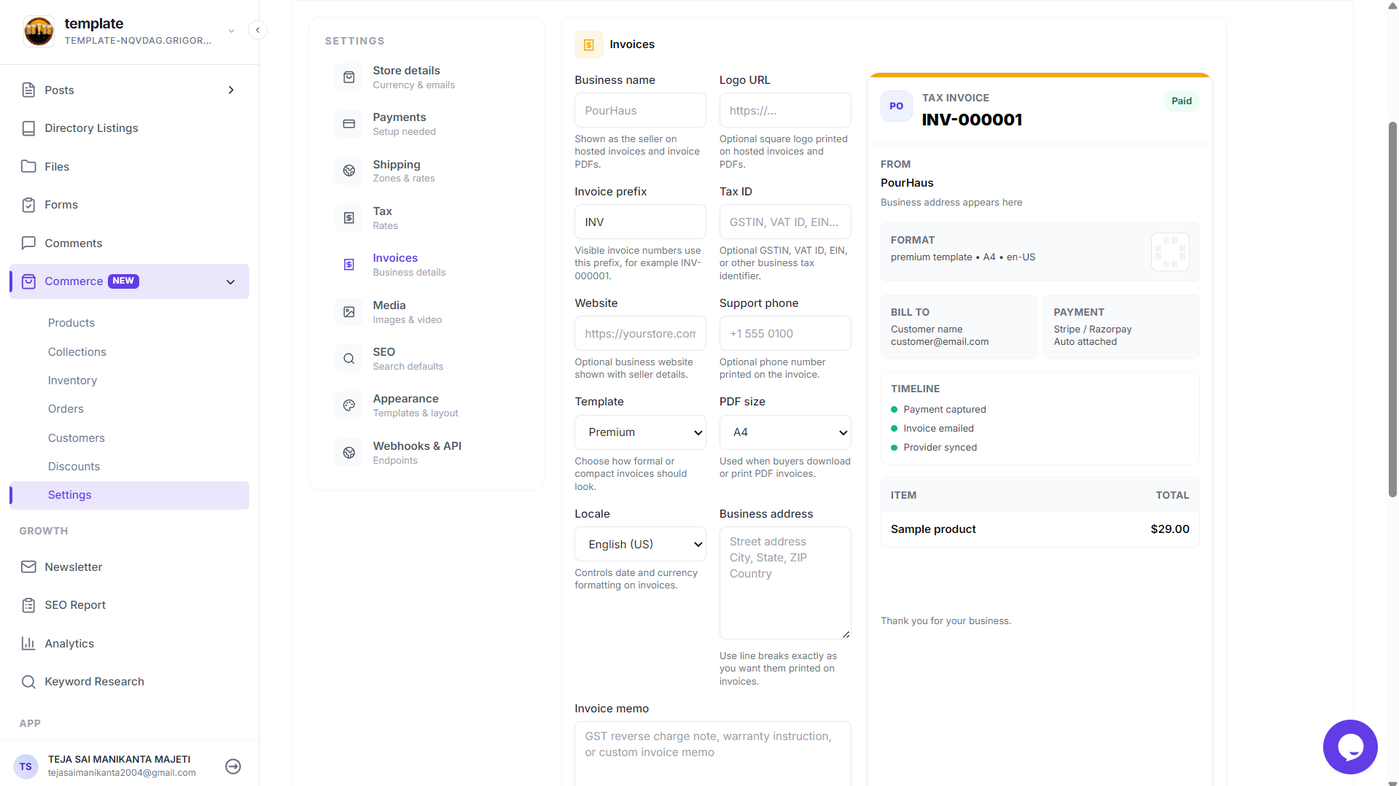
Configuring Invoices
The Invoices settings allow you to customize the information displayed on customer invoices.
You can configure details such as:
Business name
Logo
Invoice prefix
Tax ID
Website
Support phone
Business address
Invoice template
PDF size
Locale
A preview is displayed alongside the settings so you can see how the invoice will appear.
Managing Product Media
Commerce provides store-wide media settings for products.
You can configure:
Fallback product image
Social sharing image
Default product video
Maximum gallery items
Video playback behavior
The fallback product image is used when an individual product does not have its own image.
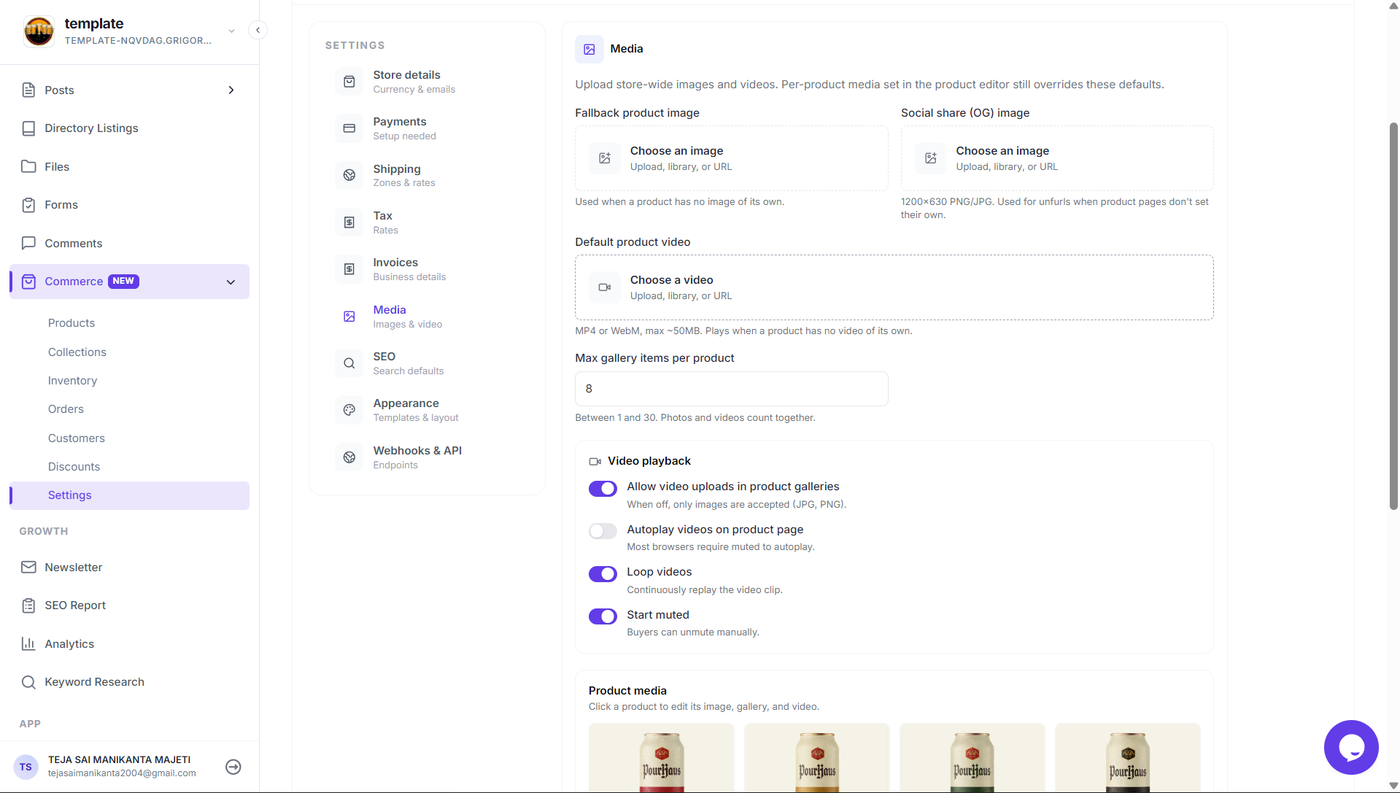
You can also control video behavior, including:
Allowing videos in product galleries
Autoplay
Looping
Starting videos muted
Configuring Product SEO
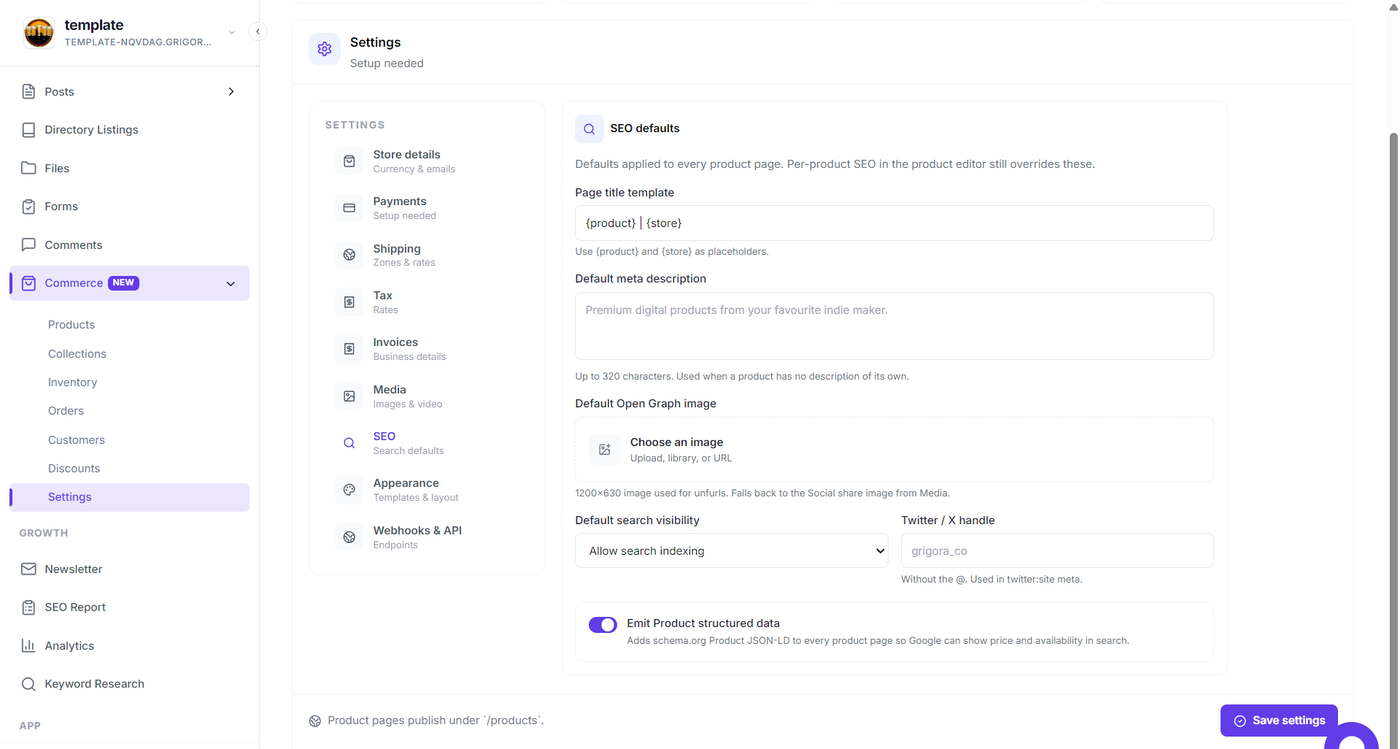
Commerce includes global SEO defaults that can be applied to product pages.
You can configure:
Product page title template
Default meta description
Default Open Graph image
Search visibility
Twitter/X handle
Product structured data
Product-specific SEO settings can override the global defaults when configuring an individual product.
Customizing Product Page Appearance
Use Settings → Appearance to control how your product pages look.
Grigora provides multiple storefront templates, including:
Clean checkout
Showcase
Editorial
Compact
Bold launch
You can also customize:
Button style
Media fit
Accent color
Background color
Text color
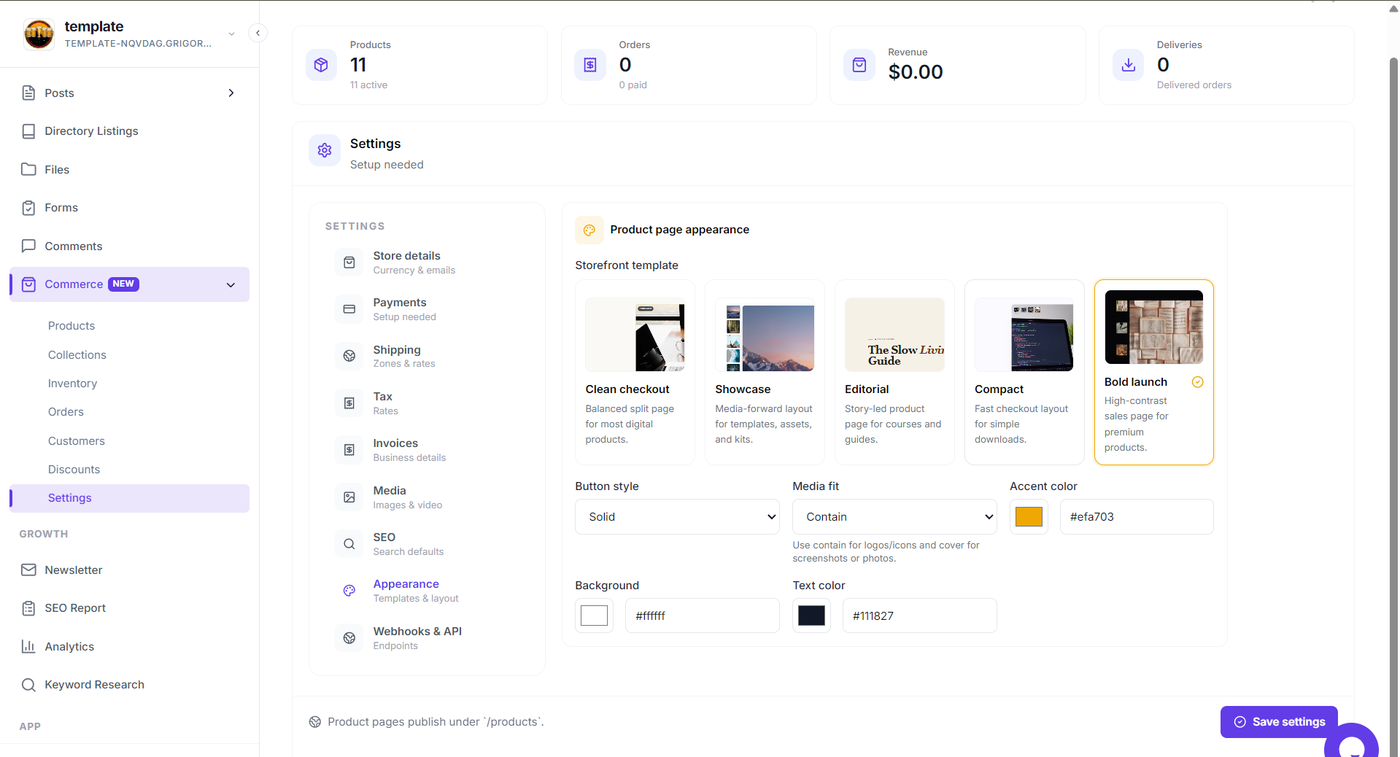
This allows you to select a product-page layout that matches the type of products you sell and customize its visual appearance.
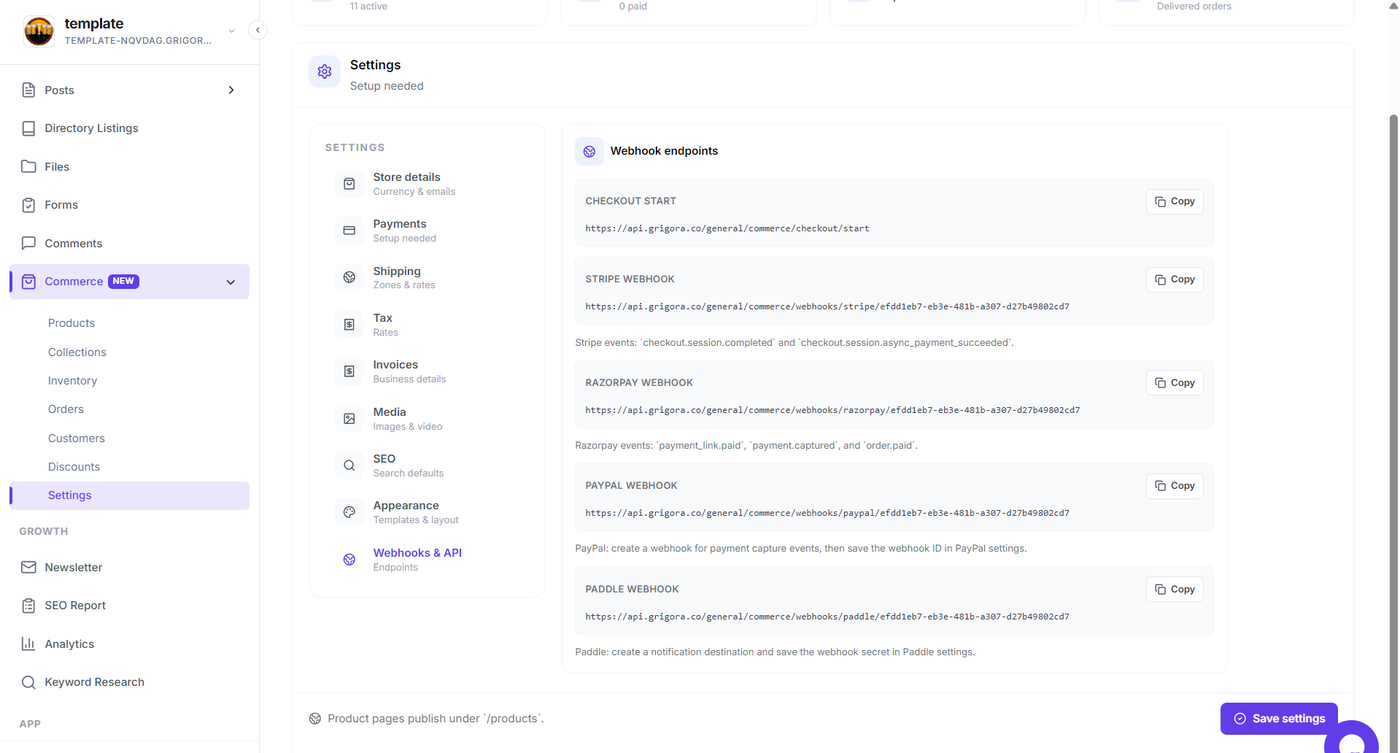
Configuring Webhooks and API Endpoints
The Webhooks & API section provides the endpoints required to connect your Commerce store with supported payment providers.
The page provides endpoints for:
Checkout start
Stripe webhooks
Razorpay webhooks
PayPal webhooks
Paddle webhooks
Each endpoint includes a Copy button so you can quickly use the URL when configuring webhooks with your payment provider.
Professional Commerce Management
Grigora Commerce brings the complete store management workflow into one dashboard. Use its Commerce tools to:
Create and publish products with guided setup.
Sell both digital and physical products.
Organize products using collections.
Manage inventory and product stock.
Connect payment providers and accept payments.
Configure shipping zones and delivery rates.
Manage taxes and invoices.
Create discount codes and promotions.
Track orders and customer profiles.
Configure product media and video behavior.
Optimize product pages for search engines.
Customize product-page templates and visual styles.
Configure payment webhooks and Commerce integrations.
Once your store is configured, you can manage the entire product-selling workflow from Commerce in your Grigora dashboard.