

Migrating from another email service provider (such as Mailchimp, Substack, ConvertKit, or Klaviyo) to Grigora is fast and seamless. With the built-in CSV Import Wizard, you can upload thousands of subscribers at once, automatically map columns to standard and custom fields, assign lists and tags, and maintain complete data integrity.
This guide walks you through preparing your CSV file, navigating the 4-step import wizard, and avoiding common import pitfalls.
Step 1: Preparing Your CSV File
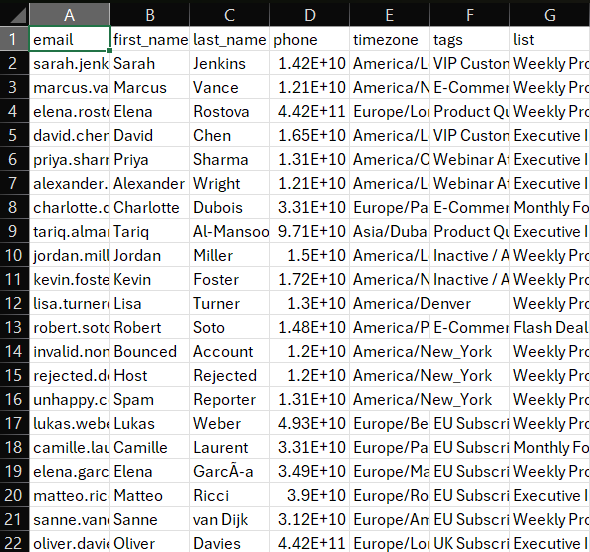
Before uploading, ensure your spreadsheet (from Excel, Google Sheets, or another ESP export) is formatted properly:
First Row as Headers: The first row must contain descriptive column headers (e.g.,
email,first_name,last_name,phone,company).One Email per Row: Every row must contain a valid email address.
Supported Formats: Save your file as a standard comma-separated values file (
.csv).Phone Numbers: Phone numbers in international format (e.g.,
+1 555 123 4567) are automatically parsed and normalized to E.164 by Grigora.
Step 2: Launch the Import Wizard
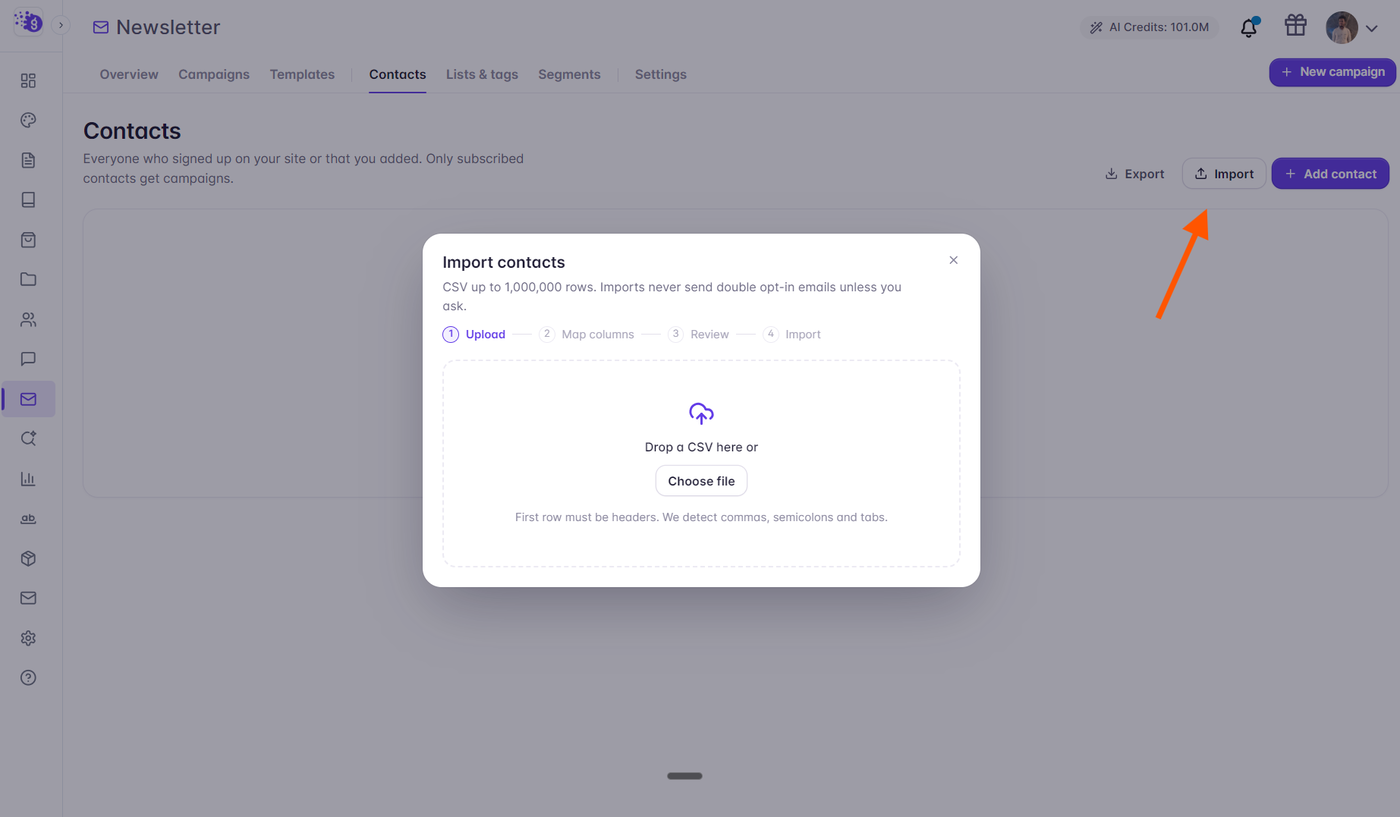
In the Grigora dashboard, go to Newsletter > Contacts.
Click the Import button next to the search bar.
The Import Contacts Wizard will open.
Step 3: Upload Your File
Drag and drop your .csv file into the upload zone, or click Browse files to select it from your computer.
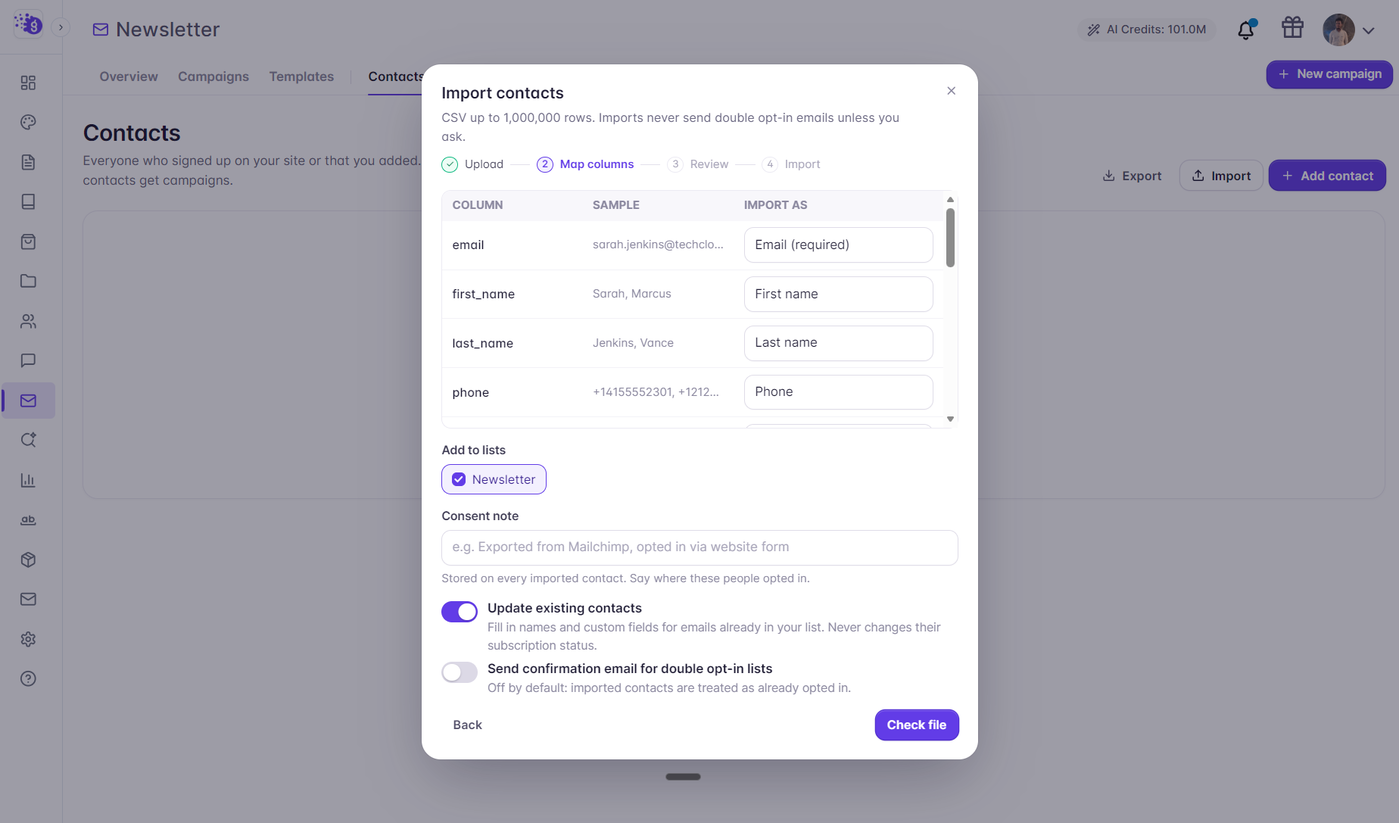
Grigora reads the file header instantly and displays the total number of detected rows.
Step 4: Map Your Columns
The column mapping screen displays every column detected in your CSV file alongside sample data from your first few rows.
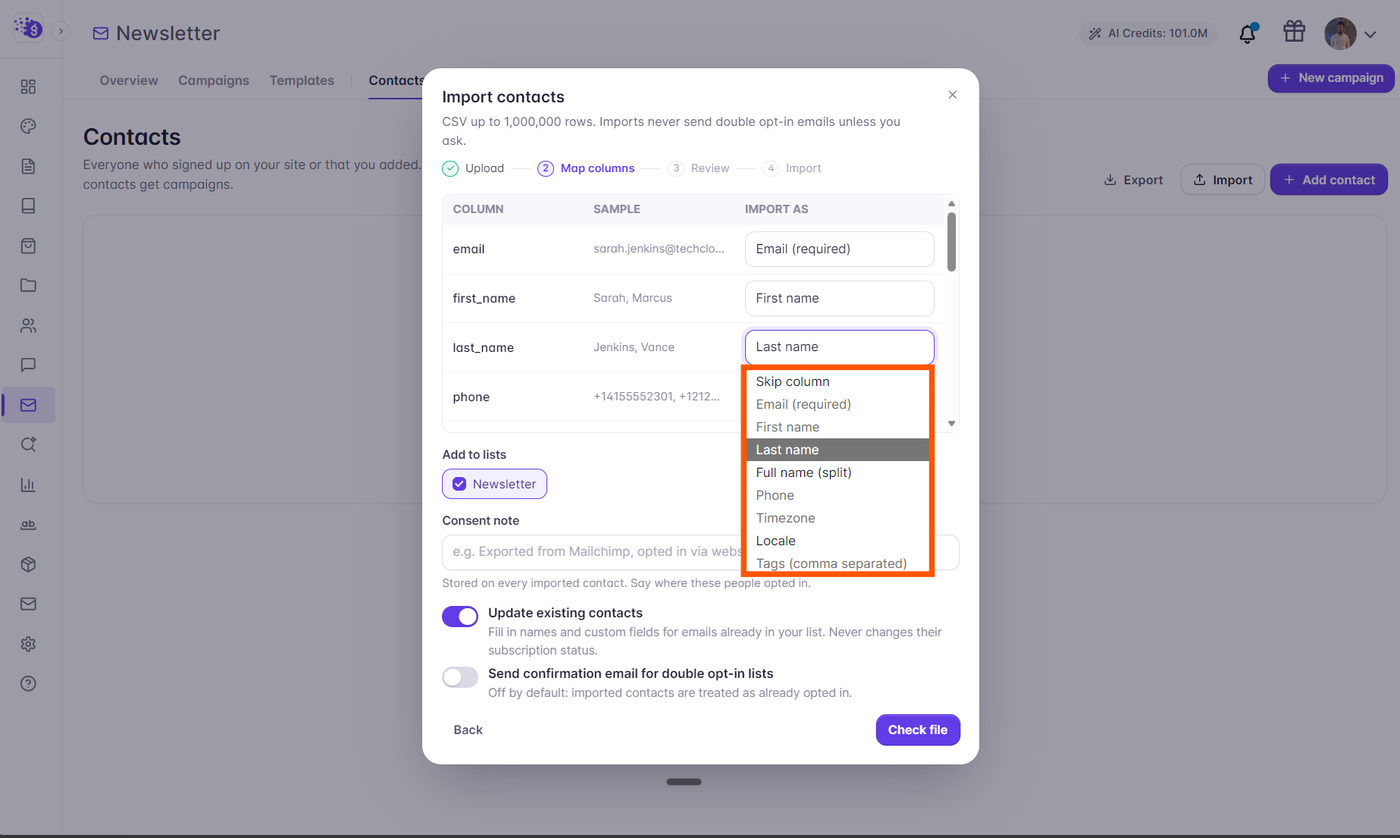
Grigora automatically predicts mappings based on your header names, but you can adjust any column using the dropdown menu:
Email Address (Required): Select the column containing your subscriber emails.
First Name & Last Name: Map individual name fields.
Phone: Map telephone numbers.
Custom Fields: Map attributes to any custom subscriber fields you have created in your project (e.g., Company, Account Tier).
Do Not Import (Skip): Any column you do not need can be set to Skip column.
Step 5: Configure Lists, Tags & Update Options
Before processing the import, choose how the subscribers should be organized:
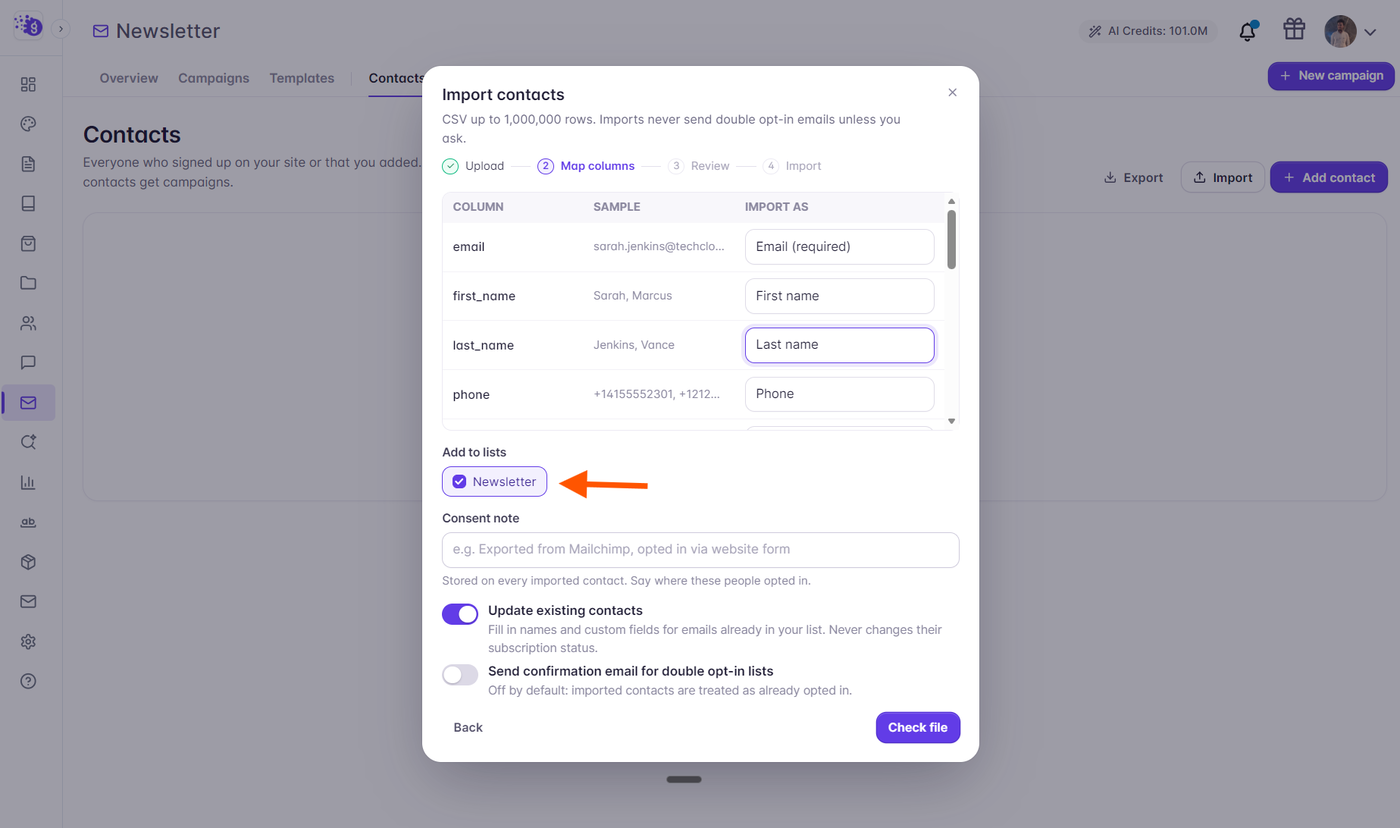
Add to Lists: Choose which audience list(s) the imported contacts should join (e.g., your default Newsletter list).
Apply Tags: Add one or more tags (e.g.,
mailchimp-importorvip-customers) to easily segment this cohort later.Update Existing Contacts:
Checked: If an email address already exists in your account, Grigora updates their name, phone, and custom fields with the new CSV data.
Unchecked: Existing contacts are kept as-is and skipped to prevent overwriting existing data.
Unsubscribe Protection: Grigora respects previous unsubscribe requests. If an imported contact previously unsubscribed from your site, their unsubscribed status will be preserved to maintain compliance with anti-spam laws.
Step 6: Review and Run the Import
Click Import {N} Contacts. Grigora will process your rows in the background and display a live progress indicator.
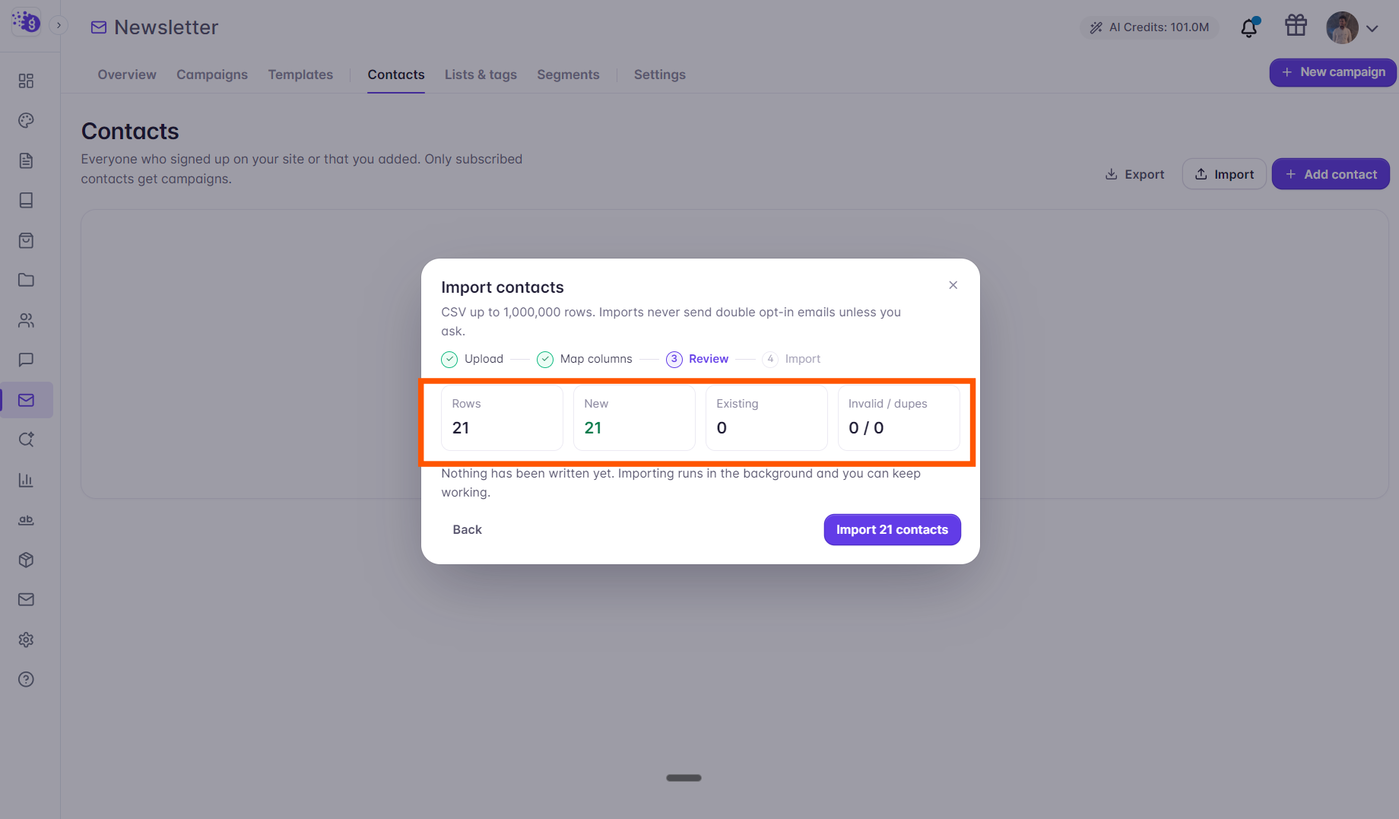
When finished, a summary report details:
Successfully imported: New contacts added.
Updated: Existing contacts updated with new details.
Skipped / Invalid: Malformed email rows skipped.
Next Steps
How to Create and Organize Subscriber Lists in Grigora
How to Use Tags to Organize and Filter Newsletter Subscribers
How to Build Targeted Audience Segments with Multi-Condition Rules