

When you send email campaigns through an external email delivery service, some delivery issues occur after the email has left the server. Recipients may have obsolete inboxes (causing a hard bounce) or choose to report an email as spam. To keep your audience list clean and protect your sender reputation, Grigora provides automated Bounce and complaint reports via webhooks.
When configured, your external email provider immediately notifies Grigora whenever a message bounces or is marked as spam. Grigora instantly updates the contact's status and adds them to your Suppression list, ensuring they are permanently excluded from future campaigns.
Supported Email Providers & Compatibility
Webhooks require an email service with automated event notification capabilities. Grigora provides dedicated webhook integration for external email delivery providers including Brevo, Amazon SES, Mailgun, Postmark, and SendGrid.
Why is "Bounce reports" not visible for Gmail or Custom SMTP?
Standard personal and business email services such as Google Workspace (Gmail), Microsoft 365, or standard Custom SMTP mailboxes do not support webhook event dispatching. When an email bounces through Gmail, the mail system sends a standard bounce notification email (a Non-Delivery Report) back to your personal inbox instead of posting automated data to an external server. Because standard mailboxes cannot push automated event notifications to Grigora, the Bounce reports button is only displayed for dedicated email infrastructure providers.
Step 1: Copy Your Webhook Address in Grigora
In your Grigora dashboard, go to Newsletter > Settings.
Locate the Sending connections card.
Find your connected email provider row.
Click the Bounce reports button located on that provider's row.
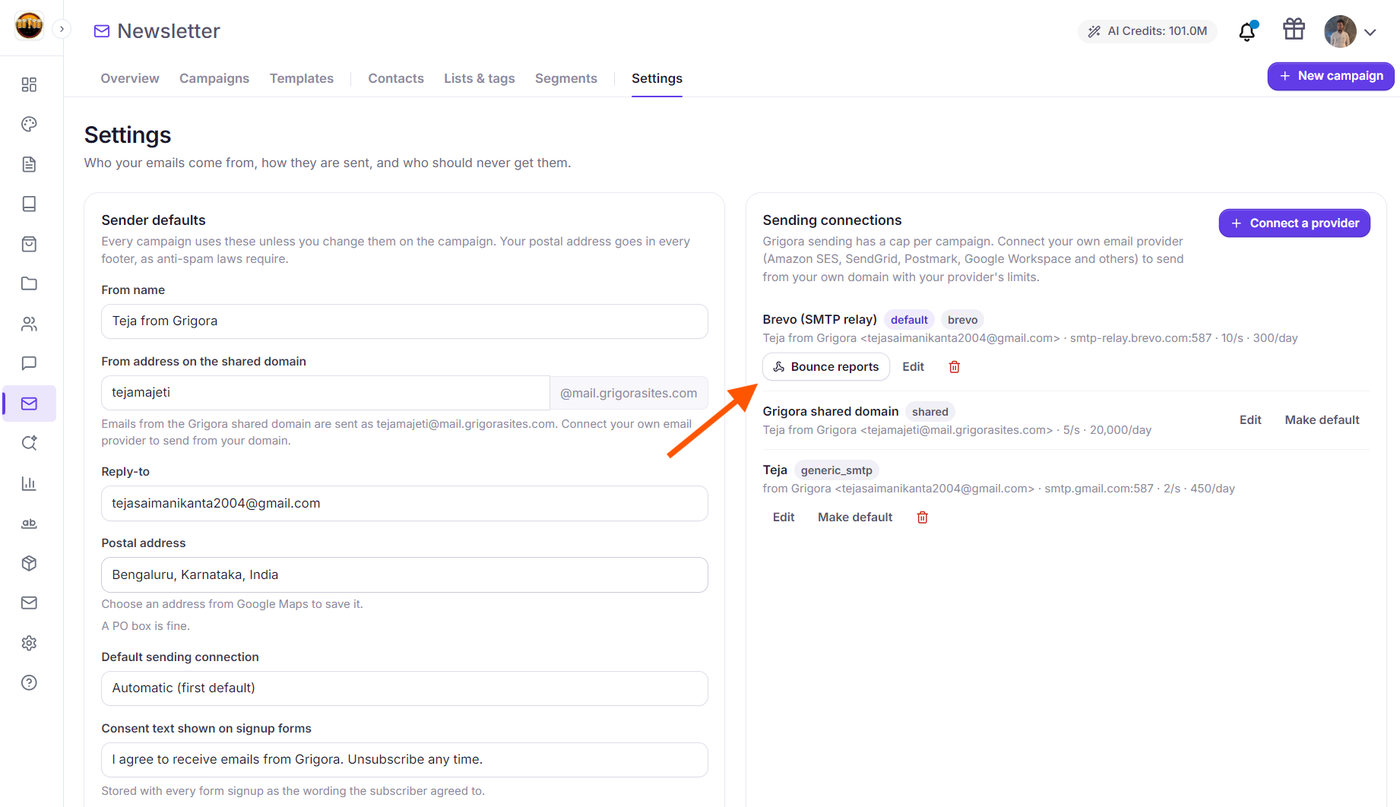
A modal titled Bounce and complaint reports from [Provider Name] opens on screen, displaying your unique Webhook address and setup guidance.
Click the Copy button next to the Webhook address field to copy the URL to your clipboard.
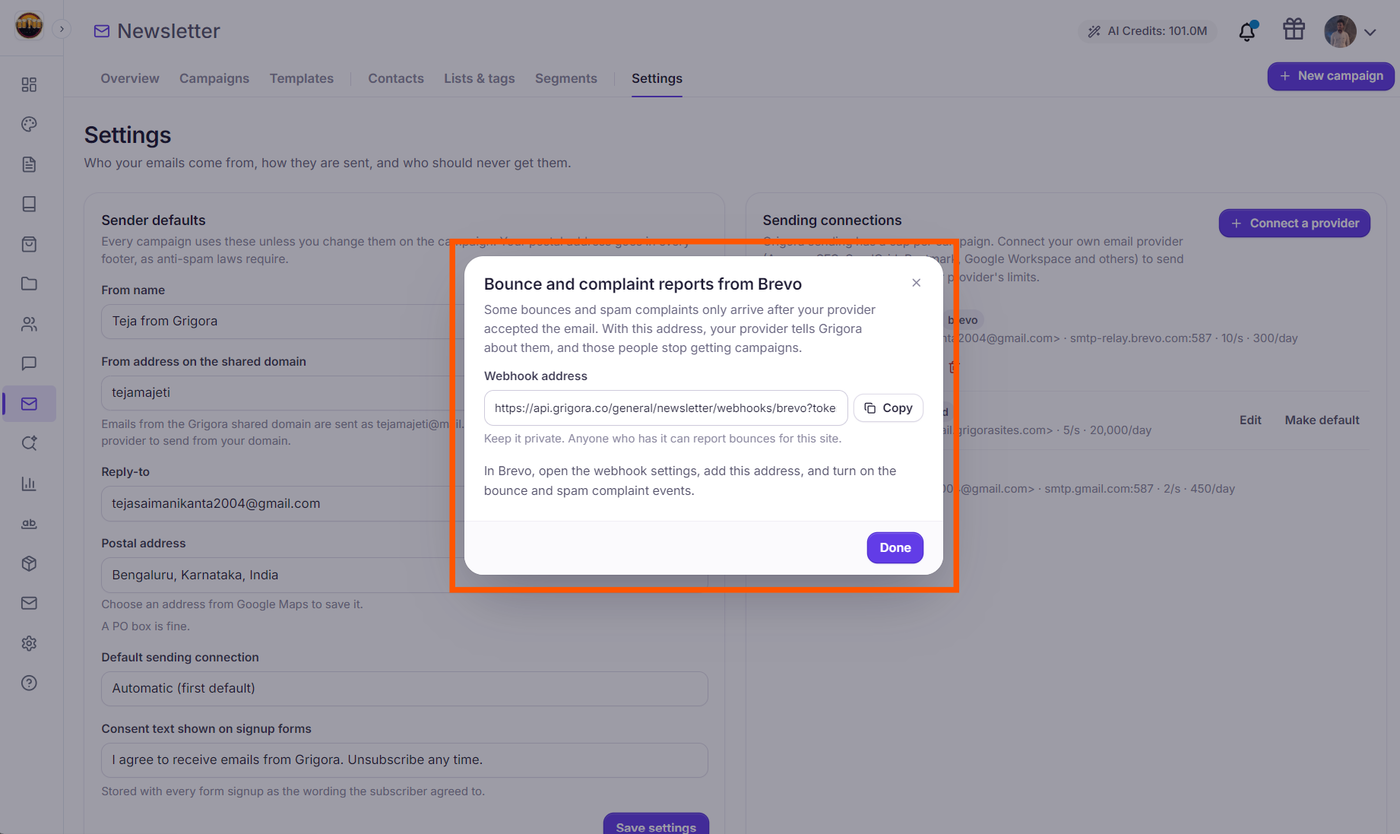
Security Tip: Keep your webhook address confidential. Anyone with access to this address could report delivery events for your site.
Step 2: Add the Webhook Address to Your Provider (Example: Brevo)
Note: The webhook integration process follows the exact same workflow across all supported email providers: copy your unique Grigora webhook address, locate your provider's webhook or event notification settings, create a new outbound webhook with the address, and enable bounce and complaint events. In this section, we use Brevo as a representative example to walk through the configuration.
In Brevo, webhooks are configured under your account's integrations menu rather than the general account settings:
Log in to your Brevo dashboard and click your profile icon / account name in the top-right corner.
From the dropdown menu, select Integrations.
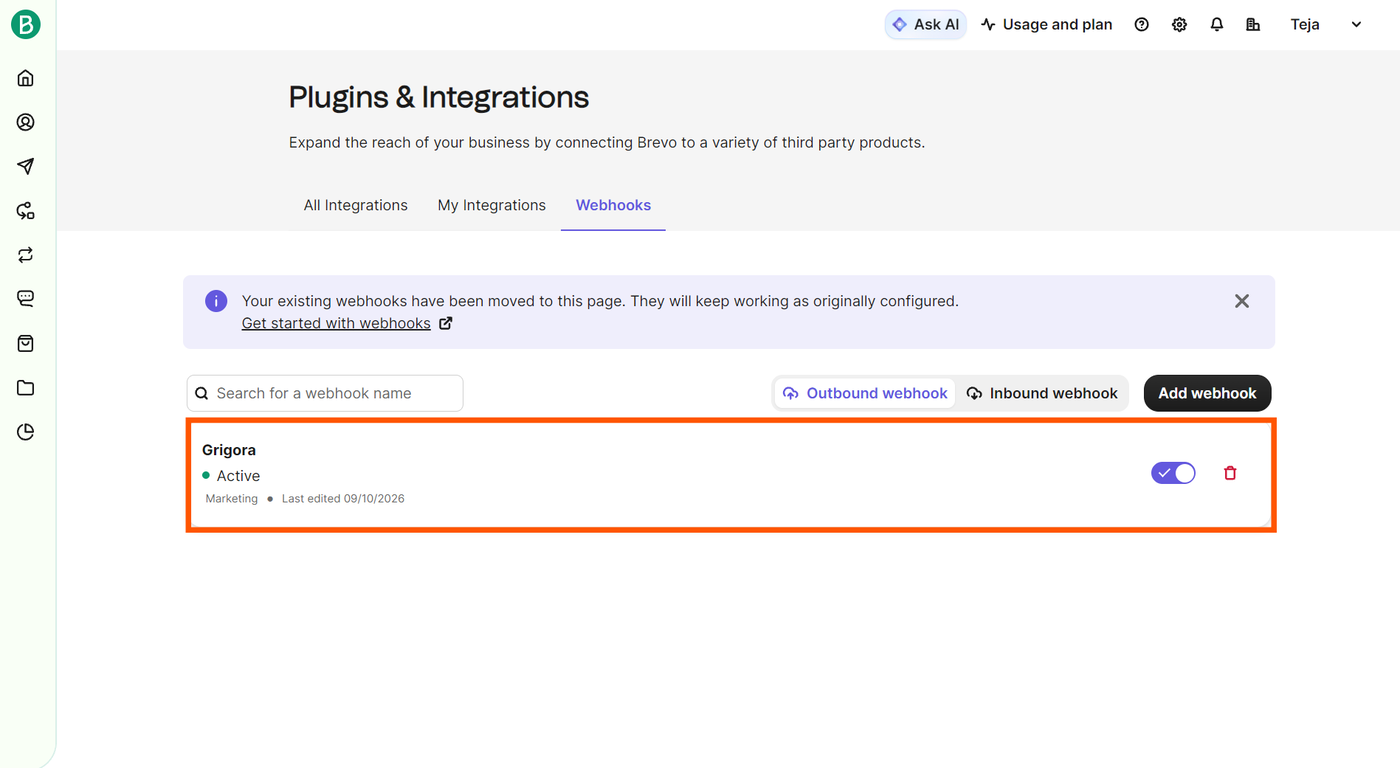
On the Plugins & Integrations screen, click the Webhooks tab.
Ensure Outbound webhook is selected.
Understanding Outbound vs. Inbound Webhooks:
• Outbound webhook: Sends real-time event updates from Brevo to external tools (such as Grigora) when delivery events occur (like hard bounces, soft bounces, and spam complaints). You must use Outbound webhook for Grigora.
• Inbound webhook: Listens for events coming from external tools into Brevo to update contacts or trigger automations inside Brevo. This is not used for bounce tracking.
Click Add webhook (or Create an outbound webhook).
Configure the webhook details in the form:
URL to be called / URL: Paste the unique Webhook address you copied from Grigora.
Authentication: Select No authentication.
Events: Select the delivery events you want Brevo to send to Grigora:
Hard bounce (permanent delivery failures)
Spam or Complaint (spam reports)
Soft bounce (temporary delivery issues, recommended)
Click Add webhook (or Save) to activate the integration.
Step 3: What Happens When Grigora Receives a Report
Once active, whenever an email fails or a subscriber flags an email as spam, your provider sends an automated report to your Grigora webhook. Grigora immediately processes the report:
Hard Bounces:
The contact's status changes to Cleaned.
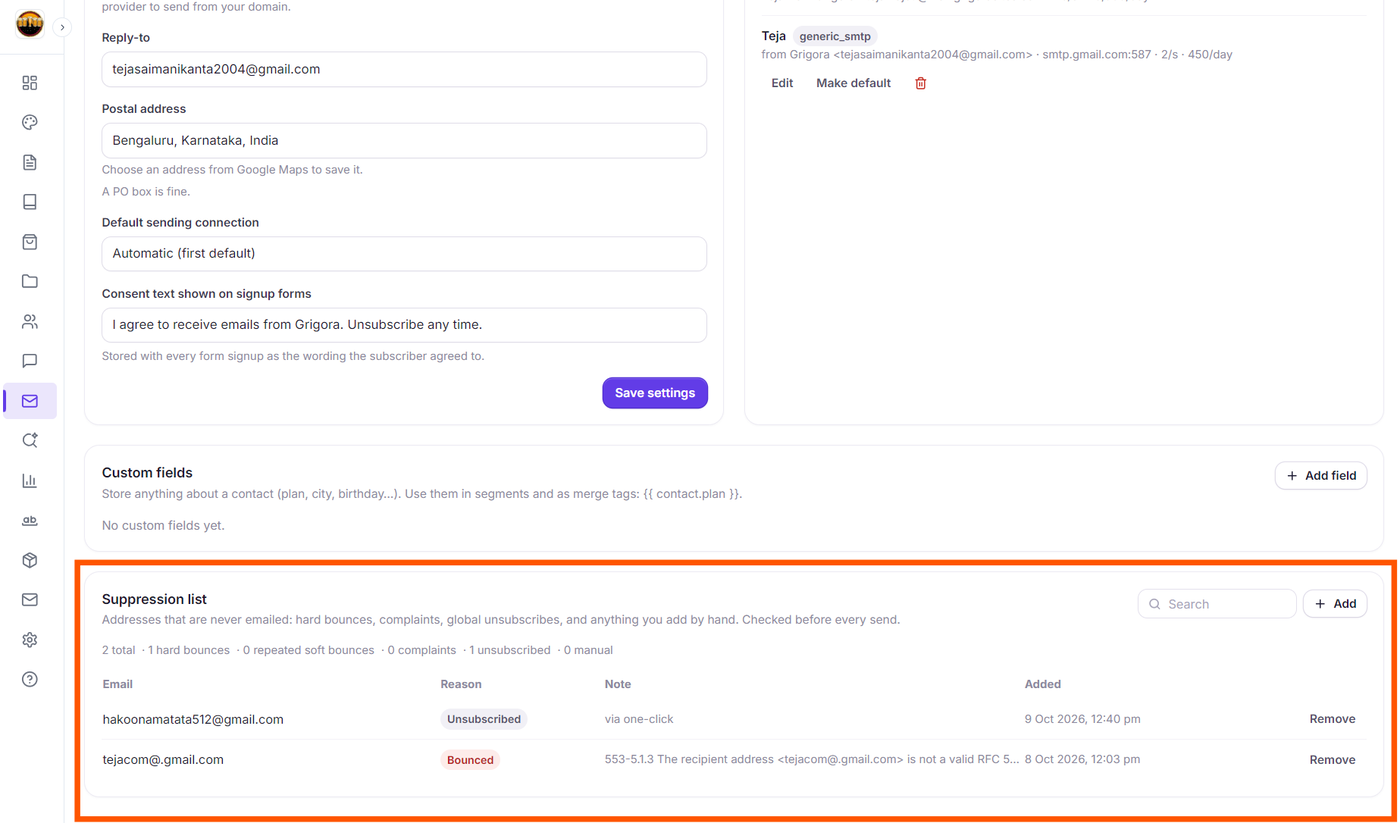
The address is automatically added to your Suppression list (under Newsletter > Settings > Suppression list) with the reason pill Bounced and the diagnostic error note received from the provider.
The contact is automatically excluded from all future campaign sends across all lists.
Repeated Soft Bounces:
Temporary issues (such as a full inbox) increment a soft bounce counter. If the address repeatedly soft-bounces across consecutive campaigns, Grigora automatically marks the contact as Cleaned and suppresses them with the reason pill Kept bouncing.
Spam Complaints:
The contact's status changes to Complained.
The address is added to your Suppression list with the reason pill Reported spam.
All list memberships are switched to unsubscribed to permanently block any further emails.
Live Campaign Analytics:
The campaign report for the email that triggered the event increments its Bounced or Complaints counter in real time.
Frequently Asked Questions
Can I manually remove a contact from the Suppression list?
Yes. If an address was suppressed due to a temporary issue or after a subscriber confirms their email is active again, navigate to Newsletter > Settings > Suppression list, locate the email address, and click the Remove button on that row.
How do I track bounces if I use Gmail or Custom SMTP?
If you connect Gmail or Custom SMTP, any delivery rejections or bounce notices will be sent directly to your sender email inbox by the recipient's mail provider (e.g., from Mail Delivery Subsystem). You can manually add any bad email addresses to your Suppression list by clicking the + Add button on the Suppression list card in Newsletter > Settings.
Next Steps
How to Manage Suppressed Contacts, Spam Complaints, and Hard Bounces
How to View Contact Profiles, Engagement History, and Activity in Grigora
How to Read and Analyze Campaign Reports in Grigora